基于centos7安装redis sentinel/Cluster
2018-03-30 22:44
597 查看
1.安装RVM-ruby
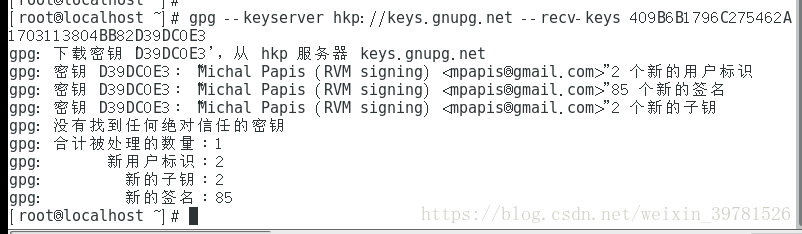
$ gpg --keyserver hkp://keys.gnupg.net --recv-keys 409B6B1796C275462A1703113804BB82D39DC0E3
$ curl -sSL https://get.rvm.io | bash -s stable
网速不行就换
$ curl -L https://raw.githubusercontent.com/wayneeseguin/rvm/master/binscripts/rvm-installer | bash -s stable
还是不行就半夜下,还是不行就换网络环境。
这个熟悉linux都知道干啥的,不知道的就重启linux
source ~/.rvm/scripts/rvm
检测是否安装成功rvm -v
安装2.4版本:rvm install 2.4.0
设置2.4为默认版本: rvm use 2.4.0 --default
2:xftp传输redis3.2.9版本到centos7
2.1 放在你喜欢的目录下解压我放在了/usr/local/src/下,
tar -zxvf 你的redis
2.2 进行编译
进到你的redis文件夹
make&make install
2.3 搭建哨兵sentinel,1主2从3哨兵模式
在这个地方 /usr/local/src/redis-3.2.9
创建文件夹,官网说配置文件需要放在各个文件夹进行运行,所以我们建立文件夹sentinel,然后再sentinel中建立6个子文件夹,分别为10001~10006,然后
cp redis.conf sentinel/10001/redis_10001.conf
cp redis.conf sentinel/10002/redis_10002.conf
cp redis.conf sentinel/10002/redis_10003.conf
cp sentinel.conf sentinel/10004/sentinel_10004.conf
cp sentinel.conf sentinel/10005/sentinel_10005.conf
cp sentinel.conf sentinel/10006/sentinel_10006.conf
把 10001.conf到10003.conf按照这个更改,当然所有的10001改成对应的
#bind 127.0.0.1 #把这个注了吧。在你第一次接触redis的时候
protected-mode no #这个是允许你用代码连接
port 10001 #端口不用解释了吧
daemonize yes #后台运行
pidfile "/var/run/redis_10001.pid"
dbfilename "dump_10001.rdb"
dir "/usr/local/src/redis-3.2.9/sentinel"
把10004.conf~10006.conf中的配置改成对应的,然后端口改成对应的。
protected-mode no
port 10004
sentinel monitor mymaster 192.168.136.130 10001 2
新版本编译后的执行文件在src中,所以我们copy src中的redis-cli ,redis-sentinel,redis-server到sentinel文件夹中。
然后执行启动文件
./redis-server 10001/redis_10001.conf
./redis-server 10002/redis_10002.conf
./redis-server 10003/redis_10003.conf
./redis-sentinel 10004/sentinel_10004.conf &
./redis-sentinel 10005/sentinel_10005.conf &
./redis-sentinel 10006/sentinel_10006.conf &
至此sentinel的1主两从3哨兵就搭建完成了。
2.4搭建Cluster模式
在redis的文件夹中创建cluster文件夹,在cluster中创建6个文件夹7001~7006
cp redis.conf cluster/7001/redis_7001.conf
cp redis.conf cluster/7002/redis_7002.conf
cp redis.conf cluster/7003/redis_7003.conf
cp redis.conf cluster/7004/redis_7004.conf
cp redis.conf cluster/7005/redis_7005.conf
cp redis.conf cluster/7006/redis_7006.conf
每一个都如下改,然后把7001换成对应的7002~7006
#bind 127.0.0.1
protected-mode no
port 7001
daemonize yes
pidfile /var/run/redis_7001.pid
logfile "redis_log_7001"
dbfilename dump_7001.rdb
appendonly yes
appendfilename "appendonly_7001.aof"
appendfsync everysec
cluster-enabled yes
cluster-config-file nodes-7001.conf
cluster-node-timeout 5000
启动实例
cp src/redis-server cluster/redis-server
cp src/redis-cli cluster/redis-cli
cd cluster
./redis-server 7001/redis-7001.conf
./redis-server 7002/redis-7002.conf
./redis-server 7003/redis-7003.conf
./redis-server 7004/redis-7004.conf
./redis-server 7005/redis-7005.conf
./redis-server 7006/redis-7006.conf

建立集群
cd ../src
./redis-trib.rb create --replicas 1 192.168.175.129:7001 192.168.175.129:7002 192.168.175.129:7003 192.168.175.129:7004 192.168.175.129:7005 192.168.175.129:7006

设置成你自己的对应ip就行
关于第二次启动报错的时候
你要删掉所有的nodes文件,aof文件
cd到cluster文件执行
rm -rf appendonly_700* nodes-700*
当然你要是嫌麻烦可以写个脚本,比如
#/bin/bash
cd /usr/local/src/redis-3.2.9/cluster
rm -rf appendonly_700* nodes-700* redis_log_700*

#建立redis实例
./redis-server 7001/redis-7001.conf
./redis-server 7002/redis-7002.conf
./redis-server 7003/redis-7003.conf
./redis-server 7004/redis-7004.conf
./redis-server 7005/redis-7005.conf
./redis-server 7006/redis-7006.conf

#搭建redis集群

cd ../src
./redis-trib.rb create --replicas 1 192.168.175.129:7001 192.168.175.129:7002 192.168.175.129:7003 192.168.175.129:7004 192.168.175.129:7005 192.168.175.129:7006
redis-trib.rb不好用报错,可能是因为你ruby版本不对,需要ruby2.0以上的版本,按照开始的时候安装ruby2.4是没有问题的。就这样。

相关文章推荐
- Centos7搭建redis集群及安装sentinel
- Redis 3.0.7基于Sentinel的高可用安装及配置
- Redis系列学习(一)安装与配置(基于Centos7)
- redis的安装配置及其基于sentinel的redis集群高可用方案
- Redis 高可用 基于Sentinel + keepalived 实现
- 基于Cluster的Redis集群方案
- Centos7安装并配置redis
- 基于C#的MongoDB数据库开发应用(4)--Redis的安装及使用
- 基于CentOS6.6环境安装Redis和Memcache
- redis演练(8) redis Cluster 集群环境安装
- Redis+Sentinel安装与配置
- Centos7安装redis3.0
- Hadoop基于Linux-CentOS7安装-安装Hadoop
- centos7安装redis-3.0.4集群
- Centos7安装mariadb galera cluster数据库集群 & 详解
- Centos7在安装配置redis
- linux(centOS7)安装 redis及php操作redis
- 基于Redis Sentinel的Redis集群(主从&Sharding)高可用方案
- 实现redis(主从,sentinel,cluster)的主从复制集群
- CentOS7安装Redis