Debian7配置LAMP(Apache/MySQL/PHP)环境及搭建建站
2018-03-26 20:01
627 查看
完整Debian7配置LAMP(Apache/MySQL/PHP)环境及搭建建站
apt-get update
apt-get upgrade --show-upgraded
安装Apache Web服务器的当前版本(在2.x系列),执行命令如下:
apt-get install apache2
大部分应用程序网站都会用到路径重写(伪静态)功能,默认APACHE是没有安装的,我们需要运行脚本支持rewrite
a2enmod rewrite
启动rewrite 。
编辑/etc/apache2/apache2.conf文件配置让系统运行更加优化(测试机器基于1GB内存VPS)
<IfModule mpm_prefork_module>
StartServers 2
MinSpareServers 6
MaxSpareServers 12
MaxClients 80
MaxRequestsPerChild 3000
</IfModule>
这一步我们也可以默认,等网站运行情况再进行调整以对比有何不同,老左目前也没搞明白这里面的参数对应的性能区别,以前我在用MAPN环境时候MYSQL占用太大,然后调整后占用率是低很多。
配置完毕之后,我们下面就需要配置域名、子域名添加站点。
站点A - /etc/apache2/sites-available/laozuo.org.conf
<VirtualHost *:80>
ServerAdmin [email protected]
ServerName laozuo.org
ServerAlias www.laozuo.org
DocumentRoot /srv/www/laozuo.org/public_html/
ErrorLog /srv/www/laozuo.org/logs/error.log
CustomLog /srv/www/laozuo.org/logs/access.log combined
</VirtualHost>
站点B - /etc/apache2/sites-available/idcxen.com.conf
<VirtualHost *:80>
ServerAdmin [email protected]
ServerNameidcxen.com
ServerAlias www.idcxen.com
DocumentRoot /srv/www/idcxen.com/public_html/
ErrorLog /srv/www/idcxen.com/logs/error.log
CustomLog /srv/www/idcxen.com/logs/access.log combined
</VirtualHost>
按照上面的示范,我们有几个站点就搭建几个.CONF文件,然后对其进行路径的配置。同样的上述牵涉到的几个目录我们也需要创建。
mkdir -p /srv/www/laozuo.org/public_html
mkdir /srv/www/laozuo.org/logs
mkdir -p /srv/www/idcxen.com/public_html
mkdir /srv/www/idcxen.com/logs
执行命令启动站点
a2ensite laozuo.org.conf
a2ensite idcxen.com.conf
启动Apache
service apache2 restart
备注:如果我们希望取消这个站点运行,那就用这个命令取消这个站点
a2dissite laozuo.org.conf
apt-get install mysql-server
在执行过程中需要我们输入MYSQL的ROOT用户密码,这个要稍微复杂些。数据库配置文件在/etc/mysql/my.cnf,如果我们需要调整尽量先备份一个。
B -配置MySQL建立数据库
mysql_secure_installation
需要我们输入上面设置的MYSQL数据库ROOT密码才可以进入,首次进入会问是否需要修改,以及其他的各种设置,我们根据需要选择n/y选项。
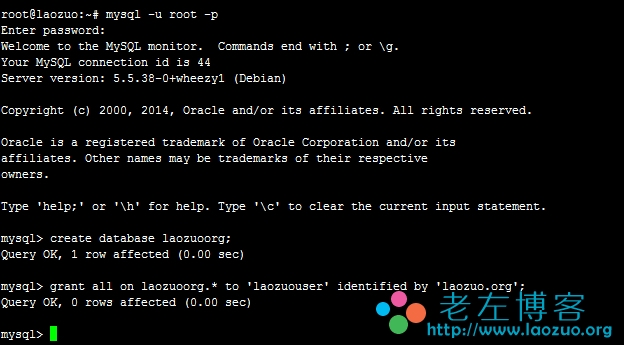
mysql -u root -p
create database laozuoorg;
grant all on laozuoorg.* to 'laozuouser' identified by 'laozuo.org';
利用root权限进入MYSQL数据库,输入我们之前设置的密码进入,然后建立laozuoorg数据库名,laozuouser数据表,以及laozuo.org设置数据库密码。
创建完毕之后输入 quit 退出MYSQL设置。
apt-get install php5 php-pear
安装之后我们需要配置php.ini文件(/etc/php5/apache2/php.ini)可以默认不改
max_execution_time = 30
memory_limit = 128M
error_reporting = E_COMPILE_ERROR|E_RECOVERABLE_ERROR|E_ERROR|E_CORE_ERROR
display_errors = Off
log_errors = On
error_log = /var/log/php.log
register_globals = Off
max_input_time = 30
我们还需要创建日志目录且设置权限
mkdir /var/log/php
chown www-data /var/log/php
如果我们需要MySQL的PHP支持,那么我们必须安装PHP5 MySQL包下面的命令:
apt-get install php5-mysql
启动apache
service apache2 restart
这样,通过上面的四步,就可以搭建站点、数据库,后面我们就只需要到/srv/www/idcxen.com/public_html上传网页程序,然后根据提示安装就可以了。
PS:老左安装WORDPRESS成功的,唯一需要注意根目录权限需要可写.htaccess或者手工创建伪静态文件,这样后台的固定连接设置之后才生效。
chown -R www-data:www-data /srv/www/
本文转自: http://www.laozuo.org/3423.html | 老左博客
.si_captcha_small { width: 175px; height: 45px; padding-top: 10px; padding-bottom: 10px }
.si_captcha_large { width: 250px; height: 60px; padding-top: 10px; padding-bottom: 10px }
img#si_image_com { border-style: none; margin: 0; padding-right: 5px; float: left }
img#si_image_reg { border-style: none; margin: 0; padding-right: 5px; float: left }
img#si_image_log { border-style: none; margin: 0; padding-right: 5px; float: left }
img#si_image_side_login { border-style: none; margin: 0; padding-right: 5px; float: left }
img#si_image_checkout { border-style: none; margin: 0; padding-right: 5px; float: left }
img#si_image_jetpack { border-style: none; margin: 0; padding-right: 5px; float: left }
img#si_image_bbpress_topic { border-style: none; margin: 0; padding-right: 5px; float: left }
.si_captcha_refresh { border-style: none; margin: 0; vertical-align: bottom }
div#si_captcha_input { display: block; padding-top: 15px; padding-bottom: 5px }
label#si_captcha_code_label { margin: 0 }
input#si_captcha_code_input { width: 65px }
p#si_captcha_code_p { clear: left; padding-top: 10px }
.si-captcha-jetpack-error { color: #DC3232 }
第一、安装和配置Apache Web服务器
运行升级命令来确保我们的系统组件各方面都是最新的。apt-get update
apt-get upgrade --show-upgraded
安装Apache Web服务器的当前版本(在2.x系列),执行命令如下:
apt-get install apache2
大部分应用程序网站都会用到路径重写(伪静态)功能,默认APACHE是没有安装的,我们需要运行脚本支持rewrite
a2enmod rewrite
启动rewrite 。
编辑/etc/apache2/apache2.conf文件配置让系统运行更加优化(测试机器基于1GB内存VPS)
<IfModule mpm_prefork_module>
StartServers 2
MinSpareServers 6
MaxSpareServers 12
MaxClients 80
MaxRequestsPerChild 3000
</IfModule>
这一步我们也可以默认,等网站运行情况再进行调整以对比有何不同,老左目前也没搞明白这里面的参数对应的性能区别,以前我在用MAPN环境时候MYSQL占用太大,然后调整后占用率是低很多。
配置完毕之后,我们下面就需要配置域名、子域名添加站点。
第二、配置虚拟主机、绑定域名
在/etc/apache2/sites-available/的文件夹,用来存放所有站点的站点域名配置文件,设置站点时候用域名命名.conf这样站点多的时候也可以看到对应的站点。比如我们这里要创建2个站点,就需要配置2个conf文件,如下:站点A - /etc/apache2/sites-available/laozuo.org.conf
<VirtualHost *:80>
ServerAdmin [email protected]
ServerName laozuo.org
ServerAlias www.laozuo.org
DocumentRoot /srv/www/laozuo.org/public_html/
ErrorLog /srv/www/laozuo.org/logs/error.log
CustomLog /srv/www/laozuo.org/logs/access.log combined
</VirtualHost>
站点B - /etc/apache2/sites-available/idcxen.com.conf
<VirtualHost *:80>
ServerAdmin [email protected]
ServerNameidcxen.com
ServerAlias www.idcxen.com
DocumentRoot /srv/www/idcxen.com/public_html/
ErrorLog /srv/www/idcxen.com/logs/error.log
CustomLog /srv/www/idcxen.com/logs/access.log combined
</VirtualHost>
按照上面的示范,我们有几个站点就搭建几个.CONF文件,然后对其进行路径的配置。同样的上述牵涉到的几个目录我们也需要创建。
mkdir -p /srv/www/laozuo.org/public_html
mkdir /srv/www/laozuo.org/logs
mkdir -p /srv/www/idcxen.com/public_html
mkdir /srv/www/idcxen.com/logs
执行命令启动站点
a2ensite laozuo.org.conf
a2ensite idcxen.com.conf
启动Apache
service apache2 restart
备注:如果我们希望取消这个站点运行,那就用这个命令取消这个站点
a2dissite laozuo.org.conf
第三、安装和配置MySQL数据库
A - 安装MYSQLapt-get install mysql-server
在执行过程中需要我们输入MYSQL的ROOT用户密码,这个要稍微复杂些。数据库配置文件在/etc/mysql/my.cnf,如果我们需要调整尽量先备份一个。
B -配置MySQL建立数据库
mysql_secure_installation
需要我们输入上面设置的MYSQL数据库ROOT密码才可以进入,首次进入会问是否需要修改,以及其他的各种设置,我们根据需要选择n/y选项。
mysql -u root -p
create database laozuoorg;
grant all on laozuoorg.* to 'laozuouser' identified by 'laozuo.org';
利用root权限进入MYSQL数据库,输入我们之前设置的密码进入,然后建立laozuoorg数据库名,laozuouser数据表,以及laozuo.org设置数据库密码。
创建完毕之后输入 quit 退出MYSQL设置。
第四、安装和设置PHP环境
apt-get install php5 php-pear
安装之后我们需要配置php.ini文件(/etc/php5/apache2/php.ini)可以默认不改
max_execution_time = 30
memory_limit = 128M
error_reporting = E_COMPILE_ERROR|E_RECOVERABLE_ERROR|E_ERROR|E_CORE_ERROR
display_errors = Off
log_errors = On
error_log = /var/log/php.log
register_globals = Off
max_input_time = 30
我们还需要创建日志目录且设置权限
mkdir /var/log/php
chown www-data /var/log/php
如果我们需要MySQL的PHP支持,那么我们必须安装PHP5 MySQL包下面的命令:
apt-get install php5-mysql
启动apache
service apache2 restart
这样,通过上面的四步,就可以搭建站点、数据库,后面我们就只需要到/srv/www/idcxen.com/public_html上传网页程序,然后根据提示安装就可以了。
PS:老左安装WORDPRESS成功的,唯一需要注意根目录权限需要可写.htaccess或者手工创建伪静态文件,这样后台的固定连接设置之后才生效。
chown -R www-data:www-data /srv/www/
本文转自: http://www.laozuo.org/3423.html | 老左博客
.si_captcha_small { width: 175px; height: 45px; padding-top: 10px; padding-bottom: 10px }
.si_captcha_large { width: 250px; height: 60px; padding-top: 10px; padding-bottom: 10px }
img#si_image_com { border-style: none; margin: 0; padding-right: 5px; float: left }
img#si_image_reg { border-style: none; margin: 0; padding-right: 5px; float: left }
img#si_image_log { border-style: none; margin: 0; padding-right: 5px; float: left }
img#si_image_side_login { border-style: none; margin: 0; padding-right: 5px; float: left }
img#si_image_checkout { border-style: none; margin: 0; padding-right: 5px; float: left }
img#si_image_jetpack { border-style: none; margin: 0; padding-right: 5px; float: left }
img#si_image_bbpress_topic { border-style: none; margin: 0; padding-right: 5px; float: left }
.si_captcha_refresh { border-style: none; margin: 0; vertical-align: bottom }
div#si_captcha_input { display: block; padding-top: 15px; padding-bottom: 5px }
label#si_captcha_code_label { margin: 0 }
input#si_captcha_code_input { width: 65px }
p#si_captcha_code_p { clear: left; padding-top: 10px }
.si-captcha-jetpack-error { color: #DC3232 }

相关文章推荐
- 完整Debian7配置LAMP(Apache/MySQL/PHP)环境及搭建建站
- 阿里云Ubuntu系统从0搭建LAMP(Apache+MySQL+PHP)以及服务器生产环境常用配置
- 阿里云Ubuntu系统从0搭建LAMP(Apache+MySQL+PHP)以及服务器生产环境常用配置
- LAMP攻略: LAMP环境搭建,Linux下Apache,MySQL,PHP安装与配置
- 阿里云Ubuntu系统从0搭建LAMP(Apache+MySQL+PHP)以及服务器生产环境常用配置
- LAMP攻略: LAMP环境搭建,Linux下Apache,MySQL,PHP安装与配置
- [PHP] ubuntu16.04配置Lamp环境(搭建linux+apache+mysql+php7环境)
- 完整配置CentOS6安装LAMP(Apache/MySQL/PHP)环境搭建教程
- LAMP攻略: LAMP环境搭建,Linux下Apache,MySQL,PHP安装与配置
- Ubuntu搭建LAMP服务器(apache+mysql+php),Ubuntu配置php环境
- Debian配置LAMP(Apache/MySQL/PHP)ecshop环境
- LAMP环境配置 Linux+apache+php+mysql搭建
- ->ubuntu的lamp(apache+php+mysql+phpmyadmin)环境配置过程:
- Ubuntu下LAMP环境搭建 Apache、MySQL、PHP
- Mint15(或Ubuntu)下搭建LAMP(Apache+PHP+MYSQL)开发环境
- PHP环境搭建:Windows 7下安装配置PHP+Apache+Mysql环境教程
- Windows 上 LAMP 环境 搭建 (MySQL5.7+PHP7+Apache2.4)
- PHP环境搭建:Windows7系统配置PHP+Apache+MySQL环境教程
- centos lamp 环境搭建 Linux+Apache+Mysql/MariaDB+Perl/PHP/Python
- 为Ubuntu搭建LAMP(Apache+PHP+MYSQL)开发环境