IOS学习——自定义View与使用block实现事件处理入门
2018-03-20 13:38
519 查看
IOS学习系列已经写了7篇了,还是忍不住想写我最喜欢的自定义View部分。如果问在我接的Android,IOS开发项目的开发过程中最让我高兴的时刻是什么时候,答案不是项目结束收钱的那一刻,而是在开发过程中能够实现美工的所有设计,制作出精美的页面效果的时候。所以其实在移动开发的所有知识点里面,我最喜欢的就是自定义View了
那么,这一次我先写一下入门教程,先写一个简单的自定义View并用block实现事件处理吧。
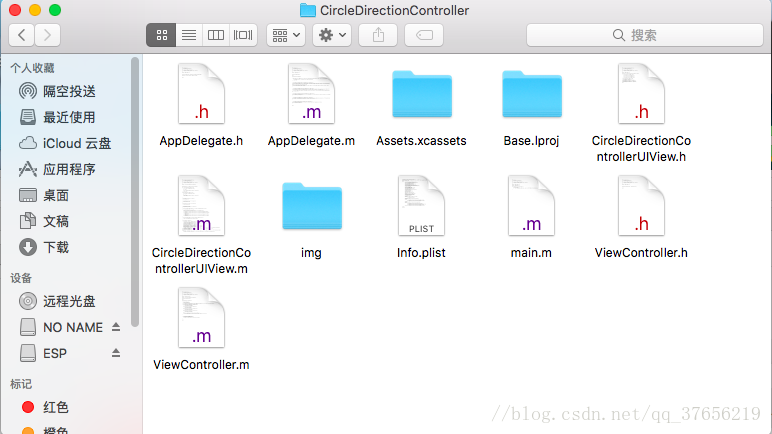
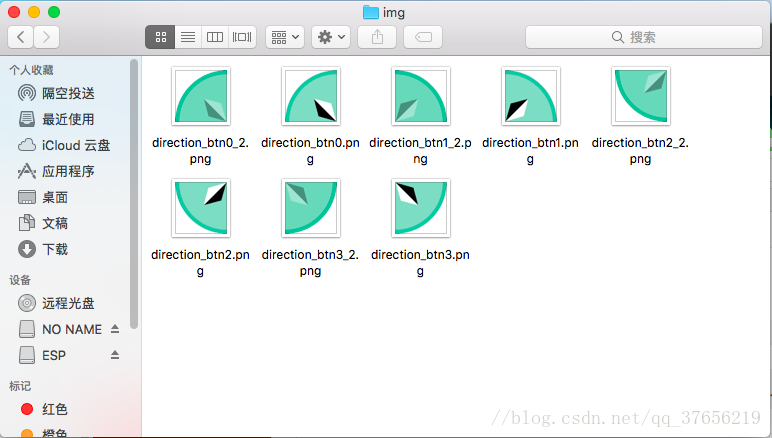
首先我们先准备一下图片素材,这些用PS很简单就能做出来。创建Single View Application,在项目里面创建img文件夹,放上准备好的图片,然后在项目里面加上这些图片
然后就创建类继承UIView,直接上代码
先是CircleDirectionControllerUIView.h
#import <UIKit/UIKit.h>
@interface CircleDirectionControllerUIView : UIView
{
void (^UpClick)();//声明上按键block
void (^DownClick)();//声明下按键block
void (^LeftClick)();//声明左按键block
void (^RightClick)();//声明右按键block
}
- (id)initWithFrame:(CGRect)frame;
- (void)drawRect:(CGRect)rect;
-(void)setUpClick:(void(^)()) upClick;
-(void)setDownClick:(void(^)()) downClick;
-(void)setLeftClick:(void(^)()) leftClick;
-(void)setRightClick:(void(^)()) rightClick;
@end
然后是CircleDirectionController.m

到这里基本上就实现了,但是感觉体验超级差,加个点击效果吧,修改CircleDirectionController.m如下
现在好多了,好了,就到这里了,DRW
那么,这一次我先写一下入门教程,先写一个简单的自定义View并用block实现事件处理吧。
首先我们先准备一下图片素材,这些用PS很简单就能做出来。创建Single View Application,在项目里面创建img文件夹,放上准备好的图片,然后在项目里面加上这些图片
然后就创建类继承UIView,直接上代码
先是CircleDirectionControllerUIView.h
#import <UIKit/UIKit.h>
@interface CircleDirectionControllerUIView : UIView
{
void (^UpClick)();//声明上按键block
void (^DownClick)();//声明下按键block
void (^LeftClick)();//声明左按键block
void (^RightClick)();//声明右按键block
}
- (id)initWithFrame:(CGRect)frame;
- (void)drawRect:(CGRect)rect;
-(void)setUpClick:(void(^)()) upClick;
-(void)setDownClick:(void(^)()) downClick;
-(void)setLeftClick:(void(^)()) leftClick;
-(void)setRightClick:(void(^)()) rightClick;
@end
然后是CircleDirectionController.m
#import "CircleDirectionControllerUIView.h"

@implementation CircleDirectionControllerUIView

- (id)initWithFrame:(CGRect)frame {
self = [super initWithFrame:frame];
if (self) {
}
[self setBackgroundColor:[UIColor clearColor]];//设置为透明背景
return self;

}

-(void)setUpClick:(void (^)())upClick{//设置block事件
UpClick=upClick;
}

-(void)setDownClick:(void (^)())downClick{
DownClick=downClick;
}

-(void)setLeftClick:(void (^)())leftClick{
LeftClick=leftClick;
}

-(void)setRightClick:(void (^)())rightClick{
RightClick=rightClick;
}

- (void)touchesBegan:(NSSet<UITouch *> *)touches withEvent:(UIEvent *)event//判断点击的位置处理响应的事件
{
int width=self.bounds.size.width;
CGPoint clickPoint = [[touches anyObject] locationInView:self];
if(clickPoint.x>clickPoint.y&&clickPoint.x+clickPoint.y<width&&UpClick!=NULL)
UpClick();
if(clickPoint.x>clickPoint.y&&clickPoint.x+clickPoint.y>width&&RightClick!=NULL)
RightClick();
if(clickPoint.x<clickPoint.y&&clickPoint.x+clickPoint.y>width&&DownClick!=NULL)
DownClick();
if(clickPoint.x<clickPoint.y&&clickPoint.x+clickPoint.y<width&&LeftClick!=NULL)
LeftClick();
}

- (void)touchesEnded:(NSSet *)touches withEvent:(UIEvent *)event {
[super touchesEnded:touches withEvent:event];
}

- (void)drawRect:(CGRect)rect//绘制自定义View画面
{
CGContextRef context = UIGraphicsGetCurrentContext();
CGContextTranslateCTM(context, self.bounds.size.width/2, self.bounds.size.height/2);
CGContextRotateCTM(context, 45 * M_PI/180);
UIImage *imageUp = [UIImage imageNamed:@"direction_btn0.png"];
UIImage *imageDown = [UIImage imageNamed:@"direction_btn3.png"];
UIImage *imageLeft = [UIImage imageNamed:@"direction_btn2.png"];
UIImage *imageRight = [UIImage imageNamed:@"direction_btn1.png"];
[imageUp drawInRect:CGRectMake(-self.bounds.size.width/2, -self.bounds.size.height/2, self.bounds.size.width/2-3, self.bounds.size.height/2-3)];
[imageRight drawInRect:CGRectMake(0, -self.bounds.size.height/2, self.bounds.size.width/2-3, self.bounds.size.height/2-3)];
[imageLeft drawInRect:CGRectMake(-self.bounds.size.width/2, 0, self.bounds.size.width/2-3, self.bounds.size.height/2-3)];
[imageDown drawInRect:CGRectMake(0, 0, self.bounds.size.width/2-3, self.bounds.size.height/2-3)];
}

@end 接着使用它#import "ViewController.h"
#import "CircleDirectionControllerUIView.h"
@interface ViewController ()
@end
@implementation ViewController
- (void)viewDidLoad {
[super viewDidLoad];
CircleDirectionControllerUIView *circleViewControllerUIView = [[CircleDirectionControllerUIView alloc]initWithFrame:CGRectMake(0, 0, 300, 300)];
[circleViewControllerUIView setRightClick:^{
NSLog(@"响应Right点击结束");
}];
[circleViewControllerUIView setUpClick:^{
NSLog(@"响应Up点击结束");
}];
[circleViewControllerUIView setDownClick:^{
NSLog(@"响应Down点击结束");
}];
[circleViewControllerUIView setLeftClick:^{
NSLog(@"响应Left点击结束");
}];
[self.view addSubview:circleViewControllerUIView];
}
- (void)didReceiveMemoryWarning {
[super didReceiveMemoryWarning];
}
@end 看看效果到这里基本上就实现了,但是感觉体验超级差,加个点击效果吧,修改CircleDirectionController.m如下
//
//  CircleDirectionControllerUIView.m
//  CircleDirectionController
//
//  Created by DRW on 2018/3/20.
//  Copyright © 2018年 DRW. All rights reserved.
//

#import "CircleDirectionControllerUIView.h"
@interface CircleDirectionControllerUIView ()
@property(nonatomic,strong)UIImage *imageUp;
@property(nonatomic,strong)UIImage *imageDown;
@property(nonatomic,strong)UIImage *imageLeft;
@property(nonatomic,strong)UIImage *imageRight;
@end

@implementation CircleDirectionControllerUIView

- (id)initWithFrame:(CGRect)frame {
self = [super initWithFrame:frame];
if (self) {
}
[self setBackgroundColor:[UIColor clearColor]];
self.imageUp = [UIImage imageNamed:@"direction_btn0.png"];
self.imageDown = [UIImage imageNamed:@"direction_btn3.png"];
self.imageLeft = [UIImage imageNamed:@"direction_btn2.png"];
self.imageRight = [UIImage imageNamed:@"direction_btn1.png"];
return self;

}

-(void)setUpClick:(void (^)())upClick{
UpClick=upClick;
}

-(void)setDownClick:(void (^)())downClick{
DownClick=downClick;
}

-(void)setLeftClick:(void (^)())leftClick{
LeftClick=leftClick;
}

-(void)setRightClick:(void (^)())rightClick{
RightClick=rightClick;
}

- (void)touchesBegan:(NSSet<UITouch *> *)touches withEvent:(UIEvent *)event
{
int width=self.bounds.size.width;
CGPoint clickPoint = [[touches anyObject] locationInView:self];
if(clickPoint.x>clickPoint.y&&clickPoint.x+clickPoint.y<width&&UpClick!=NULL){
self.imageUp = [UIImage imageNamed:@"direction_btn0_2.png"];
[self setNeedsDisplay];
UpClick();
}
if(clickPoint.x>clickPoint.y&&clickPoint.x+clickPoint.y>width&&RightClick!=NULL){
self.imageRight = [UIImage imageNamed:@"direction_btn1_2.png"];
[self setNeedsDisplay];
RightClick();
}
if(clickPoint.x<clickPoint.y&&clickPoint.x+clickPoint.y>width&&DownClick!=NULL){
self.imageDown = [UIImage imageNamed:@"direction_btn3_2.png"];
[self setNeedsDisplay];
DownClick();
}
if(clickPoint.x<clickPoint.y&&clickPoint.x+clickPoint.y<width&&LeftClick!=NULL){
self.imageLeft = [UIImage imageNamed:@"direction_btn2_2.png"];
[self setNeedsDisplay];
LeftClick();
}
}

- (void)touchesEnded:(NSSet *)touches withEvent:(UIEvent *)event {
[super touchesEnded:touches withEvent:event];
int width=self.bounds.size.width;
CGPoint clickPoint = [[touches anyObject] locationInView:self];
if(clickPoint.x>clickPoint.y&&clickPoint.x+clickPoint.y<width&&UpClick!=NULL){
self.imageUp = [UIImage imageNamed:@"direction_btn0.png"];
[self setNeedsDisplay];
}

a8fa
if(clickPoint.x>clickPoint.y&&clickPoint.x+clickPoint.y>width&&RightClick!=NULL){
self.imageRight = [UIImage imageNamed:@"direction_btn1.png"];
[self setNeedsDisplay];
}
if(clickPoint.x<clickPoint.y&&clickPoint.x+clickPoint.y>width&&DownClick!=NULL){
self.imageDown = [UIImage imageNamed:@"direction_btn3.png"];
[self setNeedsDisplay];
}
if(clickPoint.x<clickPoint.y&&clickPoint.x+clickPoint.y<width&&LeftClick!=NULL){
self.imageLeft = [UIImage imageNamed:@"direction_btn2.png"];
[self setNeedsDisplay];
}
}

- (void)drawRect:(CGRect)rect
{
CGContextRef context = UIGraphicsGetCurrentContext();
//CGContextSetStrokeColorWithColor(context, [UIColor redColor].CGColor);
//CGContextSetLineWidth(context, 5.0);
CGContextTranslateCTM(context, self.bounds.size.width/2, self.bounds.size.height/2);
CGContextRotateCTM(context, 45 * M_PI/180);
[self.imageUp drawInRect:CGRectMake(-self.bounds.size.width/2, -self.bounds.size.height/2, self.bounds.size.width/2-3, self.bounds.size.height/2-3)];
[self.imageRight drawInRect:CGRectMake(0, -self.bounds.size.height/2, self.bounds.size.width/2-3, self.bounds.size.height/2-3)];
[self.imageLeft drawInRect:CGRectMake(-self.bounds.size.width/2, 0, self.bounds.size.width/2-3, self.bounds.size.height/2-3)];
[self.imageDown drawInRect:CGRectMake(0, 0, self.bounds.size.width/2-3, self.bounds.size.height/2-3)];
}

@end 再看看效果现在好多了,好了,就到这里了,DRW

相关文章推荐
- IOS自定义View使用block实现点击事件
- iOS:使用Block回调按钮事件(自定义view)
- 自定义View想使用Scroller实现滑动效果,但是事件接收出现问题,只收到ACTION_DOWN,而无法收到ACTION_MOVE, ACTION_UP等消息的处理
- iOS:使用block代码块实现事件处理过程中的回调
- IOS 学习---通过block自定义button的点击事件
- iOS 自定义抽屉式效果--ViewDeck(SlidingDrawer)实现与使用详解
- iOS学习之WebView的使用--实现打开网页
- android 开发零起步学习笔记(十七):自定义android用户控件,使用回调函数实现自定义事件
- IOS 使用自定义View实现圆形布局(Swift)
- 二十三 ,iOS UIAlertView使用block来实现代理方法;
- ((ios开发学习笔记 十一))自定义TableViewCell 的方式实现自定义TableView(带源码)
- iOS开发之用block来实现UIAlertView点击事件的代理方法
- ios学习笔记----实现一个带滑动手势的tabBarViewController,并可自定义tabBar
- 两行代码搞定iOS自定义HUD风格动画弹窗(支持选择记录) - SKChoosePopView的使用和实现思路
- iOS开发--QQ音乐练习,旋转动画的实现,音乐工具类的封装,定时器的使用技巧,SliderBar的事件处理
- IOS 学习:UITableView使用详解2 自定义的单元格
- IOS学习 Block语法的使用:Button、AlertView监听方法改写
- iOS学习之WebView的使用 (主要是下面的全屏半透明实现)
- Android客户端之“微服私访”App的系统学习(五)使用Picasso实现轮播图以及使用自定义View实现个人中心页面
- ios学习笔记:UIAlertView使用和监听点击事件