SpringCloud之consul(服务注册发现,客户端安装) |第十四章 -yellowcong
2018-03-18 18:32
876 查看
consul的服务端,就是直接将Consul的服务启动即可,然后现在需要做的是配置客户端,1、配置pom.xml,添加
下面是完整的pom.xml配置
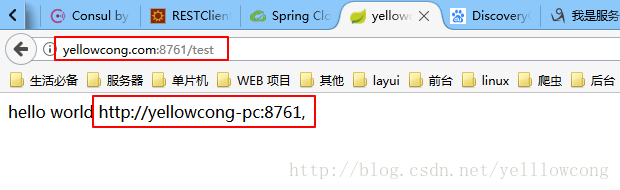
访问测试服务:http://yellowcong.com:8761/test,可以看到,返回了我们当前节点配置的服务地址信息。
spring-cloud-starter-consul-discovery的依赖,2、配置application.yml 设置consul的注册节点,3、配置启动类,添加
@EnableDiscoveryClient注解,表示俺是一个注册类。4、添加一个测试服务,查看当前界consul服务器所有的注册服务信息。
代码地址
https://gitee.com/yellowcong/springcloud/tree/master/chapter14/
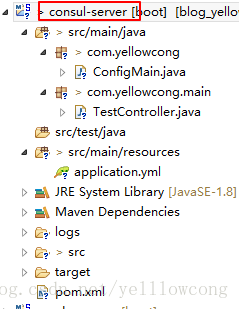
目录结构
搭建Consul客户端
1、配置pom.xml
在pom.xml添加spring-cloud-starter-consul-discovery的依赖,这样才可以注册服务到consul上
<!--consul server -->
<dependency>
<groupId>org.springframework.cloud</groupId>
<artifactId>spring-cloud-starter-consul-discovery</artifactId>
<version>1.3.0.RELEASE</version><!--$NO-MVN-MAN-VER$-->
</dependency>
下面是完整的pom.xml配置
<project xmlns="http://maven.apache.org/POM/4.0.0" xmlns:xsi="http://www.w3.org/2001/XMLSchema-instance"
xsi:schemaLocation="http://maven.apache.org/POM/4.0.0 http://maven.apache.org/xsd/maven-4.0.0.xsd"> <modelVersion>4.0.0</modelVersion>

<groupId>yellowcong.com</groupId>
<artifactId>cas-client-springboot</artifactId>
<version>0.0.1-SNAPSHOT</version>
<packaging>jar</packaging>

<name>cas-client-springboot</name>
<url>http://maven.apache.org</url>

<repositories>
<repository>
<id>spring-milestones</id>
<name>Spring Milestones</name>
<url>https://repo.spring.io/milestone</url>
<snapshots>
<enabled>false</enabled>
</snapshots>
</repository>
</repositories>

<!-- 引用父类依赖 -->
<parent>
<groupId>org.springframework.boot</groupId>
<artifactId>spring-boot-starter-parent</artifactId>
<version>1.5.10.RELEASE</version>
</parent>

<properties>
<project.build.sourceEncoding>UTF-8</project.build.sourceEncoding>
<project.reporting.outputEncoding>UTF-8</project.reporting.outputEncoding>
<java.version>1.8</java.version>
</properties>

<dependencies>

<!--consul server -->
<dependency>
<groupId>org.springframework.cloud</groupId>
<artifactId>spring-cloud-starter-consul-discovery</artifactId>
<version>1.3.0.RELEASE</version><!--$NO-MVN-MAN-VER$-->
</dependency>

<dependency>
<groupId>org.springframework.boot</groupId>
<artifactId>spring-boot-starter-test</artifactId>
<scope>test</scope>
</dependency>

</dependencies>
<build>
<plugins>
<!-- 添加spring的插件, 就可以直接通过 mvn spring-boot:run 运行了 -->
<plugin>
<groupId>org.springframework.boot</groupId>
<artifactId>spring-boot-maven-plugin</artifactId>
<dependencies>
<dependency>
<groupId>org.springframework</groupId>
<artifactId>springloaded</artifactId>
<version>1.2.4.RELEASE</version>
</dependency>
</dependencies>
</plugin>
</plugins>
</build>
</project>
2、配置application.yml
配置consul的服务器地址信息,同时还配置了健康检查,每隔15s检查一下,服务是不是宕机了。# 注册服务的端口
server:
port: 8761
#配置服务的名称
spring:
application:
name: consul-client
#配置consul注册服务器地址
---
spring:
cloud:
consul:
host: yellowcong.com
port: 8500
discovery: #健康检查
healthCheckPath: ${management.contextPath}/health
healthCheckInterval: 15s3、配置启动类
添加注解@EnableDiscoveryClient,表示这个服务开启向consul服务器上注册服务。
package com.yellowcong;

import org.springframework.boot.SpringApplication;
import org.springframework.boot.autoconfigure.SpringBootApplication;
import org.springframework.cloud.client.discovery.EnableDiscoveryClient;

@SpringBootApplication
@EnableDiscoveryClient
public class ConfigMain {

public static void main(String[] args) {
SpringApplication.run(ConfigMain.class, args);
}
}
4、添加一个服务测试
测试服务类中,注入了DiscoveryClient对象,可以通过这个类查看当前Consul容器中,注册的所有服务信息。
package com.yellowcong.main;

import java.util.List;

import org.springframework.beans.factory.annotation.Autowired;
import org.springframework.cloud.client.ServiceInstance;
import org.springframework.cloud.client.discovery.DiscoveryClient;
import org.springframework.web.bind.annotation.GetMapping;
import org.springframework.web.bind.annotation.RestController;

@RestController
public class TestController {

@Autowired
DiscoveryClient discoveryClient;

@GetMapping("/test")
public String test() {
//获取实例化的注册节点
List<ServiceInstance> list = discoveryClient.getInstances("CONSUL-CLIENT");

//获取实例化的服务
StringBuffer sb = new StringBuffer();
if (list != null && list.size() > 0 ) {
sb.append(list.get(0).getUri()+",");
}
return "hello world  "+sb.toString();
}
}
5、访问测试
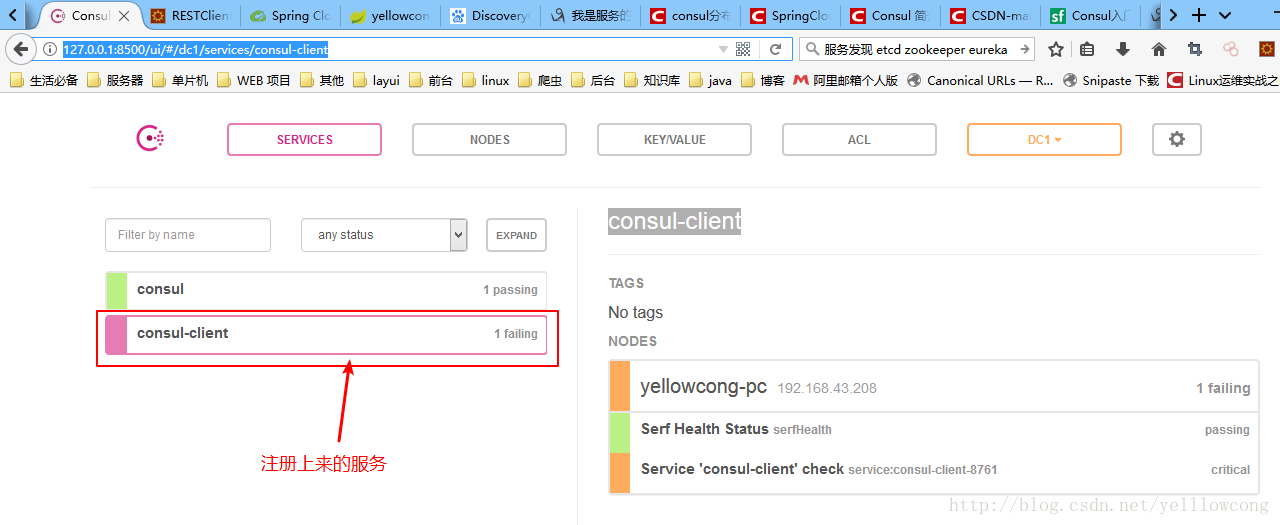
访问consul的控制台http://127.0.0.1:8500 ,可以看到注册上的服务信息访问测试服务:http://yellowcong.com:8761/test,可以看到,返回了我们当前节点配置的服务地址信息。
参考文章
1、上最简单的 SpringCloud 教程 | 第十四篇: 服务注册(consul)
相关文章推荐
- SpringCloud之consul (服务注册发现)客户端的安装与简单使用|第十三章-yellowcong
- 服务注册发现consul之一:spring cloud consul介绍及安装
- Spring Cloud构建微服务架构:Consul服务注册与发现
- SpringCloud+Consul 服务注册与服务发现
- 使用Spring Cloud Consul实现服务的注册和发现
- Spring Cloud Spring Boot mybatis 企业分布式微服务云(二)服务注册与发现(Consul)
- 使用Spring Cloud Consul实现服务的注册和发现
- Spring Boot + Spring Cloud 构建微服务系统(一):服务注册和发现(Consul)
- SpringCloud之注册与发现服务(Eureka)|第一章-yellowcong
- Spring Cloud Consul使用——服务注册与发现(注册中心)
- SpringCloud之服务注册发现(Spring Cloud Zookeeper) |第十五章 -yellowcong
- 服务注册发现consul之二:使用Spring Cloud Consul实现服务的注册和发现
- 详解使用Spring Cloud Consul实现服务的注册和发现
- 详解Spring Cloud Consul 实现服务注册和发现
- Spring Cloud 服务注册与发现 [ consul ]
- Spring Cloud Consul 实现服务注册和发现
- Spring Cloud构建微服务架构:服务注册与发现(Eureka、Consul)【Dalston版】
- spring cloud搭建微服务second-fiberhome(二):结合consul实现服务注册与服务发现
- Spring Cloud Spring Boot mybatis 企业分布式微服务云(二)服务注册与发现(Consul)
- springcloud consul +consul 实现服务注册及发现