Fragment 详细介绍(由来、静态加载,动态加载,页卡滑动切换)
2018-03-06 21:37
501 查看
1.什么是Fragment?
Fragment的由来
基于Android系统的设备越来越多,分辨率种类越来越多,Google提出Fragment的概念也是希望通过Fragment解决屏幕碎片化问题。
Fragment的翻译为碎片,自Android3.0开始引入Fragment的概念
用Fragment替换TabHost是Google推荐的方案
2.Fragment 能够比之前v4 有什么好处呢?
1,使用Fragment可以在一个Activity中实现不同界面的灵活切换。
2,Fragment解决了Activity间的切换不流畅,布局切换更轻量。
3,Fragment可以封装成不同的重要组件,并可以单独管理其生命周期和UI布局。
4,Fragment无需在AndroidManifest中注册,可以在布局文件中直接引用。
3,Fragment静态加载方法(步骤)
新建类继承Fragment;
重写onCreateView方法;
使用LayoutInflater对象中的inflate方法绑定布局和控件;
在Activity对应的布局文件中通过<fragment>标签引用。
新建一个项目,再里面新建Fragment
extends Fragment ,
代码如下:
它的xml 代码如下:
XML效果图:
在acticity_main.xml 里 出除了添加一个TextView,还要添加fragment 里面最重要的属性就是
id 和 name ,代码如下:
<?xml version="1.0" encoding="utf-8"?>
<LinearLayout xmlns:android="http://schemas.android.com/apk/res/android"
xmlns:app="http://schemas.android.com/apk/res-auto"
xmlns:tools="http://schemas.android.com/tools"
android:layout_width="match_parent"
android:layout_height="match_parent"
android:orientation="vertical"
tools:context="com.xdw.myapplication.MainActivity">
<TextView
android:id="@+id/main_textview"
android:layout_width="match_parent"
android:layout_height="150dp"
android:text="这是一个TextView"
android:gravity="center"
/>
<LinearLayout
android:layout_width="match_parent"
android:layout_height="match_parent"
android:orientation="horizontal"
>
<fragment
android:layout_width="0dp"
android:layout_weight="1"
android:layout_height="match_parent"
android:id="@+id/fragment_one"
android:name="com.xdw.myapplication.BlankFragment"
/>
</LinearLayout>
</LinearLayout>
xml效果图:
运行出来的效果图:
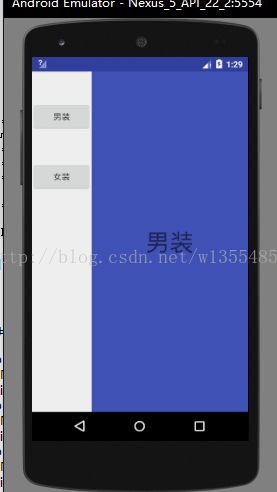
4,Fragment 动态加载:
新建类继承Fragment
重写onGreateView方法
使用layout infler 对象中的inflate 方法绑定布局和控件
使用FragmentManger
和 FragmentTransaction
对象进行动态加载
代码如下:
package com.xdw.myapplication;
import android.app.FragmentManager;
import android.ap
4000
p.FragmentTransaction;
import android.support.v7.app.AppCompatActivity;
import android.os.Bundle;
import android.view.View;
import android.widget.Button;
import com.xdw.myapplication.fragment.NanFragment;
import com.xdw.myapplication.fragment.NvFragment;
public class TianMaoActivity extends AppCompatActivity implements View.OnClickListener{
private Button nan_btn;
private Button nv_btn;
private NanFragment nanFragment;
private NvFragment nvFragment;
@Override
protected void onCreate(Bundle savedInstanceState) {
super.onCreate(savedInstanceState);
setContentView(R.layout.activity_tian_mao);
bindID();
}
private void bindID() {
nan_btn=findViewById(R.id.nan_btn);
nv_btn=findViewById(R.id.nv_btn);
nan_btn.setOnClickListener(this);
nv_btn.setOnClickListener(this);
}
@Override
public void onClick(View view) {
FragmentManager manager=getFragmentManager();//创建FragmentManger对象 (管理器)
FragmentTransaction transaction=manager.beginTransaction();//创建FragmentTransaction对象
// 事务对象 对Fragment进行添加,移除,替换,提交等操作
switch (view.getId()){
case R.id.nan_btn:
if(nanFragment==null){
//显示男装
nanFragment =new NanFragment();
}
transaction.replace(R.id.shop_framelayout,nanFragment);
break;
case R.id.nv_btn:
if (nvFragment==null){
//显示女装
nvFragment =new NvFragment();
}
transaction.replace(R.id.shop_framelayout,nvFragment);
break;
default:
break;
}
transaction.commit();//提交
}
}
xml代码如下:
<?xml version="1.0" encoding="utf-8"?>
<LinearLayout xmlns:android="http://schemas.android.com/apk/res/android"
xmlns:app="http://schemas.android.com/apk/res-auto"
xmlns:tools="http://schemas.android.com/tools"
android:layout_width="match_parent"
android:layout_height="match_parent"
android:orientation="horizontal"
tools:context="com.xdw.myapplication.TianMaoActivity">
<LinearLayout
android:layout_width="100dp"
android:layout_height="match_parent"
android:orientation="vertical"
>
<Button
android:layout_marginTop="50dp"
android:id="@+id/nan_btn"
android:layout_width="match_parent"
android:layout_height="50dp"
android:text="男装"
/>
<Button
android:layout_marginTop="50dp"
android:id="@+id/nv_btn"
android:layout_width="match_parent"
android:layout_height="50dp"
android:text="女装"
/>
</LinearLayout>
<FrameLayout
android:id="@+id/shop_framelayout"
android:layout_width="match_parent"
android:layout_height="match_parent">
</FrameLayout>
</LinearLayout>
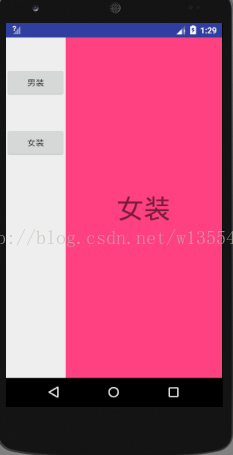
效果如图
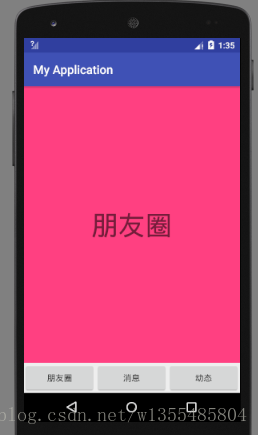
5,实现页卡切换效果:
代码如下:
package com.xdw.myapplication;
import android.support.v4.app.Fragment;
import android.support.v4.view.ViewPager;
import android.support.v7.app.AppCompatActivity;
import android.os.Bundle;
import android.view.View;
import android.widget.Button;
import com.xdw.myapplication.adaper.MyPageAdaper;
import com.xdw.myapplication.fragment.FriendFragment;
import com.xdw.myapplication.fragment.NewsFragment;
import com.xdw.myapplication.fragment.PlayFragment;
import java.util.ArrayList;
import java.util.List;
public class MainActivity extends AppCompatActivity implements View.OnClickListener {
private Button btn_friend;
private Button btn_news;
private Button btn_play;
private FriendFragment friendFragment;
private NewsFragment newsFragment;
private PlayFragment playFragment;
private ViewPager viewPager;
private List<Fragment> fragmentList=new ArrayList<>();
@Override
protected void onCreate(Bundle savedInstanceState) {
super.onCreate(savedInstanceState);
setContentView(R.layout.activity_main);
bindID();
friendFragment =new FriendFragment();
newsFragment =new NewsFragment();
playFragment =new PlayFragment();
fragmentList.add(friendFragment);
fragmentList.add(newsFragment);
fragmentList.add(playFragment);
MyPageAdaper adaper=new MyPageAdaper(getSupportFragmentManager(),fragmentList);
viewPager.setAdapter(adaper);
}
private void bindID() {
btn_friend=findViewById(R.id.main_friend);
btn_news=findViewById(R.id.main_news);
btn_play=findViewById(R.id.main_play);
viewPager=findViewById(R.id.main_viewpager);
btn_friend.setOnClickListener(this);
btn_play.setOnClickListener(this);
btn_news.setOnClickListener(this);
}
@Override
public void onClick(View view) {
switch (view.getId()){
case R.id.main_friend:
viewPager.setCurrentItem(0);
break;
case R.id.main_news:
viewPager.setCurrentItem(1);
break;
case R.id.main_play:
viewPager.setCurrentItem(2);
break;
default:
break;
}
}
}
adaper 代码如下:
package com.xdw.myapplication.adaper;
import android.support.v4.app.Fragment;
import android.support.v4.app.FragmentManager;
import android.support.v4.app.FragmentPagerAdapter;
import java.util.List;
/**
* Created by lenovo on 2018/3/6.
*/
public class MyPageAdaper extends FragmentPagerAdapter {
private List<Fragment> mfragmentlist;
public MyPageAdaper(FragmentManager fm, List<Fragment> fragmentList) {
super(fm);
this.mfragmentlist=fragmentList;
}
@Override
public Fragment getItem(int position) {
return mfragmentlist.get(position);
}
@Override
public int getCount() {
return mfragmentlist.size();
}
}
在activity_main.xml里
代码如下:<?xml version="1.0" encoding="utf-8"?>
<RelativeLayout xmlns:android="http://schemas.android.com/apk/res/android"
xmlns:app="http://schemas.android.com/apk/res-auto"
xmlns:tools="http://schemas.android.com/tools"
android:layout_width="match_parent"
android:layout_height="match_parent"
tools:context="com.xdw.myapplication.MainActivity">
<LinearLayout
android:id="@+id/main_btn"
android:layout_width="match_parent"
android:layout_height="50dp"
android:orientation="horizontal"
android:layout_alignParentBottom="true"
>
<Button
android:id="@+id/main_friend"
android:layout_width="0dp"
android:layout_height="50dp"
android:layout_weight="1"
android:text="朋友圈"
/>
<Button
android:id="@+id/main_news"
android:layout_width="0dp"
android:layout_height="50dp"
android:layout_weight="1"
android:text="消息"
/>
<Button
android:id="@+id/main_play"
android:layout_width="0dp"
android:layout_height="50dp"
android:layout_weight="1"
android:text="动态"
/>
</LinearLayout>
<android.support.v4.view.ViewPager
android:id="@+id/main_viewpager"
android:layout_width="match_parent"
android:layout_height="match_parent"
android:layout_above="@+id/main_btn"
>
</android.support.v4.view.ViewPager>
</RelativeLayout>
效果如图:
希望给大家带来帮助
Fragment的由来
基于Android系统的设备越来越多,分辨率种类越来越多,Google提出Fragment的概念也是希望通过Fragment解决屏幕碎片化问题。
Fragment的翻译为碎片,自Android3.0开始引入Fragment的概念
用Fragment替换TabHost是Google推荐的方案
2.Fragment 能够比之前v4 有什么好处呢?
1,使用Fragment可以在一个Activity中实现不同界面的灵活切换。
2,Fragment解决了Activity间的切换不流畅,布局切换更轻量。
3,Fragment可以封装成不同的重要组件,并可以单独管理其生命周期和UI布局。
4,Fragment无需在AndroidManifest中注册,可以在布局文件中直接引用。
3,Fragment静态加载方法(步骤)
新建类继承Fragment;
重写onCreateView方法;
使用LayoutInflater对象中的inflate方法绑定布局和控件;
在Activity对应的布局文件中通过<fragment>标签引用。
新建一个项目,再里面新建Fragment
extends Fragment ,
代码如下:
public class BlankFragment extends Fragment {

public BlankFragment() {
// Required empty public constructor
}

@Override
public View onCreateView(LayoutInflater inflater, ViewGroup container,
Bundle savedInstanceState) {
// Inflate the layout for this fragment
View view=inflater.inflate(R.layout.fragment_blank, container, false);

return view;
它的xml 代码如下:
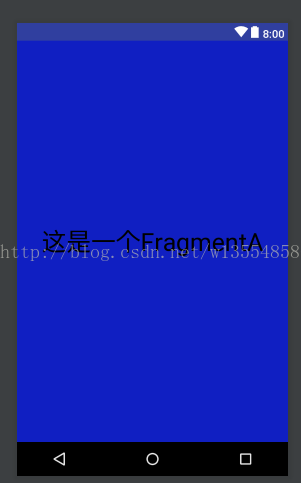
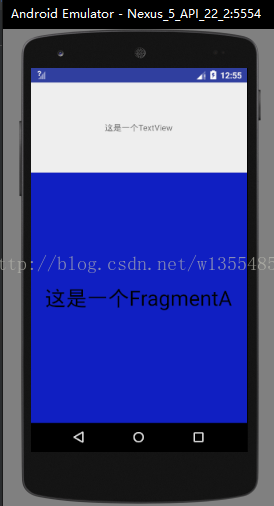
<FrameLayout xmlns:android="http://schemas.android.com/apk/res/android"
xmlns:tools="http://schemas.android.com/tools"
android:layout_width="match_parent"
android:layout_height="match_parent"
tools:context="com.xdw.myapplication.BlankFragment">

<!-- TODO: Update blank fragment layout -->
<TextView
android:id="@+id/fragment_textview"
android:layout_width="match_parent"
android:layout_height="match_parent"
android:text="这是一个FragmentA"
android:gravity="center"
android:background="#101fc2"
android:textColor="#000000"
android:textSize="35dp"
/>

</FrameLayout>
XML效果图:
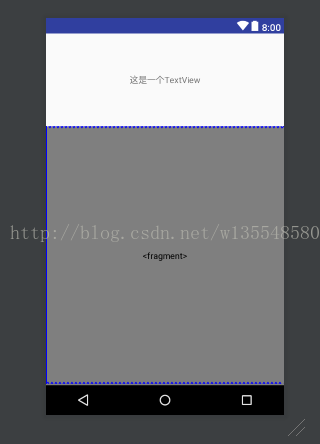
在acticity_main.xml 里 出除了添加一个TextView,还要添加fragment 里面最重要的属性就是
id 和 name ,代码如下:
<?xml version="1.0" encoding="utf-8"?>
<LinearLayout xmlns:android="http://schemas.android.com/apk/res/android"
xmlns:app="http://schemas.android.com/apk/res-auto"
xmlns:tools="http://schemas.android.com/tools"
android:layout_width="match_parent"
android:layout_height="match_parent"
android:orientation="vertical"
tools:context="com.xdw.myapplication.MainActivity">
<TextView
android:id="@+id/main_textview"
android:layout_width="match_parent"
android:layout_height="150dp"
android:text="这是一个TextView"
android:gravity="center"
/>
<LinearLayout
android:layout_width="match_parent"
android:layout_height="match_parent"
android:orientation="horizontal"
>
<fragment
android:layout_width="0dp"
android:layout_weight="1"
android:layout_height="match_parent"
android:id="@+id/fragment_one"
android:name="com.xdw.myapplication.BlankFragment"
/>
</LinearLayout>
</LinearLayout>
xml效果图:
运行出来的效果图:
4,Fragment 动态加载:
新建类继承Fragment
重写onGreateView方法
使用layout infler 对象中的inflate 方法绑定布局和控件
使用FragmentManger
和 FragmentTransaction
对象进行动态加载
代码如下:
package com.xdw.myapplication;
import android.app.FragmentManager;
import android.ap
4000
p.FragmentTransaction;
import android.support.v7.app.AppCompatActivity;
import android.os.Bundle;
import android.view.View;
import android.widget.Button;
import com.xdw.myapplication.fragment.NanFragment;
import com.xdw.myapplication.fragment.NvFragment;
public class TianMaoActivity extends AppCompatActivity implements View.OnClickListener{
private Button nan_btn;
private Button nv_btn;
private NanFragment nanFragment;
private NvFragment nvFragment;
@Override
protected void onCreate(Bundle savedInstanceState) {
super.onCreate(savedInstanceState);
setContentView(R.layout.activity_tian_mao);
bindID();
}
private void bindID() {
nan_btn=findViewById(R.id.nan_btn);
nv_btn=findViewById(R.id.nv_btn);
nan_btn.setOnClickListener(this);
nv_btn.setOnClickListener(this);
}
@Override
public void onClick(View view) {
FragmentManager manager=getFragmentManager();//创建FragmentManger对象 (管理器)
FragmentTransaction transaction=manager.beginTransaction();//创建FragmentTransaction对象
// 事务对象 对Fragment进行添加,移除,替换,提交等操作
switch (view.getId()){
case R.id.nan_btn:
if(nanFragment==null){
//显示男装
nanFragment =new NanFragment();
}
transaction.replace(R.id.shop_framelayout,nanFragment);
break;
case R.id.nv_btn:
if (nvFragment==null){
//显示女装
nvFragment =new NvFragment();
}
transaction.replace(R.id.shop_framelayout,nvFragment);
break;
default:
break;
}
transaction.commit();//提交
}
}
xml代码如下:
<?xml version="1.0" encoding="utf-8"?>
<LinearLayout xmlns:android="http://schemas.android.com/apk/res/android"
xmlns:app="http://schemas.android.com/apk/res-auto"
xmlns:tools="http://schemas.android.com/tools"
android:layout_width="match_parent"
android:layout_height="match_parent"
android:orientation="horizontal"
tools:context="com.xdw.myapplication.TianMaoActivity">
<LinearLayout
android:layout_width="100dp"
android:layout_height="match_parent"
android:orientation="vertical"
>
<Button
android:layout_marginTop="50dp"
android:id="@+id/nan_btn"
android:layout_width="match_parent"
android:layout_height="50dp"
android:text="男装"
/>
<Button
android:layout_marginTop="50dp"
android:id="@+id/nv_btn"
android:layout_width="match_parent"
android:layout_height="50dp"
android:text="女装"
/>
</LinearLayout>
<FrameLayout
android:id="@+id/shop_framelayout"
android:layout_width="match_parent"
android:layout_height="match_parent">
</FrameLayout>
</LinearLayout>
效果如图
5,实现页卡切换效果:
代码如下:
package com.xdw.myapplication;
import android.support.v4.app.Fragment;
import android.support.v4.view.ViewPager;
import android.support.v7.app.AppCompatActivity;
import android.os.Bundle;
import android.view.View;
import android.widget.Button;
import com.xdw.myapplication.adaper.MyPageAdaper;
import com.xdw.myapplication.fragment.FriendFragment;
import com.xdw.myapplication.fragment.NewsFragment;
import com.xdw.myapplication.fragment.PlayFragment;
import java.util.ArrayList;
import java.util.List;
public class MainActivity extends AppCompatActivity implements View.OnClickListener {
private Button btn_friend;
private Button btn_news;
private Button btn_play;
private FriendFragment friendFragment;
private NewsFragment newsFragment;
private PlayFragment playFragment;
private ViewPager viewPager;
private List<Fragment> fragmentList=new ArrayList<>();
@Override
protected void onCreate(Bundle savedInstanceState) {
super.onCreate(savedInstanceState);
setContentView(R.layout.activity_main);
bindID();
friendFragment =new FriendFragment();
newsFragment =new NewsFragment();
playFragment =new PlayFragment();
fragmentList.add(friendFragment);
fragmentList.add(newsFragment);
fragmentList.add(playFragment);
MyPageAdaper adaper=new MyPageAdaper(getSupportFragmentManager(),fragmentList);
viewPager.setAdapter(adaper);
}
private void bindID() {
btn_friend=findViewById(R.id.main_friend);
btn_news=findViewById(R.id.main_news);
btn_play=findViewById(R.id.main_play);
viewPager=findViewById(R.id.main_viewpager);
btn_friend.setOnClickListener(this);
btn_play.setOnClickListener(this);
btn_news.setOnClickListener(this);
}
@Override
public void onClick(View view) {
switch (view.getId()){
case R.id.main_friend:
viewPager.setCurrentItem(0);
break;
case R.id.main_news:
viewPager.setCurrentItem(1);
break;
case R.id.main_play:
viewPager.setCurrentItem(2);
break;
default:
break;
}
}
}
adaper 代码如下:
package com.xdw.myapplication.adaper;
import android.support.v4.app.Fragment;
import android.support.v4.app.FragmentManager;
import android.support.v4.app.FragmentPagerAdapter;
import java.util.List;
/**
* Created by lenovo on 2018/3/6.
*/
public class MyPageAdaper extends FragmentPagerAdapter {
private List<Fragment> mfragmentlist;
public MyPageAdaper(FragmentManager fm, List<Fragment> fragmentList) {
super(fm);
this.mfragmentlist=fragmentList;
}
@Override
public Fragment getItem(int position) {
return mfragmentlist.get(position);
}
@Override
public int getCount() {
return mfragmentlist.size();
}
}
在activity_main.xml里
代码如下:<?xml version="1.0" encoding="utf-8"?>
<RelativeLayout xmlns:android="http://schemas.android.com/apk/res/android"
xmlns:app="http://schemas.android.com/apk/res-auto"
xmlns:tools="http://schemas.android.com/tools"
android:layout_width="match_parent"
android:layout_height="match_parent"
tools:context="com.xdw.myapplication.MainActivity">
<LinearLayout
android:id="@+id/main_btn"
android:layout_width="match_parent"
android:layout_height="50dp"
android:orientation="horizontal"
android:layout_alignParentBottom="true"
>
<Button
android:id="@+id/main_friend"
android:layout_width="0dp"
android:layout_height="50dp"
android:layout_weight="1"
android:text="朋友圈"
/>
<Button
android:id="@+id/main_news"
android:layout_width="0dp"
android:layout_height="50dp"
android:layout_weight="1"
android:text="消息"
/>
<Button
android:id="@+id/main_play"
android:layout_width="0dp"
android:layout_height="50dp"
android:layout_weight="1"
android:text="动态"
/>
</LinearLayout>
<android.support.v4.view.ViewPager
android:id="@+id/main_viewpager"
android:layout_width="match_parent"
android:layout_height="match_parent"
android:layout_above="@+id/main_btn"
>
</android.support.v4.view.ViewPager>
</RelativeLayout>
效果如图:
希望给大家带来帮助

相关文章推荐
- DrawerLayout的使用 侧滑加载Listview,首页使用Fragment和处理点击触摸冲突、穿透事件和监听菜单滑动状态的改变的详细介绍
- Fragment 动态加载 / 静态加载
- Android Fragment 动态、静态切换
- 详细介绍linux动态网络和静态网络和克隆后的网络配置
- Java中的静态绑定和动态绑定详细介绍
- 动态加载jar包和jar包签名及dsa加密和keytool工具详细介绍
- 【Android】 Viewpager+Fragment实现滑动图片的动态加载
- Fragment生命周期、静态加载、动态加载
- Android-Fragment(基本知识,静态加载,动态加载)
- fragment的静态与动态加载
- 八、fragment静态、动态加载
- 一起Talk Android吧(第四十三回:Android中的Fragment八-静态加载VS动态加载)
- 详细介绍kvm虚拟机静态和动态迁移(图文介绍)
- 顶部动态列表GridView+底部viewpager+fragment切换滑动
- Android笔记(8)---Fragment的使用(静态加载,动态加载)
- FragMent的静态加载和动态加载
- Android导入design.v4包,Fragment生命周期,静态/动态加载
- 喝酒不骑马的Android自学日记(12)-Fragment动态加载和静态加载
- Android中Fragment的动态加载和双屏切换问题
- Fragment 的两种加载方式 (静态加载,动态加载)