Qt多线程通信
2018-03-03 11:56
155 查看
简述:
1> Qt线程间共享数据主要有两种方式:
1)使用共享内存。即使用一个两个线程都能够共享的变量(如全局变量),这样两个线程都能够访问和修改该变量,从而达到共享数据的目的。
2)使用singal/slot机制,把数据从一个线程传递到另外一个线程。
第一种方法在各个编程语言都普遍使用,而第二种方法是QT的特有的,本文主要介绍第二种。
2 >
槽参数类型
1) 在线程间使用信号槽进行通信时,槽参数必须使用元数据类型的参数;
2) Qt内生的元数据类型,如int double QString等;
3) 如果要用自定义的数据类型,需要在connect之前将其注册(qRegisterMetaType)为元数据类型。
4) 线程间用“信号与槽”传递引用参数的话,要加const,因为const文字常量存在常量区中,生命周期与程序一样的长。这样可以避免slot调用的时候参数的运行期已过而使引用无效。
connect(m_thread,
SIGNAL(MsgSignal(const QString&)),
this, SLOT(OnMsgSignal(const QString&)));
3 > Q_DECLARE_METATYPE与qRegisterMetaType
Q_DECLARE_METATYPE
如果要使自定义类型或其他非QMetaType内置类型在QVaiant中使用,必须使用该宏。
该类型必须有公有的 构造、析构、复制构造函数。
qRegisterMetaType
必须使用该函数的两种情况:
如果非QMetaType内置类型要在Qt的属性系统中使用。
如果非QMetaType内置类型要在queued 信号与槽中使用。
两者的关系:
Q_DECLARE_METATYPE展开后是一个特化后的类QMetaTypeId<TYPE>
qRegisterMetaType将某类型注册到MetaType系统中。
QMetaTypeId<TYPE>的类中成员包含对qRegisterMetaType的调用。
testthread.cpp文件
自定义的类继承了QThread类,重写run函数,然后触发TestSignal信号。
mainwindow.h
mainwindow.cpp
Mainwindow里面连接信号槽,并且将收到的int参数显示在界面上。
运行效果:
testthread.h 文件
testthread.cpp文件
mainwindow.h
mainwindow.cpp
此时再进行编译,编译通过,但Qt Creator会有提示:
并且运行程序时会发现,信号发送了,槽函数始终不调用。
如果将槽参数注册为元数据类型,即mainwindow.cpp文件改动一下:
此时便可正常运行:
前提是全部的线程都要在主线程里面实例化(new)。
线程
头文件 ABFThread.h
ABFThread.cpp
GUI线程
radarControl.h
radarControl.cpp
按下按钮就发射信号
mainwindow.h
mainwindow.cpp
2 > 多线程间的信号槽传递,在connect的时候需要以Qt::QueuedConnection的方式,不然以Qt::DirectConnection的方式接收者UI线程会很长时间收不到后台线程发出的信号,或者信号直接丢失都是有可能的
1> Qt线程间共享数据主要有两种方式:
1)使用共享内存。即使用一个两个线程都能够共享的变量(如全局变量),这样两个线程都能够访问和修改该变量,从而达到共享数据的目的。
2)使用singal/slot机制,把数据从一个线程传递到另外一个线程。
第一种方法在各个编程语言都普遍使用,而第二种方法是QT的特有的,本文主要介绍第二种。
2 >
槽参数类型
1) 在线程间使用信号槽进行通信时,槽参数必须使用元数据类型的参数;
2) Qt内生的元数据类型,如int double QString等;
3) 如果要用自定义的数据类型,需要在connect之前将其注册(qRegisterMetaType)为元数据类型。
4) 线程间用“信号与槽”传递引用参数的话,要加const,因为const文字常量存在常量区中,生命周期与程序一样的长。这样可以避免slot调用的时候参数的运行期已过而使引用无效。
connect(m_thread,
SIGNAL(MsgSignal(const QString&)),
this, SLOT(OnMsgSignal(const QString&)));
3 > Q_DECLARE_METATYPE与qRegisterMetaType
Q_DECLARE_METATYPE
如果要使自定义类型或其他非QMetaType内置类型在QVaiant中使用,必须使用该宏。
该类型必须有公有的 构造、析构、复制构造函数。
qRegisterMetaType
必须使用该函数的两种情况:
如果非QMetaType内置类型要在Qt的属性系统中使用。
如果非QMetaType内置类型要在queued 信号与槽中使用。
两者的关系:
Q_DECLARE_METATYPE展开后是一个特化后的类QMetaTypeId<TYPE>
qRegisterMetaType将某类型注册到MetaType系统中。
QMetaTypeId<TYPE>的类中成员包含对qRegisterMetaType的调用。
1、传递int参数(主线程与子线程)
testthread.h 文件#ifndef TESTTHREAD_H
#define TESTTHREAD_H
#include <QThread>
#include "msg.h"
class TestThread : public QThread
{
Q_OBJECT
public:
explicit TestThread(QObject *parent = 0);
protected:
void run();
signals:
void TestSignal(int);
private:
Msg msg;
};
#endif // TESTTHREAD_Htestthread.cpp文件
#include "testthread.h"
TestThread::TestThread(QObject *parent) :
QThread(parent)
{
}
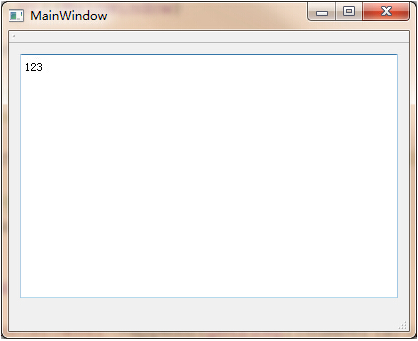
void TestThread::run()
{
//触发信号
emit TestSignal(123);
}自定义的类继承了QThread类,重写run函数,然后触发TestSignal信号。
mainwindow.h
#ifndef MAINWINDOW_H
#define MAINWINDOW_H

#include <QMainWindow>

#include "testthread.h"

namespace Ui {
class MainWindow;
}

class MainWindow : public QMainWindow
{
Q_OBJECT

public:
explicit MainWindow(QWidget *parent = 0);
~MainWindow();

private slots:
void DisplayMsg(int);

private:
Ui::MainWindow *ui;
TestThread *t;
};

#endif // MAINWINDOW_H
mainwindow.cpp
#include "mainwindow.h"
#include "ui_mainwindow.h"

MainWindow::MainWindow(QWidget *parent) :
QMainWindow(parent),
ui(new Ui::MainWindow)
{
ui->setupUi(this);

//进行connect前必须实例化
t = new TestThread();

connect(t, SIGNAL(TestSignal(int)), this, SLOT(DisplayMsg(int)));

//执行子线程
t->start();
}

void MainWindow::DisplayMsg(int a)
{
ui->textBrowser->append(QString::number(a));
}

MainWindow::~MainWindow()
{
delete ui;
}
Mainwindow里面连接信号槽,并且将收到的int参数显示在界面上。
运行效果:
2、传递自定义参数(主线程与子线程)
对以上程序进行简单的修改,使它传递自定义消息。testthread.h 文件
#ifndef TESTTHREAD_H
#define TESTTHREAD_H

#include <QThread>

#include "msg.h"

class TestThread : public QThread
{
Q_OBJECT
public:
explicit TestThread(QObject *parent = 0);
Msg msg;

protected:
void run();

signals:
void TestSignal(Msg);   //自定义消息Msg!!!
};

#endif // TESTTHREAD_H
testthread.cpp文件
#include "testthread.h"
TestThread::TestThread(QObject *parent) :
QThread(parent)
{
}
void TestThread::run()
{
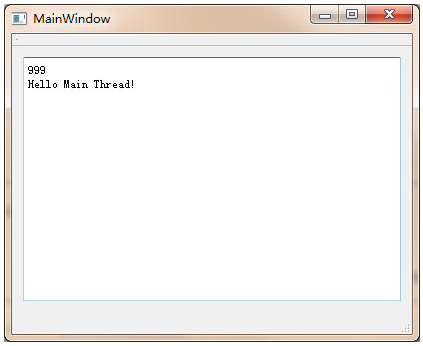
msg.int_info = 999;
msg.str_info = "Hello Main Thread!";
//触发信号
emit TestSignal(msg);
}mainwindow.h
#ifndef MAINWINDOW_H
#define MAINWINDOW_H

#include <QMainWindow>

#include "testthread.h"
#include "msg.h"

namespace Ui {
class MainWindow;
}

class MainWindow : public QMainWindow
{
Q_OBJECT

public:
explicit MainWindow(QWidget *parent = 0);
~MainWindow();

private slots:
void DisplayMsg(Msg);   //Msg!!!

private:
Ui::MainWindow *ui;
TestThread *t;
};

#endif // MAINWINDOW_H
mainwindow.cpp
#include "mainwindow.h"
#include "ui_mainwindow.h"

MainWindow::MainWindow(QWidget *parent) :
QMainWindow(parent),
ui(new Ui::MainWindow)
{
ui->setupUi(this);

//进行connect前必须实例化
t = new TestThread();

//Msg!!!
connect(t, SIGNAL(TestSignal(Msg)), this, SLOT(DisplayMsg(Msg)));

//执行子线程
t->start();
}

void MainWindow::DisplayMsg(Msg msg)
{
ui->textBrowser->append(QString::number(msg.int_info));
ui->textBrowser->append(msg.str_info);
}

MainWindow::~MainWindow()
{
delete ui;
}
此时再进行编译,编译通过,但Qt Creator会有提示:
QObject::connect: Cannot queue arguments of type 'Msg'
(Make sure 'Msg' is registered using qRegisterMetaType().)
并且运行程序时会发现,信号发送了,槽函数始终不调用。
如果将槽参数注册为元数据类型,即mainwindow.cpp文件改动一下:
ui->setupUi(this);

qRegisterMetaType<Msg>("Msg");
此时便可正常运行:
3、传递自定义参数(子线程与子线程)
原理同上,然后把connect函数中的第三参数this(主线程)改成要监听的另一个线程对象就好了(QT多么健壮、友好、强大)。connect(t, SIGNAL(TestSignal(Msg)), this, SLOT(DisplayMsg(Msg)));
前提是全部的线程都要在主线程里面实例化(new)。
4、传递自定义结构体参数(子线程与子线程)
实现子线程与GUI子线程的参数进行传递。线程
头文件 ABFThread.h
public:

struct G_ABFTableSrcUnit
{
int a;
int b;
int c;
float d;
float e;
unsigned int f;
float Gg;

QString waveformTypel;
};

public slots:

void parameterPassing(abfThread::G_ABFTableSrcUnit); //线程自己调用自己的结构体。。。必须这么写不然主线程会报错的  错误是参数内容不一样
ABFThread.cpp
void abfThread::parameterPassing(abfThread::G_ABFTableSrcUnit)
{

}
GUI线程
radarControl.h
#include "abfThread"

private:
Ui::radarControl *ui;

abfThread::G_ABFTableSrcUnit mst_abfSrcUnit;

signals:
void sendString(abfThread::G_ABFTableSrcUnit);
radarControl.cpp
按下按钮就发射信号
void radarControl::on_pushButton_clicked()
{
emit sendString(mst_abfSrcUnit);
}
mainwindow.h
#include "abfThread.h"
#include "radarControl.h"
mainwindow.cpp
radarInterface = new radarControl();
m_ABFThread = new QThread();
m_ABF = new abfThread();
m_ABF->moveToThread(m_ABFThread);
m_ABFThread->start();

qRegisterMetaType<abfThread::G_ABFTableSrcUnit>("abfThread::G_ABFTableSrcUnit");
connect(radarInterface,SIGNAL(sendString(abfThread::G_ABFTableSrcUnit)),m_ABF,SLOT(parameterPassing(abfThread::G_ABFTableSrcUnit)));
//除了注册结构体外  还要保证传递的参数写法要一样  这就是为什么 前面线程自己定义的结构体自己调用自己的原因了
小结:
1 > Qt的信号槽函数只默认支持Qt的类型和C++提供的内建的基本类型,比如int double float等,根本不支持C++的std::string std::vector 自定义的struct类型。所以需要用Qt提供的Q_DECLARE_METATYPE和qRegisterMetaType来声明和注册自定义的类型和C++的其他类型。2 > 多线程间的信号槽传递,在connect的时候需要以Qt::QueuedConnection的方式,不然以Qt::DirectConnection的方式接收者UI线程会很长时间收不到后台线程发出的信号,或者信号直接丢失都是有可能的

相关文章推荐
- Java编程线程间通信与信号量代码示例
- Python多线程编程(八):使用Event实现线程间通信
- java线程间通信的通俗解释及代码示例
- 【JavaScript】关于包装类与类型转换
- 黑马程序员_多线程间通信的两种方式
- 线程间通信及其安全问题
- android异步消息机制,Handler,Looper,MessageQueue的关系
- 黑马程序员_多线程和String类
- 消息传递机制之Handler机制
- java多线程之 生产者和消费者 线程间通信 等待与唤醒机制
- iOS开发多线程创建及线程间通信
- 使用wait/notify实现线程间通信
- AsyncTask原理
- linux基础——linux线程间通信及同步机制总结
- Android线程间通信Handler机制(Android开发艺术探索学习笔记)
- 线程间的通信 iOS
- Thread详解10:用管道进行线程间通信
- linux线程间通信中的信号量
- iOS开发多线程-线程间的通信
- 进程间通信与线程间通信