iOS-按钮单选与多选逻辑处理
2018-02-20 12:08
381 查看
概述
循环创建按钮, 进行按钮单选或者多选的操作.
详细
代码下载:http://www.demodashi.com/demo/10712.html
我们经常会有多行多列按钮的页面, 这个时候我们通常会选择循环创建按钮, 然后进行按钮单选或者多选的操作!
一、程序实现
一. 单选逻辑处理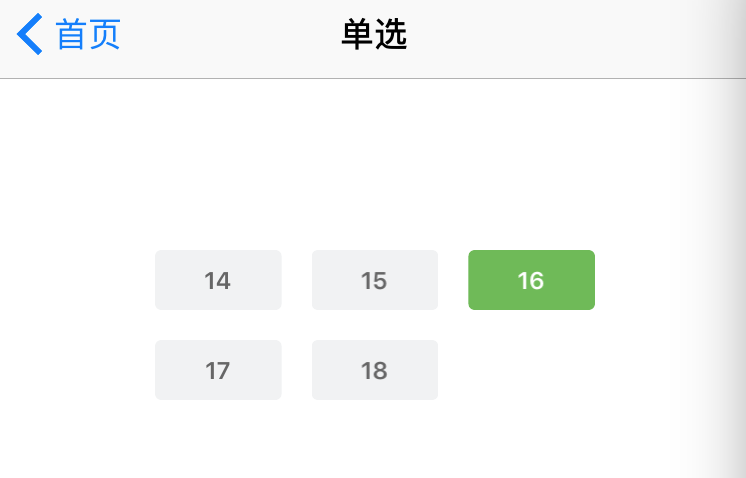
1. 创建按钮控件数组及标签数组, 并升级当前选中按钮为属性,方便使用
// 标签数组(按钮文字)
@property (nonatomic, strong) NSArray *markArray;
// 按钮数组
@property (nonatomic, strong) NSMutableArray *btnArray;
// 选中按钮
@property (nonatomic, strong) UIButton *selectedBtn;
#pragma mark - 懒加载
- (NSArray *)markArray {
if (!_markArray) {
NSArray *array = [NSArray array];
array = @[@"14", @"15", @"16", @"17", @"18"];
_markArray = array;
}
return _markArray;
}
- (NSMutableArray *)btnArray {
if (!_btnArray) {
NSMutableArray *array = [NSMutableArray array];
_btnArray = array;

}
return _btnArray;
}
2. 创建单选视图, 循环创建按钮, 并回显上次选中值
- (void)setupRadioBtnView {

CGFloat UI_View_Width = [UIScreen mainScreen].bounds.size.width;
CGFloat marginX = 15;
CGFloat top = 100;
CGFloat btnH = 30;
CGFloat width = (250 - marginX * 4) / 3;

// 按钮背景
UIView *btnsBgView = [[UIView alloc] initWithFrame:CGRectMake((UI_View_Width - 250) * 0.5, 50, 250, 300)];
btnsBgView.backgroundColor = [UIColor whiteColor];
[self.view addSubview:btnsBgView];

// 循环创建按钮
NSInteger maxCol = 3;
for (NSInteger i = 0; i < 5; i++) {

UIButton *btn = [UIButton buttonWithType:UIButtonTypeCustom];
btn.backgroundColor = ZLUnselectedColor;
btn.layer.cornerRadius = 3.0; // 按钮的边框弧度
btn.clipsToBounds = YES;
btn.titleLabel.font = [UIFont boldSystemFontOfSize:12];
[btn setTitleColor:[UIColor colorWithRed:(102)/255.0 green:(102)/255.0 blue:(102)/255.0 alpha:1.0] forState:UIControlStateNormal];
[btn setTitleColor:[UIColor whiteColor] forState:UIControlStateSelected];
[btn addTarget:self action:@selector(chooseMark:) forControlEvents:UIControlEventTouchUpInside];
NSInteger col = i % maxCol; //列
btn.x = marginX + col * (width + marginX);
NSInteger row = i / maxCol; //行
btn.y = top + row * (btnH + marginX);
btn.width = width;
btn.height = btnH;
[btn setTitle:self.markArray[i] forState:UIControlStateNormal];
[btnsBgView addSubview:btn];
btn.tag = i;
[self.btnArray addObject:btn];
}

// 创建完btn后再判断是否能选择(之前是已经选取过的)
// 假数据:之前已经上传16时,则回显16
for (UIButton *btn in btnsBgView.subviews) {
if ([@"16" isEqualToString:btn.titleLabel.text]) {
btn.selected = YES;
btn.backgroundColor = ZLSelectedColor;
break;
}
}
}
3. 数字按钮单选处理, 根据tag值去判断是否是当前选中按钮
- (void)chooseMark:(UIButton *)sender {
NSLog(@"点击了%@", sender.titleLabel.text);

self.selectedBtn = sender;

sender.selected = !sender.selected;

for (NSInteger j = 0; j < [self.btnArray count]; j++) {
UIButton *btn = self.btnArray[j] ;
if (sender.tag == j) {
btn.selected = sender.selected;
} else {
btn.selected = NO;
}
btn.backgroundColor = ZLUnselectedColor;
}

UIButton *btn = self.btnArray[sender.tag];
if (btn.selected) {
btn.backgroundColor = ZLSelectedColor;
} else {
btn.backgroundColor = ZLUnselectedColor;
}
}
二. 多选逻辑处理
1. 创建按钮控件数组和标签字典, 及选中标签数组(数字)和选中标签数组(文字字符串), 为了展示及上传按钮数据使用
// 标签数组
@property (nonatomic, strong) NSArray *markArray;
// 标签字典
@property (nonatomic, strong) NSDictionary *markDict;
// 选中标签数组(数字)
@property (nonatomic, strong) NSMutableArray *selectedMarkArray;
// 选中标签数组(文字字符串)
@property (nonatomic, strong) NSMutableArray *selectedMarkStrArray;
#pragma mark - 懒加载
- (NSArray *)markArray {
if (!_markArray) {
NSArray *array = [NSArray array];
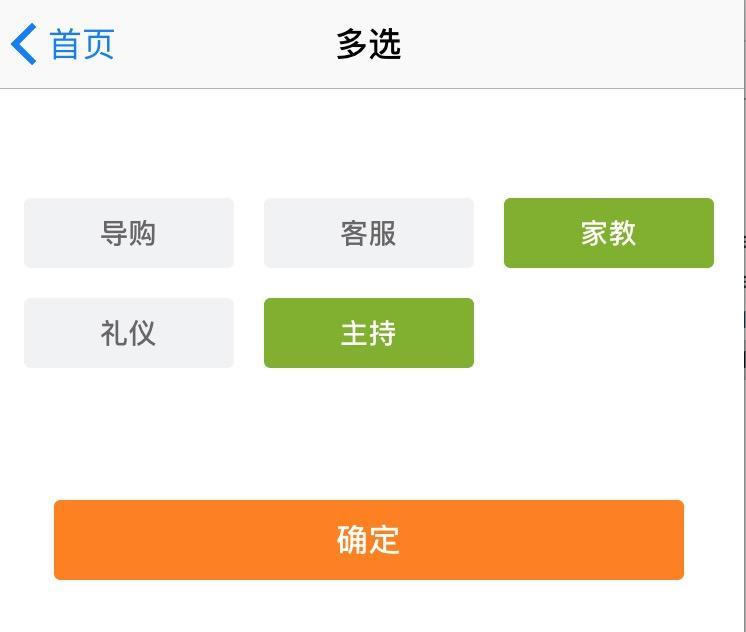
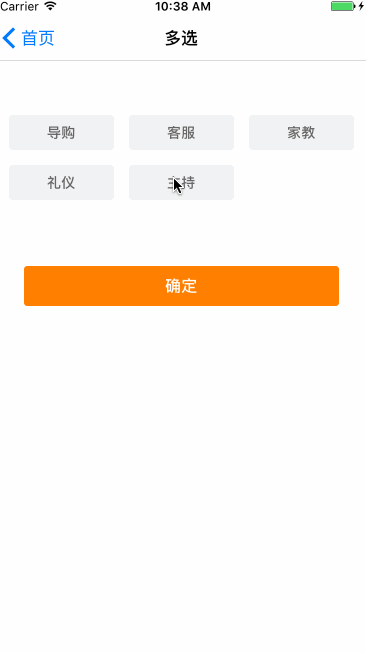
array = @[@"导购", @"客服", @"家教", @"礼仪", @"主持"];
_markArray = array;
}
return _markArray;
}
// 上传通过文字key取数字value发送数字
- (NSDictionary *)markDict {
if (!_markDict) {
NSDictionary *dict = [NSDictionary dictionary];
dict = @{
@"导购" : @"3" ,
@"客服" : @"7",
@"家教" : @"9",
@"礼仪" : @"10",
@"主持" : @"11",
};
_markDict = dict;
}
return _markDict;
}
- (NSMutableArray *)selectedMarkArray {
if (!_selectedMarkArray) {
_selectedMarkArray = [NSMutableArray array];
}
return _selectedMarkArray;
}
- (NSMutableArray *)selectedMarkStrArray {
if (!_selectedMarkStrArray) {
_selectedMarkStrArray = [NSMutableArray array];
}
return _selectedMarkStrArray;
}2.循环创建按钮视图, 循环创建按钮
- (void)setupMultiselectView {

CGFloat UI_View_Width = [UIScreen mainScreen].bounds.size.width;
CGFloat marginX = 15;
CGFloat top = 19;
CGFloat btnH = 35;
CGFloat marginH = 40;
CGFloat height = 130;
CGFloat width = (UI_View_Width - marginX * 4) / 3;

// 按钮背景
UIView *btnsBgView = [[UIView alloc] initWithFrame:CGRectMake(0, 100, UI_View_Width, height)];
btnsBgView.backgroundColor = [UIColor whiteColor];
[self.view addSubview:btnsBgView];

// 循环创建按钮
NSInteger maxCol = 3;
for (NSInteger i = 0; i < 5; i++) {

UIButton *btn = [UIButton buttonWithType:UIButtonTypeCustom];
btn.backgroundColor = ZLUnselectedColor;
btn.layer.cornerRadius = 3.0; // 按钮的边框弧度
btn.clipsToBounds = YES;
btn.titleLabel.font = [UIFont boldSystemFontOfSize:14];
[btn setTitleColor:[UIColor colorWithRed:(102)/255.0 green:(102)/255.0 blue:(102)/255.0 alpha:1.0] forState:UIControlStateNormal];
[btn setTitleColor:[UIColor whiteColor] forState:UIControlStateSelected];
[btn addTarget:self action:@selector(chooseMark:) forControlEvents:UIControlEventTouchUpInside];
NSInteger col = i % maxCol; //列
btn.x  = marginX + col * (width + marginX);
NSInteger row = i / maxCol; //行
btn.y = top + row * (btnH + marginX);
btn.width = width;
btn.height = btnH;
[btn setTitle:self.markArray[i] forState:UIControlStateNormal];
[btnsBgView addSubview:btn];
}

// 确定按钮
UIButton *surebtn = [UIButton buttonWithType:UIButtonTypeCustom];
[surebtn setTitle:@"确定" forState:UIControlStateNormal];
surebtn.frame = CGRectMake(marginX * 2, CGRectGetMaxY(btnsBgView.frame) + marginH, UI_View_Width - marginX * 4, 40);
surebtn.titleLabel.font = [UIFont boldSystemFontOfSize:16];
[surebtn addTarget:self action:@selector(sureBtnClick) forControlEvents:UIControlEventTouchUpInside];
surebtn.backgroundColor = [UIColor orangeColor];
surebtn.layer.cornerRadius = 3.0;
surebtn.clipsToBounds = YES;
[self.view addSubview:surebtn];
}
3. 按钮多选逻辑处理, 并上传数据请求处理
/**
* 按钮多选处理
*/
- (void)chooseMark:(UIButton *)btn {

btn.selected = !btn.selected;

if (btn.isSelected) {
btn.backgroundColor = ZLSelectedColor;
[self.selectedMarkArray addObject:self.markDict[btn.titleLabel.text]];
[self.selectedMarkStrArray addObject:btn.titleLabel.text];
} else {
btn.backgroundColor = ZLUnselectedColor;
[self.selectedMarkArray removeObject:self.markDict[btn.titleLabel.text]];
[self.selectedMarkStrArray removeObject:btn.titleLabel.text];
}
}
/**
* 确认接口请求处理
*/
- (void)sureBtnClick {
// 用户选择标签后就把值上传, 也要传给服务器下次直接请求回来
// 按钮数字标识字符串
NSString *numStr = [self.selectedMarkArray componentsJoinedByString:@","];
// 按钮文字字符串
NSString *str = [self.selectedMarkStrArray componentsJoinedByString:@","];
// 测试:拼接请求参数
NSLog(@"按钮数字标识字符串:%@", numStr);
NSLog(@"按钮文字字符串:%@", str);
}三. 可选与不可选逻辑处理
当然有时候也有特殊按钮不让选择.
假数据 测试, 逻辑如下
// 不可选按钮
for (UIButton *btn in self.btnArray) {
if (btn.tag != 0) {
btn.enabled = YES;
btn.backgroundColor = [UIColor whiteColor];
btn.layer.borderColor = [XHHNavColor CGColor];
} else {
btn.enabled = NO;
btn.backgroundColor =  XHHColor(230, 230, 230);
btn.layer.borderColor = [XHHColor(230, 230, 230) CGColor];
}
}
二、运行效果
1、单选运行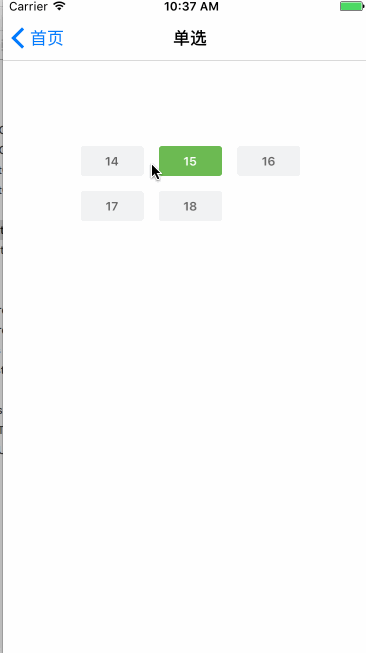
2、多选运行
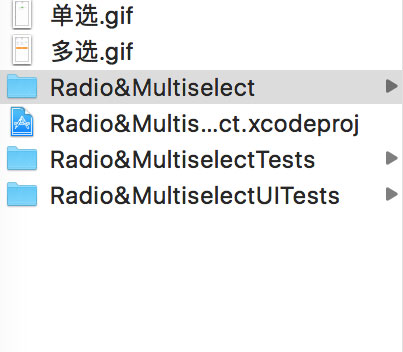
三、压缩文件截图
界面性问题可以根据自己项目需求调整即可, 具体可参考代码, 项目能够直接运行!
注:本文著作权归作者,由demo大师(http://www.demodashi.com)宣传,拒绝转载,转载需要作者授权

相关文章推荐
- 详解iOS-按钮单选与多选逻辑处理
- iOS-按钮单选与多选逻辑处理
- iOS - (几个 button 按钮之间的单选与多选)
- 自定义样式的单选、多选按钮逻辑
- iOS开发系列之常用自定义控件开发集—自定义单选按钮或者多选按钮控件开发
- cocos2dx 3.x (单选,多选,复选checkBox按钮的实现) RadioButton
- ios表视图之UITableViewCellAccessoryCheckmark单选、多选状态保存
- iOS按钮倒计时在进入后台不继续计时的处理
- 单选多选post值到控制器处理
- 通过值设置单选按钮radio,多选按钮checkbox
- 详解iOS中按钮点击事件处理方式
- 18. JAVA 图形界面 Part 2(JTextComponent、事件处理、单选按钮、复选框、列表框、下拉列表框、菜单组件、文件选择) ----- 学习笔记
- ztree 节点单选多选按钮不显示
- 高度自定义的 iOS 单选按钮:DLRadioButton
- android控件开发之Radio(单选按钮)和CheckBox(多选按钮)开发
- IOS多选单选相册图片
- android学习总结(16.08.29)单选按钮(RadioButton),多选按钮(CheckBox)和开关按钮(Switch)
- 单选按钮radioButton 多选按钮checkBox Toast 的使用
- iOS导航栏的按钮处理
- input disable属性下面 更改文本框或者按钮的颜色(对IOS兼容处理)