2、Spring Boot中属性的获取
2018-01-30 09:07
211 查看
在本节我们来讨论下如何获取配置文件里面的属性
那么要获得这个属性,有以下几种方式
通过env.getProperty()方法可以获取一个整数,比如huahua属性是一个整数。那么可以通过evn的重载方法getProperty(String prop, Class clazz)获取。
来获取,同样也可以获取boolean类型的值
SpringBootConfigApplication类保持不变。然后运行它,仍然可以达到统一的效果。
需要注意的是如果通过@Value注解的形式注解一个没有的属性,那么是会启动报错的,而通过Environment对象获取一个没有的属性,会返回null。
将会有如下的打印
在上面的示例中,我们将@Value注解了一个默认值。同样Environment对象也是可以有默认值的。看下面的代码
除了上面的2种设置默认值,我们还有下面的方式可以设置默认值
然后我们来看启动类
运行该类,其打印如下
也就是说通过application.setDefaultProperties()设置的方式,优先级最高:
获取属性,但是指定默认值,有3种方式:
那么content的值就是 propera: a, properb: 20
默认的位置是有4个:classpath根目录、classpath:/config、file:/、file:config/。
如果我们的配置文件不叫application.properties,而是叫app.properties,那么很显然这种情况默认是无法启动的。比如说我们的目录结构如下
在我们打成jar包后(这里需要注意的是,默认maven的打包是要执行test里面的逻辑,我们上面的代码里面的src/test/java中是有代码的,所以打包的命令要是clean compile package -Dmaven.test.skip=true),通过spring.config.name可以来指定启动的配置文件:
也可以运行打包完成后的jar。这种情况就是app.properties在classpath目录下。可以只指定配置文件的名称从而忽略后缀。
但是也还有一种情况就是指定外部的配置文件,比如配置文件在某个目录下,那么这时候需要使用spring.config.location来指定:
需要注意的是,通过spring.config.location是需要指定配置文件的绝对路径(包含后缀)。同时,也可以指定多个配置文件,多个配置文件用逗号分隔,如:
通过上面的讲解,我们知道文件的指定方式有两种:1、classpath. 2、file:/ 。第一种是classpath,第二种是文件系统加载。
@PropertySource可以指定多个配置文件。如
那么可以通过如下的配置来获取对应的属性
上面的方式配置在application.properties(或者能够读取到的其他配置文件)中,然后通过
就可以注入就去
只需要在类文件中声明一个数组就可以获取了:
比如说我们在/Users/aa/Downloads/目录下有个app.properties的文件,这个文件是需要加载到Spring Boot中的,那么我们可以这样做
在/Users/aa/Downloads/app.properties文件中输入下面的属性
spring.name=zhangsanaaa
声明一个实现了EnvironmentPostProcessor接口的类
3、启动类读取
然后我们在启动类读取这个类.
我们的理想是从/Users/aa/Downloads/app.properties这个文件中读取spring.name的属性。但是很遗憾的是取不到该值的。
我们查看EnvironmentPostProcessor的源码会发现下面的注释:
也就是说EnvironmentPostProcessor的实现类必须注册在META-INF/spring.factories文件中。
4、注册EnvironmentPostProcessor实现类
我们在src/main/resources里面新建一个名词为META-INF的文件夹,再新建一个名称为spring.factories的文件,然后在该文件中加入下面的内容:
然后再启动SpringBootConfigApplication就可以看到如下的信息
之所以要加入spring.factories文件,是因为EnvironmentPostProcessor是Spring Boot的processor,而不是Spring的,是Spring原生不支持的。
通过了上面的几个步骤,我们就实现了动态注入。这种方式的好处是可以将配置文件集中管理,我们只需要指定配置文件的路径即可,可以实现多个工程的配置文件集中管理,而不需要各个工程各自维护一个配置文件。然后各个工程去相应的目录下读取即可。也可以通过HttpClient将远程的配置文件读取进来。(有点类似Spring Cloud的config-server的功能)
假设我们的classpath下面有application-test.properties、application-prod.properties这2个配置文件,代表了测试和正式环境,那么我们如何来加载不同的配置环境呢?
可以通过程序指定的代码实现
通过application.setAdditionalProfiles(“test”);就可以指定环境为test环境,那么加载的就是application-test.properties。
除了通过代码的方式,还可以通过spring.application.active来指定特定的环境。比如说–spring.profiles.active=test。
1、属性的获取
Spring Boot要从application.yml(application.properties)中获取变量的值,比如application.properties中有下面的属性:huahua=lili
那么要获得这个属性,有以下几种方式
1.1、通过context获取
@SpringBootApplication
public class SpringBootConfigApplication {
public static void main(String[] args) {
ConfigurableApplicationContext application =
SpringApplication.run(
SpringBootConfigApplication.class, args);
System.out.println(application.getEnvironment()
.getProperty("huahua"));
application.close();
}
}
1.2、通过注入Environment对象获取
@Component
public class UserConfig {
@Autowired
private Environment env;

public void show(){
System.out.println("name = " + env.getProperty("huahua"));
}
}

@SpringBootApplication
public class SpringBootConfigApplication {
public static void main(String[] args) {
ConfigurableApplicationContext application =
SpringApplication.run(
SpringBootConfigApplication.class, args);
application.getBean(UserConfig.class).show();
application.close();
}
}
通过env.getProperty()方法可以获取一个整数,比如huahua属性是一个整数。那么可以通过evn的重载方法getProperty(String prop, Class clazz)获取。
System.out.println(env.getProperty("huahua", Integer.class));来获取,同样也可以获取boolean类型的值
1.3、通过@Value()注解
@Component
public class UserConfig {

@Value("${huahua}")
private String huahua;

public void show(){
System.out.println("name = " + huahua);
}
}
SpringBootConfigApplication类保持不变。然后运行它,仍然可以达到统一的效果。
需要注意的是如果通过@Value注解的形式注解一个没有的属性,那么是会启动报错的,而通过Environment对象获取一个没有的属性,会返回null。
1.4、属性的默认值
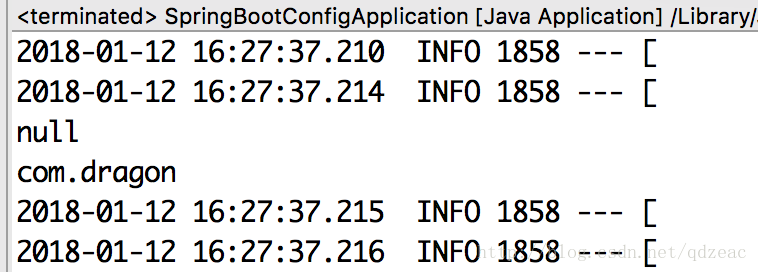
比如我们的classpath下没有host的这个属性,那么我们运行下面的代码@SpringBootApplication
public class SpringBootConfigApplication {
@Value("${host:com.dragon}")
private String host;
public static void main(String[] args) {
ConfigurableApplicationContext application =
SpringApplication.run(
SpringBootConfigApplication.class, args);
System.out.println(application.getEnvironment()
.getProperty("host"));
System.out.println(application.getBean(
SpringBootConfigApplication.class).host);
application.close();
}
}将会有如下的打印
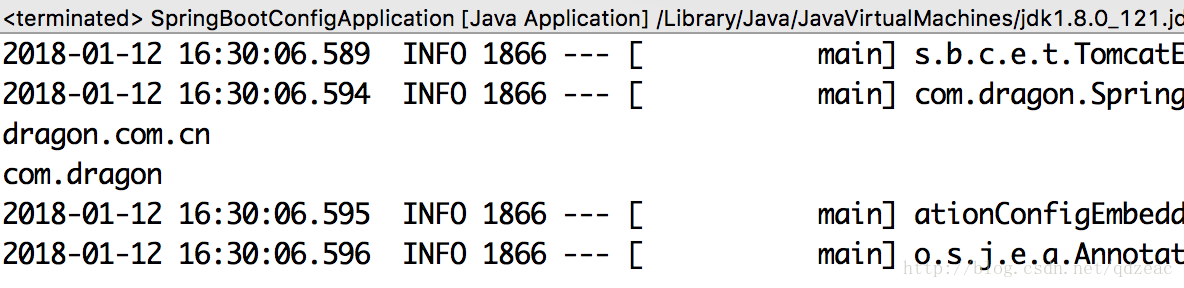
在上面的示例中,我们将@Value注解了一个默认值。同样Environment对象也是可以有默认值的。看下面的代码
@SpringBootApplication
public class SpringBootConfigApplication {
@Value("${host:com.dragon}")
private String host;
public static void main(String[] args) {
ConfigurableApplicationContext application = SpringApplication.run(SpringBootConfigApplication.class, args);
System.out.println(application.getEnvironment().getProperty("host","dragon.com.cn"));
System.out.println(application.getBean(SpringBootConfigApplication.class).host);
application.close();
}
}
除了上面的2种设置默认值,我们还有下面的方式可以设置默认值
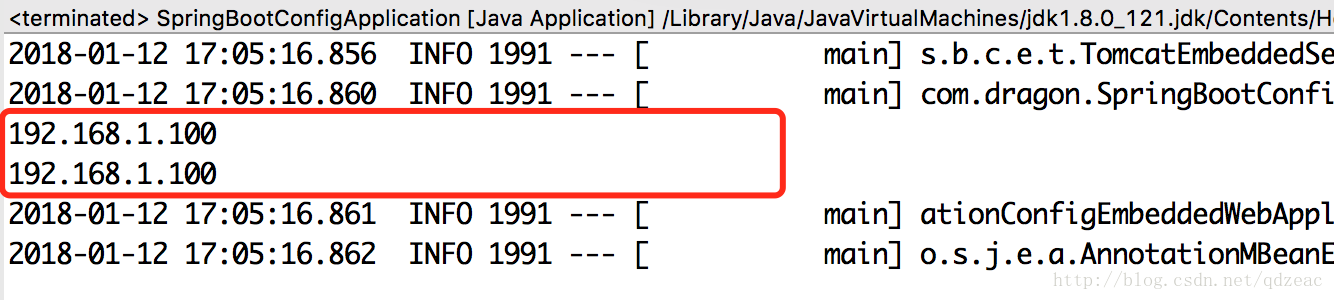
SpringApplication application = new SpringApplication(SpringBootConfigApplication.class);
Map<String, Object> defaultProperties = new HashMap<>();
defaultProperties.put("host", "192.168.1.100");
application.setDefaultProperties(defaultProperties);
然后我们来看启动类
@SpringBootApplication
public class SpringBootConfigApplication {

@Value("${host:com.dragon}")
private String host;

public static void main(String[] args) {
SpringApplication application = new SpringApplication(SpringBootConfigApplication.class);
Map<String, Object> defaultProperties = new HashMap<>();
defaultProperties.put("host", "192.168.1.100");
application.setDefaultProperties(defaultProperties);

ConfigurableApplicationContext context = application.run(args);
System.out.println(context.getEnvironment().getProperty("host","dragon.com.cn"));
System.out.println(context.getBean(SpringBootConfigApplication.class).host);
context.close();
}
}
运行该类,其打印如下
也就是说通过application.setDefaultProperties()设置的方式,优先级最高:
获取属性,但是指定默认值,有3种方式:
a、@Value("${host:com.dragon}")
b、context.getEnvironment().getProperty("host","dragon.com.cn")
c、
SpringApplication application = new SpringApplication(SpringBootConfigApplication.class);
Map<String, Object> defaultProperties = new HashMap<>();
defaultProperties.put("host", "192.168.1.100");
application.setDefaultProperties(defaultProperties);
1.5、配置文件里面获取配置项
配置文件里面除了配置普通的外,还可以使用当前配置的文件。如application.yml有如下配置:propera: a
properb: 20
content: "propera: ${propera}, properb: ${properb}"那么content的值就是 propera: a, properb: 20
2、配置文件及其文件路径
Spring Boot默认的配置文件是application.yml(application.properties),默认的位置是有4个:classpath根目录、classpath:/config、file:/、file:config/。
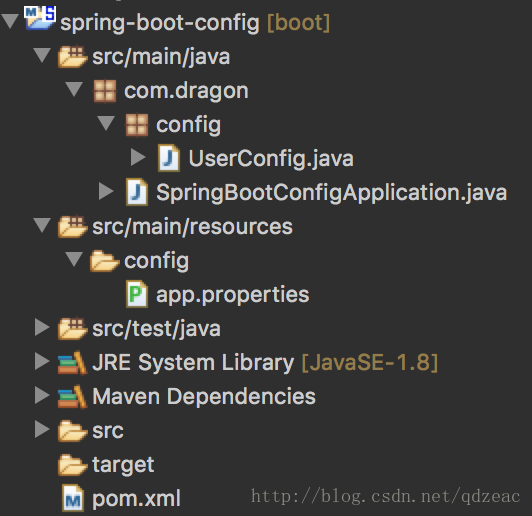
如果我们的配置文件不叫application.properties,而是叫app.properties,那么很显然这种情况默认是无法启动的。比如说我们的目录结构如下
在我们打成jar包后(这里需要注意的是,默认maven的打包是要执行test里面的逻辑,我们上面的代码里面的src/test/java中是有代码的,所以打包的命令要是clean compile package -Dmaven.test.skip=true),通过spring.config.name可以来指定启动的配置文件:
java -jar spring-boot-config-0.0.1-SNAPSHOT.jar --spring.config.name=app
也可以运行打包完成后的jar。这种情况就是app.properties在classpath目录下。可以只指定配置文件的名称从而忽略后缀。
但是也还有一种情况就是指定外部的配置文件,比如配置文件在某个目录下,那么这时候需要使用spring.config.location来指定:
java -jar spring-boot-config-0.0.1-SNAPSHOT.jar --spring.config.location=file:/Users/aa/Downloads/app.properties
需要注意的是,通过spring.config.location是需要指定配置文件的绝对路径(包含后缀)。同时,也可以指定多个配置文件,多个配置文件用逗号分隔,如:
java -jar spring-boot-config-0.0.1-SNAPSHOT.jar --spring.config.location=file:/Users/aa/Downloads/app.properties,file:/Users/aa/Downloads/app2.properties
这里需要注意一点:逗号之间不能有空格。
通过上面的讲解,我们知道文件的指定方式有两种:1、classpath. 2、file:/ 。第一种是classpath,第二种是文件系统加载。
2.1、其他的配置文件
除了上面的spring boot需要的配置文件,我们可能还有其他的配置文件,比如jdbc.properties,那么这个时候可以通过下面的方式读取:@Configuration
@PropertySource(value = "classpath:config/jdbc.properties")
public class JdbcConfig {
@Value("$spring.datasource.driverClassName}")
private String driverClassName;
public void show(){
System.out.println("driverClassName : " + driverClassName);
}
}@PropertySource可以指定多个配置文件。如
@PropertySource(value = {"classpath:config/jdbc.properties", "classpath:config/redis.properties"})2.2、带有前缀规律的配置文件
比如我们有个book.properties的配置文件,其内容如下:book.name=spring boot book.price=1
那么可以通过如下的配置来获取对应的属性
@Configuration
@PropertySource(value = "classpath:config/book.properties")
@ConfigurationProperties(prefix = "book")
public class BookConfig {
private String name;
private String price;
// 省略 getter/setter
}
2.3、其他类型的注入
spring boot除了上面的简单注入属性外,还有其他注入属性。2.3.1、注入List数据
ds.hosts[0] = 192.168.1.100
ds.hosts[1] = 192.168.1.101
ds.hosts[2] = 192.168.1.102
ds.hosts[3] = 192.168.1.103
上面的方式配置在application.properties(或者能够读取到的其他配置文件)中,然后通过
private List<String> hosts ;
就可以注入就去
2.3.2、注入数组
数组在配置文件中的写法和List一致:ds.ports[0] = 8000 ds.ports[1] = 8001 ds.ports[2] = 8002
只需要在类文件中声明一个数组就可以获取了:
private String[] ports ;
2.4、动态注入
前面几小节讲解的都是静态文件的注入,Spring Boot也还支持动态文件的注入,这里时候的动态文件的注入是指的通过代码来进行注入。要实现注入动态文件需要一个接口名叫EnvironmentPostProcessor的支持。EnvironmentPostProcessor接口的主要作用就是在Bean的装配期进行回调。比如说我们在/Users/aa/Downloads/目录下有个app.properties的文件,这个文件是需要加载到Spring Boot中的,那么我们可以这样做
在/Users/aa/Downloads/app.properties文件中输入下面的属性
spring.name=zhangsanaaa
声明一个实现了EnvironmentPostProcessor接口的类
package com.dragon.config;

import java.io.FileInputStream;
import java.io.IOException;
import java.io.InputStream;
import java.util.Properties;

import org.springframework.boot.SpringApplication;
import org.springframework.boot.env.EnvironmentPostProcessor;
import org.springframework.core.env.ConfigurableEnvironment;
import org.springframework.core.env.PropertiesPropertySource;
import org.springframework.stereotype.Component;

@Component
public class MyEnvironmentPostProcessor implements EnvironmentPostProcessor {
@Override
public void postProcessEnvironment(ConfigurableEnvironment environment, SpringApplication application) {
try(InputStream input = new FileInputStream("/Users/aa/Downloads/app.properties")){
Properties source = new Properties();
source.load(input);
//PropertiesPropertySource构造函数接收2个参数。第一个是取个名称,第二个是数据源
PropertiesPropertySource propertySource = new PropertiesPropertySource("my", source);
environment.getPropertySources().addLast(propertySource);
}catch(IOException e){

}
}
}
3、启动类读取
然后我们在启动类读取这个类.
@SpringBootApplication
public class SpringBootConfigApplication {
public static void main(String[] args) {
ConfigurableApplicationContext application = SpringApplication.run(SpringBootConfigApplication.class, args);
System.out.println(application.getEnvironment().getProperty("spring.name"));
application.close();
}
}
我们的理想是从/Users/aa/Downloads/app.properties这个文件中读取spring.name的属性。但是很遗憾的是取不到该值的。
我们查看EnvironmentPostProcessor的源码会发现下面的注释:
<p>
* EnvironmentPostProcessor implementations have to be registered in
* {@code META-INF/spring.factories}, using the fully qualified name of this class as the
* key.
* <p>
也就是说EnvironmentPostProcessor的实现类必须注册在META-INF/spring.factories文件中。
4、注册EnvironmentPostProcessor实现类
我们在src/main/resources里面新建一个名词为META-INF的文件夹,再新建一个名称为spring.factories的文件,然后在该文件中加入下面的内容:
org.springframework.boot.env.EnvironmentPostProcessor=com.dragon.config.MyEnvironmentPostProcessor
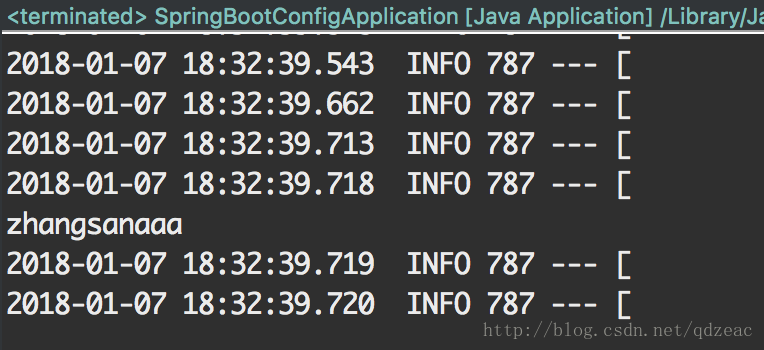
然后再启动SpringBootConfigApplication就可以看到如下的信息
之所以要加入spring.factories文件,是因为EnvironmentPostProcessor是Spring Boot的processor,而不是Spring的,是Spring原生不支持的。
通过了上面的几个步骤,我们就实现了动态注入。这种方式的好处是可以将配置文件集中管理,我们只需要指定配置文件的路径即可,可以实现多个工程的配置文件集中管理,而不需要各个工程各自维护一个配置文件。然后各个工程去相应的目录下读取即可。也可以通过HttpClient将远程的配置文件读取进来。(有点类似Spring Cloud的config-server的功能)
2.5、Profile
一般来说,都会有本地环境、测试环境和公网环境。那么不同的环境对应的配置文件肯定不一样的。这里的Profile就是指的不同的环境。假设我们的classpath下面有application-test.properties、application-prod.properties这2个配置文件,代表了测试和正式环境,那么我们如何来加载不同的配置环境呢?
可以通过程序指定的代码实现
@SpringBootApplication
public class SpringBootConfigApplication {
public static void main(String[] args) {
SpringApplication application = new SpringApplication(SpringBootConfigApplication.class);
application.setAdditionalProfiles("test");

ConfigurableApplicationContext context = application.run(args);
System.out.println(context.getEnvironment().getProperty("profile"));
}
}
通过application.setAdditionalProfiles(“test”);就可以指定环境为test环境,那么加载的就是application-test.properties。
除了通过代码的方式,还可以通过spring.application.active来指定特定的环境。比如说–spring.profiles.active=test。

相关文章推荐
- 查看spring-boot-dependencies pom获取支持的属性列表
- spring boot获取属性文件内容
- springboot获取配置文件中的属性(包含自定义的文件)
- spring boot 获取jar 中xml文件属性
- 用AOP拦截自定义注解并获取注解属性与上下文参数(基于Springboot框架)
- [Spring][Bean]Spring配置文件、属性注入、从IOC容器获取实例
- spring boot,用@value获取application.properties文件的中文,出现乱码
- Spring Bean包装类案例之修改,获取bean属性
- springboot&ftl获取cookie失败的问题
- SpringBoot获取properties配置
- 微服务1 Spring Boot中属性配置
- ing boot属性文件之多环境配置【从零开始学Spring Boot】
- 24. Spring Boot环境变量读取和属性对象的绑定【从零开始学Spring Boot】
- Spring Boot系列四 Spring @Value 属性注入使用总结一
- Spring在代码中获取properties文件属性
- springboot Configuration 获取不到@value配置问题
- Spring Boot 2--项目属性配置案例
- 在SpringBoot应用中获取应用上下文方法
- SpringBoot定时获取微信access_token
- SpringBoot(三):SpringBoot 属性配置文件详解