原生javascript防淘宝商品详情实现放大镜效果
2018-01-14 17:22
971 查看
我们经常逛淘宝的时候到淘宝商品详情看的时候,会经常使用到商品图片的放大镜功能,以前一直不知道怎么实现,遇到基本上都是网上找代码改,今天就用原生的js实现以下放大镜效果。
码云上的代码:
js淘宝放大镜效果
效果如下图所示(ps:请忽略掉图片那个丑逼):
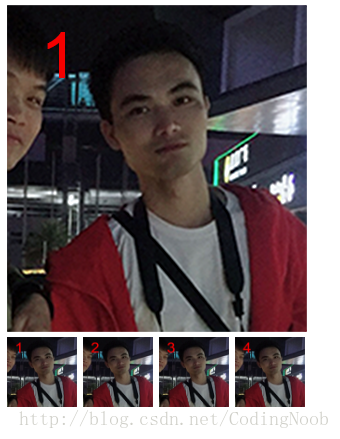
实现原理:
准备好大图(清晰的)和小图,两张图片必须一样只是放大或者缩小了而已,鼠标移入小缩略图的时候,上面的小图显示相应的图片,当鼠标移入上面的小图的时候,显示zoom和大图的box,然后鼠标在里面移动的时候通过 //鼠标到可视化窗口左边的距离减去小图遮罩层的一半宽度则为zomm的left的值,同理可以求top的值
zoom.style.left = event.clientX - zoom.offsetWidth/2 + “px”;
zoom.style.top = event.clientY - zoom.offsetHeight/2 + “px”;
然后用大图的尺寸除以小图的尺寸,那么就可以得出两个图片的放大比,当鼠标在左边的小图上移动的时候,通过放大比,就可以求出右边大图要向左或者上偏移的值。即可得出想要的结果。
//左边小遮罩层left的值乘以图片之间的放大倍数,则为右边大图片的left偏移值,top同理
bigimg.style.left = “-” + zoom.offsetLeft*scale + “px”;
bigimg.style.top = “-” + zoom.offsetTop*scale + “px”;
直接上代码:
html部分:
javascript部分:
码云上的代码:
js淘宝放大镜效果
效果如下图所示(ps:请忽略掉图片那个丑逼):
实现原理:
准备好大图(清晰的)和小图,两张图片必须一样只是放大或者缩小了而已,鼠标移入小缩略图的时候,上面的小图显示相应的图片,当鼠标移入上面的小图的时候,显示zoom和大图的box,然后鼠标在里面移动的时候通过 //鼠标到可视化窗口左边的距离减去小图遮罩层的一半宽度则为zomm的left的值,同理可以求top的值
zoom.style.left = event.clientX - zoom.offsetWidth/2 + “px”;
zoom.style.top = event.clientY - zoom.offsetHeight/2 + “px”;
然后用大图的尺寸除以小图的尺寸,那么就可以得出两个图片的放大比,当鼠标在左边的小图上移动的时候,通过放大比,就可以求出右边大图要向左或者上偏移的值。即可得出想要的结果。
//左边小遮罩层left的值乘以图片之间的放大倍数,则为右边大图片的left偏移值,top同理
bigimg.style.left = “-” + zoom.offsetLeft*scale + “px”;
bigimg.style.top = “-” + zoom.offsetTop*scale + “px”;
直接上代码:
html部分:
<!DOCTYPE html>
<html lang="en">
<head>
<meta charset="UTF-8">
<title>javascript防淘宝放大镜效果</title>
<style>
*{padding:0;margin:0;}
#box{margin:10px 0 0 10px;}
#box .smallbox{position:relative;height:327px;width:300px;}
#box .bigbox{display:none;position:absolute;left:310px;top:0;height:327px;width:300px;overflow:hidden;}
#box .bigbox img{position:relative;}
#box .zoom{display:none;position:absolute;height:100px;width:100px;background:#000;opacity:0.75;}
#box .item{margin-top:5px;font-size:0;}
#box .item img{height:70px;width:70px;margin-right:6px;}
</style>
</head>
<body>
<div class="scale-img" id="box">
<div class="wrapbox">
<!--左边小图片-->
<div class="smallbox">
<!--放大镜小层-->
<div class="zoom"></div>
<img src="s-1.png" class="smallimg">
<!--右边大图片-->
<div class="bigbox">
<img src="b-1.png" class="bigimg">
</div>
</div>
<div class="item">
<img src="s-1.png" date-num = "1">
<img src="s-2.png" date-num = "2">
<img src="s-3.png" date-num = "3">
<img src="s-4.png" date-num = "4">
</div>
</div>
</div>
</body>
</html>
javascript部分:
(function(){
//预先加载大图,避免后面鼠标移入后显示大图时再去请求资源,影响体验
new Image().src = "b-1.png";
new Image().src = "b-2.png";
new Image().src = "b-3.png";
new Image().src = "b-4.png";

var smallbox = document.querySelector("#box .smallbox");    //小图片box
var bigbox = document.querySelector("#box .bigbox");    //大图片box
var smallimg = smallbox.querySelector(".smallimg"); //小图片
var bigimg = bigbox.querySelector(".bigimg");   //大图片
var zoom = document.querySelector(".zoom");
var itemImg = document.querySelectorAll("#box .item img");

for(var i = 0, len = itemImg.length; i < len; i++){
(function(j){
itemImg[j].onmouseenter = function(){
var imgSrc = this.src;
smallimg.src = imgSrc;
bigimg.src = "b-" + (j+1) + ".png";
}
})(i);

}

//鼠标移入事件
smallbox.onmouseenter = function(event){
zoom.style.display = "block";
bigbox.style.display ="block";
//注意:offsetWdith的值是要元素为可视状态下才可以计算出来,不然当display:none的时候则为0;

var scale = bigimg.offsetWidth/smallimg.offsetWidth;    //放大倍数
var ev = event || window.event;

//鼠标在内部移动的时候
this.onmousemove = function(event){
//鼠标到可视化窗口左边的距离减去小图遮罩层的一半宽度则为zomm的left的值,同理可以求top的值
zoom.style.left = event.clientX - zoom.offsetWidth/2 + "px";
zoom.style.top = event.clientY - zoom.offsetHeight/2 + "px";

//如果向左向上移动小于0,那么则设置left为0,实现紧贴着边框效果
if(zoom.offsetLeft <= 0){
zoom.style.left = 0;
}

if(zoom.offsetTop <= 0){
zoom.style.top = 0;
}

//如果向右向下移动小于0,那么则设置top,实现紧贴着边框效果

if(zoom.offsetLeft >= smallbox.offsetWidth - zoom.offsetWidth){
zoom.style.left = smallbox.offsetWidth - zoom.offsetWidth + "px";
}

if(zoom.offsetTop >= smallbox.offsetHeight - zoom.offsetHeight){
zoom.style.top = smallbox.offsetHeight - zoom.offsetHeight + "px";
}

//左边小遮罩层left的值乘以图片之间的放大倍数,则为右边大图片的left偏移值,top同理
bigimg.style.left = "-" + zoom.offsetLeft*scale + "px";
bigimg.style.top = "-" + zoom.offsetTop*scale + "px";

}
}

//鼠标移出事件
smallbox.onmouseleave = function(){
bigbox.style.display = "none";
zoom.style.display = "none";
this.onmousemove = null;
}

}());

相关文章推荐
- 原生javaScript实现淘宝放大镜效果
- 原生javascript实现图片放大镜效果
- JavaScript实现仿淘宝商品购买数量的增减效果
- 原生javascript 简易实现放大镜效果
- 原生js实现淘宝放大镜效果
- 基于JavaScript实现购物网站商品放大镜效果
- 原生javascript实现图片放大镜效果
- JavaScript实现仿淘宝商品购买数量的增减效果
- 原生js实现商品放大镜效果
- 原生JavaScript实现精美的淘宝轮播图效果示例【附demo源码下载】
- 基于JavaScript实现淘宝商品广告效果
- iOS 相似淘宝商品详情查看翻页效果的实现
- 基于JavaScript实现购物网站商品放大镜效果
- iOS 类似淘宝商品详情查看翻页效果的实现
- 原生JavaScript实现的简单放大镜效果示例
- 仿京东、淘宝商品详情中上滑tableView的cell与headerView之间的动画效果
- 用原生JavaScript实现图片瀑布流的浏览效果
- 仿淘宝商品图片放大镜效果(鼠标移动上去会出现放大的图片,并且可以移动)
- JavaScript实现放大镜效果demo
- HTML CSS写商品详情放大镜效果