Java Web项目maven + tomcat配置与部署方案
2018-01-12 16:45
211 查看
分享一下自己的基于maven的Java Web项目部署在tomcat上的相关解决方案。
一、项目说明
该web项目是自己练手用的,基于 springMVC + Hibernate + Redis + 自己的非开源工具jar包 来完成。
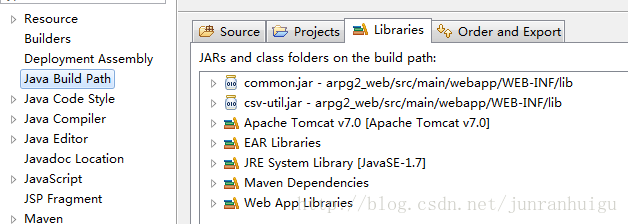
非开源工具jar包放置在项目的 /src/main/webapp/WEB-INF/lib 路径下,在Eclipse中配置引入相关jar包。
二、Linux上的Tomcat部署
1.在tomcat的 conf/server.xml中的
<Host appBase="webapps" autoDeploy="true" name="localhost" unpackWARs="true"> ... </Host>这个标签中,添加web项目linux上的所在路径,结果如下:
<Host appBase="webapps" autoDeploy="true" name="localhost" unpackWARs="true">
<!-- SingleSignOn valve, share authentication between web applications
Documentation at: /docs/config/valve.html -->
<!--
<Valve className="org.apache.catalina.authenticator.SingleSignOn" />
-->
<Context path="/arpg2_web" reloadable="true" docBase="WEB项目所在路径"/>
<!-- Access log processes all example.
Documentation at: /docs/config/valve.html
Note: The pattern used is equivalent to using pattern="common" -->
<Valve className="org.apache.catalina.valves.AccessLogValve" directory="logs" pattern="%h %l %u %t "%r" %s %b" prefix="localhost_access_log." suffix=".txt"/>
</Host>2.使用maven命令打包web项目文件
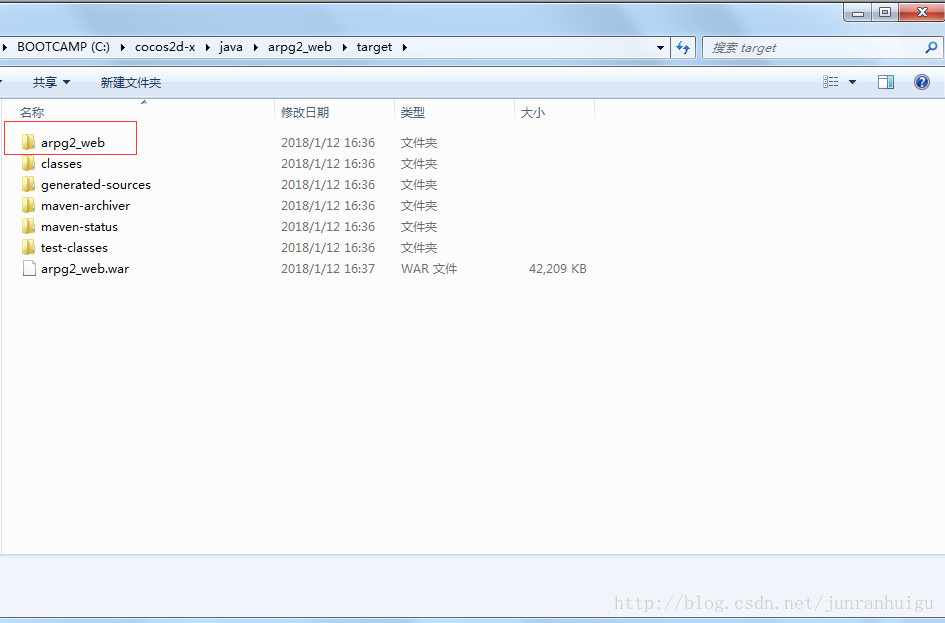
本人使用的是windows环境。先ctrl + R,输入cmd进入命令行。通过cd切换到web项目所在目录,使用maven clean install命令进行项目编译。
编译完成后在项目的 target目录下能找到项目名称的 编译后的完整项目(非war)
3.将编译后的web项目通过xftp上传到linux的相关路径下
4.启动tomcat即可~
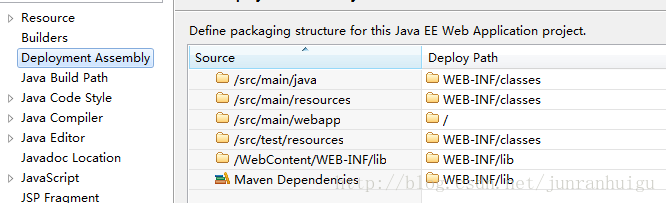
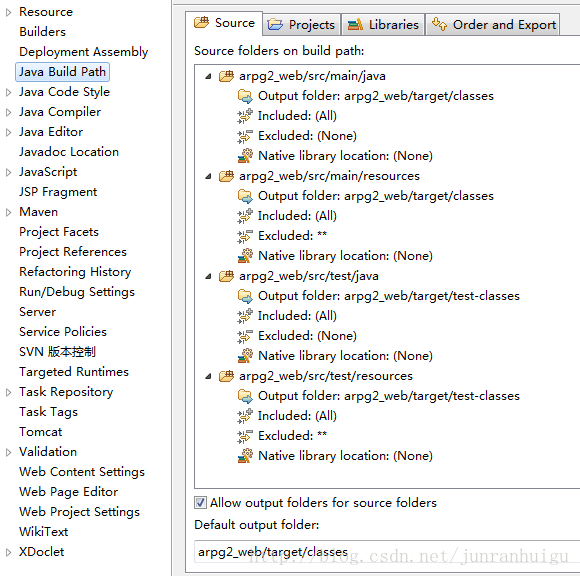
三、Eclipse中maven相关设置
四、maven相关配置
<project xmlns="http://maven.apache.org/POM/4.0.0" xmlns:xsi="http://www.w3.org/2001/XMLSchema-instance"
xsi:schemaLocation="http://maven.apache.org/POM/4.0.0 http://maven.apache.org/maven-v4_0_0.xsd"> <modelVersion>4.0.0</modelVersion>
<groupId>com</groupId>
<artifactId>arpg2_web</artifactId>
<packaging>war</packaging>
<version>0.0.1-SNAPSHOT</version>
<name>arpg2_web Maven Webapp</name>
<url>http://maven.apache.org</url>
<dependencies>
<!-- jstl -->
<dependency>
<groupId>javax.servlet</groupId>
<artifactId>jstl</artifactId>
<version>1.2</version>
</dependency>
<dependency>
<groupId>javax.servlet.jsp</groupId>
<artifactId>jsp-api</artifactId>
<version>2.2.1-b03</version>
<scope>provided</scope>
</dependency>
<!-- servlet -->
<dependency>
<groupId>javax.servlet</groupId>
<artifactId>servlet-api</artifactId>
<version>2.5</version>
<scope>provided</scope>
</dependency>
<!-- 项目所需jar包 -->
...
</dependencies>
<properties>
<project.build.sourceEncoding>UTF-8</project.build.sourceEncoding>
<maven.compiler.encoding>UTF-8</maven.compiler.encoding>
</properties>
<build>
<finalName>arpg2_web</finalName>
<plugins>
<plugin>
<groupId>org.apache.maven.plugins</groupId>
<artifactId>maven-compiler-plugin</artifactId>
<version>3.1</version>
<configuration>
<!-- maven编译环境 -->
<source>1.7</source>
<target>1.7</target>
<!-- maven编译编码 -->
<encoding>UTF-8</encoding>
<!-- 项目非开源jar包编译配置 -->
<compilerArgs>
<arg>-verbose</arg>
<arg>-Xlint:unchecked</arg>
<arg>-Xlint:deprecation</arg>
<arg>-bootclasspath</arg>
<arg>${env.JAVA_HOME}/jre/lib/rt.jar</arg>
<arg>-extdirs</arg>
<arg>${project.basedir}/src/main/webapp/WEB-INF/lib</arg>
</compilerArgs>
</configuration>
</plugin>
</plugins>
</build>
</project>
一、项目说明
该web项目是自己练手用的,基于 springMVC + Hibernate + Redis + 自己的非开源工具jar包 来完成。
非开源工具jar包放置在项目的 /src/main/webapp/WEB-INF/lib 路径下,在Eclipse中配置引入相关jar包。
二、Linux上的Tomcat部署
1.在tomcat的 conf/server.xml中的
<Host appBase="webapps" autoDeploy="true" name="localhost" unpackWARs="true"> ... </Host>这个标签中,添加web项目linux上的所在路径,结果如下:
<Host appBase="webapps" autoDeploy="true" name="localhost" unpackWARs="true">
<!-- SingleSignOn valve, share authentication between web applications
Documentation at: /docs/config/valve.html -->
<!--
<Valve className="org.apache.catalina.authenticator.SingleSignOn" />
-->
<Context path="/arpg2_web" reloadable="true" docBase="WEB项目所在路径"/>
<!-- Access log processes all example.
Documentation at: /docs/config/valve.html
Note: The pattern used is equivalent to using pattern="common" -->
<Valve className="org.apache.catalina.valves.AccessLogValve" directory="logs" pattern="%h %l %u %t "%r" %s %b" prefix="localhost_access_log." suffix=".txt"/>
</Host>2.使用maven命令打包web项目文件
本人使用的是windows环境。先ctrl + R,输入cmd进入命令行。通过cd切换到web项目所在目录,使用maven clean install命令进行项目编译。
编译完成后在项目的 target目录下能找到项目名称的 编译后的完整项目(非war)
3.将编译后的web项目通过xftp上传到linux的相关路径下
4.启动tomcat即可~
三、Eclipse中maven相关设置
四、maven相关配置
<project xmlns="http://maven.apache.org/POM/4.0.0" xmlns:xsi="http://www.w3.org/2001/XMLSchema-instance"
xsi:schemaLocation="http://maven.apache.org/POM/4.0.0 http://maven.apache.org/maven-v4_0_0.xsd"> <modelVersion>4.0.0</modelVersion>
<groupId>com</groupId>
<artifactId>arpg2_web</artifactId>
<packaging>war</packaging>
<version>0.0.1-SNAPSHOT</version>
<name>arpg2_web Maven Webapp</name>
<url>http://maven.apache.org</url>
<dependencies>
<!-- jstl -->
<dependency>
<groupId>javax.servlet</groupId>
<artifactId>jstl</artifactId>
<version>1.2</version>
</dependency>
<dependency>
<groupId>javax.servlet.jsp</groupId>
<artifactId>jsp-api</artifactId>
<version>2.2.1-b03</version>
<scope>provided</scope>
</dependency>
<!-- servlet -->
<dependency>
<groupId>javax.servlet</groupId>
<artifactId>servlet-api</artifactId>
<version>2.5</version>
<scope>provided</scope>
</dependency>
<!-- 项目所需jar包 -->
...
</dependencies>
<properties>
<project.build.sourceEncoding>UTF-8</project.build.sourceEncoding>
<maven.compiler.encoding>UTF-8</maven.compiler.encoding>
</properties>
<build>
<finalName>arpg2_web</finalName>
<plugins>
<plugin>
<groupId>org.apache.maven.plugins</groupId>
<artifactId>maven-compiler-plugin</artifactId>
<version>3.1</version>
<configuration>
<!-- maven编译环境 -->
<source>1.7</source>
<target>1.7</target>
<!-- maven编译编码 -->
<encoding>UTF-8</encoding>
<!-- 项目非开源jar包编译配置 -->
<compilerArgs>
<arg>-verbose</arg>
<arg>-Xlint:unchecked</arg>
<arg>-Xlint:deprecation</arg>
<arg>-bootclasspath</arg>
<arg>${env.JAVA_HOME}/jre/lib/rt.jar</arg>
<arg>-extdirs</arg>
<arg>${project.basedir}/src/main/webapp/WEB-INF/lib</arg>
</compilerArgs>
</configuration>
</plugin>
</plugins>
</build>
</project>

相关文章推荐
- Docker实践-docker + svn + maven + tomcat 一键部署Java Web项目
- 使用Maven自动部署Java Web项目到Tomcat问题小记
- Maven配置2-使用Maven创建WEB项目支持Tomcat目录部署
- 使用Maven自动部署Java Web项目到Tomcat问题小记
- ubuntu16.04安装及配置tomcat,IDEA集成tomcat及部署web项目,IDEA通过阿里云镜像加速maven项目创建
- [原]使用Maven自动部署Java Web项目到Tomcat问题小记
- Maven项目配置tomcat插件实现项目自动部署到远程服务器
- 使用Maven自动部署Java Web项目到Tomcat问题小记
- 搭建Maven自动部署Java Web项目到Tomcat服务器
- 部署maven项目到tomcat resources里面配置文件无法部署到tomcat下
- 配置JDK、tomcat及Java Web项目部署
- Maven配置2-使用Maven创建WEB项目支持Tomcat目录部署
- 使用Maven自动部署Java Web项目到Tomcat问题小记
- myeclipse部署maven项目到tomcat,src/main/resources里面配置文件部署不到webapp下classes的问题
- tomcat-maven-plugin部署Web项目配置文件
- Maven配置-使用Maven创建WEB项目支持Tomcat目录部署
- 使用Maven自动部署Java Web项目到Tomcat问题小记
- Eclipse使用Maven搭建Java Web项目,并直接部署Tomcat(转载)
- IDEA配置web项目、部署Tomcat、配置maven
- 配置maven构建的webApp项目部署到Tomcat服务器