分布式架构中一致性解决方案——Zookeeper集群搭建
2017-12-06 21:24
465 查看
当我们的项目在不知不觉中做大了之后,各种问题就出来了,真头疼,比如性能,业务系统的并行计算的一致性协调问题,比如分布式架构的事务问题,我们需要多台机器共同commit事务,经典的案例当然是银行转账,支付宝转账这种,如果是一台机器的话,这个还是很方便的,windows中自带了一个事务协调器mstsc,但是呢,你那种很大很牛逼的项目不可能全是windows服务器,对吧,有些人为了解决这个问题,会采用2pc,3pc这种算法,或者是paxos的思想进行分布式下的一致性处理,当然在这个世界上,真的不需要你自己去开发这种协调性,因为现在已经有了专门解决这种问题的解决方案,比如zookeeper。
一:zookeeper集群搭建
有些人应该明白,zookeeper正是google的chubby的开源实现,使用zookeeper之前,我们先来搭建一个集群。
1. 下载
从官网上,我们可以看到,zookeeper的最新版本是3.4.8,下载地址是:http://apache.fayea.com/zookeeper/zookeeper-3.4.8/,可以下载一下:
2. 文件夹配置
接下来我们解压一下,根目录为zkcluster,下面使用clientport(3000,3001,3002)这样的端口作为文件夹名称,里面就是zookeeper解压包,如下面这样:

3. 配置zoo.cfg
现在我们有三个文件夹,也就是3个zookeeper程序,在3001/conf/下面有一个zoo_sample.cfg文件,现在我们改成zoo.cfg,并且修改如下:
这里我们要注意的是,红色的部分分别就是:指定zookeeper的data和log文件夹,指定clientport访问的端口和servers的列表。
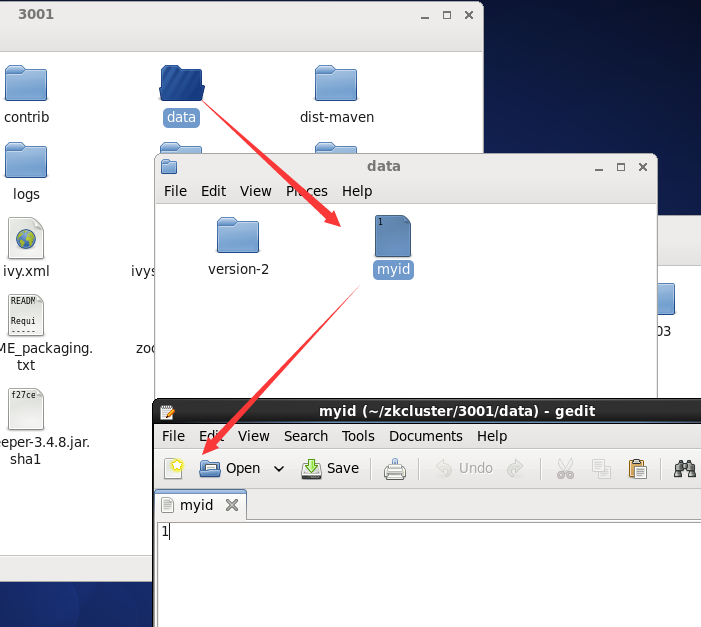
4. 生成pid文件
我们在servers列表中,可以看到有server.1 ,server.2, server.3 三个字符串,生成pid文件的内容就取决如此,比如server.1的地址,
我们的pid文件里面就是1,不过要知道的是,pid文件要在data目录下,比如下面这样:
ok,同样的道理,3002和3003的文件夹同3001就可以了,比如他们的zoo.cfg如下:
-------- 3002 --------------
-------- 3003 --------------
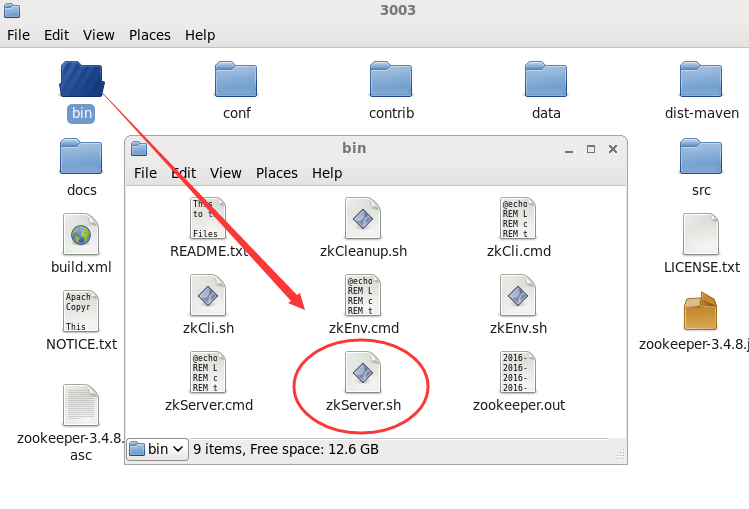
5. 启动各自服务器
到现在为止,我们各个zookeeper程序的配置都结束了,接下来我们到各自目录的bin目录下,通过zkServer.sh来进行启动,比如下面这样:
ok,接下来我们来开始启动,通过如下命令即可:
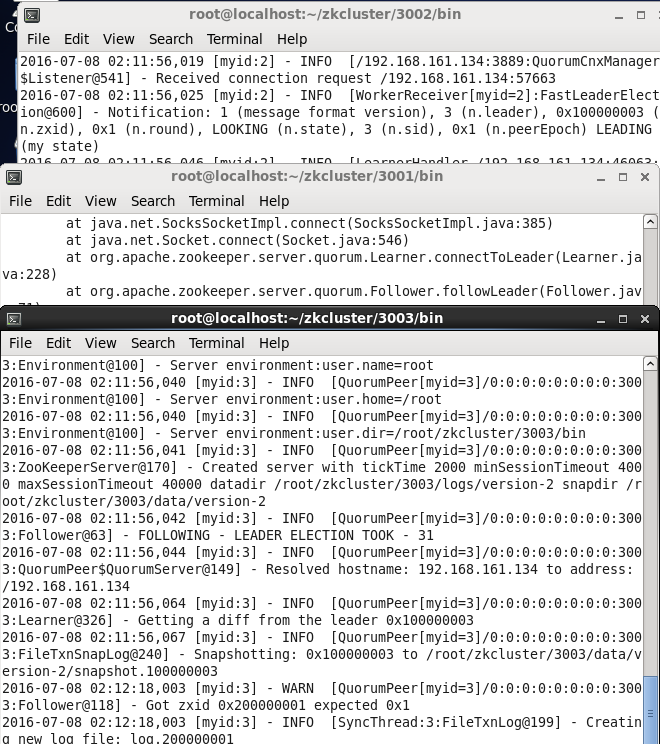
现在我们都启动了,接下来我们可以用命令看下哪个server是leader,哪些是follower。。。
到目前为止,我们的服务端操作都ok啦,,,是不是好吊。。。
二:驱动下载
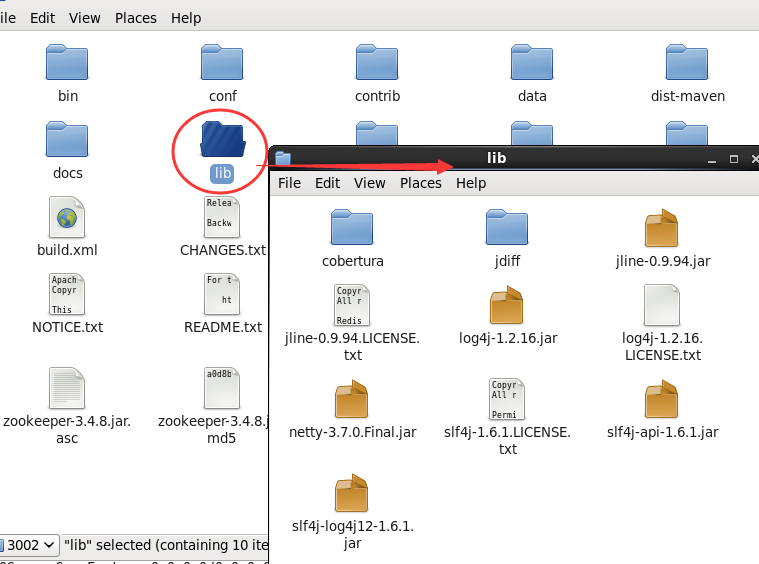
1. java的驱动就方便了,直接在源代码中就提供了,直接copy一下lib文件夹中的jar包就ok了,真是tmd的方便。
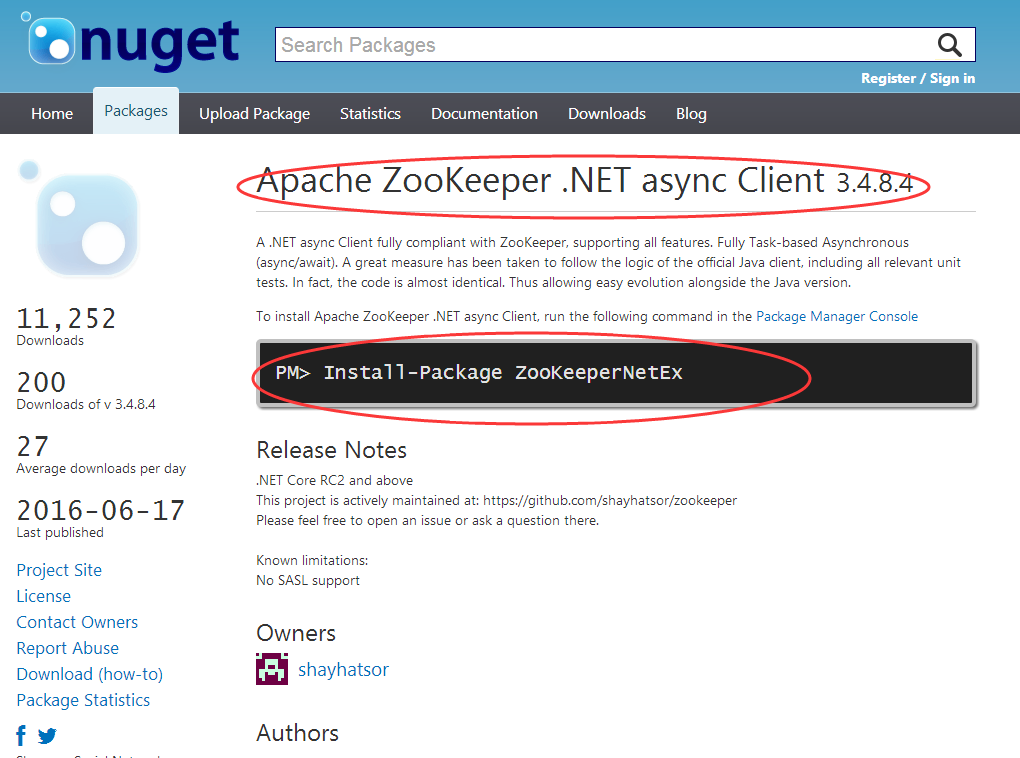
2. 用C#驱动的也不要太烦,要使用也是不难的,我们可以通过nuget下载一下就可以了,转换过来的版本也是3.4.8的最新版本,比如下面这样:
好了,大概就说这么多,希望对你有帮助~~~
一:zookeeper集群搭建
有些人应该明白,zookeeper正是google的chubby的开源实现,使用zookeeper之前,我们先来搭建一个集群。
1. 下载
从官网上,我们可以看到,zookeeper的最新版本是3.4.8,下载地址是:http://apache.fayea.com/zookeeper/zookeeper-3.4.8/,可以下载一下:
2. 文件夹配置
接下来我们解压一下,根目录为zkcluster,下面使用clientport(3000,3001,3002)这样的端口作为文件夹名称,里面就是zookeeper解压包,如下面这样:
3. 配置zoo.cfg
现在我们有三个文件夹,也就是3个zookeeper程序,在3001/conf/下面有一个zoo_sample.cfg文件,现在我们改成zoo.cfg,并且修改如下:
# The number of milliseconds of each tick
tickTime=2000
# The number of ticks that the initial
# synchronization phase can take
initLimit=10
# The number of ticks that can pass between
# sending a request and getting an acknowledgement
syncLimit=5
# the directory where the snapshot is stored.
# do not use /tmp for storage, /tmp here is just
# example sakes.
dataDir=/root/zkcluster/3001/data
dataLogDir=/root/zkcluster/3001/logs
# the port at which the clients will connect
clientPort=3001
# the maximum number of client connections.
# increase this if you need to handle more clients
#maxClientCnxns=6
#
# Be sure to read the maintenance section of the
# administrator guide before turning on autopurge.
#
# http://zookeeper.apache.org/doc/current/zookeeperAdmin.html#sc_maintenance #
# The number of snapshots to retain in dataDir
#autopurge.snapRetainCount=3
# Purge task interval in hours
# Set to "0" to disable auto purge feature
#autopurge.purgeInterval=1

server.1=192.168.161.134:2888:3888
server.2=192.168.161.134:2889:3889
server.3=192.168.161.134:2890:3890
这里我们要注意的是,红色的部分分别就是:指定zookeeper的data和log文件夹,指定clientport访问的端口和servers的列表。
4. 生成pid文件
我们在servers列表中,可以看到有server.1 ,server.2, server.3 三个字符串,生成pid文件的内容就取决如此,比如server.1的地址,
我们的pid文件里面就是1,不过要知道的是,pid文件要在data目录下,比如下面这样:
ok,同样的道理,3002和3003的文件夹同3001就可以了,比如他们的zoo.cfg如下:
-------- 3002 --------------
# The number of milliseconds of each tick
tickTime=2000
# The number of ticks that the initial
# synchronization phase can take
initLimit=10
# The number of ticks that can pass between
# sending a request and getting an acknowledgement
syncLimit=5
# the directory where the snapshot is stored.
# do not use /tmp for storage, /tmp here is just
# example sakes.
dataDir=/root/zkcluster/3002/data
dataLogDir=/root/zkcluster/3002/logs
# the port at which the clients will connect
clientPort=3002
# the maximum number of client connections.
# increase this if you need to handle more clients
#maxClientCnxns=6
#
# Be sure to read the maintenance section of the
# administrator guide before turning on autopurge.
#
# http://zookeeper.apache.org/doc/current/zookeeperAdmin.html#sc_maintenance #
# The number of snapshots to retain in dataDir
#autopurge.snapRetainCount=3
# Purge task interval in hours
# Set to "0" to disable auto purge feature
#autopurge.purgeInterval=1

server.1=192.168.161.134:2888:3888
server.2=192.168.161.134:2889:3889
server.3=192.168.161.134:2890:3890
-------- 3003 --------------
# The number of milliseconds of each tick
tickTime=2000
# The number of ticks that the initial
# synchronization phase can take
initLimit=10
# The number of ticks that can pass between
# sending a request and getting an acknowledgement
syncLimit=5
# the directory where the snapshot is stored.
# do not use /tmp for storage, /tmp here is just
# example sakes.
dataDir=/root/zkcluster/3003/data
dataLogDir=/root/zkcluster/3003/logs
# the port at which the clients will connect
clientPort=3003
# the maximum number of client connections.
# increase this if you need to handle more clients
#maxClientCnxns=6
#
# Be sure to read the maintenance section of the
# administrator guide before turning on autopurge.
#
# http://zookeeper.apache.org/doc/current/zookeeperAdmin.html#sc_maintenance #
# The number of snapshots to retain in dataDir
#autopurge.snapRetainCount=3
# Purge task interval in hours
# Set to "0" to disable auto purge feature
#autopurge.purgeInterval=1

server.1=192.168.161.134:2888:3888
server.2=192.168.161.134:2889:3889
server.3=192.168.161.134:2890:3890
5. 启动各自服务器
到现在为止,我们各个zookeeper程序的配置都结束了,接下来我们到各自目录的bin目录下,通过zkServer.sh来进行启动,比如下面这样:
ok,接下来我们来开始启动,通过如下命令即可:
./zkServer.sh start-foreground
现在我们都启动了,接下来我们可以用命令看下哪个server是leader,哪些是follower。。。
[root@localhost bin]# ./zkServer.sh status
ZooKeeper JMX enabled by default
Using config: /root/zkcluster/3001/bin/../conf/zoo.cfg
Mode: follower
[root@localhost bin]#

[root@localhost bin]# ./zkServer.sh status
ZooKeeper JMX enabled by default
Using config: /root/zkcluster/3002/bin/../conf/zoo.cfg
Mode: leader
[root@localhost bin]#

[root@localhost bin]# ./zkServer.sh status
ZooKeeper JMX enabled by default
Using config: /root/zkcluster/3003/bin/../conf/zoo.cfg
Mode: follower
[root@localhost bin]#
到目前为止,我们的服务端操作都ok啦,,,是不是好吊。。。
二:驱动下载
1. java的驱动就方便了,直接在源代码中就提供了,直接copy一下lib文件夹中的jar包就ok了,真是tmd的方便。
2. 用C#驱动的也不要太烦,要使用也是不难的,我们可以通过nuget下载一下就可以了,转换过来的版本也是3.4.8的最新版本,比如下面这样:
好了,大概就说这么多,希望对你有帮助~~~

相关文章推荐
- 分布式架构中一致性解决方案——Zookeeper集群搭建
- 分布式架构中一致性解决方案——Zookeeper集群搭建
- 分布式架构中一致性解决方案——Zookeeper集群搭建
- 搭建分布式架构6--ZooKeeper 集群的安装
- 搭建分布式架构5--ZooKeeper 集群的安装 3ff0
- 搭建分布式架构6--ZooKeeper 集群的安装
- 一脸懵逼搭建Zookeeper分布式集群
- HaDoop_分布式集群搭建(zookeeper,hadoop)
- ZooKeeper完全分布式集群搭建
- 伪分布式集群环境hadoop、hbase、zookeeper搭建
- hadoop+hbase+zookeeper 分布式集群搭建 + eclipse远程连接hdfs 完美运行
- hadoop-2.7.4+hbase-1.3.1+zookeeper-3.4.9搭建分布式集群环境
- 搭建分布式架构 --ZooKeeper注册中心安装
- zookeeper完全分布式集群搭建-zookeeper-3.4.6
- hadoop+hbase+zookeeper 分布式集群搭建 + eclipse远程连接hdfs 完美运行
- HBase 分布式安装搭建/独立Zookeeper集群
- 搭建3个节点的hadoop集群(完全分布式部署)--3 zookeeper与hbase安装
- 分布式集群环境hadoop1.2.0、hbase0.94.4、zookeeper、elasticsearch搭建2
- 大数据分布式集群组件--Zookeeper详解及环境搭建
- hadoop2.74+zookeeper3.4.10+hbase1.2.6完全分布式HA集群搭建