SpringBoot入门第一个简单示例
2017-12-06 00:00
525 查看
摘要: SpringBoot
本示例使用SpringBoot官方的QuickStart程序
详情地址:http://projects.spring.io/spring-boot/#quick-start
使用SpringBoot前提:一定得用maven或其他项目管理工具。
1、新建项目
new-project-Maven Project-Next
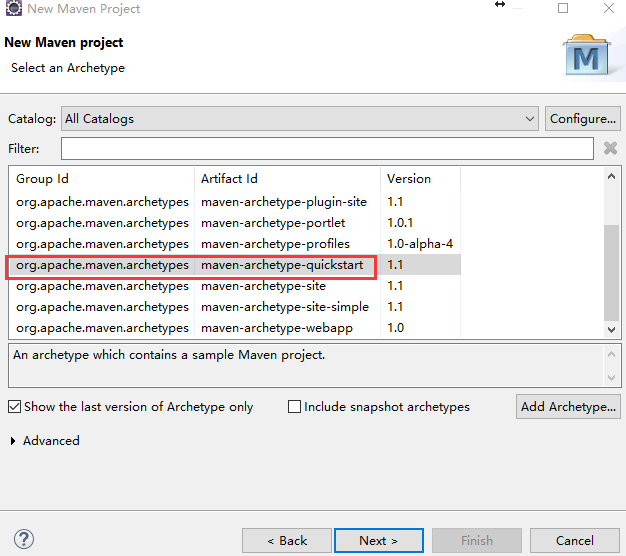
Next
输入GroupId和ArtifactId 后
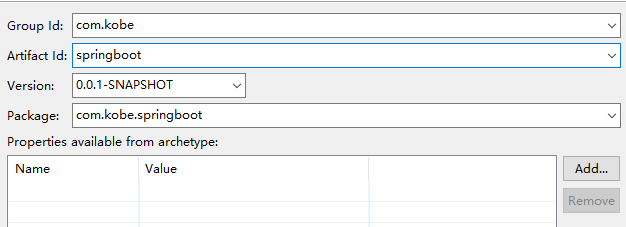
Finish
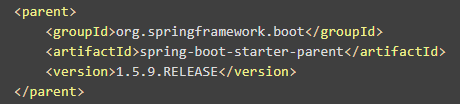
2、修改POM文件
这两处的配置是从文章开头的链接处复制的

3、右键项目-Maven-Update Project
4、编写一个具体的程序(此处还是以springboot的quickstart为例)
此处代码如果有报错的话,重新maven-update project
5、右键项目,Run as - Maven Build
在Goals输入spring-boot:run
Apply-Run
即可看到以下输出

默认是8080端口
打开浏览器输入localhost:8080
跟以往开发不同的是此程序没有编写index.jsp也不用部署到Tomcat,强大的springboot简化了繁琐的开发,我也是刚走上springboot这条大路,后续会继续更新进一步的学习操作。
建议:学习springboot前须对maven(或其他项目管理工具)有一定的理解,对SSM整合也需要有一定的了解。
本示例使用SpringBoot官方的QuickStart程序
详情地址:http://projects.spring.io/spring-boot/#quick-start
使用SpringBoot前提:一定得用maven或其他项目管理工具。
1、新建项目
new-project-Maven Project-Next
Next
输入GroupId和ArtifactId 后
Finish
2、修改POM文件
<project xmlns="http://maven.apache.org/POM/4.0.0" xmlns:xsi="http://www.w3.org/2001/XMLSchema-instance"
xsi:schemaLocation="http://maven.apache.org/POM/4.0.0 http://maven.apache.org/xsd/maven-4.0.0.xsd"> <modelVersion>4.0.0</modelVersion>
<parent>
<groupId>org.springframework.boot</groupId>
<artifactId>spring-boot-starter-parent</artifactId>
<version>1.5.9.RELEASE</version>
</parent>
<groupId>com.kobe</groupId>
<artifactId>bootfirst</artifactId>
<version>0.0.1-SNAPSHOT</version>
<packaging>jar</packaging>

<name>bootfirst</name>
<url>http://maven.apache.org</url>

<properties>
<jdk.version>1.6</jdk.version>
<project.build.sourceEncoding>UTF-8</project.build.sourceEncoding>
</properties>

<dependencies>
<dependency>
<groupId>junit</groupId>
<artifactId>junit</artifactId>
<scope>test</scope>
</dependency>
<dependency>
<groupId>org.springframework.boot</groupId>
<artifactId>spring-boot-starter-web</artifactId>
</dependency>
</dependencies>
<build>
<finalName>springboot</finalName>
<plugins>
<plugin>
<groupId>org.apache.maven.plugins</groupId>
<artifactId>maven-compiler-plugin</artifactId>
<configuration>
<source>1.6</source>
<target>1.6</target>
<encode>UTF-8</encode>
</configuration>
</plugin>
</plugins>
</build>
</project>
这两处的配置是从文章开头的链接处复制的
3、右键项目-Maven-Update Project
4、编写一个具体的程序(此处还是以springboot的quickstart为例)
import org.springframework.boot.*;
import org.springframework.boot.autoconfigure.*;
import org.springframework.stereotype.*;
import org.springframework.web.bind.annotation.*;

@Controller
@EnableAutoConfiguration
public class SampleController {

@RequestMapping("/")
@ResponseBody
String home() {
return "Hello World!";
}

public static void main(String[] args) throws Exception {
SpringApplication.run(SampleController.class, args);
}
}
此处代码如果有报错的话,重新maven-update project
5、右键项目,Run as - Maven Build
在Goals输入spring-boot:run
Apply-Run
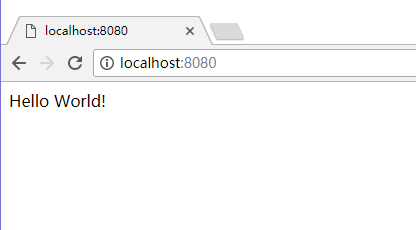
即可看到以下输出
默认是8080端口
打开浏览器输入localhost:8080
跟以往开发不同的是此程序没有编写index.jsp也不用部署到Tomcat,强大的springboot简化了繁琐的开发,我也是刚走上springboot这条大路,后续会继续更新进一步的学习操作。
建议:学习springboot前须对maven(或其他项目管理工具)有一定的理解,对SSM整合也需要有一定的了解。

相关文章推荐
- springboot websocket简单入门示例
- SpringBoot简单入门示例
- 建立第一个spring boot ,就是这么简单
- spring简单入门示例
- 最简单的Spring入门示例
- SpringBoot简单入门(二)
- Spring Boot / Spring MVC 入门实践 (一) :环境搭建与第一个项目
- springboot activiti工作流简单示例
- 最简单的SpringBoot示例之.yml配置文件
- 【SpringBoot】SpringBoot 入门示例
- 最简单的spring-mvc入门示例,绝对原创
- 最简单的 Spring Boot 入门指南
- 【java开发系列】—— spring简单入门示例
- Spring Boot MVC简单入门
- Spring Boot入门(1)-第一个Spring Boot应用
- springboot+mybatis的简单的入门例子
- 最简单的spring入门示例
- Spring Boot / Spring MVC 入门实践 (一) :环境搭建与第一个项目
- Spring Boot整合Dubbo开发系列(一)----一个简单的示例
- Spring_AOP_简单入门示例