Angular:内置指令
2017-12-05 17:08
232 查看
【ngIf】表达式结果为真,显示元素;表达式结果为假,移除元素。
【ngSwitch】对表达式进行一次求值,然后根据其结果来决定如何显示指令内的嵌套元素。
一旦表达式有了结果,就可以
- 使用ngSwitchCase指令描述已知结果;
- 使用ngSwitchDefault指令处理所有其他未知情况。
当你需要根据一个条件来渲染不同元素的时候,如下代码使用了ngIf来实现:
如你所见,myVar 的取值越多,最后的条件就变得非常繁琐。
如果用 ngSwitch 指令重写:
ngSwitchDefault元素是可选的。如果我们不用它,那么当myVar没有匹配到任何期望的值时就不会渲染任何东西。
你也可以为不同的元素声明同样的*ngSwitchCase值:
这样,当choice的值为2时,第二个和第五个<li></li>都会被渲染。
【ngStyle】根据表达式的结果给特定的DOM元素设定CSS属性
该指令最简单的用法就是[style.<cssproperty>]="value"的形式:
以上代码就是使用ngStyle指令把CSS的background-color属性设置为字符串字面量 yellow。
另一种设置固定值的方式就是使用ngStyle属性,使用键值对来设置每个属性:
【ngClass】动态设置和改变一个给定DOM元素的CSS类
① 传入一个对象字面量
假设我们有一个叫作bordered的CSS类,用来给元素添加一个黑色虚线边框:
使用ngClass指令来动态分配CSS类:
或者在组件中定义该对象,并且直接使用它:
② 传入一个数组型字面量
或者在组件中声明一个数组对象,并把它传进来:
【ngFor】重复一个给定的DOM元素(或一组DOM元素),每次重复都会从数组中取一个不同的值
它的语法是 *ngFor="let item of items"
- let item语法指定一个用来接收items数组中每个元素的(模板)变量。
- items是来自组件控制器的一组项的集合。
假设在组件控制器中声明了一个城市的数组:
然后在模板中有如下的HTML片段
它会如你期望的那样在div中渲染每一个城市:
我们还可以这样迭代一个对象数组:
然后根据每一行数据渲染出一个表格:
结果如图:
获取索引
我们可以在ngFor指令的值中插入语法let idx = index并用分号分隔开,这样就可以获取索引了。这时候,Angular会把当前的索引分配给我们提供的变量(在这里是变量idx)。
例如,对第一个例子进行修改,添加代码段let num = index。
结果如图:

【ngNonBindable】当我们想告诉Angular不要编译或者绑定页面中的某个特殊部分时,要使用ngNodBindable指令
假设我们想要用一个div来渲染变量content的内容,紧接着输出文本 ←this is what {{ content }} rendered来指向变量实际的值。通常情况下,{{content}}会被绑定到content变量的值,因为使用了{{ }}模板语法,为了能够渲染出纯文本,我们使用ngNonBindable指令:
有了ngNonBindable属性,Angular不会编译第二个span里的内容,而是原封不动地将其显示出来:

<div *ngIf="a > b"></div>
【ngSwitch】对表达式进行一次求值,然后根据其结果来决定如何显示指令内的嵌套元素。
一旦表达式有了结果,就可以
- 使用ngSwitchCase指令描述已知结果;
- 使用ngSwitchDefault指令处理所有其他未知情况。
当你需要根据一个条件来渲染不同元素的时候,如下代码使用了ngIf来实现:
<div class="container">
  <div *ngIf="myVar == 'A'">Var is A</div>
  <div *ngIf="myVar == 'B'">Var is B</div>
  <div *ngIf="myVar == 'C'">Var is C</div>
  <div *ngIf="myVar != 'A' && myVar != 'B' && myVar != 'C'">Var is something else</div>
</div>
如你所见,myVar 的取值越多,最后的条件就变得非常繁琐。
如果用 ngSwitch 指令重写:
<div class="container" [ngSwitch]="myVar">
<div *ngSwitchCase="'A'">Var is A</div>
<div *ngSwitchCase="'B'">Var is B</div>
<div *ngSwitchCase="'C'">Var is C</div>
<div *ngSwitchDefault>Var is something else</div>
</div>
ngSwitchDefault元素是可选的。如果我们不用它,那么当myVar没有匹配到任何期望的值时就不会渲染任何东西。
你也可以为不同的元素声明同样的*ngSwitchCase值:
<div class="ui raised segment">
<ul [ngSwitch]="choice">
<li *ngSwitchCase="1">First choice</li>
<li *ngSwitchCase="2">Second choice</li>
<li *ngSwitchCase="3">Third choice</li>
<li *ngSwitchCase="4">Fourth choice</li>
<li *ngSwitchCase="2">Second choice, again</li>
<li *ngSwitchDefault>Default choice</li>
</ul>
</div>
这样,当choice的值为2时,第二个和第五个<li></li>都会被渲染。
【ngStyle】根据表达式的结果给特定的DOM元素设定CSS属性
该指令最简单的用法就是[style.<cssproperty>]="value"的形式:
<div [style.background-color]="'yellow'">
Uses fixed yellow background
</div>
以上代码就是使用ngStyle指令把CSS的background-color属性设置为字符串字面量 yellow。
另一种设置固定值的方式就是使用ngStyle属性,使用键值对来设置每个属性:
<div [ngStyle]="{color: 'white', 'background-color': 'blue'}">
Uses fixed white text on blue background
</div>【ngClass】动态设置和改变一个给定DOM元素的CSS类
① 传入一个对象字面量
假设我们有一个叫作bordered的CSS类,用来给元素添加一个黑色虚线边框:
.bordered {
border: 1px dashed black;
background-color: #eee;
}
使用ngClass指令来动态分配CSS类:
<div [ngClass]="{bordered: isBordered}">
Using object literal. Border {{ isBordered ? "ON" : "OFF" }}
</div>
或者在组件中定义该对象,并且直接使用它:
export class NgClassSampleApp {
isBordered: boolean;
classesObj: Object;
classList: string[];
}

<div [ngClass]="classesObj">
Using object var. Border {{ classesObj.bordered ? "ON" : "OFF" }}
</div>
② 传入一个数组型字面量
<div class="base" [ngClass]="['blue', 'round']">
This will always have a blue background and round corners
</div>
或者在组件中声明一个数组对象,并把它传进来:
this.classList = ['blue', 'round'];

<div class="base" [ngClass]="classList">
This is {{ classList.indexOf('blue') > -1 ? "" : "NOT" }} blue and {{ classList.indexOf('round') > -1 ? "" : "NOT" }} round
</div>【ngFor】重复一个给定的DOM元素(或一组DOM元素),每次重复都会从数组中取一个不同的值
它的语法是 *ngFor="let item of items"
- let item语法指定一个用来接收items数组中每个元素的(模板)变量。
- items是来自组件控制器的一组项的集合。
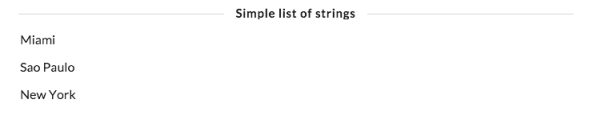
假设在组件控制器中声明了一个城市的数组:
this.cities = ['Miami', 'Sao Paulo', 'New York'];
然后在模板中有如下的HTML片段
<h4 class="ui horizontal divider header">
Simple list of strings
</h4>
<div class="ui list" *ngFor="let c of cities">
<div class="item">{{ c }}</div>
</div>
它会如你期望的那样在div中渲染每一个城市:
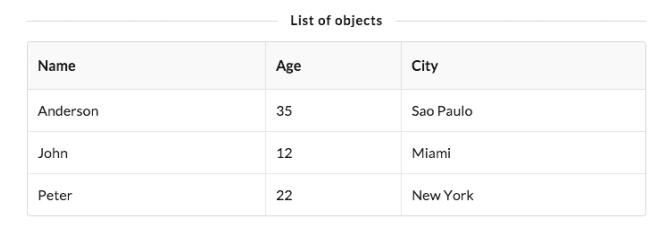
我们还可以这样迭代一个对象数组:
this.people = [
{ name: 'Anderson', age: 35, city: 'Sao Paulo' },
{ name: 'John', age: 12, city: 'Miami' },
{ name: 'Peter', age: 22, city: 'New York' }
];
然后根据每一行数据渲染出一个表格:
<h4 class="ui horizontal divider header">
List of objects
</h4>
<table class="ui celled table">
<thead>
<tr>
<th>Name</th>
<th>Age</th>
<th>City</th>
</tr>
</thead>
<tr *ngFor="let p of people">
<td>{{ p.name }}</td>
<td>{{ p.age }}</td>
<td>{{ p.city }}</td>
</tr>
</table>
结果如图:
获取索引
我们可以在ngFor指令的值中插入语法let idx = index并用分号分隔开,这样就可以获取索引了。这时候,Angular会把当前的索引分配给我们提供的变量(在这里是变量idx)。
例如,对第一个例子进行修改,添加代码段let num = index。
<div class="ui list" *ngFor="let c of cities; let num = index">
<div class="item">{{ num+1 }} - {{ c }}</div>
</div>
结果如图:
【ngNonBindable】当我们想告诉Angular不要编译或者绑定页面中的某个特殊部分时,要使用ngNodBindable指令
假设我们想要用一个div来渲染变量content的内容,紧接着输出文本 ←this is what {{ content }} rendered来指向变量实际的值。通常情况下,{{content}}会被绑定到content变量的值,因为使用了{{ }}模板语法,为了能够渲染出纯文本,我们使用ngNonBindable指令:
template: `
<div class='ngNonBindableDemo'>
<span class="bordered">{{ content }}</span>
<span class="pre" ngNonBindable>
← This is what {{ content }} rendered
</span>
</div>
`
有了ngNonBindable属性,Angular不会编译第二个span里的内容,而是原封不动地将其显示出来:

相关文章推荐
- Angular 内置结构型指令
- Angular 中间部分 2.1 内置指令和表单
- Angular中的内置指令和自定义指令
- 关于angular中内置指令的介绍
- ionic -使用内置指令基本环境搭建angular
- angular.js常用内置指令
- angular内置指令---以form为例
- Angular内置指令
- angular常用内置指令
- angular常见内置指令
- Angular 常见内置指令
- Angular入门、Angular控制器、Angular常见内置指令总结
- Angular入门 Angular控制器 常见内置指令
- Angular中的内置指令
- Angular--内置指令
- Angular的内置指令
- Angular中的内置指令和自定义指令
- Angular 内置属性型指令
- 【angular】指令及数据绑定入门
- Angular2组件与指令的小实践——实现一个图片轮播组件