Protobuf 序列化和反序列化源码分析
2017-11-24 14:07
701 查看
假设大家对protobuf有一些基础,没有用过也没有关系
这里使用protobuf 3.5.0
下面就对这些码流进行分析,逐步拆解到每个字段
通过上面的流程,发现写一个

同样,先写了一个

其实这里的数组role,就是循环输出了String,这里不做过多说明,即:

这里开始序列化map字段
对map中每项进行输出

先输出TAG,58(自己计算,同上)

这里开始输出map中的具体内容
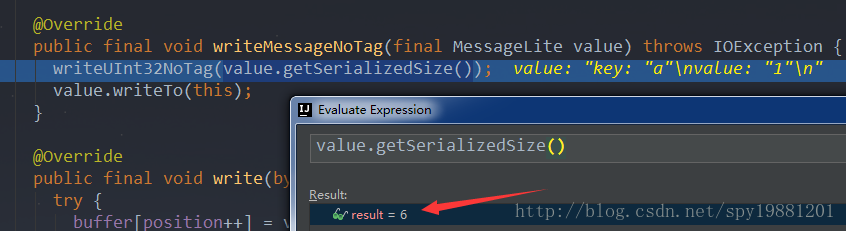
先输出了key和value的序列化总大小,6

将key和value内容序列化输出,
即:
-
-
总结:
-
-
-
-
-
-
-
-
通过上述截图,可以直观看到根据
全篇完。
这里使用protobuf 3.5.0
编写proto文件
syntax = "proto3";

package tutorial;

option java_package = "com.spy.test.protobuf.model";
option java_outer_classname = "UserV3Proto";

// User domain comment
/* user domain comment*/
message User{
int64 user_id = 1;
string user_code = 2;
string user_name =3;
string  email =4;
int32 age = 5;
repeated string roles = 6;
map<string, string> address=7;
}
生成java类文件
protoc userV3.proto --java_out=./
编写序列化和反序列化单元测试
UserV3Proto.User user = UserV3Proto.User.newBuilder()
.setUserId(2L)
.setUserCode("00001")
.setUserName("cc")
.setAge(20)
.addRoles("admin")
.addRoles("cc")
.putAddress("a", "1")
.putAddress("b", "2")
.build();

byte[] bytes = user.toByteArray();
log.debug("{}", bytes);
log.debug("{}", bytes.length);

// 反序列化
UserV3Proto.User user2 = UserV3Proto.User.parseFrom(bytes);

log.debug("{}", user2.toString());
序列化后的码流
[8, 2, 18, 5, 48, 48, 48, 48, 49, 26, 2, 99, 99, 40, 20, 50, 5, 97, 100, 109, 105, 110, 50, 2, 99, 99, 58, 6, 10, 1, 97, 18, 1, 49, 58, 6, 10, 1, 98, 18, 1, 50]
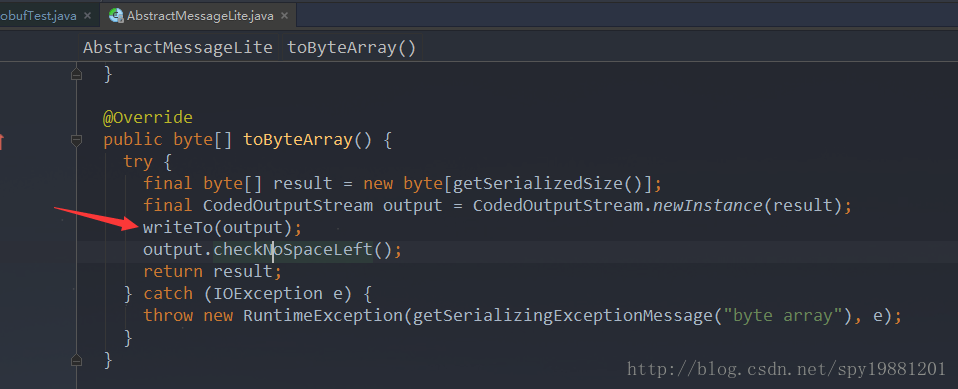
下面就对这些码流进行分析,逐步拆解到每个字段
.toByteArray()源码分析
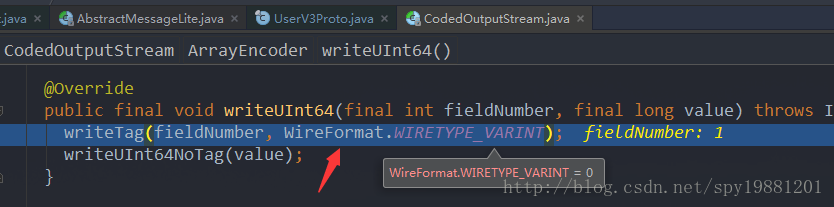
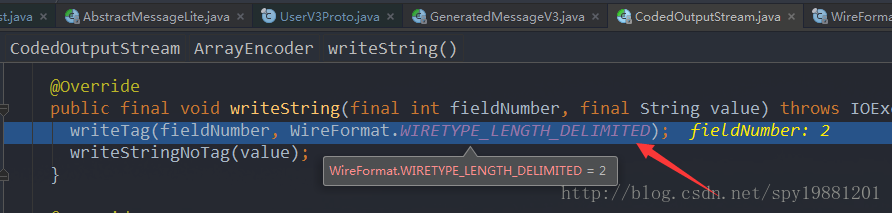
写int
通过上面的流程,发现写一个
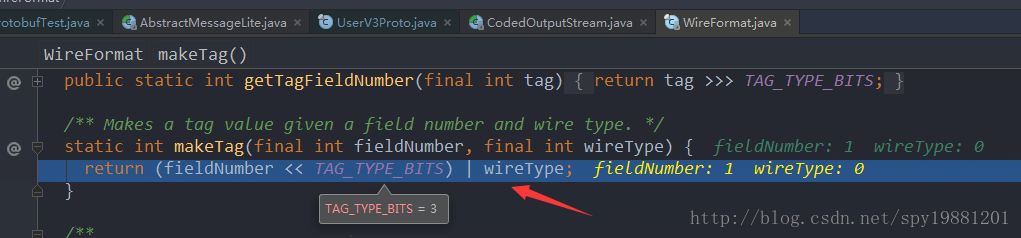
TAG,这个值是字段序号(
fieldNumber)左移3位,再
或上字段类型,得值8,再将值2输出,即:
user_id: 8, 2,
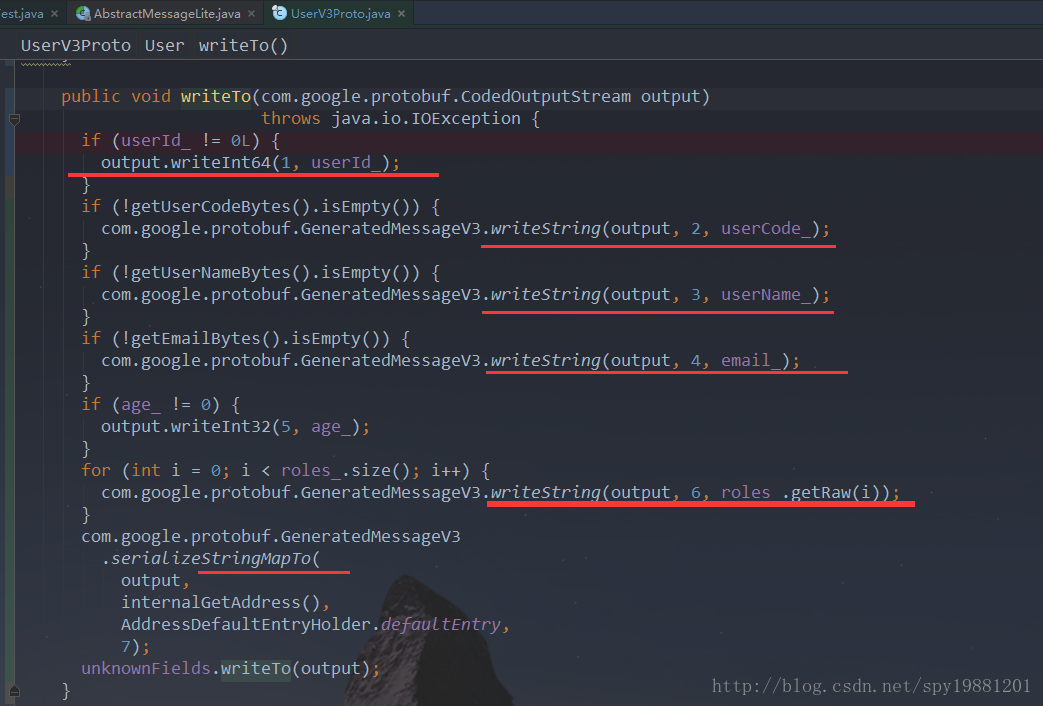
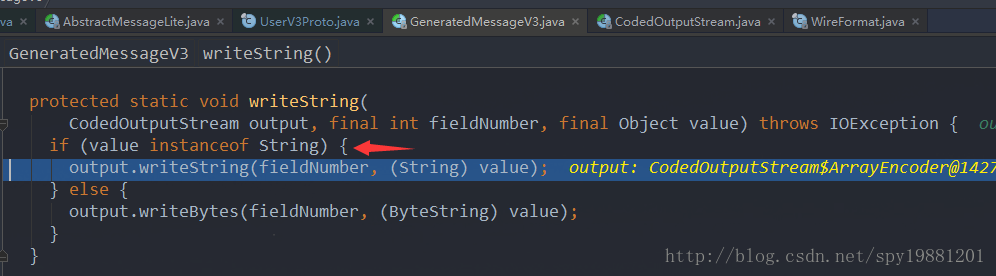
写String
以user_code为例:同样,先写了一个
TAG,其值为(2<<3|2)=18,然后输出string,即:
user_code: 18, 5, 48, 48, 48, 48, 49,
写Array
这里以role为例其实这里的数组role,就是循环输出了String,这里不做过多说明,即:
role: 50, 5, 97, 100, 109, 105, 110,
role: 50, 2, 99, 99,
写Map
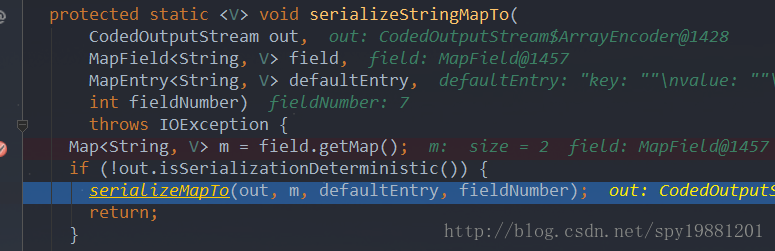
这里以address为例这里开始序列化map字段
对map中每项进行输出
先输出TAG,58(自己计算,同上)
这里开始输出map中的具体内容
先输出了key和value的序列化总大小,6
将key和value内容序列化输出,
类型索引(key或value)大小+长度大小+具体内容
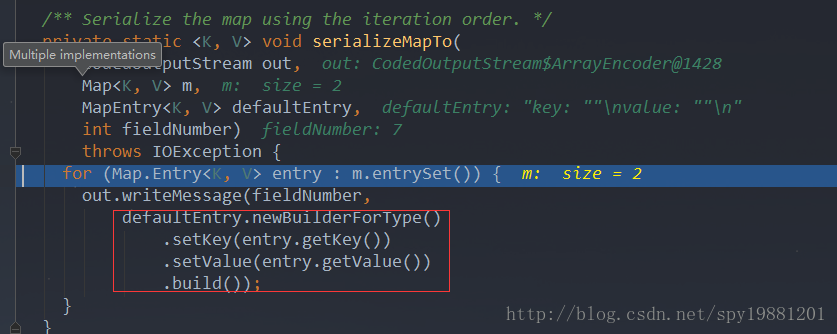
即:
-
address 58, 6, 10, 1, 97, 18, 1, 49,
-
address 58, 6, 10, 1, 98, 18, 1, 50
总结:
-
user_id: 8, 2,
-
user_code: 18, 5, 48, 48, 48, 48, 49,
-
user_name: 26, 2, 99, 99,
-
age: 40, 20,
-
role: 50, 5, 97, 100, 109, 105, 110,
-
role: 50, 2, 99, 99,
-
address: 58, 6, 10, 1, 97, 18, 1, 49,
-
address: 58, 6, 10, 1, 98, 18, 1, 50
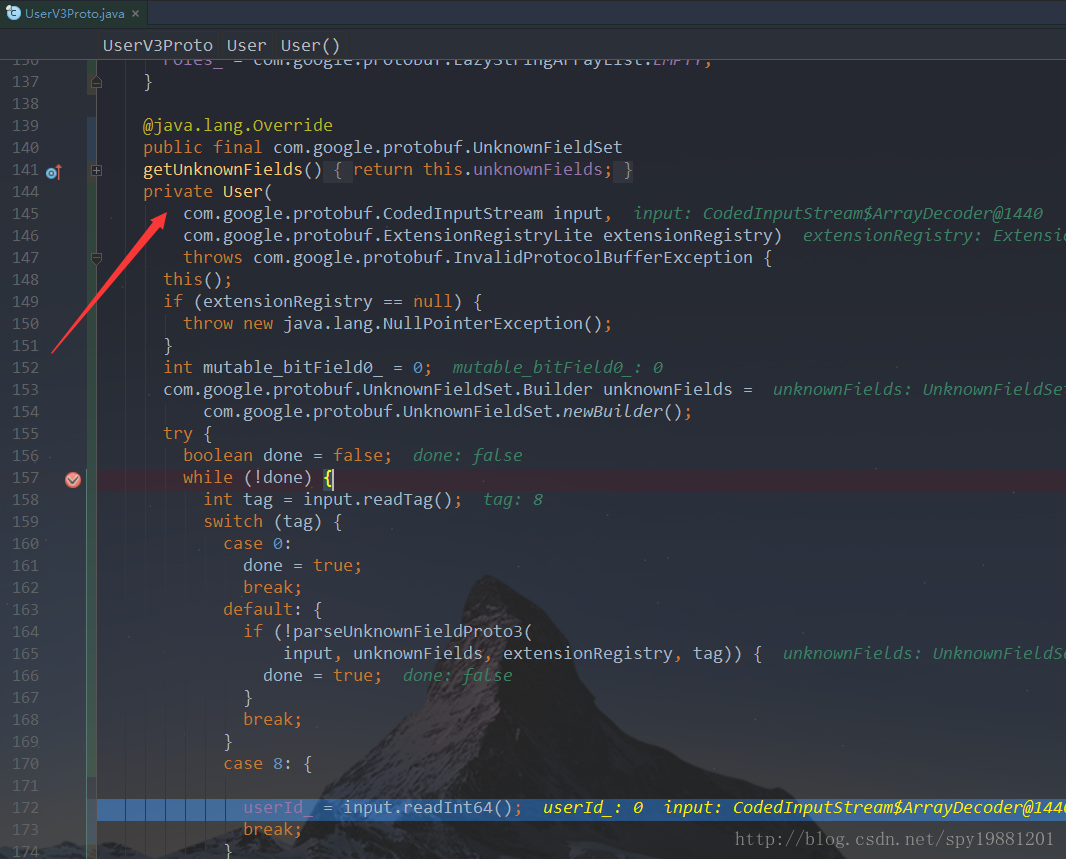
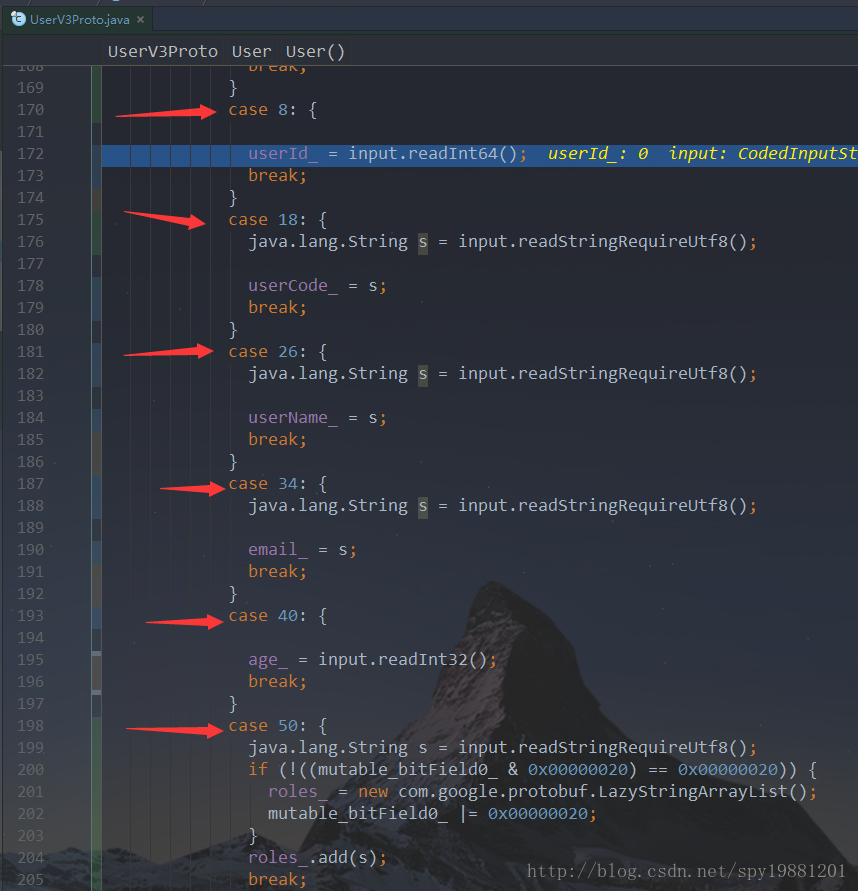
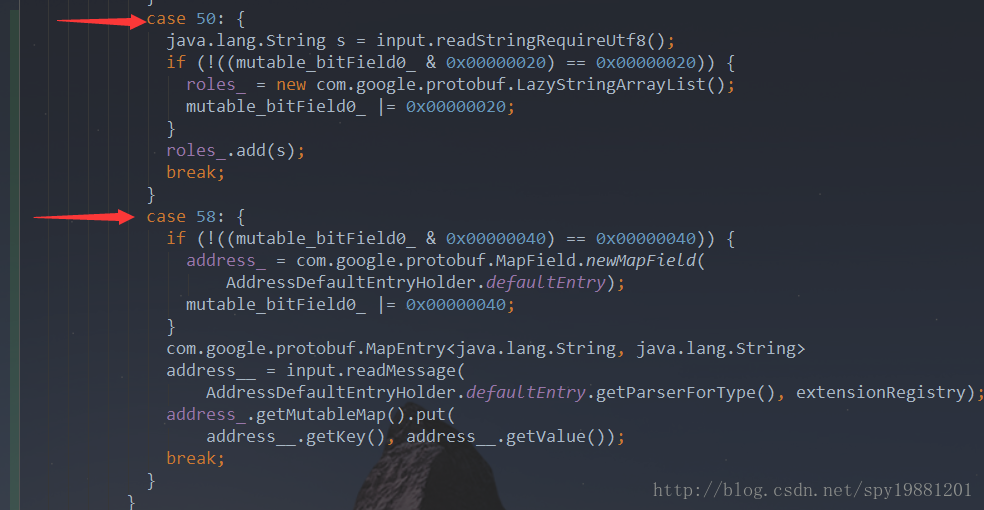
.parseForm()源码分析
通过上述截图,可以直观看到根据
TAG即可识别到具体的那个
field,然后赋值。
全篇完。

相关文章推荐
- 我对C++ string和length方法的一个长期误解------从protobuf序列化说起(没处理好会引起数据丢失、反序列化失败哦!)
- 序列化和反序列化及Protobuf 基本使用
- ProtoBuf 常用序列化/反序列化API
- 【protobuf】 3.使用protobuf-csharp-port进行序列化和反序列化
- Google protobuf序列化以及反序列化
- 【转】【UNITY3D 游戏开发之五】Google-protobuf与FlatBuffers数据的序列化和反序列化
- ProtoBuf的序列化和反序列化
- ProtoBuf 常用序列化/反序列化API
- ProtoBuf 常用序列化/反序列化API
- ProtoBuf 常用序列化/反序列化API
- java序列化/反序列化之xstream、protobuf、protostuff 的比较与使用例子
- Google Protobuf - 实现跨平台跨语言的序列化/反序列化
- 使用protoBuf进行序列化和反序列化
- protobuf序列化、反序列化
- Google Protobuf——实现跨平台跨语言的序列化/反序列化
- 性能最好的序列化反序列化,Protobuf的用法(maven项目)
- protobuf-net序列化反序列化
- ProtoBuf 常用序列化/反序列化API
- java序列化/反序列化之xstream、protobuf、protostuff 的比较与使用例子
- Google Protobuf Primer (1) 实现跨平台跨语言的序列化/反序列化