第一个树莓派JAVA测试程序-LED灯控制
2017-11-18 00:08
387 查看
1. 安装JDK(用SecuritFX)
上传jdk-8u151-linux-arm32-vfp-hflt.tar.gz到树莓派/home/pi
tar -zxvf jdk-8u151-linux-arm32-vfp-hflt.tar.gz
sudo nano /etc/profile
在最后加入:
JAVA_HOME=/home/pi/jdk1.8.0_151
CLASSPATH=.:$JAVA_HOME/jre/lib/rt.jar:$JAVA_HOME/lib/dt.jar:$JAVA_HOME/lib/tool$
PATH=$JAVA_HOME/bin:$PATH
export JAVA_HOME CLASSPATH PATH
Ctrl+O,回车,保存
Ctrl+X,退出
sudo reboot
重启后生效
2. 安装wiringPi
上传wiringPi-96344ff.tar.gz,路径同上。
tar xfz wiringPi-96344ff.tar.gz
cd wiringPi-96344ff
./build
3. 安装pi4j
上传pi4j-1.2-SNAPSHOT.deb,路径同上,注意树莓派3一定要安装这个版本,低版本不能正确运行。
cd ..
sudo dpkg -i pi4j-1.2-SNAPSHOT.deb
4.新建一个JAVA程序Led.java
/*
* #%L
* **********************************************************************
* ORGANIZATION : Pi4J
* PROJECT : Pi4J :: Java Examples
* FILENAME : ControlGpioExample.java
*
* This file is part of the Pi4J project. More information about
* this project can be found here: http://www.pi4j.com/
* **********************************************************************
*/
import com.pi4j.io.gpio.GpioController;
import com.pi4j.io.gpio.GpioFactory;
import com.pi4j.io.gpio.GpioPinDigitalOutput;
import com.pi4j.io.gpio.PinState;
import com.pi4j.io.gpio.RaspiPin;
/**
* This example code demonstrates how to perform simple state
* control of a GPIO pin on the Raspberry Pi.
*
* @author Robert Savage
*/
public class Led {
public static void main(String[] args) throws InterruptedException {
System.out.println("<--Pi4J--> GPIO Control Example ... started.");
// create gpio controller
final GpioController gpio = GpioFactory.getInstance();
// provision gpio pin #01 as an output pin and turn on
final GpioPinDigitalOutput pin = gpio.provisionDigitalOutputPin(RaspiPin.GPIO_01, "MyLED", PinState.HIGH);
// set shutdown state for this pin
pin.setShutdownOptions(true, PinState.LOW);
System.out.println("--> GPIO state should be: ON");
Thread.sleep(5000);
// turn off gpio pin #01
pin.low();
System.out.println("--> GPIO state should be: OFF");
Thread.sleep(5000);
// toggle the current state of gpio pin #01 (should turn on)
pin.toggle();
System.out.println("--> GPIO state should be: ON");
Thread.sleep(5000);
// toggle the current state of gpio pin #01 (should turn off)
pin.toggle();
System.out.println("--> GPIO state should be: OFF");
Thread.sleep(5000);
// turn on gpio pin #01 for 1 second and then off
System.out.println("--> GPIO state should be: ON for only 1 second");
pin.pulse(1000, true); // set second argument to 'true' use a blocking call
// stop all GPIO activity/threads by shutting down the GPIO controller
// (this method will forcefully shutdown all GPIO monitoring threads and scheduled tasks)
gpio.shutdown();
System.out.println("Exiting ControlGpioExample");
}
}

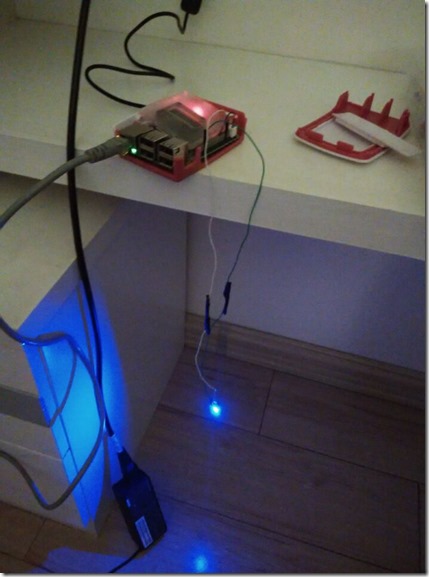
注意编号为左右两边最外侧的数字
5.编译和运行
javac -classpath .:classes:'*':classes:/opt/pi4j/lib/'*' Led.java
java -classpath .:classes:'*':classes:/opt/pi4j/lib/'*' Led
上传jdk-8u151-linux-arm32-vfp-hflt.tar.gz到树莓派/home/pi
tar -zxvf jdk-8u151-linux-arm32-vfp-hflt.tar.gz
sudo nano /etc/profile
在最后加入:
JAVA_HOME=/home/pi/jdk1.8.0_151
CLASSPATH=.:$JAVA_HOME/jre/lib/rt.jar:$JAVA_HOME/lib/dt.jar:$JAVA_HOME/lib/tool$
PATH=$JAVA_HOME/bin:$PATH
export JAVA_HOME CLASSPATH PATH
Ctrl+O,回车,保存
Ctrl+X,退出
sudo reboot
重启后生效
2. 安装wiringPi
上传wiringPi-96344ff.tar.gz,路径同上。
tar xfz wiringPi-96344ff.tar.gz
cd wiringPi-96344ff
./build
3. 安装pi4j
上传pi4j-1.2-SNAPSHOT.deb,路径同上,注意树莓派3一定要安装这个版本,低版本不能正确运行。
cd ..
sudo dpkg -i pi4j-1.2-SNAPSHOT.deb
4.新建一个JAVA程序Led.java
/*
* #%L
* **********************************************************************
* ORGANIZATION : Pi4J
* PROJECT : Pi4J :: Java Examples
* FILENAME : ControlGpioExample.java
*
* This file is part of the Pi4J project. More information about
* this project can be found here: http://www.pi4j.com/
* **********************************************************************
*/
import com.pi4j.io.gpio.GpioController;
import com.pi4j.io.gpio.GpioFactory;
import com.pi4j.io.gpio.GpioPinDigitalOutput;
import com.pi4j.io.gpio.PinState;
import com.pi4j.io.gpio.RaspiPin;
/**
* This example code demonstrates how to perform simple state
* control of a GPIO pin on the Raspberry Pi.
*
* @author Robert Savage
*/
public class Led {
public static void main(String[] args) throws InterruptedException {
System.out.println("<--Pi4J--> GPIO Control Example ... started.");
// create gpio controller
final GpioController gpio = GpioFactory.getInstance();
// provision gpio pin #01 as an output pin and turn on
final GpioPinDigitalOutput pin = gpio.provisionDigitalOutputPin(RaspiPin.GPIO_01, "MyLED", PinState.HIGH);
// set shutdown state for this pin
pin.setShutdownOptions(true, PinState.LOW);
System.out.println("--> GPIO state should be: ON");
Thread.sleep(5000);
// turn off gpio pin #01
pin.low();
System.out.println("--> GPIO state should be: OFF");
Thread.sleep(5000);
// toggle the current state of gpio pin #01 (should turn on)
pin.toggle();
System.out.println("--> GPIO state should be: ON");
Thread.sleep(5000);
// toggle the current state of gpio pin #01 (should turn off)
pin.toggle();
System.out.println("--> GPIO state should be: OFF");
Thread.sleep(5000);
// turn on gpio pin #01 for 1 second and then off
System.out.println("--> GPIO state should be: ON for only 1 second");
pin.pulse(1000, true); // set second argument to 'true' use a blocking call
// stop all GPIO activity/threads by shutting down the GPIO controller
// (this method will forcefully shutdown all GPIO monitoring threads and scheduled tasks)
gpio.shutdown();
System.out.println("Exiting ControlGpioExample");
}
}
注意编号为左右两边最外侧的数字
5.编译和运行
javac -classpath .:classes:'*':classes:/opt/pi4j/lib/'*' Led.java
java -classpath .:classes:'*':classes:/opt/pi4j/lib/'*' Led

相关文章推荐
- selenium2 java第一个自动化测试程序
- Flex+BlazeDs+Java的第一个测试程序
- 【JAVA初学者】配置JDK的详细过程,以及第一个JAVA程序的编写。
- Java学习第一步:环境配置与编译第一个程序
- 第一个java程序(cmd下的调试)
- Java SE入门、JDK的下载与安装、第一个Java程序、Java程序的编译与执行
- [Java Concurrency in Practice]第十二章 并发程序的测试
- 第一个JAVA小程序的程序框架
- Java入门—第一节(1)(JDK的安装、环境变量的配置和第一个java程序)
- hadoop-0.23.9安装以及第一个mapreduce测试程序
- 第一个Java程序
- 我的第一个JAVA程序
- Java的整体认识--类的初步理解和第一个Java程序
- 第一个Java程序
- 小程序-----Java代码产生6个随机数,其中第一个不能为0
- java第一个程序helloworld的实现及其注意事项
- 第一个Java程序,简单的打开图片并显示在面板上
- 第一个java application 程序
- caffe_windows下的第一个测试程序学习教程
- 我的第一个Android程序----工厂测试软件