(spring redis第二章)Spring+Redis+Nginx实现不同服务器下的Session共享
2017-10-26 11:35
633 查看
上一章我们只是简单的将Redis整合到Spring中,不是一个完整的实例,这次呢,我们可以做一个更贴近公司项目需要的实例。针对一般访问量大的网站,很多公司会考虑负载均衡,通过Nginx来将用户的访问分发到不同的服务器上。这个时候就会面对一个问题。如何保证这个用户在不同服务器上面的Session一致性。下面就引出我们今天的主题。Spring+Redis+Nginx实现不同服务器下的Session共享。好了,废话不多说,我们一步一步的操作吧。
第一步:安装和配置Ngnix。安装比较简单,直接在官网上面下载Nginx的包,解压到电脑里面就行了。我下载的是windows的版本。
按照不多说了,我就说一下配置吧。打开Nginx下面的conf文件。编辑nginx.conf文件。下面是我配置好的。 PS:默认的端口是80,因为我的80端口被占用,所以我就把端口改成90了。同时我用了2个tomcat做实验,分别是tomcat1,端口为8080;另外一个是tomcat2,端口为8089。 nginx.conf如下:
配置好了,暂时不要启动Nginx,因为你的2个tomcat没有启动。
第二步:准备2个tomcat。分别修改端口为8080和8089。
在tomcat下面的conf文件夹下,修改server.xml。
tomcat1的配置:
tomcat2的配置:
第三步:测试tomcat和Nginx。先启动tomcat。再启动Nginx。
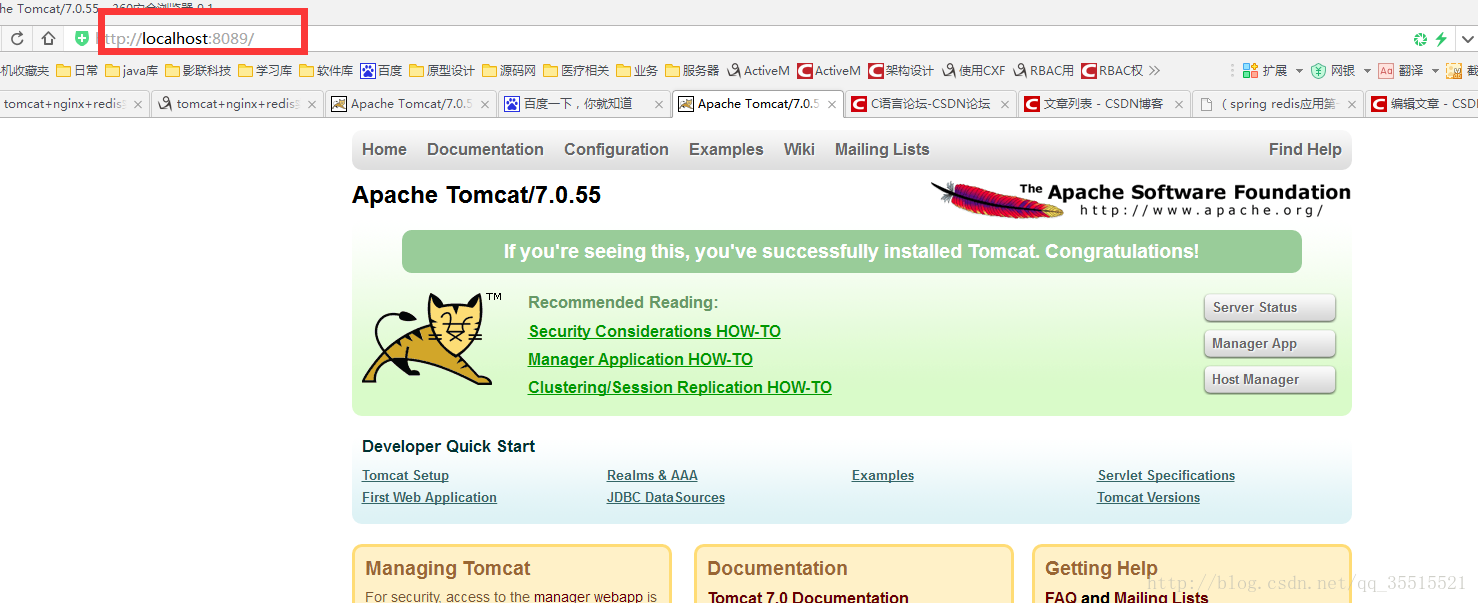
我们访问其中一个tomcat的页面。是成功的
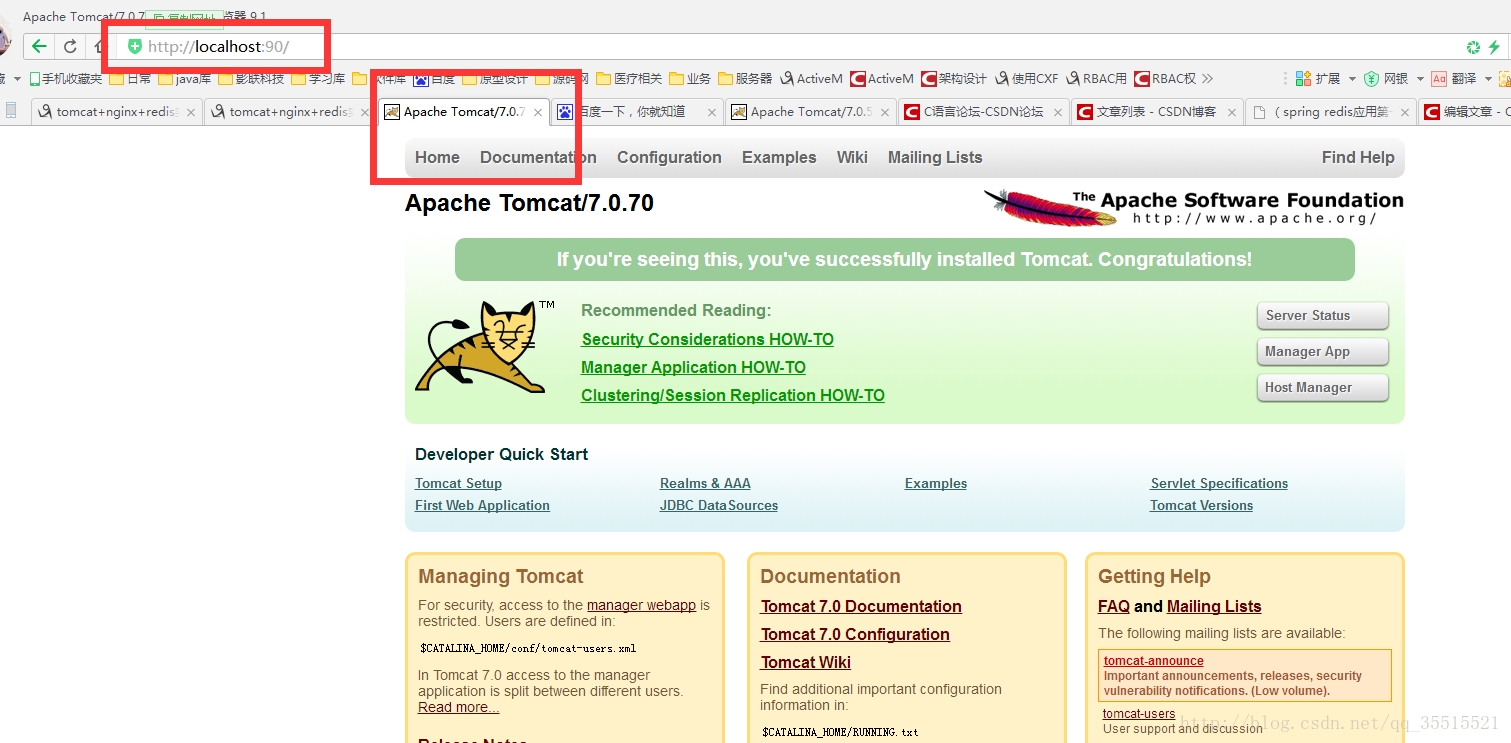
我们再访问我们的Nginx。再看看,也成功访问到tomcat首页。
第四步:
好了,刚刚Nginx可以转发tomcat的了。同时在上一章里面我们也配置好了spring+redis服务了,我们只需要在原来的项目再也一个测试的Demo就行了。模拟一个登录和一个登陆后的页面
java测试:
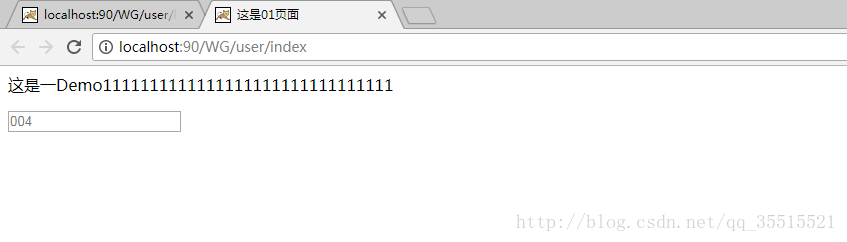
index.jsp页面:这里为了区分tomcat1和tomcat2,我分别给index加了标示区分。
login.jsp
将项目打成war包。分别部署到tomcat1和tomcat2上面。重新启动tomcat1和tomcat2项目。
第五步:正式测试。
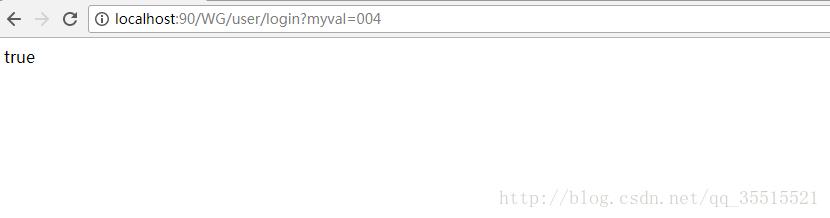
首先,我们模拟登录:将004值存到redis中
然后我们在访问首页,并且不断刷新页面,就会发现Nginx不断轮流访问tomcat1和tomcat2,并且都能获得004值。
。
PS:注意,这需要在一个浏览器上测试,如果你在不同浏览器访问时没有效果的,因为每当浏览器与服务器建立连接的时候,服务器就会分别一个sessionID给这个浏览器。这个sessionID就是这个浏览器针对这个服务器的身份标示。如果用不同浏览器测试的话,就会有2个sessionID。另外一个浏览器在取session的时候必然会出现空指针异常。
下面是各个安装包和测试demo。可以下载下来自己跑一跑
http://download.csdn.net/download/qq_35515521/10040356
第一步:安装和配置Ngnix。安装比较简单,直接在官网上面下载Nginx的包,解压到电脑里面就行了。我下载的是windows的版本。
按照不多说了,我就说一下配置吧。打开Nginx下面的conf文件。编辑nginx.conf文件。下面是我配置好的。 PS:默认的端口是80,因为我的80端口被占用,所以我就把端口改成90了。同时我用了2个tomcat做实验,分别是tomcat1,端口为8080;另外一个是tomcat2,端口为8089。 nginx.conf如下:
upstream test{
server localhost:8080 max_fails=1 fail_timeout=1s;
server localhost:8089 max_fails=1 fail_timeout=1s;
}
server {
listen       90;
server_name  localhost;
proxy_connect_timeout 2s;

location / {
proxy_pass http://test;
}
}
配置好了,暂时不要启动Nginx,因为你的2个tomcat没有启动。
第二步:准备2个tomcat。分别修改端口为8080和8089。
在tomcat下面的conf文件夹下,修改server.xml。
tomcat1的配置:
<Connector port="8080" protocol="HTTP/1.1"
connectionTimeout="20000"
redirectPort="8443" />
tomcat2的配置:
<Connector port="8089" protocol="HTTP/1.1"
connectionTimeout="20000"
redirectPort="8443" />
第三步:测试tomcat和Nginx。先启动tomcat。再启动Nginx。
我们访问其中一个tomcat的页面。是成功的
我们再访问我们的Nginx。再看看,也成功访问到tomcat首页。
第四步:
好了,刚刚Nginx可以转发tomcat的了。同时在上一章里面我们也配置好了spring+redis服务了,我们只需要在原来的项目再也一个测试的Demo就行了。模拟一个登录和一个登陆后的页面
java测试:
package com.controller.user;

import java.util.HashMap;
import java.util.Map;

import javax.annotation.Resource;
import javax.servlet.http.HttpServletRequest;
import javax.servlet.http.HttpServletResponse;

import org.springframework.context.annotation.Scope;
import org.springframework.stereotype.Controller;
import org.springframework.ui.Model;
import org.springframework.web.bind.annotation.RequestMapping;
import org.springframework.web.bind.annotation.ResponseBody;
import org.springframework.web.servlet.ModelAndView;

import com.google.gson.Gson;
import com.google.gson.GsonBuilder;
import com.model.User;
import com.util.base.RedisTemplateUtil;

@Controller
@RequestMapping(value = "/user")
@Scope("prototype")
public class RedisTest {

@Resource
private RedisTemplateUtil<Object> redisCache;

private final Gson gson = new GsonBuilder().setDateFormat("yyyyMMddHHmmss").create();

@RequestMapping(value = "/login")
@ResponseBody
public String login(HttpServletRequest request, String username){
String val=request.getParameter("myval");
request.getSession().setAttribute("user", val);
return "true";
}

@RequestMapping(value = "/index")
public String index(HttpServletRequest request, Map<String, Object> map){
String  sys=request.getSession().getAttribute("user").toString();
map.put("user", sys);
return "/index";
}

}
index.jsp页面:这里为了区分tomcat1和tomcat2,我分别给index加了标示区分。
<%@ page language="java" contentType="text/html; charset=UTF-8"
pageEncoding="UTF-8"%>
<%@ include file="/common/jsp/taglibs.jsp"%>
<!DOCTYPE html PUBLIC "-//W3C//DTD HTML 4.01 Transitional//EN" "http://www.w3.org/TR/html4/loose.dtd">
<html>
<head>
<meta http-equiv="Content-Type" content="text/html; charset=utf-8">
<script type="text/javascript" src="jquery-easyui-1.4.1/jquery.min.js"></script>
<title>这是02页面</title>
</head>
<body>
<%-- <form action="${ctx}/user/opersss" method="post">
<!-- 请输入值<input type="text" id="userName" name="userName"/> -->
<input type="submit" value="我要查看人员信息" />
</form> --%>
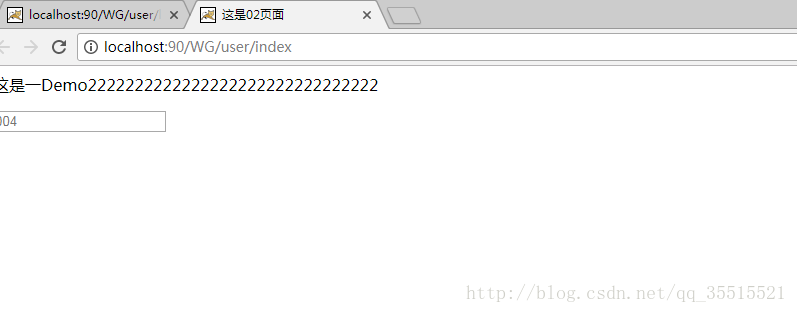
<p>这是一Demo2222222222222222222222222222222</p>
<div>
<input type="text" val="54545" placeholder="${user}"/>
</div>
</body>
</html>login.jsp
<%@ page language="java" contentType="text/html; charset=UTF-8"
pageEncoding="UTF-8"%>
<%@ include file="/common/jsp/taglibs.jsp"%>
<!DOCTYPE html PUBLIC "-//W3C//DTD HTML 4.01 Transitional//EN" "http://www.w3.org/TR/html4/loose.dtd">
<html>
<head>
<meta http-equiv="Content-Type" content="text/html; charset=utf-8">
<script type="text/javascript" src="jquery-easyui-1.4.1/jquery.min.js"></script>
<script type="text/javascript" src="${ctx }/common/js/jquery/jquery.min.js"></script>
<title>登录页面</title>
</head>
<body>
<%-- <form action="${ctx}/user/opersss" method="post">
<!-- 请输入值<input type="text" id="userName" name="userName"/> -->
<input type="submit" value="我要查看人员信息" />
</form> --%>
<p></p>
<div>
登录名
<input type="text" id="myval" value=""/>
<button onclick="jin()">提交</button>
</div>
</body>
<script type="text/javascript">
function jin(){
var myval=$("#myval").val();
$.ajax({
url :"${ctx}/user/login",
type : "post",
dataType : "json",
data:{
"myval":myval
},
success : function(data) {
alert("登录成功");
},
error : function() {
}
});
}

</script>
</html>
将项目打成war包。分别部署到tomcat1和tomcat2上面。重新启动tomcat1和tomcat2项目。
第五步:正式测试。
首先,我们模拟登录:将004值存到redis中
然后我们在访问首页,并且不断刷新页面,就会发现Nginx不断轮流访问tomcat1和tomcat2,并且都能获得004值。
。
PS:注意,这需要在一个浏览器上测试,如果你在不同浏览器访问时没有效果的,因为每当浏览器与服务器建立连接的时候,服务器就会分别一个sessionID给这个浏览器。这个sessionID就是这个浏览器针对这个服务器的身份标示。如果用不同浏览器测试的话,就会有2个sessionID。另外一个浏览器在取session的时候必然会出现空指针异常。
下面是各个安装包和测试demo。可以下载下来自己跑一跑
http://download.csdn.net/download/qq_35515521/10040356

相关文章推荐
- SpringBoot+Redis+Nginx实现负载均衡以及Session缓存共享
- Windows环境下Nginx+Tomcat+Redis实现应用服务器集群负载均衡和Session共享
- Nginx+Tomcat+Redis实现应用服务器集群负载均衡和Session共享
- redis缓存服务器(Nginx+Tomcat+redis+MySQL实现session会话共享) 推荐
- 图文并茂超详细搭建redis缓存服务器(nginx+tomcat+redis+mysql实现session会话共享)
- Spring集成redis实现session共享(无视服务器)
- redis缓存服务器(nginx+tomcat+redis+mysql实现session会话共享) 推荐
- Spring Boot集成Spring Data Reids和Spring Session实现Session共享(多个不同的应用共用一个Redis实例)
- redis缓存服务器(Nginx+Tomcat+redis+MySQL实现session会话共享
- 图文并茂超详细搭建redis缓存服务器(nginx+tomcat+redis+mysql实现session会话共享) 推荐
- Nginx+Tomcat搭建集群,Spring Session+Redis实现Session共享
- (转)tomcat+nginx+redis实现均衡负载、session共享(一)
- tomcat+nginx+redis实现均衡负载、session共享(二)
- Spring Session + Redis实现分布式Session共享
- SpringSession+Redis实现集群会话共享的方法
- tomcat+nginx+redis实现均衡负载、session共享(二)
- Spring Boot系列(七)Spring Boot使用Redis实现session共享
- [Session共享]Spring-Redis实现Session共享
- tomcat+nginx+redis实现均衡负载、session共享
- spring boot + redis 实现session共享