解决使用Spring Boot、Multipartfile上传文件路径错误问题
2017-10-25 11:41
1286 查看
1.问题描述
关键字: SpringMVC 4.2.4 、 Spring Boot 1.3.1 、Servlet 3.0 、文件上传报错信息:
java.io.IOException:
java.io.FileNotFoundException: /tmp/tomcat.273391201583741210.8080/work/Tomcat/localhost/ROOT/tmp/source/IMG_20160129_132623.jpg (No such file or directory)
问题源码: transferTo方法报错
1 2 3 4 5 6 7 8 9 | // 前端传入mulFileSource
// 创建压缩前源文件
File fileSourcePath = new File("tmp/source/");
File fileSource = new File(fileSourcePath, mulFileSource.getOriginalFilename());
if (!fileSourcePath.exists()) {
fileSourcePath.mkdirs();
}
// 将接收得图片暂存到临时文件中
mulFileSource.transferTo(fileSource); |
2.问题分析
首先,看源码中文件定义,相对路径,预期路径应该是项目路径/tmp/source/,但是报错确是一个系统临时文件路径(tomcat的)。
其次,由于是transferTo方法报错,因此应该是该方法写入文件时报错,因此,我们跟入方法源码。
1 2 3 4 5 6 7 8 910 | public class StandardMultipartHttpServletRequest extends AbstractMultipartHttpServletRequest {
//中间代码省略
/**
* Spring MultipartFile adapter, wrapping a Servlet 3.0 Part object.
*/
@SuppressWarnings("serial")
private static class StandardMultipartFile implements MultipartFile, Serializable {
//中间代码省略
@Override
public void transferTo(File dest) throws IOException, IllegalStateException {
this.part.write(dest.getPath());
}
}
} |
1 2 3 4 5 6 7 8 910 | package org.apache.catalina.core;
/**
* Adaptor to allow {@link FileItem} objects generated by the package renamed
* commons-upload to be used by the Servlet 3.0 upload API that expects
* {@link Part}s.
*/
public class ApplicationPart implements Part {
//中间代码省略
@Override
public void write(String fileName) throws IOException {
File file = new File(fileName);
if (!file.isAbsolute()) {
file
= new File(location, fileName);
}
try {
fileItem.write(file);
} catch (Exception e) {
throw new IOException(e);
}
}
} |
location路径,即:
file = new File(location, fileName);。当然,这也影响了SpringMVC的Multipartfile的使用。
由于我们创建的File在
项目路径/tmp/source/,而transferTo方法预期写入的文件路径为
/tmp/tomcat.273391201583741210.8080/work/Tomcat/localhost/ROOT/tmp/source/,我们并没有创建该目录,因此会抛出异常。
3.问题解决方案
使用绝对路径修改
location的值
这个
location可以理解为临时文件目录,我们可以通过配置
location的值,使其指向我们的项目路径,这样就解决了我们遇到的问题。
在Spring Boot下配置
location,可以在
main()方法所在文件中添加如下代码:
1 2 3 4 5 6 7 8 9 | /**
* 文件上传临时路径
*/
@Bean
MultipartConfigElement multipartConfigElement() {
MultipartConfigFactory factory = new MultipartConfigFactory();
factory.setLocation("/app/pttms/tmp");
return factory.createMultipartConfig();
} |
4
Spring 4 MVC Single and Multiple File Upload Example with Tomcat
By Arvind Rai, August 09, 2014In this page we will learn how to upload a file in Spring 4 MVC. We are presenting the demo for single and multiple file upload. We are using XML less configurations. MultipartConfigElement Bean needs to be configured for file upload. In controller, method
argument should be MultipartFile class for uploading the file. The JSP form, enctype must be set for multipart form data. Check the demo now.
Software Used
To run the file upload demo in Spring 4, get ready with below software. 1. JDK 7
2. Eclipse
3. Tomcat 7
4. Gradle 2.0 for Spring Boot
Project Structure in Eclipse
For better understanding, get the file location in eclipse how to put our classes and JSPs.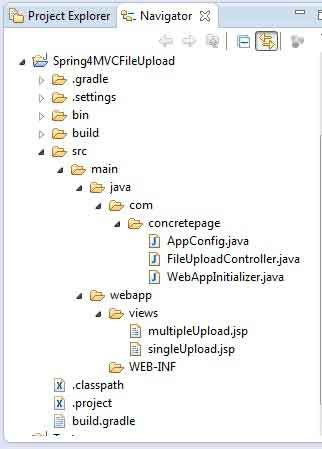
Controller Class: Use of MultipartFile
In our example we are presenting demo for single and multiple file upload. So we have created two different methods for uploading the file. In single upload, the method should have the parameter as below with other parameters.@RequestParam("file") MultipartFile fileAnd for multiple file upload , the parameter should be as below
@RequestParam("file") MultipartFile[] fileGet the name of file from MultipartFile object and save it to your desired location. Find the controller.
FileUploadController.java
package com.concretepage;
import java.io.BufferedOutputStream;
import java.io.File;
import java.io.FileOutputStream;
import org.springframework.stereotype.Controller;
import org.springframework.web.bind.annotation.RequestMapping;
import org.springframework.web.bind.annotation.RequestMethod;
import org.springframework.web.bind.annotation.RequestParam;
import org.springframework.web.bind.annotation.ResponseBody;
import org.springframework.web.multipart.MultipartFile;
@Controller
public class FileUploadController {
@RequestMapping(value="/singleUpload")
public String singleUpload(){
return "singleUpload";
}
@RequestMapping(value="/singleSave", method=RequestMethod.POST )
public @ResponseBody String singleSave(@RequestParam("file") MultipartFile file, @RequestParam("desc") String desc ){
System.out.println("File Description:"+desc);
String fileName = null;
if (!file.isEmpty()) {
try {
fileName = file.getOriginalFilename();
byte[] bytes = file.getBytes();
BufferedOutputStream buffStream =
new BufferedOutputStream(new FileOutputStream(new File("F:/cp/" + fileName)));
buffStream.write(bytes);
buffStream.close();
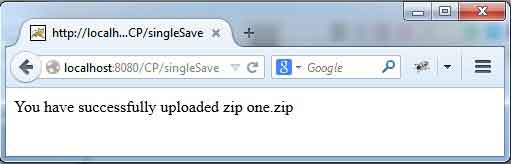
return "You have successfully uploaded " + fileName;
} catch (Exception e) {
return "You failed to upload " + fileName + ": " + e.getMessage();
}
} else {
return "Unable to upload. File is empty.";
}
}
@RequestMapping(value="/multipleUpload")
public String multiUpload(){
return "multipleUpload";
}
@RequestMapping(value="/multipleSave", method=RequestMethod.POST )
public @ResponseBody String multipleSave(@RequestParam("file") MultipartFile[] files){
String fileName = null;
String msg = "";
if (files != null && files.length >0) {
for(int i =0 ;i< files.length; i++){
try {
fileName = files[i].getOriginalFilename();
byte[] bytes = files[i].getBytes();
BufferedOutputStream buffStream =
new BufferedOutputStream(new FileOutputStream(new File("F:/cp/" + fileName)));
buffStream.write(bytes);
buffStream.close();
msg += "You have successfully uploaded " + fileName +"<br/>";
} catch (Exception e) {
return "You failed to upload " + fileName + ": " + e.getMessage() +"<br/>";
}
}
return msg;
} else {
return "Unable to upload. File is empty.";
}
}
}
Configuration Class: Use of MultipartConfigElement Bean
In the configuration class, we need to use bean for MultipartConfigElement and UrlBasedViewResolver. MultipartConfigElement supports the file upload where we can set max file size, max request size etc. MultipartConfigElement needs to be configured with Dispatcherservlet using WebApplicationInitializer . UrlBasedViewResolver defines the JSP location and file extension pattern of output.
AppConfig.java
package com.concretepage;
import javax.servlet.MultipartConfigElement;
import org.springframework.boot.autoconfigure.EnableAutoConfiguration;
import org.springframework.boot.context.embedded.MultipartConfigFactory;
import org.springframework.context.annotation.Bean;
import org.springframework.context.annotation.ComponentScan;
import org.springframework.context.annotation.Configuration;
import org.springframework.web.servlet.config.annotation.EnableWebMvc;
import org.springframework.web.servlet.view.JstlView;
import org.springframework.web.servlet.view.UrlBasedViewResolver;
@Configuration
@ComponentScan
@EnableWebMvc
@EnableAutoConfiguration
public class AppConfig {
@Bean
public MultipartConfigElement multipartConfigElement() {
MultipartConfigFactory factory = new MultipartConfigFactory();
factory.setMaxFileSize("128KB");
factory.setMaxRequestSize("128KB");
return factory.createMultipartConfig();
}
@Bean
public UrlBasedViewResolver setupViewResolver() {
UrlBasedViewResolver resolver = new UrlBasedViewResolver();
resolver.setPrefix("/views/");
resolver.setSuffix(".jsp");
resolver.setViewClass(JstlView.class);
return resolver;
}
}
WebApplicationInitializer Class: Use of Dynamic.setMultipartConfig()
WebApplicationInitializer is used when our application is not using web.xml. This supports all functionality which web.xml does. To supports file upload our dispatcher must be set for multipart config. WebAppInitializer.java
package com.concretepage;
import javax.servlet.MultipartConfigElement;
import javax.servlet.ServletContext;
import javax.servlet.ServletException;
import javax.servlet.ServletRegistration.Dynamic;
import org.springframework.web.WebApplicationInitializer;
import org.springframework.web.context.support.AnnotationConfigWebApplicationContext;
import org.springframework.web.servlet.DispatcherServlet;
public class WebAppInitializer implements WebApplicationInitializer {
public void onStartup(ServletContext servletContext) throws ServletException {
AnnotationConfigWebApplicationContext ctx = new AnnotationConfigWebApplicationContext();
ctx.register(AppConfig.class);
ctx.setServletContext(servletContext);
ctx.refresh();
Dynamic dynamic = servletContext.addServlet("dispatcher", new DispatcherServlet(ctx));
dynamic.addMapping("/");
dynamic.setLoadOnStartup(1);
dynamic.setMultipartConfig(ctx.getBean(MultipartConfigElement.class));
}
}
View: Use of enctype="multipart/form-data" and type="file"
The JSPs are being used as views. To support file upload, form must be set with enctype for multipart form data and there should a file input text. We have two JSP. Find the JSP for single file upload. singleUpload.jsp
<html>
<body>
<h1>Single File Upload</h1>
<form method="post" enctype="multipart/form-data" action="singleSave">
Upload File: <input type="file" name="file">
<br /><br />
Description: <input type="text" name="desc"/>
<br/><br/><input type="submit" value="Upload">
</form>
</body>
</html>
Find the JSP for multiple file Upload. We need to take care that each input type of file type must have same name, so that it could be accessed as an array.
multipleUpload.jsp
<html>
<body>
<h1> Multiple File Upload </h1>
<form method="post" enctype="multipart/form-data" action="multipleSave">
Upload File 1: <input type="file" name="file"> <br/>
Upload File 2: <input type="file" name="file"> <br/>
Upload File 3: <input type="file" name="file"> <br/>
Upload File 4: <input type="file" name="file"> <br/>
<br /><br /><input type="submit" value="Upload">
</form>
</body>
</html>
Spring Boot Jar Dependency using Gradle
Find the gradle script for JAR dependency and creating WAR file of the project. Spring boot web and security are being used. build.gradle
apply plugin: 'java'
apply plugin: 'eclipse'
apply plugin: 'war'
archivesBaseName = 'CP'
repositories {
mavenCentral()
}
dependencies {
compile 'org.springframework.boot:spring-boot-starter-web:1.1.4.RELEASE'
compile 'org.springframework.boot:spring-boot-starter-security:1.1.4.RELEASE'
compile 'javax.servlet:jstl:1.2'
compile 'commons-fileupload:commons-fileupload:1.3.1'
}
Deploy in Tomcat 7 To Check Output
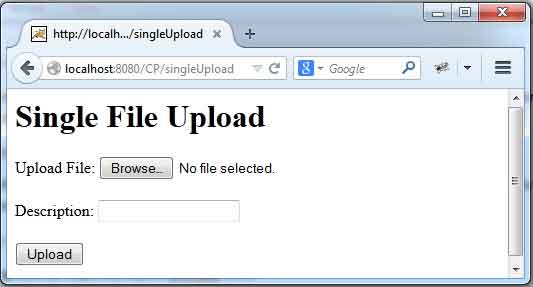
Go to build directory in your project and inside lib you will get WAR file. Deploy in in tomcat and test. In our demo we are using tomcat 7. Single File Upload Output
For single upload use the URL as http://localhost:8080/CP/singleUpload
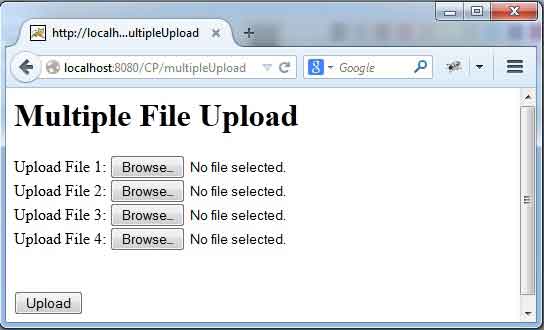
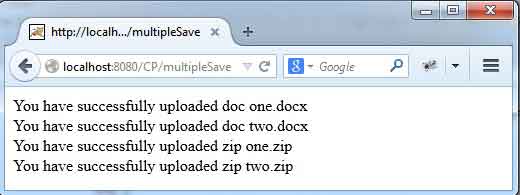
Multiple File Upload Output
For multiple file upload use the URL as http://localhost:8080/CP/multipleUpload
Download Source Code
spring-4-mvc-single-multiple-file-upload-example-with-tomcat.zip

相关文章推荐
- 解决使用Spring Boot、Multipartfile上传文件路径错误问题
- 解决Spring Boot中Multipartfile上传文件路径无效
- 解决spring boot上传文件MultipartFile找不到,报错的问题
- spring-boot上传文件MultiPartFile获取不到文件问题解决
- 使用WebClient上传文件时的错误问题解决
- 使用WebClient上传文件时的错误问题解决和上传例子
- commons-FileUpload文件上传下载,及中文乱码、IE7路径错误问题解决
- Spring Boot——多文件上传大小超限问题解决
- 使用WebClient上传文件时的错误问题解决
- 使用WebClient上传文件时的错误问题解决
- spring-boot上传文件MultiPartFile获取不到文件问题解决
- Spring Boot整合UEditor,解决找不到上传文件的问题
- 使用WebClient上传文件时的错误问题解决
- 解决springboot MultipartFile文件上传遇到的问题
- spring boot 使用MultipartFile实现文件上传报错。
- 使用WebClient上传文件时的错误问题解决
- springboot,feign上传超大文件,超时等问题解决方案
- 解决IE8上传文件时javascript取文件的本地路径的问题C:\fakepath\..
- 解决MVC下使用uploadify上传文件时HttpPostedFileBase为空的问题
- 解决文件无法上传的问题,错误信息:System.IO.DirectoryNotFoundException: Could not find a part of the path.