Nosql数据库之mongodb c++使用实例
2017-10-19 15:21
666 查看
mongodb是一个非关系型高速数据库,由多个文档(相当于关系数据库中的行记录)组成集合,多个集合(相当于关系数据库中的数据表)组成数据库。
使用命令安装或者源码安装mongodb,安装完成后mongod就是mongodb数据库服务的主程序了,指定参数或者配置文件启动命令如下
配置文件里面有ip,端口,数据存储目录的信息:
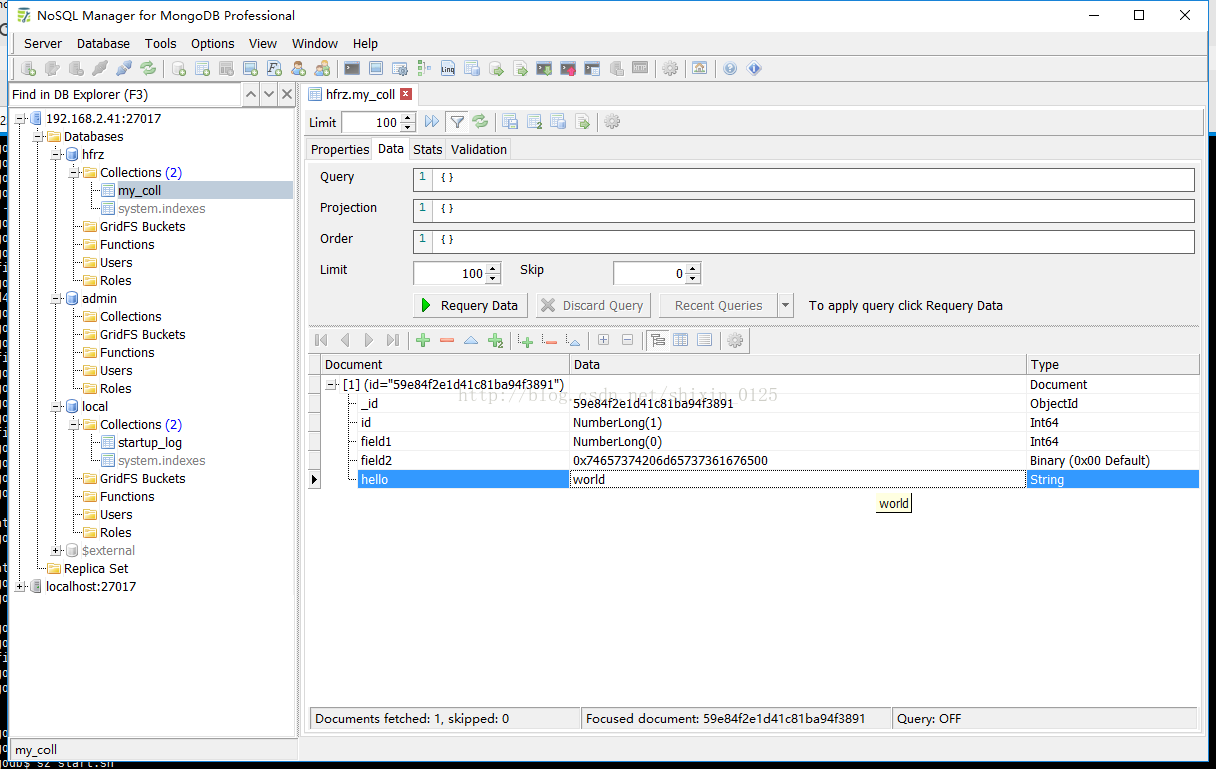
下载一个mongodb的c语言开发驱动包mongo-c-driver-1.3.5,写一个测试程序,插入一个文档

mongodb有很多的可视化工具,使用nosql manager for mongodb就可以在界面上看见刚才插入的文档了,如下图:
使用命令安装或者源码安装mongodb,安装完成后mongod就是mongodb数据库服务的主程序了,指定参数或者配置文件启动命令如下
mongod -f /etc/mongodb.conf或者
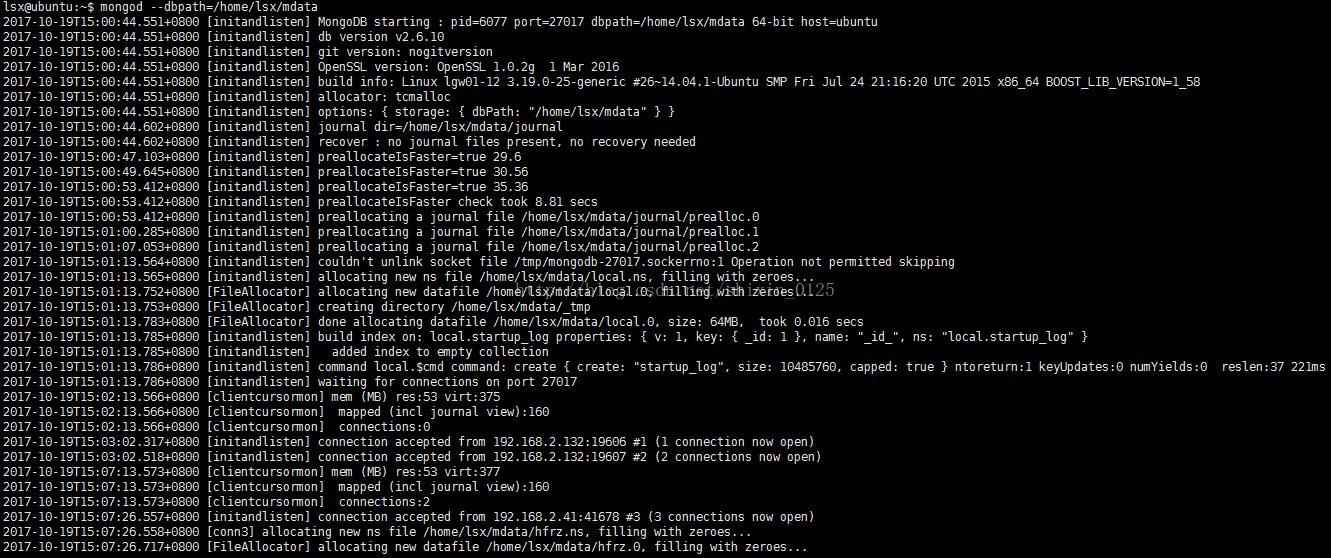
mongod --dbpath=/home/lsx/mdata启动成功后可以在控制台看见一些ip和端口,数据存储目录的信息如下:
配置文件里面有ip,端口,数据存储目录的信息:
# mongodb.conf

# Where to store the data.
dbpath=/var/lib/mongodb

#where to log
logpath=/var/log/mongodb/mongodb.log

logappend=true

bind_ip = 127.0.0.1
#port = 27017

# Enable journaling, http://www.mongodb.org/display/DOCS/Journaling journal=true

# Enables periodic logging of CPU utilization and I/O wait
#cpu = true

# Turn on/off security.  Off is currently the default
#noauth = true
#auth = true

# Verbose logging output.
#verbose = true

# Inspect all client data for validity on receipt (useful for
# developing drivers)
#objcheck = true

# Enable db quota management
#quota = true

# Set oplogging level where n is
#   0=off (default)
#   1=W
#   2=R
#   3=both
#   7=W+some reads
#oplog = 0

# Diagnostic/debugging option
#nocursors = true

# Ignore query hints
#nohints = true

# Disable the HTTP interface (Defaults to localhost:27018).
#nohttpinterface = true

# Turns off server-side scripting.  This will result in greatly limited
# functionality
#noscripting = true

# Turns off table scans.  Any query that would do a table scan fails.
#notablescan = true

# Disable data file preallocation.
#noprealloc = true

# Specify .ns file size for new databases.
# nssize = <size>

# Accout token for Mongo monitoring server.
#mms-token = <token>

# Server name for Mongo monitoring server.
#mms-name = <server-name>

# Ping interval for Mongo monitoring server.
#mms-interval = <seconds>

# Replication Options

# in replicated mongo databases, specify here whether this is a slave or master
#slave = true
#source = master.example.com
# Slave only: specify a single database to replicate
#only = master.example.com
# or
#master = true
#source = slave.example.com

# Address of a server to pair with.
#pairwith = <server:port>
# Address of arbiter server.
#arbiter = <server:port>
# Automatically resync if slave data is stale
#autoresync
# Custom size for replication operation log.
#oplogSize = <MB>
# Size limit for in-memory storage of op ids.
#opIdMem = <bytes>

# SSL options
# Enable SSL on normal ports
#sslOnNormalPorts = true
# SSL Key file and password
#sslPEMKeyFile = /etc/ssl/mongodb.pem
#sslPEMKeyPassword = pass
下载一个mongodb的c语言开发驱动包mongo-c-driver-1.3.5,写一个测试程序,插入一个文档
/* gcc example.c -o example $(pkg-config --cflags --libs libmongoc-1.0) */

/* ./example-client [CONNECTION_STRING [COLLECTION_NAME]] */

#include <mongoc.h>
#include <stdio.h>
#include <stdlib.h>
#include <string.h>

#include "bson-types.h"
int main (int argc, char *argv[])
{
mongoc_client_t *client;
mongoc_collection_t *collection;
mongoc_cursor_t *cursor;
bson_error_t error;
const bson_t *doc;
const char *uristr = "mongodb://192.168.2.41/";
const char *collection_name = "my_coll";
bson_t query;
char *str;

mongoc_init ();

if (argc > 1) {
uristr = argv [1];
}

if (argc > 2) {
collection_name = argv [2];
}

client = mongoc_client_new (uristr);

if (!client) {
fprintf (stderr, "Failed to parse URI.\n");
return EXIT_FAILURE;
}

bson_init (&query);

#if 0
bson_append_utf8 (&query, "hello", -1, "world", -1);
#endif

collection = mongoc_client_get_collection (client, "hfrz", collection_name);
/////////////////////////////////
bson_t *doc2 = bson_new();
BSON_APPEND_INT64(doc2, "id", 1);
BSON_APPEND_INT64(doc2, "field1", 0);
const char *msg = "test message";
BSON_APPEND_BINARY(doc2, "field2", BSON_SUBTYPE_BINARY, (const uint8_t*)(msg), (uint32_t)(strlen(msg)+1));
BSON_APPEND_UTF8 (doc2, "hello", "world");
bool r = mongoc_collection_insert(collection, MONGOC_INSERT_NONE, doc2, NULL, &error);
if (!r)
printf("Insert Failure:%s\n", error.message);
/////////////////////////////////

cursor = mongoc_collection_find (collection,
MONGOC_QUERY_NONE,
0,
0,
0,
&query,
NULL,  /* Fields, NULL for all. */
NULL); /* Read Prefs, NULL for default */

while (mongoc_cursor_next (cursor, &doc)) {
str = bson_as_json (doc, NULL);
fprintf (stdout, "%s\n", str);
bson_free (str);
}

if (mongoc_cursor_error (cursor, &error)) {
fprintf (stderr, "Cursor Failure: %s\n", error.message);
return EXIT_FAILURE;
}

bson_destroy (&query);
mongoc_cursor_destroy (cursor);
mongoc_collection_destroy (collection);
mongoc_client_destroy (client);

mongoc_cleanup ();

return EXIT_SUCCESS;
}
example:example-client.c g++ example-client.c -o example -g -I/usr/local/include/libmongoc-1.0 -I/usr/local/include/libbson-1.0 -L/usr/local/lib -lmongoc-1.0 -lbson-1.0 #$(pkg-config --cflags --libs libmongoc-1.0) clean: rm -f example
mongodb有很多的可视化工具,使用nosql manager for mongodb就可以在界面上看见刚才插入的文档了,如下图:

相关文章推荐
- C++使用ADO连接数据库及其实例
- 详解NoSQL数据库使用实例
- 关系数据库和NoSQL结合使用:MySQL + MongoDB
- 具体解释NoSQL数据库使用实例
- 2.非关系型数据库(Nosql)之mongodb:mongodb显示所有数据库,使用数据库,集合创建(显示和隐式创建),集合查询,初步数据的增删改查,分页
- 纯Python开发的nosql数据库CodernityDB介绍和使用实例
- nosql数据库:mongodb,redis,memcached,其优缺点和使用应用场景?
- 详解NoSQL数据库使用实例
- NoSQL文档型数据库之MongoDb的配置与使用
- 纯Python开发的nosql数据库CodernityDB介绍和使用实例
- NoSQL数据库—MongoDB入门使用和c#客户端的访问
- NoSQL数据库—MongoDB入门使用和c#客户端的访问
- 2.非关系型数据库(Nosql)之mongodb:mongodb显示所有数据库,使用数据库,集合创建(显示和隐式创建),集合查询,初步数据的增删改查,分页
- nosql数据库:mongodb,redis,memcached,其优缺点和使用应用场景?
- levelDB数据库使用及实例 - 高性能nosql存储数据库
- 详解NoSQL数据库使用实例
- NoSQL数据库使用实例
- 使用ADO封装类的数据库程序开发实例
- 以实例说明如何使用C#从数据库中提取数据,按要求自动生成定制的Excel表格?