Spring Boot 快速上手(一)快速搭建
2017-10-01 21:54
651 查看
Spring Boot官网提供了快速搭建Spring Boot项目的方法。
此处缺省将要建立一个基于maven的项目,缺省开发语言为Java,缺省Spring Boot版本号为最新正式版(当前版本号为1.5.7),当然,也可以根据实际情况合理变更以上参数值。

,生成并下载项目代码:
在这里,我们得到了一个压缩文件 spring-boot.zip,压缩文件名取自上面的Artifact项所填参数,解压后可以看到是一个基于maven的项目,可于eclipse中直接导入。
首先,在项目的根包目录下,生成了一个名为SpringBootDemoApplication.java的文件,该文件的命名规则为Name+Application,此即为项目的入口类。
其次,可以看到缺省生成了一个配置文件application.properties,此配置文件在项目启动时会自动加载。
最后,来分析下pom.xml:
① Spring Boot的父级依赖。
② Spring Boot使用的技术依赖。
③ Spring Boot的编译插件。
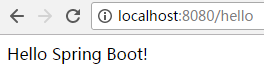
在浏览器地址栏中输入http://localhost:8080/hello,页面结果如下:
1.Spring Boot官网
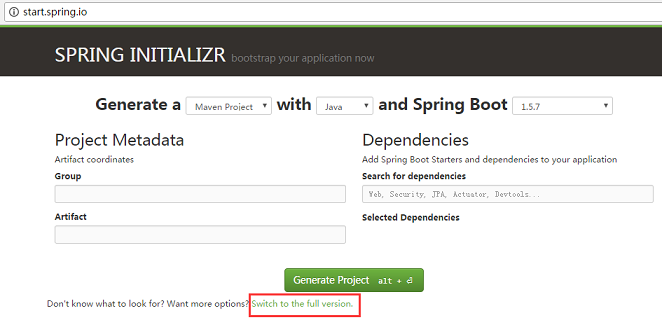
在浏览器地址栏中输入http://start.spring.io,可以看到如下页面:此处缺省将要建立一个基于maven的项目,缺省开发语言为Java,缺省Spring Boot版本号为最新正式版(当前版本号为1.5.7),当然,也可以根据实际情况合理变更以上参数值。
2.完善项目信息
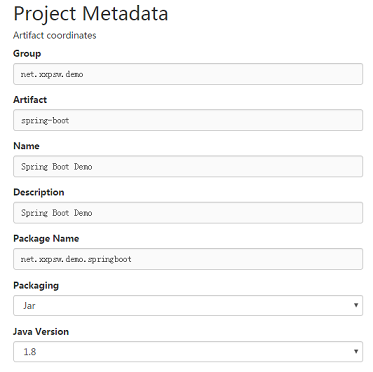
单击红色框中的 Switch to the full version,完善项目信息,示例如下:3.选择项目使用的技术
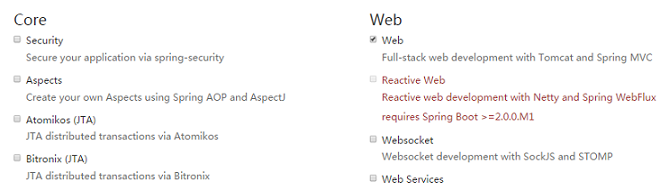
这里以选择web为例:4.生成项目代码
点击,生成并下载项目代码:
在这里,我们得到了一个压缩文件 spring-boot.zip,压缩文件名取自上面的Artifact项所填参数,解压后可以看到是一个基于maven的项目,可于eclipse中直接导入。
5.简单分析下生成的maven项目
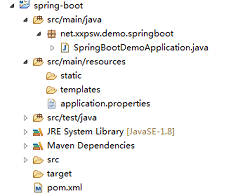
eclipse中导入maven项目后,结构如下:首先,在项目的根包目录下,生成了一个名为SpringBootDemoApplication.java的文件,该文件的命名规则为Name+Application,此即为项目的入口类。
package net.xxpsw.demo.springboot;

import org.springframework.boot.SpringApplication;
import org.springframework.boot.autoconfigure.SpringBootApplication;

@SpringBootApplication
public class SpringBootDemoApplication {

public static void main(String[] args) {
SpringApplication.run(SpringBootDemoApplication.class, args);
}
}
此处@SpringBootApplication开启Spring Boot的自动配置,main方法是项目启动的入口。其次,可以看到缺省生成了一个配置文件application.properties,此配置文件在项目启动时会自动加载。
最后,来分析下pom.xml:
① Spring Boot的父级依赖。
<parent>
<groupId>org.springframework.boot</groupId>
<artifactId>spring-boot-starter-parent</artifactId>
<version>1.5.7.RELEASE</version>
<relativePath/>
</parent>
spring-boot-starter-parent提供了相关的Maven依赖,使用之后,相关的依赖包可以省去版本声明。
② Spring Boot使用的技术依赖。
<dependencies>
<dependency>
<groupId>org.springframework.boot</groupId>
<artifactId>spring-boot-starter-web</artifactId>
</dependency>

<dependency>
<groupId>org.springframework.boot</group
98bc
Id>
<artifactId>spring-boot-starter-test</artifactId>
<scope>test</scope>
</dependency>
</dependencies>
此处生成的是web及test的依赖,如果需要添加更多,可于\.m2\repository\org\springframework\boot\spring-boot-dependencies\1.5.7.RELEASE\spring-boot-dependencies-1.5.7.RELEASE.pom中查找。
③ Spring Boot的编译插件。
<build>
<plugins>
<plugin>
<groupId>org.springframework.boot</groupId>
<artifactId>spring-boot-maven-plugin</artifactId>
</plugin>
</plugins>
</build>
6.Hello Spring Boot
现在来启动并感受下Spring Boot,在根包下新建类HelloSpringBootControllerpackage net.xxpsw.demo.springboot;
import org.springframework.web.bind.annotation.RequestMapping;
import org.springframework.web.bind.annotation.RestController;
@RestController
public class HelloSpringBootController {
@RequestMapping("hello")
public String sayHello() {
return "Hello Spring Boot!";
}
}右键菜单选择Java Application 运行 SpringBootDemoApplication,在打印台中可找到如下信息:[ main] s.b.c.e.t.TomcatEmbeddedServletContainer : Tomcat started on port(s): 8080 (http)此处Spring Boot使用内置的Tomcat启动服务,端口号为8080。
在浏览器地址栏中输入http://localhost:8080/hello,页面结果如下:

相关文章推荐
- 【SpringBoot教程二】:RESTfull API简单项目的快速搭建
- SpringBoot(一)_快速实战搭建项目
- 使用idea快速搭建springboot
- 快速搭建Spring-boot Demo
- 通过Spring Boot + Mybatis + Redis快速搭建现代化Web项目
- Spring Boot+JPA+Mysql+ThymeLeaf快速构建CURD系统(二)搭建SpringBoot工程
- Spring Boot的快速搭建(IDEA)
- Spring Boot 2.0 WebFlux 上手系列课程:快速入门(一)
- [置顶] WEB开发----Spring Boot项目快速搭建
- spring boot 搭建的一个企业级快速开发脚手架
- spring-boot快速搭建解析
- SpringBoot 快速搭建
- SPRING BOOT快速搭建WEB应用教程(二)—HELLOWORLD
- Spring Boot+JPA+Mysql+ThymeLeaf快速构建CURD系统(二)搭建SpringBoot工程
- Spring Boot 快速上手(二)基本配置
- 【SpringBoot】2.快速搭建一个SpringBoot应用
- Spring Boot 初探[1]--快速搭建Spring Boot项目
- spring boot / cloud (十七) 快速搭建注册中心和配置中心
- Spring Boot 学习(一) 快速搭建SpringBoot 项目