Linux下nginx的安装及点直播使用示范
2017-09-28 16:30
459 查看
Linux下nginx的安装及点直播使用示范
一、准备工作:Red hat 5.5
nginx-1.11.5.tar.gz、openssl-1.0.1i.tar.gz、zlib-1.2.8.tar.gz、pcre-8.32.tar.gz、yamdi-1.4.tar.gz、nginx_mod_h264_streaming-2.2.7.tar.gz、nginx-rtmp-module-master.zip
二、安装步骤:
1、安装相关工具包:
1)zlib
# tar xvf zlib-1.2.8.tar.gz
# cd zlib-1.2.8
# ./configure
# make
# make install
# cd ..
2)pcre
# tar zxvf pcre-8.32.tar.gz
# cd pcre-8.32
# ./configure
# make
# make install
# cd ..
3)yamdi
yadmi的作用是为flv文件添加关键帧,才能实现拖动播放
# tar xzvf yamdi-1.4.tar.gz
# cd yamdi-1.4
# make
# make install
# cd ..
4)openssl
# tar -zxvf openssl-1.0.1i.tar.gz
# cd openssl-1.0.1i
# ./config
# make
# make install
2、配置安装nginx
1)配置编译安装nginx
# unzip nginx-rtmp-module-master.zip
# tar zxvfnginx_mod_h264_streaming-2.2.7.tar.gz
#tar zxvf nginx-1.11.5.tar.gz
#cd nginx-1.11.5
#./configure --prefix=/home/nginx--add-module=../nginx_mod_h264_streaming-2.2.7 --with-pcre=/source/pcre-8.32--with-zlib=/source/zlib-1.2.8 --with-openssl=/source/openssl-1.0.1i--add-module=../nginx-rtmp-module-master
出现如下情况,即配置完成:
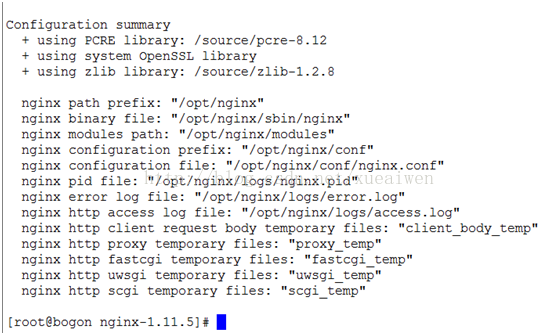
#make
遇到如下错误:
1、

打开nginx_mod_h264_streaming-2.2.7/src/ngx_http_streaming_module.c文件,修改第158行如下:
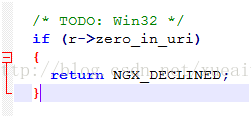
改为:
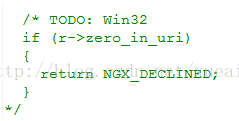
2、

找到nginx-1.11.5/objs/Makefile文件,将里面的-Werror去掉。
重新#make
#make install
2)修改配置文件
#vi /home/nginx/conf/nginx.conf
改为如下内容:
#user nobody;
worker_processes 1;
#error_log logs/error.log;
#error_log logs/error.log notice;
#error_log logs/error.log info;
#pid logs/nginx.pid;
worker_rlimit_nofile 51200;
events {
use epoll;
worker_connections 51200;
}
rtmp {
server {
listen 1935;
chunk_size 4000;
application vod {
play /opt;
}
application myapp {
live on;
}
}
}
http {
include mime.types;
default_type application/octet-stream;
#log_format main '$remote_addr - $remote_user [$time_local]"$request" '
# '$status$body_bytes_sent "$http_referer" '
# '"$http_user_agent" "$http_x_forwarded_for"';
#access_log logs/access.log main;
sendfile on;
#tcp_nopush on;
#keepalive_timeout 0;
keepalive_timeout 65;
#gzip on;
add_header Access-Control-Allow-Origin *;
add_header Access-Control-Allow-Headers X-Requested-With;
add_header Access-Control-Allow-Methods GET,POST,OPTIONS;
server {
listen 81;
server_name localhost;
#charset koi8-r;
#access_log logs/host.access.log main;
location / {
root html;
index index.html index.htm;
}
#error_page 404 /404.html;
# redirect server error pages to the static page /50x.html
#
error_page 500 502 503 504 /50x.html;
location = /50x.html {
root html;
}
# proxy the PHP scripts to Apache listening on 127.0.0.1:80
#
#location ~ \.php$ {
# proxy_pass http://127.0.0.1;
#}
# pass the PHP scripts to FastCGI server listening on 127.0.0.1:9000
#
#location ~ \.php$ {
# root html;
# fastcgi_pass 127.0.0.1:9000;
# fastcgi_index index.php;
# fastcgi_param SCRIPT_FILENAME /scripts$fastcgi_script_name;
# include fastcgi_params;
#}
# deny access to .htaccess files, if Apache's document root
# concurs with nginx's one
#
#location ~ /\.ht {
# deny all;
#}
}
#another virtual host using mix of IP-, name-, and port-based configuration
#
#server {
# listen 8000;
# listen somename:8080;
# server_name somename alias another.alias;
# location / {
# root html;
# index index.html index.htm;
# }
#}
#HTTPS server
#
#server {
# listen 443 ssl;
# server_name localhost;
# ssl_certificate cert.pem;
# ssl_certificate_key cert.key;
# ssl_session_cache shared:SSL:1m;
# ssl_session_timeout 5m;
# ssl_ciphers HIGH:!aNULL:!MD5;
# ssl_prefer_server_ciphers on;
# location / {
# root html;
# index index.html index.htm;
# }
#}
#VOD for FLV by RTMP
server
{
listen 8081;
location /stat
{
rtmp_stat all;
rtmp_stat_stylesheet stat.xsl;
}
location /stat.xsl
{
root /opt/nginx_http_rtmp/nginx-rtmp-module/;
}
}
}
3)设置跨域
在/home/nginx/html/目录下建立crossdomain.xml文件,填写如下内容:
<?xml version="1.0"encoding="utf-8"?>
<cross-domain-policy>
<allow-access-fromdomain="*"/>
</cross-domain-policy>
保存。
4)打开nginx测试:
#cd /home/nginx/sbin
#./nginx
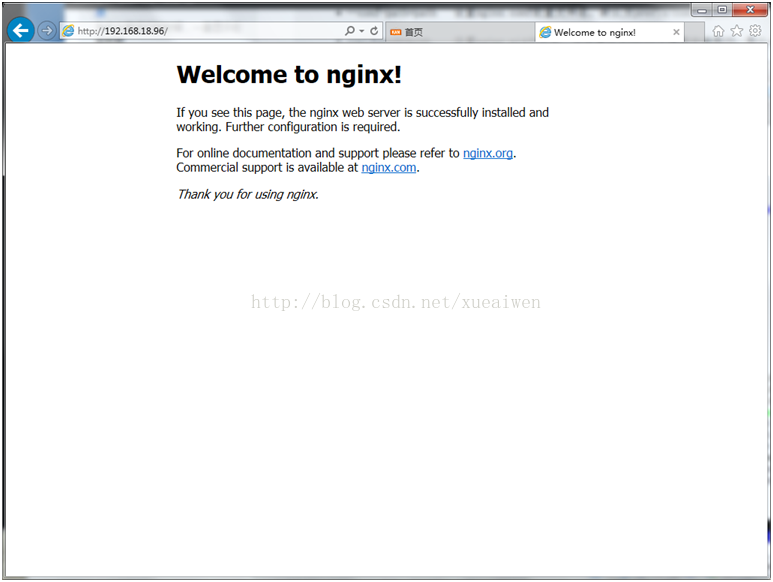
打开浏览器输入http://ip可看到nginx已经启动的画面,如下:
9、或者执行
netstat -ltn
可以看到80端口已经启用
结束nginx执行
./nginx -s stop或者./nginx -squit
一个是强制快速结束,一个是温柔结束.
完成
三、使用:
1、rtmp点播与直播:
在/home/nginx/conf/nginx.conf里,下面的代码负责点播与直播
rtmp {
server {
listen 1935;
chunk_size 4000;
application vod {
play /opt;
}
application live {
live on;
}
}
}
点播:将视频文件放到/opt目录下,vlc里输入:
rtmp://192.168.0.204/vod/sample.mp4
直播:
ffmpeg -re -i /test.mp4 -vcodec copy -f flvrtmp://192.168.0.204/live/test
rtmp://192.168.0.204/live/test
2、HLS的点播、直播
点播:
在/home/nginx/conf/nginx.conf里,下面的代码负责点播
http {
include mime.types;
default_type application/octet-stream;
#log_format main '$remote_addr - $remote_user [$time_local]"$request" '
# '$status$body_bytes_sent "$http_referer" '
# '"$http_user_agent" "$http_x_forwarded_for"';
#access_log logs/access.log main;
sendfile on;
#tcp_nopush on;
#keepalive_timeout 0;
keepalive_timeout 65;
#gzip on;
server {
listen 80;
server_name localhost;
#charset koi8-r;
#access_log logs/host.access.log main;
location / {
root html;
index index.html index.htm;
}
(1)使用ffmpeg将mp4格式文件转成TS格式文件:
ffmpeg -y -i input.mp4 -vcodec copy -acodeccopy -vbsf h264_mp4toannexb output.ts
(2)使用ffmpeg将TS文件切成ts分片并产生m3u8文件:
ffmpeg -i file.ts -c copy -map 0 -f segment-segment_list playlist.m3u8 -segment_time 2 output%03d.ts
将所得的ts分片和m3u8文件放到/home/nginx/html 目录下
(3)vlc输入[ http://192.168.0.204:80/playlist.m3u8 ]即可看到点播视频
直播:
(1)执行:ffmpeg -re -i rtsp://192.168.0.185:8557/h264 -codec copy -map 0 -fsegment -segment_list /video/playlist.m3u8 -segment_list_flags +live-segment_time 10 /video/out%03d.ts
(2)将所得的ts分片和m3u8文件放到/home/nginx/html 目录下
(3)vlc输入[ http://192.168.0.204:80/playlist.m3u8 ]即可看到点播视频
参考网站:
http://blog.chinaunix.net/uid-26000296-id-4335063.html
http://blog.chinaunix.net/uid-26000296-id-4335079.html

相关文章推荐
- linux--nginx安装-使用教程
- Linux/Centos下安装与使用Nginx(1)
- Nginx在Linux和windows下的安装使用
- Linux(CentOS6.7)下Nginx的安装和使用
- NGINX的原理、安装、配置以及使用tomcat在linux上搭载集群环境
- Linux下的Nginx安装及使用(笔记)
- nginx在linux上从安装到使用
- linux上nginx的安装启动以及配合php-fpm的使用
- cool-2018-03-09-linux下通过nginx安装rtmp视频服务器-包括推流和拉流-直播和点播
- Linux环境下安装Nginx及其使用
- Linux上nginx的安装启动以及配合php-fpm的使用
- LINUX——关于nginx的安装配置以及如何简易的使用
- Linux命令:nginx及php和mysql安装使用
- Nginx在Linux和windows下的安装使用
- linux上nginx的安装启动以及配合php-fpm的使用
- linux 安装+使用 Nginx
- Nginx在Linux和windows下的安装使用
- linux上nginx安装和使用
- linux下安装nginx详解和与tomcat的使用
- 搭建rtmp直播流服务之1:使用nginx搭建rtmp直播流服务器(nginx-rtmp模块的安装以及rtmp直播流配置)