分布式缓存技术redis学习系列----深入理解Spring Redis的使用
2017-09-21 09:22
1051 查看
摘要: 关于spring redis框架的使用,网上的例子很多很多。但是在自己最近一段时间的使用中,发现这些教程都是入门教程,包括很多的使用方法,与spring redis丰富的api大相径庭,真是浪费了这么优秀的一个框架。

关于spring redis框架的使用,网上的例子很多很多。但是在自己最近一段时间的使用中,发现这些教程都是入门教程,包括很多的使用方法,与spring redis丰富的api大相径庭,真是浪费了这么优秀的一个框架。
Spring-data-redis为spring-data模块中对redis的支持部分,简称为“SDR”,提供了基于jedis客户端API的高度封装以及与spring容器的整合,事实上jedis客户端已经足够简单和轻量级,而spring-data-redis反而具有“过度设计”的嫌疑。
jedis客户端在编程实施方面存在如下不足:
1) connection管理缺乏自动化,connection-pool的设计缺少必要的容器支持。
2) 数据操作需要关注“序列化”/“反序列化”,因为jedis的客户端API接受的数据类型为string和byte,对结构化数据(json,xml,pojo)操作需要额外的支持。
3) 事务操作纯粹为硬编码
4) pub/sub功能,缺乏必要的设计模式支持,对于开发者而言需要关注的太多。
1. Redis使用场景
Redis是一个开源的使用ANSI C语言编写、支持网络、可基于内存亦可持久化的日志型、Key-Value数据库,并提供多种语言的API。
我们都知道,在日常的应用中,数据库瓶颈是最容易出现的。数据量太大和频繁的查询,由于磁盘IO性能的局限性,导致项目的性能越来越低。
这时候,基于内存的缓存框架,就能解决我们很多问题。例如Memcache,Redis等。将一些频繁使用的数据放入缓存读取,大大降低了数据库的负担。提升了系统的性能。其实,对于hibernate以及Mybatis的二级缓存,是同样的道理。利用内存高速的读写速度,来解决硬盘的瓶颈。
2. 配置使用redis
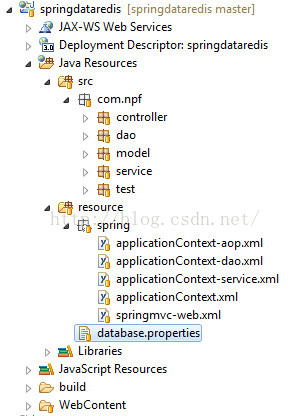
项目的整体结构如下:
在applicationContext-dao.xml中配置如下:
<?xml version="1.0" encoding="UTF-8"?>
<beans xmlns="http://www.springframework.org/schema/beans"
xmlns:xsi="http://www.w3.org/2001/XMLSchema-instance"
xmlns:context="http://www.springframework.org/schema/context"
xmlns:mongo="http://www.springframework.org/schema/data/mongo"
xmlns:aop="http://www.springframework.org/schema/aop"
xsi:schemaLocation="http://www.springframework.org/schema/beans
http://www.springframework.org/schema/beans/spring-beans-3.0.xsd
http://www.springframework.org/schema/data/mongo
http://www.springframework.org/schema/data/mongo/spring-mongo.xsd
http://www.springframework.org/schema/context
http://www.springframework.org/schema/context/spring-context-3.0.xsd
http://www.springframework.org/schema/aop
http://www.springframework.org/schema/aop/spring-aop-3.0.xsd">
<context:property-placeholder location="classpath:database.properties" />
<bean id="poolConfig" class="redis.clients.jedis.JedisPoolConfig">
<property name="maxIdle" value="${redis.maxIdle}" />
<property name="maxTotal" value="${redis.maxActive}" />
<property name="maxWaitMillis" value="${redis.maxWait}" />
<property name="testOnBorrow" value="${redis.testOnBorrow}" />
</bean>
<bean id="connectionFactory" class="org.springframework.data.redis.connection.jedis.JedisConnectionFactory">
<property name="hostName" value="${redis.host}"/>
<property name="port" value="${redis.port}"/>
<property name="password" value="${redis.pass}"/>
<property name="poolConfig" ref="poolConfig"/>
</bean>
<bean id="stringSerializer" class="org.springframework.data.redis.serializer.StringRedisSerializer"/>
<bean id="hashSerializer" class="org.springframework.data.redis.serializer.JdkSerializationRedisSerializer"/>
<bean id="redisTemplate" class="org.springframework.data.redis.core.RedisTemplate">
<property name="connectionFactory" ref="connectionFactory" />
<property name="keySerializer" ref="stringSerializer"/>
<property name="valueSerializer" ref="stringSerializer"/>
<property name="hashKeySerializer" ref="stringSerializer" />
<property name="hashValueSerializer" ref="hashSerializer"/>
</bean>
</beans>
复制代码
database.properties配置文件如下:
redis.maxIdle=10
redis.maxActive=20
redis.maxWait=10000
redis.testOnBorrow=true
redis.host=192.168.1.76
redis.port=6379
redis.pass=password1
复制代码
spring-data-redis提供了多种serializer策略,这对使用jedis的开发者而言,实在是非常便捷。sdr提供了4种内置的serializer:
JdkSerializationRedisSerializer:使用JDK的序列化手段(serializable接口,ObjectInputStrean,ObjectOutputStream),数据以字节流存储,POJO对象的存取场景,使用JDK本身序列化机制,将pojo类通过ObjectInputStream/ObjectOutputStream进行序列化操作,最终redis-server中将存储字节序列,是目前最常用的序列化策略。
StringRedisSerializer:字符串编码,数据以string存储,Key或者value为字符串的场景,根据指定的charset对数据的字节序列编码成string,是“new String(bytes, charset)”和“string.getBytes(charset)”的直接封装。是最轻量级和高效的策略。
JacksonJsonRedisSerializer:json格式存储,jackson-json工具提供了javabean与json之间的转换能力,可以将pojo实例序列化成json格式存储在redis中,也可以将json格式的数据转换成pojo实例。因为jackson工具在序列化和反序列化时,需要明确指定Class类型,因此此策略封装起来稍微复杂。【需要jackson-mapper-asl工具支持】
OxmSerializer:xml格式存储,提供了将javabean与xml之间的转换能力,目前可用的三方支持包括jaxb,apache-xmlbeans;redis存储的数据将是xml工具。不过使用此策略,编程将会有些难度,而且效率最低;不建议使用。【需要spring-oxm模块的支持】
其中JdkSerializationRedisSerializer和StringRedisSerializer是最基础的序列化策略,其中“JacksonJsonRedisSerializer”与“OxmSerializer”都是基于stirng存储,因此它们是较为“高级”的序列化(最终还是使用string解析以及构建java对象)。
针对“序列化和发序列化”中JdkSerializationRedisSerializer和StringRedisSerializer是最基础的策略,原则上,我们可以将数据存储为任何格式以便应用程序存取和解析(其中应用包括app,hadoop等其他工具),不过在设计时仍然不推荐直接使用“JacksonJsonRedisSerializer”和“OxmSerializer”,因为无论是json还是xml,他们本身仍然是String。如果你的数据需要被第三方工具解析,那么数据应该使用StringRedisSerializer而不是JdkSerializationRedisSerializer。
RedisTemplate中需要声明4种serializer,默认为“JdkSerializationRedisSerializer”:
1) keySerializer :对于普通K-V操作时,key采取的序列化策略
2) valueSerializer:value采取的序列化策略
3) hashKeySerializer: 在hash数据结构中,hash-key的序列化策略
4) hashValueSerializer:hash-value的序列化策略
无论如何,建议key/hashKey采用StringRedisSerializer。
spring-data-redis针对jedis提供了如下功能:
1. 连接池自动管理,提供了一个高度封装的“RedisTemplate”类
2. 针对jedis客户端中大量api进行了归类封装,将同一类型操作封装为operation接口
ValueOperations:简单K-V操作
SetOperations:set类型数据操作
ZSetOperations:zset类型数据操作
HashOperations:针对map类型的数据操作
ListOperations:针对list类型的数据操作
3. 提供了对key的“bound”(绑定)便捷化操作API,可以通过bound封装指定的key,然后进行一系列的操作而无须“显式”的再次指定Key,即BoundKeyOperations:
BoundValueOperations
BoundSetOperations
BoundListOperations
BoundSetOperations
BoundHashOperations
3. RedisTemplate的使用
这个类作为一个模版类,提供了很多快速使用redis的api,而不需要自己来维护连接,事务。最初的时候,我创建的BaseRedisDao是继承自这个类的。继承的好处是我的每个Dao中,都可以自由的控制序列化器,自由的控制自己是否需要事务,这个先不需要了解,跟着我目前的这种配置方法来即可。template提供了一系列的operation,比如valueOperation,HashOperation,ListOperation,SetOperation等,用来操作不同数据类型的Redis。并且,RedisTemplate还提供了对应的*OperationsEditor,用来通过RedisTemplate直接注入对应的Operation。
核心代码:
package com.npf.dao.impl;
import java.util.ArrayList;
import java.util.List;
import java.util.Map;
import java.util.Map.Entry;
import javax.annotation.Resource;
import org.springframework.beans.factory.annotation.Autowired;
import org.springframework.data.redis.core.HashOperations;
import org.springframework.data.redis.core.RedisTemplate;
import org.springframework.stereotype.Repository;
import com.npf.dao.StudentDao;
import com.npf.model.Student;
@Repository
public class StudentDaoImpl implements StudentDao{
@Autowired
private RedisTemplate<String,Student> redisTemplate;
@Resource(name="redisTemplate")
private HashOperations<String,String,Student> opsForHash;
public static final String STUDENT = "student";
@Override
public void save(Student student) {
opsForHash.put(STUDENT, student.getId(), student);
}
@Override
public Student find(String id) {
Student student = opsForHash.get(STUDENT, id);
return student;
}
@Override
public void delete(String id) {
opsForHash.delete(STUDENT, id);
}
@Override
public void update(Student student) {
opsForHash.put(STUDENT, student.getId(), student);
}
@Override
public List<Student> findAll() {
Map<String, Student> entries = opsForHash.entries(STUDENT);
List<Student> stuList = new ArrayList<Student>();
for(Entry<String, Student> entry : entries.entrySet()){
stuList.add(entry.getValue());
}
return stuList;
}
}
复制代码
控制层代码如下:
package com.npf.controller;
import java.util.List;
import java.util.UUID;
import org.springframework.beans.factory.annotation.Autowired;
import org.springframework.stereotype.Controller;
import org.springframework.ui.Model;
import org.springframework.web.bind.annotation.RequestMapping;
import org.springframework.web.bind.annotation.RequestParam;
import com.npf.model.Student;
import com.npf.service.StudentService;
@Controller
public class StudentController {
@Autowired
private StudentService studentService;
@RequestMapping("/student/save")
public String saveStudent(Student student){
String id = UUID.randomUUID().toString();
System.out.println(id);
student.setId(id);
studentService.save(student);
return "redirect:/student/find/all";
}
@RequestMapping("/student/update")
public String updateStudent(Student student){
studentService.update(student);
return "redirect:/student/find/all";
}
@RequestMapping("/student/to/save/form")
public String toSaveStudentForm(){
return "save";
}
@RequestMapping("/student/delete")
public String deleteStudent(@RequestParam("id") String id){
studentService.delete(id);
return "redirect:/student/find/all";
}
@RequestMapping("/student/to/update/form")
public String toUpdateStudentForm(@RequestParam("id") String id,Model model){
Student stu = studentService.find(id);
model.addAttribute("stu", stu);
return "update";
}
@RequestMapping("/student/find/all")
public String findStudents(Model model){
List<Student> stuList = studentService.findAll();
model.addAttribute("stuList", stuList);
return "list";
}
}
复制代码
关于spring redis框架的使用,网上的例子很多很多。但是在自己最近一段时间的使用中,发现这些教程都是入门教程,包括很多的使用方法,与spring redis丰富的api大相径庭,真是浪费了这么优秀的一个框架。
Spring-data-redis为spring-data模块中对redis的支持部分,简称为“SDR”,提供了基于jedis客户端API的高度封装以及与spring容器的整合,事实上jedis客户端已经足够简单和轻量级,而spring-data-redis反而具有“过度设计”的嫌疑。
jedis客户端在编程实施方面存在如下不足:
1) connection管理缺乏自动化,connection-pool的设计缺少必要的容器支持。
2) 数据操作需要关注“序列化”/“反序列化”,因为jedis的客户端API接受的数据类型为string和byte,对结构化数据(json,xml,pojo)操作需要额外的支持。
3) 事务操作纯粹为硬编码
4) pub/sub功能,缺乏必要的设计模式支持,对于开发者而言需要关注的太多。
1. Redis使用场景
Redis是一个开源的使用ANSI C语言编写、支持网络、可基于内存亦可持久化的日志型、Key-Value数据库,并提供多种语言的API。
我们都知道,在日常的应用中,数据库瓶颈是最容易出现的。数据量太大和频繁的查询,由于磁盘IO性能的局限性,导致项目的性能越来越低。
这时候,基于内存的缓存框架,就能解决我们很多问题。例如Memcache,Redis等。将一些频繁使用的数据放入缓存读取,大大降低了数据库的负担。提升了系统的性能。其实,对于hibernate以及Mybatis的二级缓存,是同样的道理。利用内存高速的读写速度,来解决硬盘的瓶颈。
2. 配置使用redis
项目的整体结构如下:
在applicationContext-dao.xml中配置如下:
<?xml version="1.0" encoding="UTF-8"?>
<beans xmlns="http://www.springframework.org/schema/beans"
xmlns:xsi="http://www.w3.org/2001/XMLSchema-instance"
xmlns:context="http://www.springframework.org/schema/context"
xmlns:mongo="http://www.springframework.org/schema/data/mongo"
xmlns:aop="http://www.springframework.org/schema/aop"
xsi:schemaLocation="http://www.springframework.org/schema/beans
http://www.springframework.org/schema/beans/spring-beans-3.0.xsd
http://www.springframework.org/schema/data/mongo
http://www.springframework.org/schema/data/mongo/spring-mongo.xsd
http://www.springframework.org/schema/context
http://www.springframework.org/schema/context/spring-context-3.0.xsd
http://www.springframework.org/schema/aop
http://www.springframework.org/schema/aop/spring-aop-3.0.xsd">
<context:property-placeholder location="classpath:database.properties" />
<bean id="poolConfig" class="redis.clients.jedis.JedisPoolConfig">
<property name="maxIdle" value="${redis.maxIdle}" />
<property name="maxTotal" value="${redis.maxActive}" />
<property name="maxWaitMillis" value="${redis.maxWait}" />
<property name="testOnBorrow" value="${redis.testOnBorrow}" />
</bean>
<bean id="connectionFactory" class="org.springframework.data.redis.connection.jedis.JedisConnectionFactory">
<property name="hostName" value="${redis.host}"/>
<property name="port" value="${redis.port}"/>
<property name="password" value="${redis.pass}"/>
<property name="poolConfig" ref="poolConfig"/>
</bean>
<bean id="stringSerializer" class="org.springframework.data.redis.serializer.StringRedisSerializer"/>
<bean id="hashSerializer" class="org.springframework.data.redis.serializer.JdkSerializationRedisSerializer"/>
<bean id="redisTemplate" class="org.springframework.data.redis.core.RedisTemplate">
<property name="connectionFactory" ref="connectionFactory" />
<property name="keySerializer" ref="stringSerializer"/>
<property name="valueSerializer" ref="stringSerializer"/>
<property name="hashKeySerializer" ref="stringSerializer" />
<property name="hashValueSerializer" ref="hashSerializer"/>
</bean>
</beans>
复制代码
database.properties配置文件如下:
redis.maxIdle=10
redis.maxActive=20
redis.maxWait=10000
redis.testOnBorrow=true
redis.host=192.168.1.76
redis.port=6379
redis.pass=password1
复制代码
spring-data-redis提供了多种serializer策略,这对使用jedis的开发者而言,实在是非常便捷。sdr提供了4种内置的serializer:
JdkSerializationRedisSerializer:使用JDK的序列化手段(serializable接口,ObjectInputStrean,ObjectOutputStream),数据以字节流存储,POJO对象的存取场景,使用JDK本身序列化机制,将pojo类通过ObjectInputStream/ObjectOutputStream进行序列化操作,最终redis-server中将存储字节序列,是目前最常用的序列化策略。
StringRedisSerializer:字符串编码,数据以string存储,Key或者value为字符串的场景,根据指定的charset对数据的字节序列编码成string,是“new String(bytes, charset)”和“string.getBytes(charset)”的直接封装。是最轻量级和高效的策略。
JacksonJsonRedisSerializer:json格式存储,jackson-json工具提供了javabean与json之间的转换能力,可以将pojo实例序列化成json格式存储在redis中,也可以将json格式的数据转换成pojo实例。因为jackson工具在序列化和反序列化时,需要明确指定Class类型,因此此策略封装起来稍微复杂。【需要jackson-mapper-asl工具支持】
OxmSerializer:xml格式存储,提供了将javabean与xml之间的转换能力,目前可用的三方支持包括jaxb,apache-xmlbeans;redis存储的数据将是xml工具。不过使用此策略,编程将会有些难度,而且效率最低;不建议使用。【需要spring-oxm模块的支持】
其中JdkSerializationRedisSerializer和StringRedisSerializer是最基础的序列化策略,其中“JacksonJsonRedisSerializer”与“OxmSerializer”都是基于stirng存储,因此它们是较为“高级”的序列化(最终还是使用string解析以及构建java对象)。
针对“序列化和发序列化”中JdkSerializationRedisSerializer和StringRedisSerializer是最基础的策略,原则上,我们可以将数据存储为任何格式以便应用程序存取和解析(其中应用包括app,hadoop等其他工具),不过在设计时仍然不推荐直接使用“JacksonJsonRedisSerializer”和“OxmSerializer”,因为无论是json还是xml,他们本身仍然是String。如果你的数据需要被第三方工具解析,那么数据应该使用StringRedisSerializer而不是JdkSerializationRedisSerializer。
RedisTemplate中需要声明4种serializer,默认为“JdkSerializationRedisSerializer”:
1) keySerializer :对于普通K-V操作时,key采取的序列化策略
2) valueSerializer:value采取的序列化策略
3) hashKeySerializer: 在hash数据结构中,hash-key的序列化策略
4) hashValueSerializer:hash-value的序列化策略
无论如何,建议key/hashKey采用StringRedisSerializer。
spring-data-redis针对jedis提供了如下功能:
1. 连接池自动管理,提供了一个高度封装的“RedisTemplate”类
2. 针对jedis客户端中大量api进行了归类封装,将同一类型操作封装为operation接口
ValueOperations:简单K-V操作
SetOperations:set类型数据操作
ZSetOperations:zset类型数据操作
HashOperations:针对map类型的数据操作
ListOperations:针对list类型的数据操作
3. 提供了对key的“bound”(绑定)便捷化操作API,可以通过bound封装指定的key,然后进行一系列的操作而无须“显式”的再次指定Key,即BoundKeyOperations:
BoundValueOperations
BoundSetOperations
BoundListOperations
BoundSetOperations
BoundHashOperations
3. RedisTemplate的使用
这个类作为一个模版类,提供了很多快速使用redis的api,而不需要自己来维护连接,事务。最初的时候,我创建的BaseRedisDao是继承自这个类的。继承的好处是我的每个Dao中,都可以自由的控制序列化器,自由的控制自己是否需要事务,这个先不需要了解,跟着我目前的这种配置方法来即可。template提供了一系列的operation,比如valueOperation,HashOperation,ListOperation,SetOperation等,用来操作不同数据类型的Redis。并且,RedisTemplate还提供了对应的*OperationsEditor,用来通过RedisTemplate直接注入对应的Operation。
核心代码:
package com.npf.dao.impl;
import java.util.ArrayList;
import java.util.List;
import java.util.Map;
import java.util.Map.Entry;
import javax.annotation.Resource;
import org.springframework.beans.factory.annotation.Autowired;
import org.springframework.data.redis.core.HashOperations;
import org.springframework.data.redis.core.RedisTemplate;
import org.springframework.stereotype.Repository;
import com.npf.dao.StudentDao;
import com.npf.model.Student;
@Repository
public class StudentDaoImpl implements StudentDao{
@Autowired
private RedisTemplate<String,Student> redisTemplate;
@Resource(name="redisTemplate")
private HashOperations<String,String,Student> opsForHash;
public static final String STUDENT = "student";
@Override
public void save(Student student) {
opsForHash.put(STUDENT, student.getId(), student);
}
@Override
public Student find(String id) {
Student student = opsForHash.get(STUDENT, id);
return student;
}
@Override
public void delete(String id) {
opsForHash.delete(STUDENT, id);
}
@Override
public void update(Student student) {
opsForHash.put(STUDENT, student.getId(), student);
}
@Override
public List<Student> findAll() {
Map<String, Student> entries = opsForHash.entries(STUDENT);
List<Student> stuList = new ArrayList<Student>();
for(Entry<String, Student> entry : entries.entrySet()){
stuList.add(entry.getValue());
}
return stuList;
}
}
复制代码
控制层代码如下:
package com.npf.controller;
import java.util.List;
import java.util.UUID;
import org.springframework.beans.factory.annotation.Autowired;
import org.springframework.stereotype.Controller;
import org.springframework.ui.Model;
import org.springframework.web.bind.annotation.RequestMapping;
import org.springframework.web.bind.annotation.RequestParam;
import com.npf.model.Student;
import com.npf.service.StudentService;
@Controller
public class StudentController {
@Autowired
private StudentService studentService;
@RequestMapping("/student/save")
public String saveStudent(Student student){
String id = UUID.randomUUID().toString();
System.out.println(id);
student.setId(id);
studentService.save(student);
return "redirect:/student/find/all";
}
@RequestMapping("/student/update")
public String updateStudent(Student student){
studentService.update(student);
return "redirect:/student/find/all";
}
@RequestMapping("/student/to/save/form")
public String toSaveStudentForm(){
return "save";
}
@RequestMapping("/student/delete")
public String deleteStudent(@RequestParam("id") String id){
studentService.delete(id);
return "redirect:/student/find/all";
}
@RequestMapping("/student/to/update/form")
public String toUpdateStudentForm(@RequestParam("id") String id,Model model){
Student stu = studentService.find(id);
model.addAttribute("stu", stu);
return "update";
}
@RequestMapping("/student/find/all")
public String findStudents(Model model){
List<Student> stuList = studentService.findAll();
model.addAttribute("stuList", stuList);
return "list";
}
}
复制代码

相关文章推荐
- 分布式缓存技术redis学习系列----深入理解Spring Redis的使用
- 分布式缓存技术redis学习系列----深入理解Spring Redis的使用
- 分布式缓存技术redis学习系列----深入理解Spring Redis的使用
- 分布式缓存技术redis学习系列(六)—— 深入理解Spring Redis的使用
- 技术文章 | 分布式缓存技术redis学习系列----深入理解Spring Redis的使用
- 分布式缓存技术redis学习系列----深入理解Spring Redis的使用
- 分布式缓存技术redis学习系列(五)——spring-data-redis与JedisPool的区别、使用ShardedJedisPool与spring集成的实现及一致性哈希分析
- 分布式缓存技术redis学习系列(五)——spring-data-redis与JedisPool的区别、使用ShardedJedisPool与spring集成的实现及一致性哈希分析
- 分布式缓存技术redis学习系列(五)——spring-data-redis与JedisPool的区别、使用ShardedJedisPool与spring集成的实现及一致性哈希分析
- 分布式缓存技术redis学习系列(五)——redis实战(redis与spring整合,分布式锁实现)
- 分布式缓存技术redis学习系列(五)——redis实战(redis与spring整合,分布式锁实现)
- 分布式缓存技术redis学习系列(五)——redis实战(redis与spring整合,分布式锁实现)
- 分布式缓存技术redis学习系列(九)——Redis主从实现读写分离
- 分布式缓存技术redis学习系列(一)——redis简介以及linux上的安装
- 分布式缓存技术redis学习系列(二)——详细讲解redis数据结构(内存模型)以及常用命令
- 分布式缓存技术redis学习系列(四)——redis高级应用(集群搭建、集群分区原理、集群操作)
- 分布式缓存技术redis学习系列(三)——redis高级应用(主从、事务与锁、持久化)
- 分布式缓存技术redis学习系列(三)——redis高级应用(主从、事务与锁、持久化)
- 分布式缓存技术redis学习系列(三)——redis高级应用(主从、事务与锁、持久化)
- 深入理解Spring Redis的使用 (九)、通过Redis 实现 分布式锁 的 BUG,以及和数据库加锁的性能测试