Spring详解(四)------注解配置IOC、DI
2017-09-05 09:08
387 查看
Annotation(注解)是JDK1.5及以后版本引入的。它可以用于创建文档,跟踪代码中的依赖性,甚至执行基本编译时检查。注解是以‘@注解名’在代码中存在的。
前面讲解 IOC 和 DI 都是通过 xml 文件来进行配置的,我们发现 xml 配置还是比较麻烦的,那么如何简化配置呢?答案就是使用注解!
PS:本篇博客源码下载链接:http://pan.baidu.com/s/1geBMPrX 密码:z7ku
如果我们不使用注解,通过前面讲解的,要想让 Spring 容器帮我们产生 Person 对象,我们要进行如下配置:
applicationContext.xml 配置:
如果使用注解呢?
第一步:在 applicationContext.xml 中引入命名空间
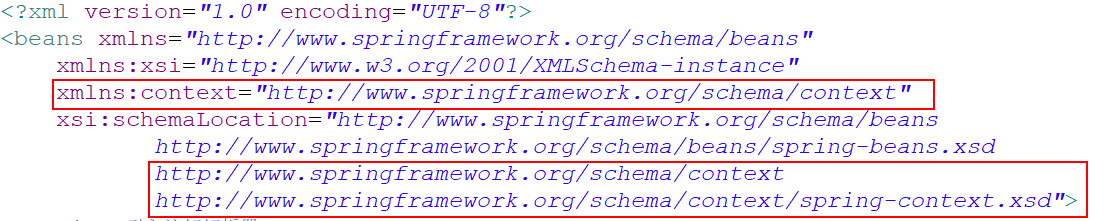
这里我们简单讲解一下这里引入的命名空间,简单来说就是用来约束xml文件格式的。第一个 xmlns:context ,这表示标签格式应该是 <context:标签名>
第二步:在 applicationContext.xml 文件中引入注解扫描器
base-package:表示含有注解类的包名
如果扫描多个包,则上面的代码书写多行,改变 base-package 里面的内容即可!
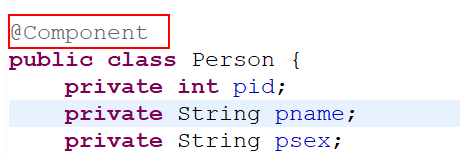
第三步:在 Person 类中添加注解@Component
第四步:测试
如果看完上面的注解配置,你一脸懵逼,那没关系,我们下面来详细讲解。
@Component
如果一个类上加了@Component注解,就会进行如下的法则
如果其value属性的值为""
@Component
public class Person {}
等价于
<bean id="person" class="..Person">
如果其value属性的值不为""
@Component("p")
public class Person {}
等价于
<bean id="p" class="..Person">
那么这就很好理解测试程序中,我们直接 context.getBean("person") 这样写。
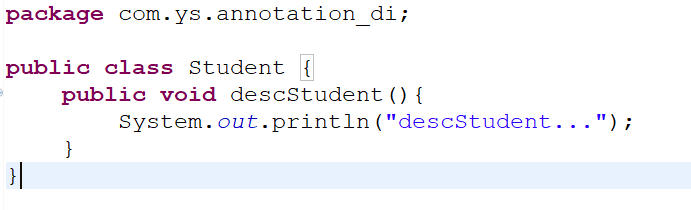
首先创建一个 学生类 Student.java
然后在 Person 类中添加一个属性 Student
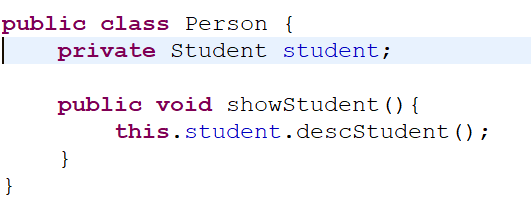
那么我们如何获取 Person 对象,并调用 showStudent()方法呢?这个问题简化就是如何给属性 Student 实例化,也就是依赖注入
不使用注解:
使用注解:
@Resource注解以后,判断该注解name的属性是否为""(name没有写)
①、如果没有写name属性,则会让属性的名称的值和spring配置文件bean中ID的值做匹配(如果没有进行配置,也和注解@Component进行匹配),如果匹配成功则赋值,如果匹配不成功,则会按照spring配置文件class类型进行匹配,如果匹配不成功,则报错
②、如果有name属性,则会按照name属性的值和spring的bean中ID进行匹配,匹配成功,则赋值,不成功则报错
第一步:创建接口 PersonDao
第二步:创建一个接口实现类 PersonDaoImplOne
第三步:创建PersonService
注意:这里我们在 private PesronDao personDao 上面添加了注解 @Autowired,它首先会根据类型去匹配,PersonDao 是一个接口,它的实现类是 PesronDaoImpOne,那么这里的意思就是:
PersonDao personDao = new PersonDaoImpOne();
那么问题来了,如果 PersonDao 的实现类有多个呢?我们创建第一个实现类 PersonDaoImpTwo
如果还是向上面那样写,那么测试就会报错。怎么解决呢?
第一种方法:更改名称

第二种方法:@Autowired 和 @Qualifier("名称") 配合使用
在使用@Autowired时,首先在容器中查询对应类型的bean
如果查询结果刚好为一个,就将该bean装配给@Autowired指定的数据
如果查询的结果不止一个,那么@Autowired会根据名称来查找。
如果查询的结果为空,那么会抛出异常。解决方法时,使用required=false
前面讲解 IOC 和 DI 都是通过 xml 文件来进行配置的,我们发现 xml 配置还是比较麻烦的,那么如何简化配置呢?答案就是使用注解!
PS:本篇博客源码下载链接:http://pan.baidu.com/s/1geBMPrX 密码:z7ku
1、注解 @Component
我们这里有个类 Personpackage com.ys.annotation;
public class Person {
private int pid;
private String pname;
private String psex;
public int getPid() {
return pid;
}
public void setPid(int pid) {
this.pid = pid;
}
public String getPname() {
return pname;
}
public void setPname(String pname) {
this.pname = pname;
}
public String getPsex() {
return psex;
}
public void setPsex(String psex) {
this.psex = psex;
}
}如果我们不使用注解,通过前面讲解的,要想让 Spring 容器帮我们产生 Person 对象,我们要进行如下配置:
applicationContext.xml 配置:
<bean id="person" class="com.ys.annotation.Person"></bean>
如果使用注解呢?
第一步:在 applicationContext.xml 中引入命名空间
这里我们简单讲解一下这里引入的命名空间,简单来说就是用来约束xml文件格式的。第一个 xmlns:context ,这表示标签格式应该是 <context:标签名>
第二步:在 applicationContext.xml 文件中引入注解扫描器
<!-- 组件扫描,扫描含有注解的类 -->
<context:component-scan base-package="com.ys.annotation"></context:component-scan>
base-package:表示含有注解类的包名
如果扫描多个包,则上面的代码书写多行,改变 base-package 里面的内容即可!
第三步:在 Person 类中添加注解@Component
第四步:测试
@Test
public void testAnnotation(){
//1、启动 spring 容器
//2、从 spring 容器中取出数据
//3、通过对象调用方法
ApplicationContext context =
new ClassPathXmlApplicationContext("applicationContext.xml");
Person person = (Person) context.getBean("person");
System.out.println(person.getPname());
}
如果看完上面的注解配置,你一脸懵逼,那没关系,我们下面来详细讲解。
@Component
如果一个类上加了@Component注解,就会进行如下的法则
如果其value属性的值为""
@Component
public class Person {}
等价于
<bean id="person" class="..Person">
如果其value属性的值不为""
@Component("p")
public class Person {}
等价于
<bean id="p" class="..Person">
那么这就很好理解测试程序中,我们直接 context.getBean("person") 这样写。
2、@Repository @Service @Controller
此外:下面三个注解是 @Component 注解的衍生注解,功能一样@Repository :dao层 @Service:service层 @Controller:web层
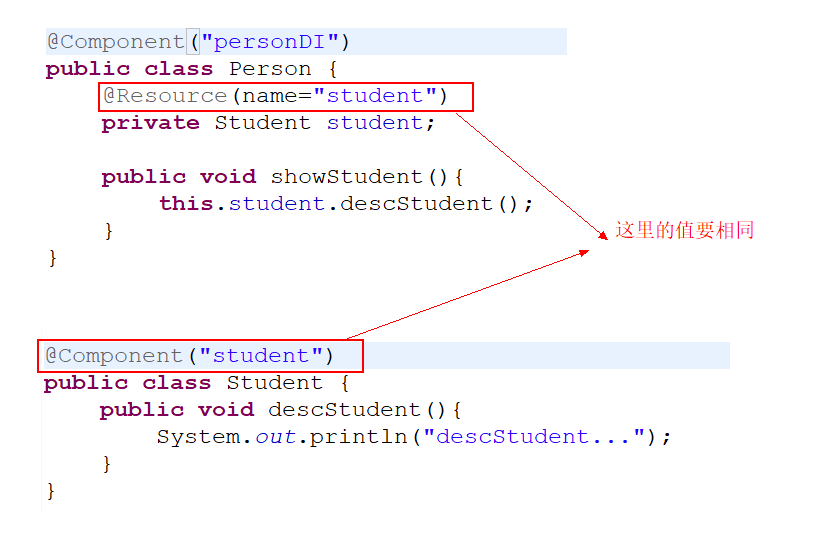
3、注解 @Resource
@Resource 注解,它可以对类成员变量、方法及构造函数进行标注,完成自动装配的工作。 通过 @Resource 的使用来消除 set ,get方法。首先创建一个 学生类 Student.java
然后在 Person 类中添加一个属性 Student
那么我们如何获取 Person 对象,并调用 showStudent()方法呢?这个问题简化就是如何给属性 Student 实例化,也就是依赖注入
不使用注解:
<property name="students">
<ref bean="student"/>
</property>
<bean id="student" class="com.ys.annotation_di.Student"></bean>
使用注解:
@Resource注解以后,判断该注解name的属性是否为""(name没有写)
①、如果没有写name属性,则会让属性的名称的值和spring配置文件bean中ID的值做匹配(如果没有进行配置,也和注解@Component进行匹配),如果匹配成功则赋值,如果匹配不成功,则会按照spring配置文件class类型进行匹配,如果匹配不成功,则报错
②、如果有name属性,则会按照name属性的值和spring的bean中ID进行匹配,匹配成功,则赋值,不成功则报错
4、注解 @Autowired
功能和注解 @Resource 一样,可以对类成员变量、方法及构造函数进行标注,完成自动装配的工作。只不过注解@Resource 是按照名称来进行装配,而@Autowired 则是按照类型来进行装配。第一步:创建接口 PersonDao
package com.ys.autowired;

public interface PersonDao {

public void savePerson();

}
第二步:创建一个接口实现类 PersonDaoImplOne
package com.ys.autowired;

import org.springframework.stereotype.Component;

@Component("personDaoImplOne")
public class PersonDaoImplOne implements PersonDao{

@Override
public void savePerson() {
System.out.println("save Person One");

}

}
第三步:创建PersonService
package com.ys.autowired;

import org.springframework.beans.factory.annotation.Autowired;
import org.springframework.stereotype.Service;

@Service("personService")
public class PersonService{
@Autowired
private PersonDao personDao;

public void savePerson() {
this.personDao.savePerson();
}

}
注意:这里我们在 private PesronDao personDao 上面添加了注解 @Autowired,它首先会根据类型去匹配,PersonDao 是一个接口,它的实现类是 PesronDaoImpOne,那么这里的意思就是:
PersonDao personDao = new PersonDaoImpOne();
那么问题来了,如果 PersonDao 的实现类有多个呢?我们创建第一个实现类 PersonDaoImpTwo
package com.ys.autowired;

import org.springframework.stereotype.Component;

@Component("personDaoImplTwo")
public class PersonDaoImplTwo implements PersonDao{

@Override
public void savePerson() {
System.out.println("save Person Two");

}

}
如果还是向上面那样写,那么测试就会报错。怎么解决呢?
第一种方法:更改名称
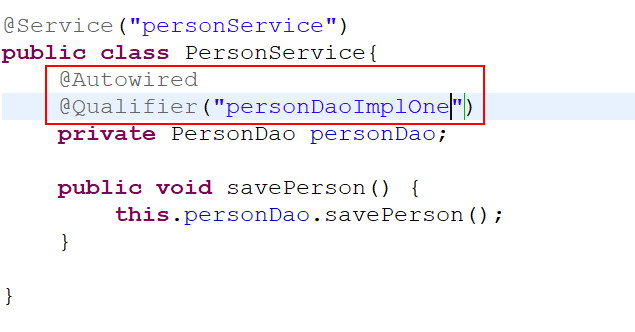
第二种方法:@Autowired 和 @Qualifier("名称") 配合使用
在使用@Autowired时,首先在容器中查询对应类型的bean
如果查询结果刚好为一个,就将该bean装配给@Autowired指定的数据
如果查询的结果不止一个,那么@Autowired会根据名称来查找。
如果查询的结果为空,那么会抛出异常。解决方法时,使用required=false

相关文章推荐
- 依赖注入(DI)和控制反转(IOC)的详细讲解 spring容器(spring注解实现,而不是xml配置文件)
- Spring之依赖注入(IOC、DI)详解---配置Bean
- Spring学习(1):控制反转(IoC)和依赖注入(DI)的详解以及注解(annotation)开发入门案例
- Spring回顾(二)注解实现IoC和DI
- Spring详解(四)------注解配置IOC、DI
- Spring(三):IoC容器装配Bean(xml配置方式和注解方式)
- Spring概述、框架搭建、相关概念、配置详解(XML)和配置详解(注解)
- SpringCloud SpringBoot mybatis 分布式微服务(十五)Spring Boot中使用MyBatis注解配置详解
- Sprinp-IOC和spring基本配置详解
- Spring Boot中使用MyBatis注解配置详解
- spring学习总结(六):IOC & DI 配置Bean之作用域、加载外部属性文件、SPEL
- Spring AOP注解通过@Autowired,@Resource,@Qualifier,@PostConstruct,@PreDestroy注入属性的配置文件详解
- Java程序员从笨鸟到菜鸟之(七十)细谈Spring(三)IOC和spring基本配置详解
- spring中注解配置IOC失败异常
- Spring学习-06:IOC容器装配Bean(xml配置方式)详解
- Spring详解(四)------注解配置IOC、DI
- [原创]java WEB学习笔记97:Spring学习---Spring 中的 Bean 配置:IOC 和 DI
- Spring学习——(二)IOC、DI以及常用xml配置
- 注解方式配置Spring实现Ioc
- 通过注解方式配置Spring实现Ioc