Android实现触摸校正功能
2017-08-29 08:55
447 查看
当我第一次听到这个需求的时候,内心是迷茫的。触摸校正是个什么鬼,这个术语好像好多年之前才会有。想了想应该是电阻屏时代吧。然后又查资料知道了Android不是电容屏吗,是不需要触摸校正的,而只有当年的电阻屏才需要触摸校正。这下我懵了,因为网上各种关于android触摸校正的资料都很少,还有很多是需要在源码环境改源码的,或者是通过aidl方式去做。(当时为了弄出来一个IWindowManager可是各种入坑啊!)好了,废话不多说,进入正题:
进入正题之前先给效果图吧,因为我为人比较厚道。

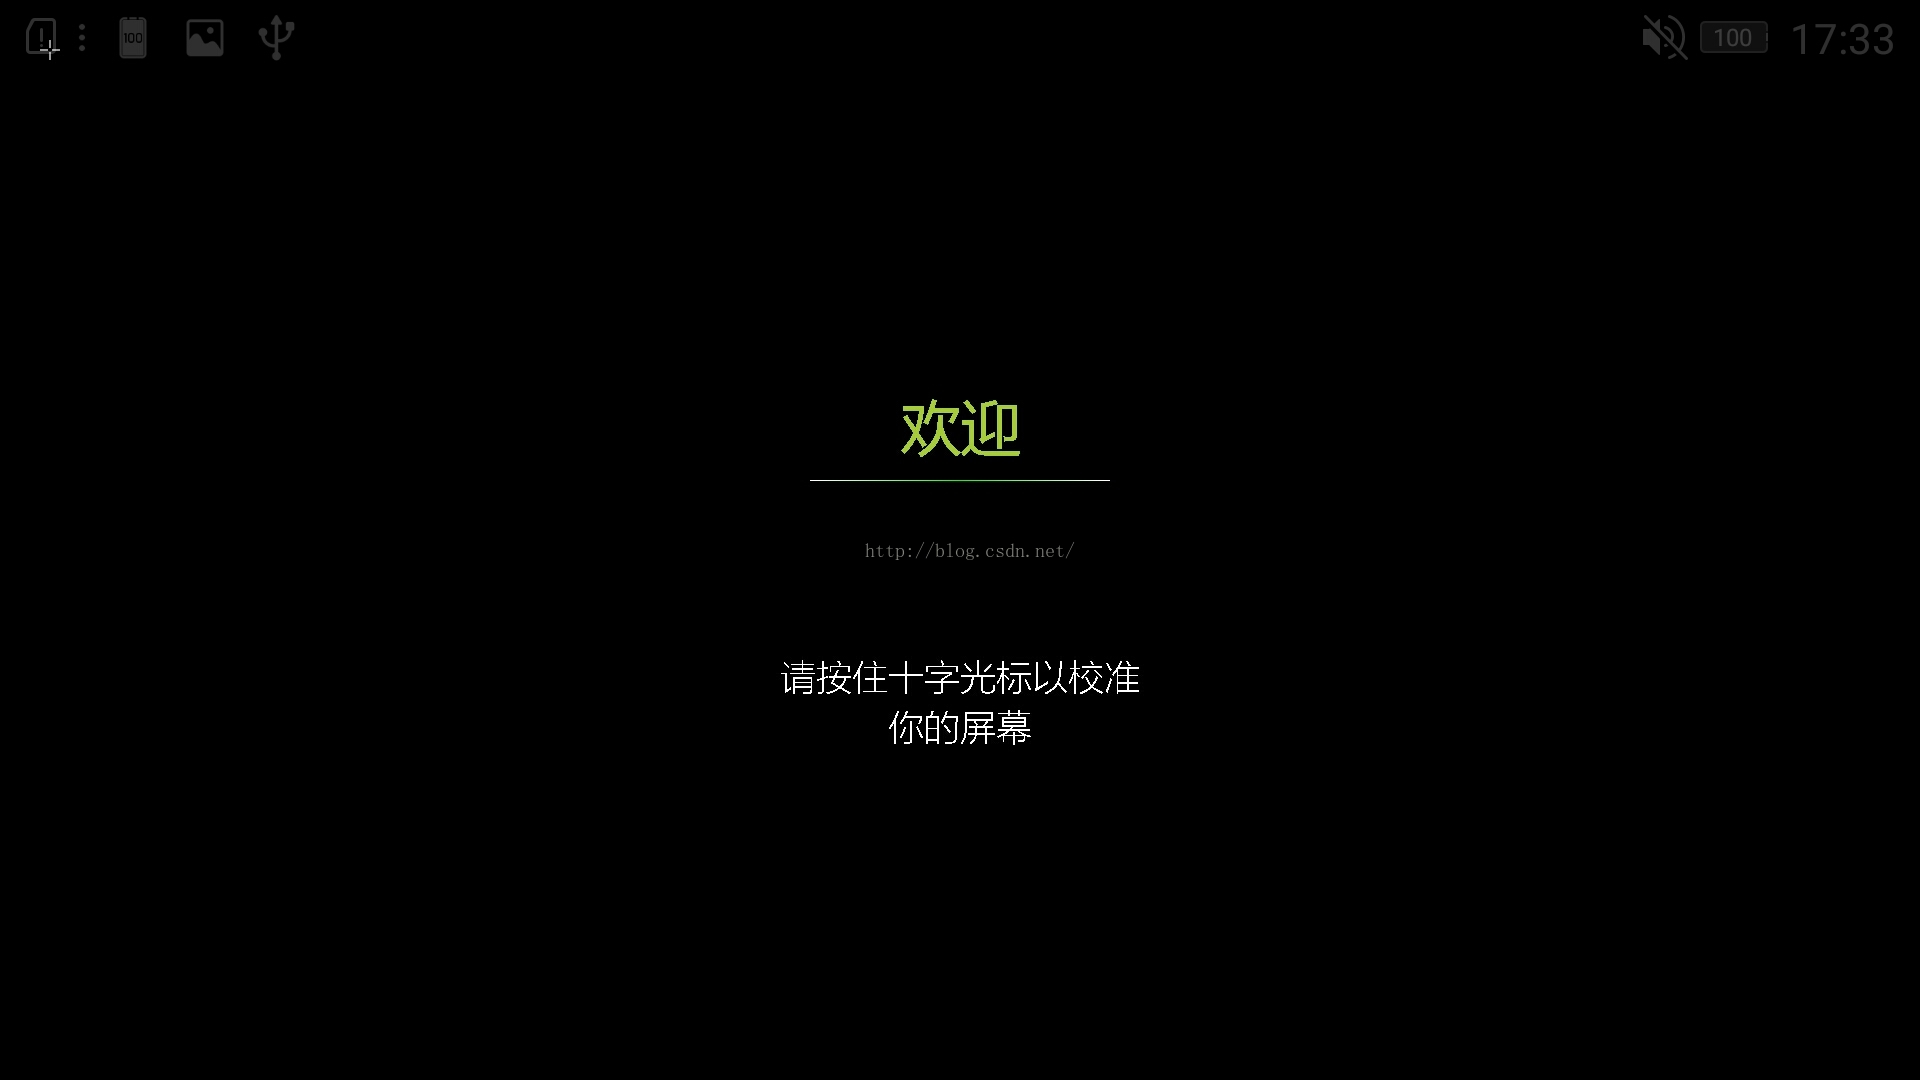
这一版触摸校正功能只用到了一个CalibrationActivity,onCreate里首先获取到了当前屏幕的宽高,
然后会有一个初始化要触摸点的坐标的方法:
接着就开始布局了,是new的一个自定义View:
构造函数如下:
接下来我要说的重点:是在onDraw方法里,因为原本这个触摸校正是没有界面的,只有5个触摸点,还是自己绘制的,所以我想在原有基础上不妨碍正常功能的同时,又能增加一个界面,之前试过几次,界面是弄出来了,但是会把原来的触摸点给遮住,就是空有其表,功能完全不能实现了,因此尝试过不少方法后,还是选择了canvas来绘制出我想要的效果:
前方高能预警,修改界面核心onDraw方法如下:
此处主要是结合了坐标系,才能把你想要的效果摆放到正确的位置中去,因为居中显示其实在xml是很容易实现的,一个gravity=center就行,但是在代码里,特别现在还是在onDraw里,就不能这么干了,因为试了好多次都不能居中显示。
首先确定好要显示的字数,然后setTextSize,确定好字体大小,接着就调用canvas.drawText进行绘制了,
参数1为x轴坐标点,参数2位y轴坐标点,参数3为画笔的实例p。
如果想要居中,就是要自己算字数和字体大小,然后用屏幕宽度一减就ok了,算法不难,可以自己试试。
然后因为原本xml中是一个横线的图片作为分隔,很好看,但是这里onDraw里面不好弄图片(也许是我不知道),我就自己画了一条线,并且还弄出了渐变的效果,虽不及原图,但也六七不离八了。
CalibrationActivity.Java 代码如下:
[java] view
plain copy
public class CalibrationActivity extends BaseActivity {
static final int SAMPLE_COUNTS = 5;
static final int POINT_DEGREE = 2;
static final int FACTOR_COUNTS = 7;
static final int TOP_LEFT = 0;
static final int TOP_RIGHT = 1;
static final int BOTTOM_RIGHT = 2;
static final int BOTTOM_LEFT = 3;
static final int CENTER = 4;
static final int X_AXIS = 0;
static final int Y_AXIS = 1;
static final int EDGE_GAP = 50;
static final String CALIBRATION_FILE = "/data/pointercal";
static final String TAG = "CalibrationActivity";
static final boolean DEBUG = true;
private int X_RES;
private int Y_RES;
private Display dpy;
private calibration cal;
@Override
protected void onCreate(Bundle savedInstanceState) {
super.onCreate(savedInstanceState);
cal = new calibration();
dpy = ((WindowManager) getSystemService(WINDOW_SERVICE)).getDefaultDisplay();
X_RES = dpy.getWidth();
Y_RES = dpy.getHeight();
initScreenPoints();
setContentView(new CalibrationView(this));
}
class calibration {
int x[] = new int[5];
int y[] = new int[5];
int xfb[] = new int[5];
int yfb[] = new int[5];
int a[] = new int[7];
}
// TopLeft-->TopRight-->BottomRight-->BottomLeft-->Center
// For 240 * 320 resolution, we use 50 pixel as edge gap
private boolean initScreenPoints() {
cal.xfb[TOP_LEFT] = EDGE_GAP;                // TopLeft
cal.yfb[TOP_LEFT] = EDGE_GAP;

cal.xfb[TOP_RIGHT] = X_RES - EDGE_GAP;        // TopRight
cal.yfb[TOP_RIGHT] = EDGE_GAP;

cal.xfb[BOTTOM_RIGHT] = X_RES - EDGE_GAP;    // BottomRight
cal.yfb[BOTTOM_RIGHT] = Y_RES - EDGE_GAP;

cal.xfb[BOTTOM_LEFT] = EDGE_GAP;            // BottomLeft
cal.yfb[BOTTOM_LEFT] = Y_RES - EDGE_GAP;

cal.xfb[CENTER] = X_RES / 2;                // Center
cal.yfb[CENTER] = Y_RES / 2;
return true;
}
private boolean perform_calibration() {
float n, x, y, x2, y2, xy, z, zx, zy;
float det, a, b, c, e, f, g;
float scaling = (float) 65536.0;
n = x = y = x2 = y2 = xy = 0;
for (int i = 0; i < SAMPLE_COUNTS; i++) {
n += 1.0;
x += (float) cal.x[i];
y += (float) cal.y[i];
x2 += (float) (cal.x[i] * cal.x[i]);
y2 += (float) (cal.y[i] * cal.y[i]);
xy += (float) (cal.x[i] * cal.y[i]);
}
det = n * (x2 * y2 - xy * xy) + x * (xy * y - x * y2) + y * (x * xy - y * x2);
if (det < 0.1 && det > -0.1) {
Log.w(TAG, "determinant is too small, det =" + det);
return false;
}
if (DEBUG) {
Log.i(TAG, "(n,x,y,x2,y2,xy,det)=("
+ n + ","
+ x + ","
+ y + ","
+ x2 + ","
+ y2 + ","
+ xy + ","
+ det + ")");
}
a = (x2 * y2 - xy * xy) / det;
b = (xy * y - x * y2) / det;
c = (x * xy - y * x2) / det;
e = (n * y2 - y * y) / det;
f = (x * y - n * xy) / det;
g = (n * x2 - x * x) / det;
Log.i(TAG, "(a,b,c,e,f,g)=("
+ a + ","
+ b + ","
+ c + ","
+ e + ","
+ f + ","
+ g + ")");
// Get sums for x calibration
z = zx = zy = 0;
for (int i = 0; i < SAMPLE_COUNTS; i++) {
z += (float) cal.xfb[i];
zx += (float) (cal.xfb[i] * cal.x[i]);
zy += (float) (cal.xfb[i] * cal.y[i]);
}
// Now multiply out to get the calibration for X coordination
cal.a[0] = (int) ((a * z + b * zx + c * zy) * (scaling));
cal.a[1] = (int) ((b * z + e * zx + f * zy) * (scaling));
cal.a[2] = (int) ((c * z + f * zx + g * zy) * (scaling));
// Get sums for y calibration
z = zx = zy = 0;
for (int i = 0; i < SAMPLE_COUNTS; i++) {
z += (float) cal.yfb[i];
zx += (float) (cal.yfb[i] * cal.x[i]);
zy += (float) (cal.yfb[i] * cal.y[i]);
}
// Now multiply out to get the calibration for Y coordination
cal.a[3] = (int) ((a * z + b * zx + c * zy) * (scaling));
cal.a[4] = (int) ((b * z + e * zx + f * zy) * (scaling));
cal.a[5] = (int) ((c * z + f * zx + g * zy) * (scaling));
cal.a[6] = (int) scaling;
return true;
}
private boolean saveCalibrationResult() {
FileOutputStream fos;
String res = "";
// save the calibration factor in file system for InputDevice
try {
fos = openFileOutput("pointercal.txt", Context.MODE_PRIVATE);
res = String.format("%d %d %d %d %d %d %d", cal.a[1], cal.a[2], cal.a[0], cal.a[4], cal.a[5], cal.a[3], cal.a[6]);
if (DEBUG) {
Log.i(TAG, "calibration result=" + res);
}
fos.write(res.getBytes());
fos.close();
} catch (FileNotFoundException e1) {
// TODO Auto-generated catch block
e1.printStackTrace();
Log.w(TAG, "open calibration file write error: " + CALIBRATION_FILE);
} catch (IOException e) {
// TODO Auto-generated catch block
e.printStackTrace();
}
return true;
}
public class CalibrationView extends View {
private Canvas cv;
private Paint paint;
private Bitmap bmp;
private int screen_pos;
private Context mContext;
public CalibrationView(Context c) {
super(c);
// set full screen and no title
requestWindowFeature(Window.FEATURE_NO_TITLE);
getWindow().setFlags(WindowManager.LayoutParams.FLAG_FULLSCREEN,
WindowManager.LayoutParams.FLAG_FULLSCREEN);
mContext = c;
paint = new Paint();
paint.setDither(true);
paint.setAntiAlias(true); ////抗锯齿,如果没有调用这个方法,写上去的字不饱满,不美观,看地不太清楚
paint.setStrokeWidth(2); //设置空心线宽
paint.setColor(Color.WHITE);
paint.setStyle(Paint.Style.STROKE); //设置画笔风格,空心或者实心。
bmp = Bitmap.createBitmap(X_RES, Y_RES, Bitmap.Config.ARGB_8888);
cv = new Canvas(bmp);
screen_pos = 0;
drawCalibrationCross(screen_pos);
}
protected void onDraw(Canvas canvas) {
canvas.drawColor(Color.BLACK);
canvas.drawBitmap(bmp, 0, 0, null);
//“欢迎”字体大小
float txt_welcome_size = 60;
//“欢迎”字数
float txt_welcome_count = 2;
//"请按住十字光标以校准"字体大小
float txt_content_size = 36;
//"请按住十字光标以校准"字数
float txt_content1_count = 10;
//"你的屏幕"字数
float txt_content2_count = 4;
//"欢迎"
Paint p = new Paint();
p.setTextSize(txt_welcome_size);
p.setFakeBoldText(true);
p.setColor(getResources().getColor(R.color.text_Welcome));
canvas.drawText("欢迎",
(X_RES / 2) - (txt_welcome_size / 2) - txt_welcome_size / 2,
Y_RES / 2 - txt_welcome_size - 30,
p);
//"请按住光标中央以校准"
p.setFakeBoldText(false);
p.setColor(getResources().getColor(R.color.text_content1));
p.setTextSize(txt_content_size);
//参数2(X_RES / 2 - (txt_content_size / 2 * txt_content1_count)):当前屏幕宽度的一半减去字数
canvas.drawText("请按住十字光标以校准",
X_RES / 2 - (txt_content_size / 2 * txt_content1_count),
Y_RES / 2 + 150,
p);
//"你的屏幕"
p.setColor(getResources().getColor(R.color.text_content1));
p.setTextSize(txt_content_size);
canvas.drawText("你的屏幕",
X_RES / 2 - txt_content_size / 2 * txt_content2_count,
Y_RES / 2 + 200,
p);
//线,渐变效果!!!
Shader shader = new LinearGradient((X_RES / 2) - (txt_welcome_size / 2) - txt_welcome_size * 2,
(Y_RES / 2) - txt_welcome_size,
X_RES / 2,
(Y_RES / 2) - txt_welcome_size,
new int[]{Color.WHITE, Color.GREEN},
null,
Shader.TileMode.MIRROR);
p.setShader(shader);
canvas.drawLine((X_RES / 2) - (txt_welcome_size / 2) - txt_welcome_size * 2,
(Y_RES / 2) - txt_welcome_size,
(X_RES / 2) + (txt_welcome_size / 2) + txt_welcome_size * 2,
(Y_RES / 2) - txt_welcome_size,
p);
}
private boolean drawCalibrationCross(int pos) {
if (DEBUG) {
Log.i(TAG, "draw cross at pos " + pos);
}
cv.drawColor(Color.BLACK);
// draw X line
cv.drawLine(cal.xfb[pos] - 10, cal.yfb[pos],
cal.xfb[pos] - 2, cal.yfb[pos], paint);
cv.drawLine(cal.xfb[pos] + 2, cal.yfb[pos],
cal.xfb[pos] + 10, cal.yfb[pos], paint);
// draw Y line
cv.drawLine(cal.xfb[pos], cal.yfb[pos] - 10,
cal.xfb[pos], cal.yfb[pos] - 2, paint);
cv.drawLine(cal.xfb[pos], cal.yfb[pos] + 2,
cal.xfb[pos], cal.yfb[pos] + 10, paint);
invalidate();
return true;
}
public boolean onTouchEvent(MotionEvent event) {
float tmpx, tmpy;
boolean ret;
if (screen_pos > SAMPLE_COUNTS - 1) {
Log.i(TAG, "get sample ok");
return true;
}
if (event.getAction() == MotionEvent.ACTION_UP) {
tmpx = event.getX();
tmpy = event.getY();
if (Math.abs(cal.xfb[screen_pos] - tmpx) > 15 &&
Math.abs(cal.yfb[screen_pos] - tmpy) > 15) {
UIUtils.showToast(mContext, "无效的校准点");
return false;
}
cal.x[screen_pos] = (int) (event.getX() * 4096.0 / (float) X_RES + 0.5);
cal.y[screen_pos] = (int) (event.getY() * 4096.0 / (float) Y_RES + 0.5);
if (screen_pos == 4) {
ret = perform_calibration();
if (ret) {
saveCalibrationResult();
UIUtils.showToast(mContext, "校正完毕!");
Intent intent = new Intent(CalibrationActivity.this, CalibrationCompleteActivity.class);
startActivity(intent);
return true;
} else {
screen_pos = 0;
Log.w(TAG, "Calibration failed");
}
} else {
screen_pos++;
drawCalibrationCross(screen_pos);
}
}
return true;
}
}
}
要点解释:BaseActivity里面主要就写了两个方法,一个是将所有Activity添加进一个Activity的list,命名为ActivityCollector,这样是为了当校正完成跳转到第二个Activity后,点击确定能关闭所有Activity直接退出程序;第二个是remove掉Activity,使其finish。ActivityCollector里面分别有:
这三个方法。
目测我写的代码还是很好懂的,触摸校正的具体算法代码是参照网上的,针对当前触摸校正功能的界面以及其他的一些细节是我修改的。有写的不对或有更好方法实现的话,还请大神们不吝赐教,本人将虚心接受,在撸码的道路上越走越远!
进入正题之前先给效果图吧,因为我为人比较厚道。
这一版触摸校正功能只用到了一个CalibrationActivity,onCreate里首先获取到了当前屏幕的宽高,
dpy = ((WindowManager) getSystemService(WINDOW_SERVICE)).getDefaultDisplay(); X_RES = dpy.getWidth(); Y_RES = dpy.getHeight();
然后会有一个初始化要触摸点的坐标的方法:
// TopLeft-->TopRight-->BottomRight-->BottomLeft-->Center
// For 240 * 320 resolution, we use 50 pixel as edge gap
private boolean initScreenPoints() {
cal.xfb[TOP_LEFT] = EDGE_GAP; // TopLeft
cal.yfb[TOP_LEFT] = EDGE_GAP;
cal.xfb[TOP_RIGHT] = X_RES - EDGE_GAP; // TopRight
cal.yfb[TOP_RIGHT] = EDGE_GAP;
cal.xfb[BOTTOM_RIGHT] = X_RES - EDGE_GAP; // BottomRight
cal.yfb[BOTTOM_RIGHT] = Y_RES - EDGE_GAP;
cal.xfb[BOTTOM_LEFT] = EDGE_GAP; // BottomLeft
cal.yfb[BOTTOM_LEFT] = Y_RES - EDGE_GAP;
cal.xfb[CENTER] = X_RES / 2; // Center
cal.yfb[CENTER] = Y_RES / 2;
return true;
}接着就开始布局了,是new的一个自定义View:
setContentView(new MyView(this));
构造函数如下:
public MyView(Context c) {
super(c);
// set full screen and no title
requestWindowFeature(Window.FEATURE_NO_TITLE);
getWindo
23ff7
w().setFlags(WindowManager.LayoutParams.FLAG_FULLSCREEN,
WindowManager.LayoutParams.FLAG_FULLSCREEN);

mContext = c;
paint = new Paint();
paint.setDither(true);
paint.setAntiAlias(true); ////抗锯齿,如果没有调用这个方法,写上去的字不饱满,不美观,看地不太清楚
paint.setStrokeWidth(2); //设置空心线宽
paint.setColor(Color.WHITE);
paint.setStyle(Paint.Style.STROKE); //设置画笔风格,空心或者实心。
bmp = Bitmap.createBitmap(X_RES, Y_RES, Bitmap.Config.ARGB_8888);
cv = new Canvas(bmp);
screen_pos = 0;
drawCalibrationCross(screen_pos);
}
接下来我要说的重点:是在onDraw方法里,因为原本这个触摸校正是没有界面的,只有5个触摸点,还是自己绘制的,所以我想在原有基础上不妨碍正常功能的同时,又能增加一个界面,之前试过几次,界面是弄出来了,但是会把原来的触摸点给遮住,就是空有其表,功能完全不能实现了,因此尝试过不少方法后,还是选择了canvas来绘制出我想要的效果:
前方高能预警,修改界面核心onDraw方法如下:
canvas.drawColor(Color.BLACK);
canvas.drawBitmap(bmp, 0, 0, null);

//“欢迎”字体大小
float txt_welcome_size = 60;
//“欢迎”字数
float txt_welcome_count = 2;
//"请按住光标……"字体大小
float txt_content_size = 36;
//"请按住十字光标以校准"字数
float txt_content1_count = 10;
//"你的屏幕"字数
float txt_content2_count = 4;
//"欢迎"
Paint p = new Paint();
p.setTextSize(txt_welcome_size);
p.setFakeBoldText(true);
p.setColor(getResources().getColor(R.color.text_Welcome));
canvas.drawText("欢迎",
(X_RES / 2) - (txt_welcome_size / 2) - txt_welcome_size / 2,
Y_RES / 2 - txt_welcome_size - 30,
p);

//"请按住光标中央以校准"
p.setFakeBoldText(false);
p.setColor(getResources().getColor(R.color.text_content1));
p.setTextSize(txt_content_size);
//参数2(X_RES / 2 - (txt_content_size / 2 * txt_content1_count)):当前屏幕宽度的一半减去字数
canvas.drawText("请按住十字光标以校准",
X_RES / 2 - (txt_content_size / 2 * txt_content1_count),
Y_RES / 2 + 150,
p);

//"你的屏幕"
p.setColor(getResources().getColor(R.color.text_content1));
p.setTextSize(txt_content_size);
canvas.drawText("你的屏幕",
X_RES / 2 - txt_content_size / 2 * txt_content2_count,
Y_RES / 2 + 200,
p);

//线,渐变效果!!!
Shader shader = new LinearGradient((X_RES / 2) - (txt_welcome_size / 2) - txt_welcome_size * 2,
(Y_RES / 2) - txt_welcome_size,
X_RES / 2,
(Y_RES / 2) - txt_welcome_size,
new int[]{Color.WHITE, Color.GREEN},
null,
Shader.TileMode.MIRROR);
p.setShader(shader);

canvas.drawLine((X_RES / 2) - (txt_welcome_size / 2) - txt_welcome_size * 2,
(Y_RES / 2) - txt_welcome_size,
(X_RES / 2) + (txt_welcome_size / 2) + txt_welcome_size * 2,
(Y_RES / 2) - txt_welcome_size,
p);
此处主要是结合了坐标系,才能把你想要的效果摆放到正确的位置中去,因为居中显示其实在xml是很容易实现的,一个gravity=center就行,但是在代码里,特别现在还是在onDraw里,就不能这么干了,因为试了好多次都不能居中显示。
首先确定好要显示的字数,然后setTextSize,确定好字体大小,接着就调用canvas.drawText进行绘制了,
canvas.drawText("你的屏幕",
X_RES / 2 - txt_content_size / 2 * txt_content2_count,
Y_RES / 2 + 200,
p);
参数1为x轴坐标点,参数2位y轴坐标点,参数3为画笔的实例p。
如果想要居中,就是要自己算字数和字体大小,然后用屏幕宽度一减就ok了,算法不难,可以自己试试。
然后因为原本xml中是一个横线的图片作为分隔,很好看,但是这里onDraw里面不好弄图片(也许是我不知道),我就自己画了一条线,并且还弄出了渐变的效果,虽不及原图,但也六七不离八了。
CalibrationActivity.Java 代码如下:
[java] view
plain copy
public class CalibrationActivity extends BaseActivity {
static final int SAMPLE_COUNTS = 5;
static final int POINT_DEGREE = 2;
static final int FACTOR_COUNTS = 7;
static final int TOP_LEFT = 0;
static final int TOP_RIGHT = 1;
static final int BOTTOM_RIGHT = 2;
static final int BOTTOM_LEFT = 3;
static final int CENTER = 4;
static final int X_AXIS = 0;
static final int Y_AXIS = 1;
static final int EDGE_GAP = 50;
static final String CALIBRATION_FILE = "/data/pointercal";
static final String TAG = "CalibrationActivity";
static final boolean DEBUG = true;
private int X_RES;
private int Y_RES;
private Display dpy;
private calibration cal;
@Override
protected void onCreate(Bundle savedInstanceState) {
super.onCreate(savedInstanceState);
cal = new calibration();
dpy = ((WindowManager) getSystemService(WINDOW_SERVICE)).getDefaultDisplay();
X_RES = dpy.getWidth();
Y_RES = dpy.getHeight();
initScreenPoints();
setContentView(new CalibrationView(this));
}
class calibration {
int x[] = new int[5];
int y[] = new int[5];
int xfb[] = new int[5];
int yfb[] = new int[5];
int a[] = new int[7];
}
// TopLeft-->TopRight-->BottomRight-->BottomLeft-->Center
// For 240 * 320 resolution, we use 50 pixel as edge gap
private boolean initScreenPoints() {
cal.xfb[TOP_LEFT] = EDGE_GAP; // TopLeft
cal.yfb[TOP_LEFT] = EDGE_GAP;
cal.xfb[TOP_RIGHT] = X_RES - EDGE_GAP; // TopRight
cal.yfb[TOP_RIGHT] = EDGE_GAP;
cal.xfb[BOTTOM_RIGHT] = X_RES - EDGE_GAP; // BottomRight
cal.yfb[BOTTOM_RIGHT] = Y_RES - EDGE_GAP;
cal.xfb[BOTTOM_LEFT] = EDGE_GAP; // BottomLeft
cal.yfb[BOTTOM_LEFT] = Y_RES - EDGE_GAP;
cal.xfb[CENTER] = X_RES / 2; // Center
cal.yfb[CENTER] = Y_RES / 2;
return true;
}
private boolean perform_calibration() {
float n, x, y, x2, y2, xy, z, zx, zy;
float det, a, b, c, e, f, g;
float scaling = (float) 65536.0;
n = x = y = x2 = y2 = xy = 0;
for (int i = 0; i < SAMPLE_COUNTS; i++) {
n += 1.0;
x += (float) cal.x[i];
y += (float) cal.y[i];
x2 += (float) (cal.x[i] * cal.x[i]);
y2 += (float) (cal.y[i] * cal.y[i]);
xy += (float) (cal.x[i] * cal.y[i]);
}
det = n * (x2 * y2 - xy * xy) + x * (xy * y - x * y2) + y * (x * xy - y * x2);
if (det < 0.1 && det > -0.1) {
Log.w(TAG, "determinant is too small, det =" + det);
return false;
}
if (DEBUG) {
Log.i(TAG, "(n,x,y,x2,y2,xy,det)=("
+ n + ","
+ x + ","
+ y + ","
+ x2 + ","
+ y2 + ","
+ xy + ","
+ det + ")");
}
a = (x2 * y2 - xy * xy) / det;
b = (xy * y - x * y2) / det;
c = (x * xy - y * x2) / det;
e = (n * y2 - y * y) / det;
f = (x * y - n * xy) / det;
g = (n * x2 - x * x) / det;
Log.i(TAG, "(a,b,c,e,f,g)=("
+ a + ","
+ b + ","
+ c + ","
+ e + ","
+ f + ","
+ g + ")");
// Get sums for x calibration
z = zx = zy = 0;
for (int i = 0; i < SAMPLE_COUNTS; i++) {
z += (float) cal.xfb[i];
zx += (float) (cal.xfb[i] * cal.x[i]);
zy += (float) (cal.xfb[i] * cal.y[i]);
}
// Now multiply out to get the calibration for X coordination
cal.a[0] = (int) ((a * z + b * zx + c * zy) * (scaling));
cal.a[1] = (int) ((b * z + e * zx + f * zy) * (scaling));
cal.a[2] = (int) ((c * z + f * zx + g * zy) * (scaling));
// Get sums for y calibration
z = zx = zy = 0;
for (int i = 0; i < SAMPLE_COUNTS; i++) {
z += (float) cal.yfb[i];
zx += (float) (cal.yfb[i] * cal.x[i]);
zy += (float) (cal.yfb[i] * cal.y[i]);
}
// Now multiply out to get the calibration for Y coordination
cal.a[3] = (int) ((a * z + b * zx + c * zy) * (scaling));
cal.a[4] = (int) ((b * z + e * zx + f * zy) * (scaling));
cal.a[5] = (int) ((c * z + f * zx + g * zy) * (scaling));
cal.a[6] = (int) scaling;
return true;
}
private boolean saveCalibrationResult() {
FileOutputStream fos;
String res = "";
// save the calibration factor in file system for InputDevice
try {
fos = openFileOutput("pointercal.txt", Context.MODE_PRIVATE);
res = String.format("%d %d %d %d %d %d %d", cal.a[1], cal.a[2], cal.a[0], cal.a[4], cal.a[5], cal.a[3], cal.a[6]);
if (DEBUG) {
Log.i(TAG, "calibration result=" + res);
}
fos.write(res.getBytes());
fos.close();
} catch (FileNotFoundException e1) {
// TODO Auto-generated catch block
e1.printStackTrace();
Log.w(TAG, "open calibration file write error: " + CALIBRATION_FILE);
} catch (IOException e) {
// TODO Auto-generated catch block
e.printStackTrace();
}
return true;
}
public class CalibrationView extends View {
private Canvas cv;
private Paint paint;
private Bitmap bmp;
private int screen_pos;
private Context mContext;
public CalibrationView(Context c) {
super(c);
// set full screen and no title
requestWindowFeature(Window.FEATURE_NO_TITLE);
getWindow().setFlags(WindowManager.LayoutParams.FLAG_FULLSCREEN,
WindowManager.LayoutParams.FLAG_FULLSCREEN);
mContext = c;
paint = new Paint();
paint.setDither(true);
paint.setAntiAlias(true); ////抗锯齿,如果没有调用这个方法,写上去的字不饱满,不美观,看地不太清楚
paint.setStrokeWidth(2); //设置空心线宽
paint.setColor(Color.WHITE);
paint.setStyle(Paint.Style.STROKE); //设置画笔风格,空心或者实心。
bmp = Bitmap.createBitmap(X_RES, Y_RES, Bitmap.Config.ARGB_8888);
cv = new Canvas(bmp);
screen_pos = 0;
drawCalibrationCross(screen_pos);
}
protected void onDraw(Canvas canvas) {
canvas.drawColor(Color.BLACK);
canvas.drawBitmap(bmp, 0, 0, null);
//“欢迎”字体大小
float txt_welcome_size = 60;
//“欢迎”字数
float txt_welcome_count = 2;
//"请按住十字光标以校准"字体大小
float txt_content_size = 36;
//"请按住十字光标以校准"字数
float txt_content1_count = 10;
//"你的屏幕"字数
float txt_content2_count = 4;
//"欢迎"
Paint p = new Paint();
p.setTextSize(txt_welcome_size);
p.setFakeBoldText(true);
p.setColor(getResources().getColor(R.color.text_Welcome));
canvas.drawText("欢迎",
(X_RES / 2) - (txt_welcome_size / 2) - txt_welcome_size / 2,
Y_RES / 2 - txt_welcome_size - 30,
p);
//"请按住光标中央以校准"
p.setFakeBoldText(false);
p.setColor(getResources().getColor(R.color.text_content1));
p.setTextSize(txt_content_size);
//参数2(X_RES / 2 - (txt_content_size / 2 * txt_content1_count)):当前屏幕宽度的一半减去字数
canvas.drawText("请按住十字光标以校准",
X_RES / 2 - (txt_content_size / 2 * txt_content1_count),
Y_RES / 2 + 150,
p);
//"你的屏幕"
p.setColor(getResources().getColor(R.color.text_content1));
p.setTextSize(txt_content_size);
canvas.drawText("你的屏幕",
X_RES / 2 - txt_content_size / 2 * txt_content2_count,
Y_RES / 2 + 200,
p);
//线,渐变效果!!!
Shader shader = new LinearGradient((X_RES / 2) - (txt_welcome_size / 2) - txt_welcome_size * 2,
(Y_RES / 2) - txt_welcome_size,
X_RES / 2,
(Y_RES / 2) - txt_welcome_size,
new int[]{Color.WHITE, Color.GREEN},
null,
Shader.TileMode.MIRROR);
p.setShader(shader);
canvas.drawLine((X_RES / 2) - (txt_welcome_size / 2) - txt_welcome_size * 2,
(Y_RES / 2) - txt_welcome_size,
(X_RES / 2) + (txt_welcome_size / 2) + txt_welcome_size * 2,
(Y_RES / 2) - txt_welcome_size,
p);
}
private boolean drawCalibrationCross(int pos) {
if (DEBUG) {
Log.i(TAG, "draw cross at pos " + pos);
}
cv.drawColor(Color.BLACK);
// draw X line
cv.drawLine(cal.xfb[pos] - 10, cal.yfb[pos],
cal.xfb[pos] - 2, cal.yfb[pos], paint);
cv.drawLine(cal.xfb[pos] + 2, cal.yfb[pos],
cal.xfb[pos] + 10, cal.yfb[pos], paint);
// draw Y line
cv.drawLine(cal.xfb[pos], cal.yfb[pos] - 10,
cal.xfb[pos], cal.yfb[pos] - 2, paint);
cv.drawLine(cal.xfb[pos], cal.yfb[pos] + 2,
cal.xfb[pos], cal.yfb[pos] + 10, paint);
invalidate();
return true;
}
public boolean onTouchEvent(MotionEvent event) {
float tmpx, tmpy;
boolean ret;
if (screen_pos > SAMPLE_COUNTS - 1) {
Log.i(TAG, "get sample ok");
return true;
}
if (event.getAction() == MotionEvent.ACTION_UP) {
tmpx = event.getX();
tmpy = event.getY();
if (Math.abs(cal.xfb[screen_pos] - tmpx) > 15 &&
Math.abs(cal.yfb[screen_pos] - tmpy) > 15) {
UIUtils.showToast(mContext, "无效的校准点");
return false;
}
cal.x[screen_pos] = (int) (event.getX() * 4096.0 / (float) X_RES + 0.5);
cal.y[screen_pos] = (int) (event.getY() * 4096.0 / (float) Y_RES + 0.5);
if (screen_pos == 4) {
ret = perform_calibration();
if (ret) {
saveCalibrationResult();
UIUtils.showToast(mContext, "校正完毕!");
Intent intent = new Intent(CalibrationActivity.this, CalibrationCompleteActivity.class);
startActivity(intent);
return true;
} else {
screen_pos = 0;
Log.w(TAG, "Calibration failed");
}
} else {
screen_pos++;
drawCalibrationCross(screen_pos);
}
}
return true;
}
}
}
要点解释:BaseActivity里面主要就写了两个方法,一个是将所有Activity添加进一个Activity的list,命名为ActivityCollector,这样是为了当校正完成跳转到第二个Activity后,点击确定能关闭所有Activity直接退出程序;第二个是remove掉Activity,使其finish。ActivityCollector里面分别有:
public static void addActivity(Activity activity) {
activities.add(activity);
}

public static void removeActivity(Activity activity) {
activities.remove(activity);
}

public static void finishAll() {
for (Activity activity : activities) {
if (!activity.isFinishing()) {
activity.finish();
}
}
}
这三个方法。
目测我写的代码还是很好懂的,触摸校正的具体算法代码是参照网上的,针对当前触摸校正功能的界面以及其他的一些细节是我修改的。有写的不对或有更好方法实现的话,还请大神们不吝赐教,本人将虚心接受,在撸码的道路上越走越远!

相关文章推荐
- Android实现触摸校正功能
- android系统设置里的触摸提示音功能怎样实现开启和关闭?
- android系统设置里的触摸提示音功能怎样实现开启和关闭?
- Android中GridView中onTouch监听(1)item实现触摸执行缩放动画的功能
- 如何用android实现类似windows的画板功能
- Android多点触摸的实现 (转)
- android实现双击功能操作
- Android多点触摸的实现(2)
- UT-S3C6410 android系统实现同伙usb wifi无线上网功能
- Android多点触摸的实现(3)
- 【Android游戏开发十六】Android Gesture之【触摸屏手势识别】操作!利用触摸屏手势实现一个简单切换图片的功能!
- 【Android2D游戏开发十六】(上文之触摸屏手势)详解Android Gesture 手势操作!利用手势实现一个简单切换图片的功能!
- 实例讲解Android中如何实现图片的异步加载功能
- Android应用程序开发教程:实现一个功能比较完善的登录对话框
- Android应用程序开发教程:实现一个功能比较完善的登录对话框
- 基于Android源码开发的来电接通振动功能实现
- 如何在android中实现swipe的手势功能及页面拖动动画
- Android实现图片的缩放翻转功能
- 2.6.30.4上触摸功能的实现(FS2410)
- 【Android游戏开发十六】Android Gesture之【触摸屏手势识别】操作!利用触摸屏手势实现一个简单切换图片的功能!