RabbitMQ消息队列+spring监听mq服务器多个ip,接收消费mq消息(二)
2017-08-25 19:56
761 查看
前文用了注解方式实现监听多个ip,本文用消费端的类实现ServletContextListener监听器来实现项目启动时开启监听多个ip。大致的代码雷同。
环境和框架:和注解方式完全一样。ssm+maven3.3.9+jdk1.7
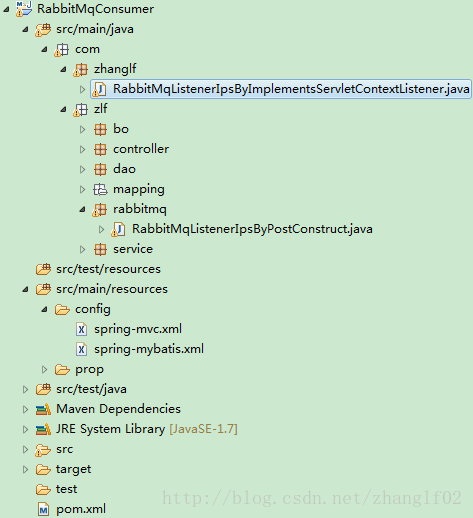
1 由于是实现监听器,没有注解,所以并不需要spring的扫包范围限制。我特地把这个监听类放到扫包范围以外来测试。项目结构如下:
2 pom.xml中引入rabbitmq的依赖
3.com.zhanglf.RabbitMqListenerIpsByImplementsServletContextListener 实现ServletContextListener监听类接口。并在public void contextInitialized()方法中引入监听mq的方法。
4.在web.xml中引入这个自定义监听类。
这样就完成了代码开发,注意点就是要使用WebApplicationContextUtils来获取WebApplicationContext进而可以实例化别的层的类。这里必须这样做因为监听器发生在spring容器初始化之前。当进来启动监听时,要调用的
WebApplicationContextUtils讲解
WebApplicationContextUtils是一个抽象类,其提供了一个很便利的方法来获取spring应用的上下文即WebApplicationContext。其中的静态方法getWebApplicationContext(ServletContext sc),提供一个ServletContext 类型参数即可。其原理十分简单,在spring容器初始化的方法
环境和框架:和注解方式完全一样。ssm+maven3.3.9+jdk1.7
1 由于是实现监听器,没有注解,所以并不需要spring的扫包范围限制。我特地把这个监听类放到扫包范围以外来测试。项目结构如下:
2 pom.xml中引入rabbitmq的依赖
<dependency>
<groupId>org.springframework.amqp</groupId>
<artifactId>spring-rabbit</artifactId>
<version>1.3.5.RELEASE</version>
</dependency>
3.com.zhanglf.RabbitMqListenerIpsByImplementsServletContextListener 实现ServletContextListener监听类接口。并在public void contextInitialized()方法中引入监听mq的方法。
package com.zhanglf;

import java.io.IOException;

import javax.servlet.ServletContext;
import javax.servlet.ServletContextEvent;
import javax.servlet.ServletContextListener;

import org.springframework.web.context.WebApplicationContext;
import org.springframework.web.context.support.WebApplicationContextUtils;

import com.rabbitmq.client.Address;
import com.rabbitmq.client.Channel;
import com.rabbitmq.client.Connection;
import com.rabbitmq.client.ConnectionFactory;
import com.rabbitmq.client.DefaultConsumer;
import com.rabbitmq.client.Envelope;
import com.rabbit
4000
mq.client.ShutdownListener;
import com.rabbitmq.client.ShutdownSignalException;
import com.rabbitmq.client.AMQP.BasicProperties;
import com.zlf.bo.StaffBo;
import com.zlf.service.IStaffService;

public class RabbitMqListenerIpsByImplementsServletContextListener implements ServletContextListener {

private Address[] addre;
private String vhost;
private String user;
private String pwd;
private String queueName;

public RabbitMqListenerIpsByImplementsServletContextListener(){
this.addre = new Address[] { new Address("10.100.82.121", 5672),
new Address("10.100.82.122", 5672),
new Address("10.100.82.123", 5672) };
this.vhost = "gf-iih";
this.user = "admin";
this.pwd = "admin";
this.queueName = "tkq.queue";
}

@Override
public void contextInitialized(ServletContextEvent sce) {
WebApplicationContext applicationContext = WebApplicationContextUtils.getWebApplicationContext(sce.getServletContext());
IStaffService staffService = applicationContext.getBean(IStaffService.class);
RabbitMqListenerIpsByImplementsServletContextListener mqListener = new  RabbitMqListenerIpsByImplementsServletContextListener();
mqListener.StartQueueListener(new ShutdownListener() {
@Override
public void shutdownCompleted(ShutdownSignalException arg0) {
System.out.println("Connection Shutdown!");
}
}, staffService);
}

@Override
public void contextDestroyed(ServletContextEvent sce) {

}

private Connection getConnection(ShutdownListener listener) {
ConnectionFactory factory = new ConnectionFactory();
factory.setUsername(user);
factory.setPassword(pwd);
factory.setVirtualHost(vhost);
factory.setAutomaticRecoveryEnabled(true);

Connection conn = null;
try {
conn = factory.newConnection(addre);
conn.addShutdownListener(listener);
} catch (IOException e) {
e.printStackTrace();
}
return conn;
}

public void StartQueueListener(ShutdownListener listener,final IStaffService staffService) {
Connection conn = getConnection(listener);
if (conn == null) {
System.out.println("Failed to Create Connection!");
return;
}
try {
final Channel channel = conn.createChannel();
// 设置ACK为手动模式,不在自动ACK
boolean autoAck = false;
/**channel.basicConsume各个参数的解释
* String queueName:队列名
* boolean autoAck: 服务器是否要手动应答/确认,true-不需要。false-需要。所以这里我们要在处理完业务逻辑后,消费掉mq后发送ack。
* String consumerTag:用于建立上下文的客户端标签。每个标签都代表一个独立的订阅。同一个channel的不同consumer使用不同的标签。
* Consumer callback: 消费端接口,实现Consumer的最方便方法是继承DefualtConsumer,并将其作为参数传给basicConsumer方法。答
*/
channel.basicConsume(queueName, autoAck, "zhanglfConsumerTag",
new DefaultConsumer(channel) {
@Override
public void handleDelivery(
String consumerTag,
Envelope envelope,
BasicProperties properties,
byte[] body)
throws IOException {
long deliveryTag = envelope.getDeliveryTag();
String out = new String(body, "UTF-8");
StaffBo staffBo = staffService.selectByPrimaryKey("s01");
System.out.println("------------------"+staffBo.getName()+"------------");
if ("业务处理结果".equals("业务处理结果")) {
// 通知mq服务器移除此条mq。设置ack为每条mq都ack,不是批量ack。
channel.basicAck(deliveryTag, false);
} else {
// 如果业务处理异常,通知服务器回收此条mq。
channel.basicNack(deliveryTag, false, true);
}
}
});

} catch (IOException e) {
e.printStackTrace();
}

}

}
4.在web.xml中引入这个自定义监听类。
<!--自定义监听器 -->
<listener>
<listener-class>com.zhanglf.RabbitMqListenerIpsByImplementsServletContextListener
</listener-class>
</listener>
这样就完成了代码开发,注意点就是要使用WebApplicationContextUtils来获取WebApplicationContext进而可以实例化别的层的类。这里必须这样做因为监听器发生在spring容器初始化之前。当进来启动监听时,要调用的
staffService.selectByPrimaryKey("s01"); 还没有实例化,就会报空指针。WebApplicationContextUtils讲解
WebApplicationContextUtils是一个抽象类,其提供了一个很便利的方法来获取spring应用的上下文即WebApplicationContext。其中的静态方法getWebApplicationContext(ServletContext sc),提供一个ServletContext 类型参数即可。其原理十分简单,在spring容器初始化的方法
org.springframework.web.context.ContextLoader.initWebApplicationContext(ServletContext)中通过
servletContext.setAttribute(WebApplicationContext.ROOT_WEB_APPLICATION_CONTEXT_ATTRIBUTE, this.context);已经将WebApplicationContext的实例放入ServletContext 中了。然后在工具类的
org.springframework.web.context.support.WebApplicationContextUtils.getWebApplicationContext(ServletContext)中就可以通过传入的ServletContext参数获取到WebApplicationContext实例了。

相关文章推荐
- RabbitMQ消息队列+spring监听mq服务器多个ip,接收消费mq消息(三)
- RabbitMQ消息队列+spring监听mq服务器,接收消费mq消息
- RabbitMQ消息队列+spring监听mq服务器,接收消费mq消息
- Spring集成rabbitMQ监听消费队列消息
- spring+activemq实战之配置监听多队列实现不同队列消息消费
- SpringBoot中如何监听两个不同源的RabbitMQ消息队列
- SpringBoot中如何监听两个不同源的RabbitMQ消息队列
- Java——定时请求后端接口数据发送RabbitMQ消息队列到指定MQ服务器
- SpringBoot+ActiveMQ多消息队列监听
- SpringBoot的RabbitMQ消息队列: 一、消息发送接收第一印象
- MQ消息队列--RabbitMQ整合Spring理论及实例讲解
- 分布式消息队列RocketMQ&Kafka -- 消息的“顺序消费”-- 一个看似简单的复杂问题
- 消息队列(三)--与spring整合(采用注解消费队列)
- 应用服务器性能优化 之 消息队列(MQ:Message Queue)
- SpringBoot应用之消息队列rabbitmq
- rabbitmq学习10:使用spring-amqp发送消息及异步接收消息
- Spring + JMS + ActiveMQ实现简单的消息队列(监听器异步实现)
- Python操作RabbitMQ服务器实现消息队列的路由功能
- 监听、接收mq消息、写入xml文件
- 分布式消息队列RocketMQ&Kafka -- 消息的“顺序消费”-- 一个看似简单的复杂问题