Thrift windows下cpp编译与使用
2017-08-21 20:30
701 查看
本文主要目的是分别介绍在Windows平台下的Thrift安装步骤,以及实现一个简单的demo演示Thrift的使用方法。
安装依赖库:
boost
openssl(windows下有编译好的二进制文件,可以直接下载 windows版openssl )
libevent(按需安装,实例中我没有使用)
编译环境:VS2015
首先这里介绍0.10.0和0.9.3两个版本
一开始,我是下载了0.10.0版本和对应的代码生成工具,但是后面在做实例的时候发现0.10.0版本的代码生成工具在我本机无法启动,提示版本不合适,为了后面使用一致性,我下载了0.9.3版本进行使用。
0.10.0版本的cpp编译比较容易成功,编译64位版本的libthrift.lib,打开thrift-0.10.0\lib\cpp\thrift.sln,里面有libthrift和libthriftnb两个工程,其中libthrift工程是常规的阻塞型server端(单线程server,一个连接一个线程server,线程池server),libthriftnb工程是非阻塞(non-blocking)模式的服务server端,也只有编译libthriftnb时才需要依赖libevent库,否则可以不编译libevent库;编译libthrift只要把正确的boost路径和openssl路径配置正确,就可以编译成功了。
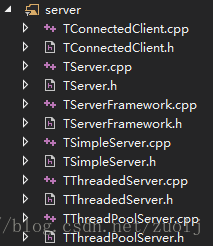
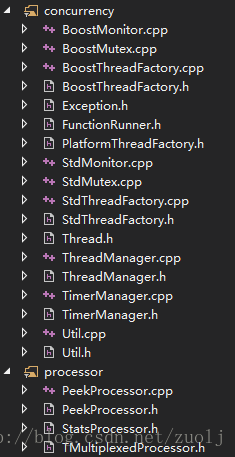
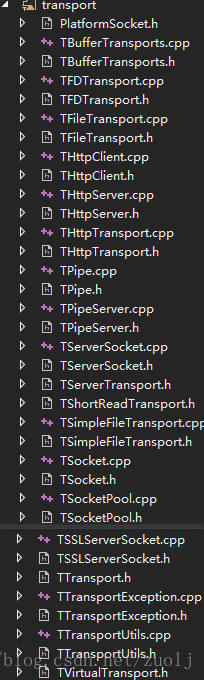
0.9.3版本的cpp编译,官网上提供的sln打开后编译是编不过的,工程有很多需要修改的地方,首先,boost和openssl包含路径和库路径配置正确后,观察libthrift工程里面的文件,对比源码目录,有很多缺少的文件,首先,Thrift.cpp已经不存在,把它从项目中手动移除,再把thrift文件夹内TDispatchProcessor.h、thrift-config.h、TLogging.h、TOutput.cpp、TOutput.h、TProcess.h、TToString.h、VirtualProfiling.cpp包含进工程中,整理OverlappedSubmissionThread.cpp和OverlappedSubmissionThread.h进windows筛选器,分别打开thrift\windows,thrift\async,thrift\concurrency,thrift\processor,thrift\protocol,thrift\server,thrift\transport,与源码目录对比,添加缺少目录:
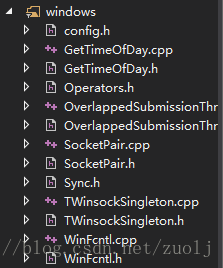


说明:已移除部分不适用与windows平台的文件
在编译时还有部分文件出错:TServerFramework.cpp #222 移除std::
(transport\TSSLSocket.cpp这个文件在编译时会出错,尽管修正后编译通过,但由于在后期使用libthrift.lib库时报错,这里工程中我把它移除出去了,实例中并不需要用到,编译通过的修改如下:
#99 移除::
#143
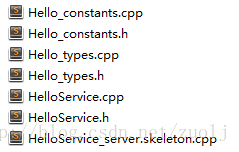
以上命令生成C++语言的源代码,然后会生成一个gen-cpp目录,里面包含自动生成的几个源代码文件:
在server.cpp中添加代码逻辑,然后编译。
编译
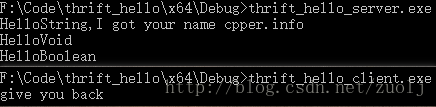
运行server程序和client程序
所有工程文件已放到github上
Thrift下载
官网下载源码 Thrift代码生成器工具下载安装依赖库:
boost
openssl(windows下有编译好的二进制文件,可以直接下载 windows版openssl )
libevent(按需安装,实例中我没有使用)
Thrift在windows下编译
所用机子:windows10,64位编译环境:VS2015
首先这里介绍0.10.0和0.9.3两个版本
一开始,我是下载了0.10.0版本和对应的代码生成工具,但是后面在做实例的时候发现0.10.0版本的代码生成工具在我本机无法启动,提示版本不合适,为了后面使用一致性,我下载了0.9.3版本进行使用。
0.10.0版本的cpp编译比较容易成功,编译64位版本的libthrift.lib,打开thrift-0.10.0\lib\cpp\thrift.sln,里面有libthrift和libthriftnb两个工程,其中libthrift工程是常规的阻塞型server端(单线程server,一个连接一个线程server,线程池server),libthriftnb工程是非阻塞(non-blocking)模式的服务server端,也只有编译libthriftnb时才需要依赖libevent库,否则可以不编译libevent库;编译libthrift只要把正确的boost路径和openssl路径配置正确,就可以编译成功了。
0.9.3版本的cpp编译,官网上提供的sln打开后编译是编不过的,工程有很多需要修改的地方,首先,boost和openssl包含路径和库路径配置正确后,观察libthrift工程里面的文件,对比源码目录,有很多缺少的文件,首先,Thrift.cpp已经不存在,把它从项目中手动移除,再把thrift文件夹内TDispatchProcessor.h、thrift-config.h、TLogging.h、TOutput.cpp、TOutput.h、TProcess.h、TToString.h、VirtualProfiling.cpp包含进工程中,整理OverlappedSubmissionThread.cpp和OverlappedSubmissionThread.h进windows筛选器,分别打开thrift\windows,thrift\async,thrift\concurrency,thrift\processor,thrift\protocol,thrift\server,thrift\transport,与源码目录对比,添加缺少目录:
说明:已移除部分不适用与windows平台的文件
在编译时还有部分文件出错:TServerFramework.cpp #222 移除std::
(transport\TSSLSocket.cpp这个文件在编译时会出错,尽管修正后编译通过,但由于在后期使用libthrift.lib库时报错,这里工程中我把它移除出去了,实例中并不需要用到,编译通过的修改如下:
#99 移除::
#143
} else if (protocol == SSLv3) {

// { @zuolj The new openssl doesn't support SSLv3

//ctx_ = SSL_CTX_new(SSLv3_method());

throw TSSLException("SSL_CTX_new: Unsupport SSLv3");

// }

} )使用示例
设计thrift文件(IDL)
namespace cpp HelloThrift.Interface
service HelloService{
string HelloString(1:string para)
i32 HelloInt(1:i32 para)
bool HelloBoolean(1:bool para)
void HelloVoid()
string HelloNull()
}
通过IDL工具生成源代码
# 执行thirift命令生成源文件:
thrift-0.9.3.exe --gen cpp Hello.thrift
以上命令生成C++语言的源代码,然后会生成一个gen-cpp目录,里面包含自动生成的几个源代码文件:
实现server程序
HelloService_server.skeleton.cpp就是默认的server端程序入口,拷贝一份重命名为server.cpp,通过VS2015新建工程,将gen-cpp目录下的所有文件复制到新工程下,设置头文件包含和lib库目录。 比如设置libthrift.lib的头文件目录为thrift-0.9.3\lib\cpp\src,lib库目录为thrift-0.9.3\lib\cpp\x64\Debug。在server.cpp中添加代码逻辑,然后编译。
class HelloServiceHandler : virtual public HelloServiceIf {
public:
HelloServiceHandler() {
// Your initialization goes here
}

void HelloString(std::string& _return, const std::string& para) {
// Your implementation goes here
printf("HelloString,I got your name %s\n",para.c_str());
_return = "give you back";
}

int32_t HelloInt(const int32_t para) {
// Your implementation goes here
printf("HelloInt\n");
return para;
}

bool HelloBoolean(const bool para) {
// Your implementation goes here
printf("HelloBoolean\n");
return para;
}

void HelloVoid() {
// Your implementation goes here
printf("HelloVoid\n");
}

void HelloNull(std::string& _return) {
// Your implementation goes here
printf("HelloNull\n");
}

};
实现client程序
通过VS2015新建工程,将gen-cpp目录下的所有文件复制到新工程下(除HelloService_server.skeleton.cpp之外),并增加上面手动实现的client.cpp,设置头文件包含和lib库目录。#include <stdio.h>
#include <string>
#include <thrift/transport/TSocket.h>
#include <thrift/protocol/TBinaryProtocol.h>
#include <thrift/server/TSimpleServer.h>
#include <thrift/transport/TServerSocket.h>
#include <thrift/transport/TBufferTransports.h>
#include "Hello_types.h"
#include "HelloService.h"
#include "Hello_constants.h"
using namespace ::apache::thrift;
using namespace ::apache::thrift::protocol;
using namespace ::apache::thrift::transport;
using namespace ::apache::thrift::server;
using namespace HelloThrift::Interface;
using boost::shared_ptr;
int main(int argc, char** argv)
{
shared_ptr<TTransport> socket(new TSocket("localhost", 9090));
shared_ptr<TTransport> transport(new TBufferedTransport(socket));
shared_ptr<TProtocol> protocol(new TBinaryProtocol(transport));
HelloServiceClient client(protocol);
try
{
transport->open();
std::string para = "cpper.info";
std::string _return;
client.HelloString(_return,para);
printf("%s\n", _return.c_str());
client.HelloVoid();
client.HelloBoolean(true);
transport->close();
}
catch (TException& tx)
{
printf("ERROR:%s\n", tx.what());
}
}编译
运行server程序和client程序
所有工程文件已放到github上

相关文章推荐
- 在windows下使用vs2013编译thrift 0.10.0
- windows下在vim中使用gcc/g++编译调试c/cpp文件
- windows下 jsoncpp的编译和使用
- windows命令行使用gcc编译.c/.cpp文件
- windows下在GVIM中使用gcc/g++编译调试c/cpp文件
- [vim配置]windows下在vim中使用gcc/g++编译调试c/cpp文件
- windows下在vim中使用gcc/g++编译调试c/cpp文件
- windows下使用thrift编译+示例+详解解决坑
- windows(8) 下在GVIM中使用gcc/g++编译调试c/cpp文件
- windows下如何使用thrift,及编译执行的全过程。boost库的使用,libevent 库的使用
- Windows下使用VIM,搭建Mainframe开发环境(二)---编译VIM
- 使用nmake在windows平台下编译xapian
- Windows下使用VIM&Cygwin,搭建Mainframe开发环境(六)---用awk/sed合并PLI/Cobol编译结果
- 【原】Boost下载安装编译配置使用指南(含Windows、Linux以及ARM Linux)
- 在Windows中使用Cygwin环境下的gcc编译器编译【电脑教程网】Informix ESQ/C程序
- Windows平台上使用VC6编译安装STLport
- Windows环境使用VIM编译简单C++程序(使用cl.exe和link.exe)
- Windows环境下log4cxx的编译及使用
- 使用mingw和msys在windows上编译bdb
- Windows环境下log4cxx的编译及使用