基于注解spring4.*,mybatis3.*最简单的SSM整合
2017-08-16 10:47
603 查看
*
在闲暇时间,也是工作需要,自主第一次尝试SSM的整合。 我整合的思路是先从springmvc开始,自我感觉是错误的方向,但是显示结果是最明显的,话不多说,上代码。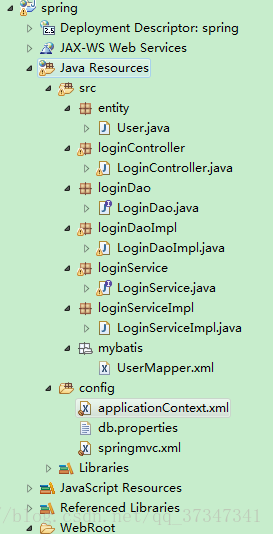 先来看springMVC部分,webRoot下面(本来是WebContent,想着以前看视频说的改成WebRoot可以导入myeclipse)只有一个index.jsp,
<%@ page language="java" contentType="text/html; charset=UTF-8"
pageEncoding="UTF-8"%>
<!DOCTYPE html PUBLIC "-//W3C//DTD HTML 4.01 Transitional//EN" "http://www.w3.org/TR/html4/loose.dtd">
<html>
<head>
<meta http-equiv="Content-Type" content="text/html; charset=UTF-8">
<title>spring</title>
</head>
<body>
<form action="LoginController/login" method="post">
<input type="submit">
</form>
</body>
既然简单,就要简单到极致,里面就一个提交按钮和要提交的路径。
以前写原生态的servlet需要倒web.xml里面去配置,那这个也少不了,来看web.xml里面的代码。
<?xml version="1.0" encoding="UTF-8"?>
<web-app xmlns:xsi="http://www.w3.org/2001/XMLSchema-instance"
xmlns="http://java.sun.com/xml/ns/javaee"
xsi:schemaLocation="http://java.sun.com/xml/ns/javaee http://java.sun.com/xml/ns/javaee/web-app_2_5.xsd" id="WebApp_ID" version="2.5">
<display-name>spring</display-name>
<welcome-file-list>
<welcome-file>index.jsp</welcome-file>
</welcome-file-list>

<!-- spring -->
<context-param>
<param-name>contextConfigLocation</param-name>
<param-value>classpath:applicationContext.xml</param-value>
</context-param>
<!-- 配置spring启动listener入口 -->
<listener>
<listener-class>org.springframework.web.context.ContextLoaderListener</listener-class>
</listener>

<!--配置DispatcherServlet-->
<servlet>
<servlet-name>dispatcherServlet</servlet-name>
<servlet-class>org.springframework.web.servlet.DispatcherServlet</servlet-class>
<!--配置初始化参数:作用是配置SpringMVC配置文件的位置和名称-->
<init-param>
<param-name>contextConfigLocation</param-name>
<param-value>classpath:springmvc.xml</param-value>
</init-param>
<load-on-startup>1</load-on-startup>
</servlet>
<servlet-mapping>
<servlet-name>dispatcherServlet</servlet-name>
<url-pattern>/</url-pattern>
</servlet-mapping>
<!--配置DispatcherServlet-->
</web-app>
springmvc文件内容
<?xml version="1.0" encoding="UTF-8"?>
<beans xmlns="http://www.springframework.org/schema/beans"
xmlns:xsi="http://www.w3.org/2001/XMLSchema-instance"
xmlns:p="http://www.springframework.org/schema/p"
xmlns:context="http://www.springframework.org/schema/context"
xsi:schemaLocation=" http://www.springframework.org/schema/beans http://www.springframework.org/schema/beans/spring-beans.xsd http://www.springframework.org/schema/context http://www.springframework.org/schema/context/spring-context.xsd">

<!-- 扫描控制类controller -->
<context:component-scan base-package="loginController"/>

<!-- ... -->
</beans>
以上之间的内容就是配置springmvc,配置拦截器名(可以自定义),拦截器的类(导入的jar包中获得), 初始参数(自定义配置文件的路径), /拦截所有,目前没涉及图片或其他CSS的东西,这个配置下来,就做了以前配置的servlet做的事。下面来看请求映射。
控制层(controller)
package loginController;

import javax.servlet.http.HttpServletRequest;

import org.springframework.beans.factory.annotation.Autowired;
import org.springframework.stereotype.Controller;
import org.springframework.web.bind.annotation.RequestMapping;

import loginService.LoginService;

@Controller
@RequestMapping("/LoginController")
public class LoginController {
@Autowired
HttpServletRequest request;
@Autowired
LoginService loginService;
@RequestMapping("/login")
public String login(){
System.out.println("--------");
String ename=request.getParameter("ename");
String password=request.getParameter("password");
loginService.getUser();
return "loginsucc";
}

}
以上代码是基于注解开发,@Controller声明这个类是个控制层的类,@RequestMapping(“/LoginController”)声明映射路径,这个是主要区分进来的请求,类似包的声明作用,避免不同请求而名字相同,
@Autowired
HttpServletRequest request;这个注解用于注册以前使用的request,用于接收request.getParameter(“普通text的名称”),例如表单中,那在controller就可以 String name=request.getParameter(“name”);如果没乱码的情况下,就是你发送的数据,前提是你的request已经注册@Autowired,不然空指针,解决post提交方式乱码的问题是在web.xml中加以下配置代码
<filter>
<filter-name>characterEncodingFilter</filter-name>
<filter-class>org.springframework.web.filter.CharacterEncodingFilter</filter-class>
<init-param>
<param-name>encoding</param-name>
<param-value>UTF-8</param-value>
</init-param>
<init-param>
<param-name>forceEncoding</param-name>
<param-value>true</param-value>
</init-param>
</filter>
<filter-mapping>
<filter-name>characterEncodingFilter</filter-name>
<url-pattern>/*</url-pattern>
</filter-mapping>
表单中的请求需要以post方式,如果以get方式,我写的代码是乱码的,而且之前的jsp页面声明的编码也是utf-8,加上这个拦截器就没产生乱码,到此,最简单版的springmvc完成。
第二部是整合spring部分
同样需要倒web.xml 中配置
<!-- spring -->
<context-param>
<param-name>contextConfigLocation</param-name>
<param-value>classpath:applicationContext.xml</param-value>
</context-param>
<!-- 配置spring启动listener入口 -->
<listener>
<listener-class>org.springframework.web.context.ContextLoaderListener</listener-class>
</listener>
就是这一段,加载spring文件,启动内容加载监听,来看spring那一块的内容,也就是application.xml(源文件夹config中)
<?xml version="1.0" encoding="UTF-8"?>
<beans xmlns="http://www.springframework.org/schema/beans" xmlns:context="http://www.springframework.org/schema/context" xmlns:xsi="http://www.w3.org/2001/XMLSchema-instance" xmlns:aop="http://www.springframework.org/schema/aop"
xmlns:tx="http://www.springframework.org/schema/tx" xmlns:p="http://www.springframework.org/schema/p" xmlns:util="http://www.springframework.org/schema/util" xmlns:jdbc="http://www.springframework.org/schema/jdbc"
xmlns:cache="http://www.springframework.org/schema/cache"
xsi:schemaLocation=" http://www.springframework.org/schema/context http://www.springframework.org/schema/context/spring-context.xsd http://www.springframework.org/schema/beans http://www.springframework.org/schema/beans/spring-beans.xsd http://www.springframework.org/schema/tx http://www.springframework.org/schema/tx/spring-tx.xsd http://www.springframework.org/schema/jdbc http://www.springframework.org/schema/jdbc/spring-jdbc-3.1.xsd http://www.springframework.org/schema/aop http://www.springframework.org/schema/aop/spring-aop.xsd http://www.springframework.org/schema/mvc http://www.springframework.org/schema/mvc/spring-mvc-4.0.xsd">

<!-- 注入service -->
<!--  <bean id="loginService" class="loginServiceImpl.LoginServiceImpl"></bean> -->
<context:component-scan base-package="loginServiceImpl" />

<context:component-scan base-package="loginDaoImpl" />

<!-- 引入配置文件 -->
<bean id="propertyConfigurer"
class="org.springframework.beans.factory.config.PropertyPlaceholderConfigurer">
<property name="location" value="classpath:db.properties" />
</bean>

<bean id="dataSource" class="org.apache.commons.dbcp.BasicDataSource"
destroy-method="close">
<property name="driverClassName" value="${driver}" />
<property name="url" value="${url}" />
<property name="username" value="${username}" />
<property name="password" value="${password}" />
<!-- 初始化连接大小 -->
<property name="initialSize" value="${initialSize}"></property>
<!-- 连接池最大数量 -->
<property name="maxActive" value="${maxActive}"></property>
<!-- 连接池最大空闲 -->
<property name="maxIdle" value="${maxIdle}"></property>
<!-- 连接池最小空闲 -->
<property name="minIdle" value="${minIdle}"></property>
<!-- 获取连接最大等待时间 -->
<property name="maxWait" value="${maxWait}"></property>
</bean>

<!-- spring和MyBatis完美整合,不需要mybatis的配置映射文件 -->
<bean id="sqlSessionFactory" class="org.mybatis.spring.SqlSessionFactoryBean">
<property name="dataSource" ref="dataSource" />
<!-- 自动扫描mapping.xml文件 -->
<property name="mapperLocations" value="classpath:mybatis/*.xml"></property>
</bean>

<!-- DAO接口所在包名,Spring会自动查找其下的类 -->
<!-- <bean class="org.mybatis.spring.mapper.MapperScannerConfigurer">
<property name="basePackage" value="loginDao" />
<property name="sqlSessionFactoryBeanName" value="sqlSessionFactory"></property>
</bean>  -->

<!-- (事务管理)transaction manager, use JtaTransactionManager for global tx -->
<bean id="transactionManager"
class="org.springframework.jdbc.datasource.DataSourceTransactionManager">
<property name="dataSource" ref="dataSource" />
</bean>
</beans>
其中有部分是关于数据库的,那个后面说,先来看spring部分
之前我们在controller层用到
@Autowired
LoginService loginService;spring类似类的生产工厂,例如这里用到的service也是用的注入操作,没有用new的方式,来看下service层使用的spring的作用
package loginServiceImpl;

import org.springframework.beans.factory.annotation.Autowired;
import org.springframework.stereotype.Service;

import entity.User;
import loginDaoImpl.LoginDaoImpl;
import loginService.*;
@Service
public class LoginServiceImpl implements LoginService {

@Autowired
LoginDaoImpl loginDaoImpl;

@Override
public String getUser() {
System.out.println("进入serviceImpl");
User u=loginDaoImpl.queryUser("1");
System.out.println(u);
return null;
}
}
@Service声明这是个用于service业务层, 对应application中
这一行对应,用于注入,没有用new对象的方式,对于之前controller中用的loginService.getUser();到了这里说明进入了业务层serviceImpl,至于后面的业务,根据需要在做补充。到此,spring和springmvc结合完成。
剩下的就是把mybatis整合进去,虽然说的不是非常清晰,,进发表个人见解(本系统是个人所写,虽然抄袭了部分网上代码),可以出数据,可以加工使用。
整合mybatis就先把配置的属性文件写好,至于连接池,目前不清晰,后面继续学习,
先来看db.properties文件,就是和数据库的连接属性
driver=com.mysql.jdbc.Driver
url=jdbc:mysql://localhost:3306/ssm
username=root
password=123
#定义初始连接数
initialSize=0
#定义最大连接数
maxActive=20
#定义最大空闲
maxIdle=20
#定义最小空闲
minIdle=1
#定义最长等待时间
maxWait=60000
最初的学习,前面四行就已经够用,就能连接到数据库,后面是连接池的使用。在看把db.properties配置到spring中(application.xml),
<!-- 引入配置文件 -->
<bean id="propertyConfigurer"
class="org.springframework.beans.factory.config.PropertyPlaceholderConfigurer">
<property name="location" value="classpath:db.properties" />
</bean>

<bean id="dataSource" class="org.apache.commons.dbcp.BasicDataSource"
destroy-method="close">
<property name="driverClassName" value="${driver}" />
<property name="url" value="${url}" />
<property name="username" value="${username}" />
<property name="password" value="${password}" />
<!-- 初始化连接大小 -->
<property name="initialSize" value="${initialSize}"></property>
<!-- 连接池最大数量 -->
<property name="maxActive" value="${maxActive}"></property>
<!-- 连接池最大空闲 -->
<property name="maxIdle" value="${maxIdle}"></property>
<!-- 连接池最小空闲 -->
<property name="minIdle" value="${minIdle}"></property>
<!-- 获取连接最大等待时间 -->
<property name="maxWait" value="${maxWait}"></property>
</bean>
到这里,db.properties已经配置进去了,使用mybatis现在主要用的Mapper.xml 映射文件,
<?xml version="1.0" encoding="UTF-8" ?>
<!DOCTYPE mapper    PUBLIC "-//mybatis.org//DTD Mapper 3.0//EN"
"http://mybatis.org/dtd/mybatis-3-mapper.dtd">
<!--这个namespace + 下面的id 就是一个完整的路径,在dao层我们写了完整的路径之后mybatis就是映射这个文件中的相关sql语句 -->
<mapper namespace="user">
<!-- parameterType就是你接受的参数的类型,  -->

<!-- resultType 就是返回查询结果的类型,而如果是resultMap=则返回的就是你定义的javabean  -->
<select  id="queryUser"  parameterType="String" resultType="entity.User">
select  * from user where id=#{id}
</select>

</mapper>
看下DaoImpl层
package loginDaoImpl;

import java.util.List;
import java.util.Map;

import org.apache.ibatis.session.SqlSession;
import org.apache.ibatis.session.SqlSessionFactory;
import org.mybatis.spring.SqlSessionTemplate;
import org.springframework.beans.factory.annotation.Autowired;
import org.springframework.stereotype.Repository;
import org.springframework.stereotype.Service;

import entity.User;
import loginDao.LoginDao;

/**
* repository 说明就是一个dao层的注解
*/
@Repository
public class LoginDaoImpl implements LoginDao{
/**
* 自动注入这里spring管理了mybatis的sqlsessionfactory
*/

@Autowired
private SqlSessionFactory sqlSessionFactory;

/**
* 查询用户信息
*
* @param id
* @return
*/
public User queryUser(String id) {
SqlSession session = sqlSessionFactory.openSession();
return session.selectOne("user.queryUser", id);
}
}
自动注入
@Autowired
private SqlSessionFactory sqlSessionFactory;
在此注入sqlSessionTemplate没成功,暂时没解决,用SqlSessionFactory可以完成,之前在service层中用到的
User u=loginDaoImpl.queryUser(“1”);
System.out.println(u);
loginDaoImpl用的注解注入对象,到此控制台能显示u的对象属性,
以下是User实体类
public class User {

String id;
String name;
String ename;
String password;
String birthday;
int age;
String photo;
String work;
String sex;
String address;
String rank;
剩下就是getter() setter()和重写toString()方法了,数据库就一个表table(user),和实体类属性意义对应,至此完成
项目地址https://github.com/gaizhong/ssm

相关文章推荐
- SSM简单整合(Mybatis,Spring,SpringMVC,基于注解和xml文件配置)
- spring+sprinmvc+mybatis基本整合(二)--基于spring注解mybais非注解非Mapper接口方式
- SSM(spring+springMVC+Mybatis)简单整合
- spring mvc系列文章 - springmvc spring mybatis ibatis freemark整合开发(2.0版:基于注解)
- Spring与Mybatis基于注解整合Redis的方法
- 基于Maven的SSM整合(Spring+SpringMVC+MyBatis)
- idea 基于maven 的 spring + spring mvc + mybatis ssm高级整合记录
- [置顶] 基于注解的mybatis整合spring开发流程?
- 基于Maven的SSM框架整合(Spring+SpringMVC+MyBatis)
- 基于SSM的秒杀业务学习[1] spring/ mybatis/springmvc整合及配置
- springboot 整合mybatis 基于注解开发 传入对象
- 基于maven搭建ssm开发框架(1) mybatis和spring的整合
- SSM框架下利用mybatis-spring.jar整合包,以及利用注解@transactional实现事务管理
- 基于注解的mybatis和spring整合
- SSM简单整合(Spring+SpringMVC+Mybatis)
- 基于注解的mybatis和spring整合
- 纯代码(基于注解和代码,零xml)整合SSHM(Spring、SpringMVC、Hibernate、Mybatis)
- Spring与Mybatis基于注解整合Redis的方法
- SpringMvc+Spring+MyBatis 基于注解整合
- IntelliJ IDEA 搭建基于Maven 的SSM(一)(spring,springMvc,Mybatis)框架整合