SSM框架的一个简单登录模块(包含注销功能)
2017-08-10 14:28
901 查看
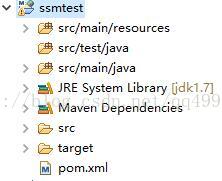
首先准备:一个整合完毕的Maven项目,(借用上次整合完毕的SSM)
然后数据库、表、内容

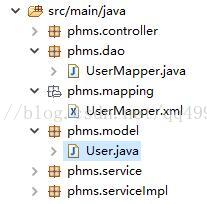
使用mybatis generator生成的Mapper,mapping,model
UserMapper.java(对应dao层)
package phms.dao;
import java.util.List;
import phms.model.User;
public interface UserMapper {
int deleteByPrimaryKey(Integer id);
int insert(User record);
int insertSelective(User record);
User selectByPrimaryKey(Integer id);
int updateByPrimaryKeySelective(User record);
int updateByPrimaryKey(User record);
List<User> getAll();
}
UserMapper.xml(对应mapping层)
<?xml version="1.0" encoding="UTF-8" ?>
<!DOCTYPE mapper PUBLIC "-//mybatis.org//DTD Mapper 3.0//EN" "http://mybatis.org/dtd/mybatis-3-mapper.dtd" >
<mapper namespace="phms.dao.UserMapper" >
<resultMap id="BaseResultMap" type="phms.model.User" >
<id column="id" property="id" jdbcType="INTEGER" />
<result column="password" property="password" jdbcType="CHAR" />
<result column="name" property="name" jdbcType="CHAR" />
<result column="sex" property="sex" jdbcType="CHAR" />
<result column="phone_num" property="phoneNum" jdbcType="INTEGER" />
<result column="address" property="address" jdbcType="VARCHAR" />
<result column="manager" property="manager" jdbcType="INTEGER" />
</resultMap>
<sql id="Base_Column_List" >
id, password, name, sex, phone_num, address, manager
</sql>
<select id="selectByPrimaryKey" resultMap="BaseResultMap" parameterType="java.lang.Integer" >
select
<include refid="Base_Column_List" />
from user
where id = #{id,jdbcType=INTEGER}
</select>
<delete id="deleteByPrimaryKey" parameterType="java.lang.Integer" >
delete from user
where id = #{id,jdbcType=INTEGER}
</delete>
<insert id="insert" parameterType="phms.model.User" >
insert into user (id, password, name,
sex, phone_num, address,
manager)
values (#{id,jdbcType=INTEGER}, #{password,jdbcType=CHAR}, #{name,jdbcType=CHAR},
#{sex,jdbcType=CHAR}, #{phoneNum,jdbcType=INTEGER}, #{address,jdbcType=VARCHAR},
#{manager,jdbcType=INTEGER})
</insert>
<insert id="insertSelective" parameterType="phms.model.User" >
insert into user
<trim prefix="(" suffix=")" suffixOverrides="," >
<if test="id != null" >
id,
</if>
<if test="password != null" >
password,
</if>
<if test="name != null" >
name,
</if>
<if test="sex != null" >
sex,
</if>
<if test="phoneNum != null" >
phone_num,
</if>
<if test="address != null" >
address,
</if>
<if test="manager != null" >
manager,
</if>
</trim>
<trim prefix="values (" suffix=")" suffixOverrides="," >
<if test="id != null" >
#{id,jdbcType=INTEGER},
</if>
<if test="password != null" >
#{password,jdbcType=CHAR},
</if>
<if test="name != null" >
#{name,jdbcType=CHAR},
</if>
<if test="sex != null" >
#{sex,jdbcType=CHAR},
</if>
<if test="phoneNum != null" >
#{phoneNum,jdbcType=INTEGER},
</if>
<if test="address != null" >
#{address,jdbcType=VARCHAR},
</if>
<if test="manager != null" >
#{manager,jdbcType=INTEGER},
</if>
</trim>
</insert>
<update id="updateByPrimaryKeySelective" parameterType="phms.model.User" >
update user
<set >
<if test="password != null" >
password = #{password,jdbcType=CHAR},
</if>
<if test="name != null" >
name = #{name,jdbcType=CHAR},
</if>
<if test="sex != null" >
sex = #{sex,jdbcType=CHAR},
</if>
<if test="phoneNum != null" >
phone_num = #{phoneNum,jdbcType=INTEGER},
</if>
<if test="address != null" >
address = #{address,jdbcType=VARCHAR},
</if>
<if test="manager != null" >
manager = #{manager,jdbcType=INTEGER},
</if>
</set>
where id = #{id,jdbcType=INTEGER}
</update>
<update id="updateByPrimaryKey" parameterType="phms.model.User" >
update user
set password = #{password,jdbcType=CHAR},
name = #{name,jdbcType=CHAR},
sex = #{sex,jdbcType=CHAR},
phone_num = #{phoneNum,jdbcType=INTEGER},
address = #{address,jdbcType=VARCHAR},
manager = #{manager,jdbcType=INTEGER}
where id = #{id,jdbcType=INTEGER}
</update>
</mapper>
User.java(对应model层)
package phms.model;
public class User {
private Integer id;
private String password;
private String name;
private String sex;
private Integer phoneNum;
private String address;
private Integer manager;
public Integer getId() {
return id;
}
public void setId(Integer id) {
this.id = id;
}
public String getPassword() {
return password;
}
public void setPassword(String password) {
this.password = password == null ? null : password.trim();
}
public String getName() {
return name;
}
public void setName(String name) {
this.name = name == null ? null : name.trim();
}
public String getSex() {
return sex;
}
public void setSex(String sex) {
this.sex = sex == null ? null : sex.trim();
}
public Integer getPhoneNum() {
return phoneNum;
}
public void setPhoneNum(Integer phoneNum) {
this.phoneNum = phoneNum;
}
public String getAddress() {
return address;
}
public void setAddress(String address) {
this.address = address == null ? null : address.trim();
}
public Integer getManager() {
return manager;
}
public void setManager(Integer manager) {
this.manager = manager;
}
}代码还是很多的,建议还是用工具生成,自己手写慢还容易出错
导入我们的项目中,如图
下一步service层的接口
很简单
LoginService.java
package phms.service;
public interface LoginService {
public boolean login(int id,String password,int manager);//定义该接口的方法
}
id就是我表的主键,manager表示的是职位是否是经理(0不是,1是)
登录使用boolean值比较方便,验证通过就是true,不通过就是false
接口写完了,下一步就是我们要实现这个接口呀!
LoginServiceImpl.java
package phms.serviceImpl;
import org.springframework.
4000
beans.factory.annotation.Autowired;
import org.springframework.stereotype.Service;
import phms.dao.UserMapper;
import phms.model.User;
import phms.service.LoginService;
@Service("LoginService")
public class LoginServiceImpl implements LoginService{ //继承该接口的方法
@Autowired
UserMapper userMapper;//实例化userMapper
public boolean login(int id,String password,int manager){//该方法的具体内容
User user = userMapper.selectByPrimaryKey(id); //selectByPrimaryKey()方法来自如UserMapper中
if (user != null) {
if (user.getId().equals(id) && user.getPassword().equals(password) && user.getManager().equals(manager))//dao层的get/set方法,获取数据库的值
return true;
}
return false;
}
}
新手学到这很容易懵逼

我也是这样过来的,这个不懂的就去百度,一时半会也难以完全弄懂!!
下一步,控制器
LoginController.java
package phms.controller;
import javax.servlet.http.HttpServletRequest;
import javax.servlet.http.HttpSession;
import org.springframework.beans.factory.annotation.Autowired;
import org.springframework.stereotype.Controller;
import org.springframework.web.bind.annotation.RequestMapping;
import phms.model.User;
import phms.service.LoginService;
/*控制类标记*/
@Controller
/*控制类访问地址的配置,启动服务器时自动映射这些类*/
public class LoginController {
@Autowired
private LoginService loginService; //注入service层
@RequestMapping(value="/login")//响应login
public String login(User user,HttpServletRequest request,HttpSession session){ //获取前台表单所传的值
try{
boolean loginType = loginService.login(user.getId(),user.getPassword(),user.getManager());
/*调用service中的login方法验证id,password,manager是否正确*/
if(loginType){
//如果验证通过,则将用户信息传到前台
//并跳转到success.jsp页面
if(user.getManager()==1){
request.setAttribute("user",user);
session.setAttribute("NowManager","经理");//设置session
return "jingli"; //经理的页面
}
else {
session.setAttribute("NowManager","管理员");
return "yuangong"; // 员工的页面
}
}
else{
//若不对,则将错误信息显示到错误页面
request.setAttribute("message","用户名密码错误");
return "redirect:loginErrors.jsp";
"redirect:index.jsp";}}
接下来,就来写前台jsp页面:
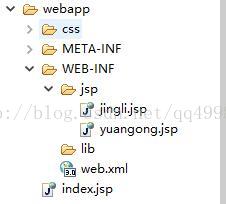
index.jsp loginErrors.jsp 这两个jsp是写在webapp下的,一定要是webapp下
jingli.jsp yuangong.jsp写在web-inf/jsp下,一定要写在web-inf里面
因为你tomcat部署项目后,可以直接访问到任何一个webapp下的jsp,但是不能直接访问到web-inf下的jsp,保证项目的安全性(关键工作性的代码都是在/web-inf/里)
结构如图:
index.jsp
<%@ page language="java" import="java.util.*"
contentType="text/html; charset=UTF-8"%>
<%@ taglib prefix="c" uri="http://java.sun.com/jsp/jstl/core"%>
<html>
<head>
<title>登录</title>
</head>
<body>
<div>
<form action="login" name="login" id="login" method="post">
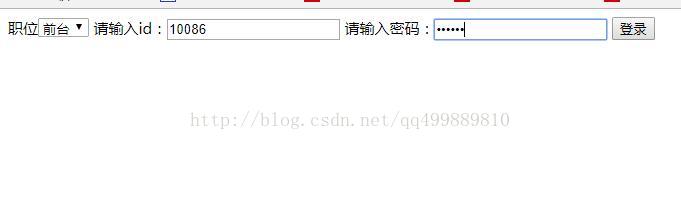
职位<select name="manager" id="manager">
<option value="0" style="color: black;" >前台</option>
<option value="1" style="color: black;">经理</option>
</select>
请输入id:<input type="text" name="id">
请输入密码:<input type="password" name="password">
<input type="submit" value="登录" id="login">
</form>
</div>
</body>
</html>jingli.jsp
<%@ page language="java" contentType="text/html; charset=UTF-8"
pageEncoding="UTF-8"%>
<%@ taglib prefix="c" uri="http://java.sun.com/jsp/jstl/core"%>
<html>
<head>
<title>经理</title>
</head>
<body>
欢迎经理!!!
<a href="${pageContext.request.contextPath}/loginOut">注销</a>
</body>
</html>
yuangong.jsp
<%@ page language="java" contentType="text/html; charset=UTF-8"
pageEncoding="UTF-8"%>
<%@ taglib prefix="c" uri="http://java.sun.com/jsp/jstl/core"%>
<html>
<head>
<title>员工</title>
</head>
<body>
欢迎员工!!!
<a href="${pageContext.request.contextPath}/loginOut">注销</a>
</body>
</html>loginErrors.jsp
<%@ page language="java" import="java.util.*"
contentType="text/html; charset=UTF-8"%>
<%@ taglib prefix="c" uri="http://java.sun.com/jsp/jstl/core"%>
<html>
<head>
<title>登录失败</title>
</head>
<body>
职位或id或密码错误!!!
</body>
</html>发布到tomcat上:
运行截图:
备注:这个例子的session请忽略!本来原版的登录模块是在service里面写了一个当前用户的方法,这里为了简便省略了!
总结一下这个登录模块:
首先:搞定你的mybatis需要的dao,mapping,model
然后根据模块功能写service
然后写serviceImpl
然后写jsp
然后写controller
然后..jsp和controller互相配合写
作者水平有限,有错误的地方请指正!!!
然后数据库、表、内容
使用mybatis generator生成的Mapper,mapping,model
UserMapper.java(对应dao层)
package phms.dao;
import java.util.List;
import phms.model.User;
public interface UserMapper {
int deleteByPrimaryKey(Integer id);
int insert(User record);
int insertSelective(User record);
User selectByPrimaryKey(Integer id);
int updateByPrimaryKeySelective(User record);
int updateByPrimaryKey(User record);
List<User> getAll();
}
UserMapper.xml(对应mapping层)
<?xml version="1.0" encoding="UTF-8" ?>
<!DOCTYPE mapper PUBLIC "-//mybatis.org//DTD Mapper 3.0//EN" "http://mybatis.org/dtd/mybatis-3-mapper.dtd" >
<mapper namespace="phms.dao.UserMapper" >
<resultMap id="BaseResultMap" type="phms.model.User" >
<id column="id" property="id" jdbcType="INTEGER" />
<result column="password" property="password" jdbcType="CHAR" />
<result column="name" property="name" jdbcType="CHAR" />
<result column="sex" property="sex" jdbcType="CHAR" />
<result column="phone_num" property="phoneNum" jdbcType="INTEGER" />
<result column="address" property="address" jdbcType="VARCHAR" />
<result column="manager" property="manager" jdbcType="INTEGER" />
</resultMap>
<sql id="Base_Column_List" >
id, password, name, sex, phone_num, address, manager
</sql>
<select id="selectByPrimaryKey" resultMap="BaseResultMap" parameterType="java.lang.Integer" >
select
<include refid="Base_Column_List" />
from user
where id = #{id,jdbcType=INTEGER}
</select>
<delete id="deleteByPrimaryKey" parameterType="java.lang.Integer" >
delete from user
where id = #{id,jdbcType=INTEGER}
</delete>
<insert id="insert" parameterType="phms.model.User" >
insert into user (id, password, name,
sex, phone_num, address,
manager)
values (#{id,jdbcType=INTEGER}, #{password,jdbcType=CHAR}, #{name,jdbcType=CHAR},
#{sex,jdbcType=CHAR}, #{phoneNum,jdbcType=INTEGER}, #{address,jdbcType=VARCHAR},
#{manager,jdbcType=INTEGER})
</insert>
<insert id="insertSelective" parameterType="phms.model.User" >
insert into user
<trim prefix="(" suffix=")" suffixOverrides="," >
<if test="id != null" >
id,
</if>
<if test="password != null" >
password,
</if>
<if test="name != null" >
name,
</if>
<if test="sex != null" >
sex,
</if>
<if test="phoneNum != null" >
phone_num,
</if>
<if test="address != null" >
address,
</if>
<if test="manager != null" >
manager,
</if>
</trim>
<trim prefix="values (" suffix=")" suffixOverrides="," >
<if test="id != null" >
#{id,jdbcType=INTEGER},
</if>
<if test="password != null" >
#{password,jdbcType=CHAR},
</if>
<if test="name != null" >
#{name,jdbcType=CHAR},
</if>
<if test="sex != null" >
#{sex,jdbcType=CHAR},
</if>
<if test="phoneNum != null" >
#{phoneNum,jdbcType=INTEGER},
</if>
<if test="address != null" >
#{address,jdbcType=VARCHAR},
</if>
<if test="manager != null" >
#{manager,jdbcType=INTEGER},
</if>
</trim>
</insert>
<update id="updateByPrimaryKeySelective" parameterType="phms.model.User" >
update user
<set >
<if test="password != null" >
password = #{password,jdbcType=CHAR},
</if>
<if test="name != null" >
name = #{name,jdbcType=CHAR},
</if>
<if test="sex != null" >
sex = #{sex,jdbcType=CHAR},
</if>
<if test="phoneNum != null" >
phone_num = #{phoneNum,jdbcType=INTEGER},
</if>
<if test="address != null" >
address = #{address,jdbcType=VARCHAR},
</if>
<if test="manager != null" >
manager = #{manager,jdbcType=INTEGER},
</if>
</set>
where id = #{id,jdbcType=INTEGER}
</update>
<update id="updateByPrimaryKey" parameterType="phms.model.User" >
update user
set password = #{password,jdbcType=CHAR},
name = #{name,jdbcType=CHAR},
sex = #{sex,jdbcType=CHAR},
phone_num = #{phoneNum,jdbcType=INTEGER},
address = #{address,jdbcType=VARCHAR},
manager = #{manager,jdbcType=INTEGER}
where id = #{id,jdbcType=INTEGER}
</update>
</mapper>
User.java(对应model层)
package phms.model;
public class User {
private Integer id;
private String password;
private String name;
private String sex;
private Integer phoneNum;
private String address;
private Integer manager;
public Integer getId() {
return id;
}
public void setId(Integer id) {
this.id = id;
}
public String getPassword() {
return password;
}
public void setPassword(String password) {
this.password = password == null ? null : password.trim();
}
public String getName() {
return name;
}
public void setName(String name) {
this.name = name == null ? null : name.trim();
}
public String getSex() {
return sex;
}
public void setSex(String sex) {
this.sex = sex == null ? null : sex.trim();
}
public Integer getPhoneNum() {
return phoneNum;
}
public void setPhoneNum(Integer phoneNum) {
this.phoneNum = phoneNum;
}
public String getAddress() {
return address;
}
public void setAddress(String address) {
this.address = address == null ? null : address.trim();
}
public Integer getManager() {
return manager;
}
public void setManager(Integer manager) {
this.manager = manager;
}
}代码还是很多的,建议还是用工具生成,自己手写慢还容易出错
导入我们的项目中,如图
下一步service层的接口
很简单
LoginService.java
package phms.service;
public interface LoginService {
public boolean login(int id,String password,int manager);//定义该接口的方法
}
id就是我表的主键,manager表示的是职位是否是经理(0不是,1是)
登录使用boolean值比较方便,验证通过就是true,不通过就是false
接口写完了,下一步就是我们要实现这个接口呀!
LoginServiceImpl.java
package phms.serviceImpl;
import org.springframework.
4000
beans.factory.annotation.Autowired;
import org.springframework.stereotype.Service;
import phms.dao.UserMapper;
import phms.model.User;
import phms.service.LoginService;
@Service("LoginService")
public class LoginServiceImpl implements LoginService{ //继承该接口的方法
@Autowired
UserMapper userMapper;//实例化userMapper
public boolean login(int id,String password,int manager){//该方法的具体内容
User user = userMapper.selectByPrimaryKey(id); //selectByPrimaryKey()方法来自如UserMapper中
if (user != null) {
if (user.getId().equals(id) && user.getPassword().equals(password) && user.getManager().equals(manager))//dao层的get/set方法,获取数据库的值
return true;
}
return false;
}
}
新手学到这很容易懵逼
我也是这样过来的,这个不懂的就去百度,一时半会也难以完全弄懂!!
下一步,控制器
LoginController.java
package phms.controller;
import javax.servlet.http.HttpServletRequest;
import javax.servlet.http.HttpSession;
import org.springframework.beans.factory.annotation.Autowired;
import org.springframework.stereotype.Controller;
import org.springframework.web.bind.annotation.RequestMapping;
import phms.model.User;
import phms.service.LoginService;
/*控制类标记*/
@Controller
/*控制类访问地址的配置,启动服务器时自动映射这些类*/
public class LoginController {
@Autowired
private LoginService loginService; //注入service层
@RequestMapping(value="/login")//响应login
public String login(User user,HttpServletRequest request,HttpSession session){ //获取前台表单所传的值
try{
boolean loginType = loginService.login(user.getId(),user.getPassword(),user.getManager());
/*调用service中的login方法验证id,password,manager是否正确*/
if(loginType){
//如果验证通过,则将用户信息传到前台
//并跳转到success.jsp页面
if(user.getManager()==1){
request.setAttribute("user",user);
session.setAttribute("NowManager","经理");//设置session
return "jingli"; //经理的页面
}
else {
session.setAttribute("NowManager","管理员");
return "yuangong"; // 员工的页面
}
}
else{
//若不对,则将错误信息显示到错误页面
request.setAttribute("message","用户名密码错误");
return "redirect:loginErrors.jsp";
/*redirect:重定位路径,为了跳出web-inf。不加该标签则默认路径为web-inf/jsp/*.jsp */}}catch (Exception e) {// TODO: handle exceptionSystem.out.println(e);}return null;}@RequestMapping(value="/loginOut")//响应loginOutpublic String loginError(HttpSession session){//注销功能,删除登录成功时候的sessionsession.removeAttribute("NowUserName");session.removeAttribute("NowManager");return
"redirect:index.jsp";}}
接下来,就来写前台jsp页面:
index.jsp loginErrors.jsp 这两个jsp是写在webapp下的,一定要是webapp下
jingli.jsp yuangong.jsp写在web-inf/jsp下,一定要写在web-inf里面
因为你tomcat部署项目后,可以直接访问到任何一个webapp下的jsp,但是不能直接访问到web-inf下的jsp,保证项目的安全性(关键工作性的代码都是在/web-inf/里)
结构如图:
index.jsp
<%@ page language="java" import="java.util.*"
contentType="text/html; charset=UTF-8"%>
<%@ taglib prefix="c" uri="http://java.sun.com/jsp/jstl/core"%>
<html>
<head>
<title>登录</title>
</head>
<body>
<div>
<form action="login" name="login" id="login" method="post">
职位<select name="manager" id="manager">
<option value="0" style="color: black;" >前台</option>
<option value="1" style="color: black;">经理</option>
</select>
请输入id:<input type="text" name="id">
请输入密码:<input type="password" name="password">
<input type="submit" value="登录" id="login">
</form>
</div>
</body>
</html>jingli.jsp
<%@ page language="java" contentType="text/html; charset=UTF-8"
pageEncoding="UTF-8"%>
<%@ taglib prefix="c" uri="http://java.sun.com/jsp/jstl/core"%>
<html>
<head>
<title>经理</title>
</head>
<body>
欢迎经理!!!
<a href="${pageContext.request.contextPath}/loginOut">注销</a>
</body>
</html>
yuangong.jsp
<%@ page language="java" contentType="text/html; charset=UTF-8"
pageEncoding="UTF-8"%>
<%@ taglib prefix="c" uri="http://java.sun.com/jsp/jstl/core"%>
<html>
<head>
<title>员工</title>
</head>
<body>
欢迎员工!!!
<a href="${pageContext.request.contextPath}/loginOut">注销</a>
</body>
</html>loginErrors.jsp
<%@ page language="java" import="java.util.*"
contentType="text/html; charset=UTF-8"%>
<%@ taglib prefix="c" uri="http://java.sun.com/jsp/jstl/core"%>
<html>
<head>
<title>登录失败</title>
</head>
<body>
职位或id或密码错误!!!
</body>
</html>发布到tomcat上:
运行截图:
备注:这个例子的session请忽略!本来原版的登录模块是在service里面写了一个当前用户的方法,这里为了简便省略了!
总结一下这个登录模块:
首先:搞定你的mybatis需要的dao,mapping,model
然后根据模块功能写service
然后写serviceImpl
然后写jsp
然后写controller
然后..jsp和controller互相配合写
作者水平有限,有错误的地方请指正!!!

相关文章推荐
- SSM框架整合---实现简单登录注册功能
- 一个使用监听器模式实现的J2ME网络编程框架,包括一个简单的登录功能实现(含源代码)
- 一个使用监听器模式实现的J2ME网络编程框架,包括一个简单的登录功能实现(含源代码)
- SSM框架整合---实现简单登录注册功能
- 一个简单WPF登陆界面,包含记住密码,自动登录等功能,简洁美观
- (NodeJS学习文章收集三) node.js基于express框架搭建一个简单的注册登录Web功能
- SSM框架整合实现简单的登录注册
- ssm框架整合实现登录功能
- 写了一个简单的注册登录模块
- SpringMVC详解(四)------SSM三大框架整合之登录功能实现
- 一个简单的登陆功能模块
- 完整使用SSM框架(Spring SpringMVC Mybatis)搭建web服务器实现登录功能
- ant design+node.js+mongoose实现一个简单的注册登录功能
- 构思的一个功能简单的接口框架
- ssm框架登录界面验证码功能
- Struts2开发环境搭建,及一个简单登录功能实例
- 开发一个简单错误记录功能小模块,能够记录出错的代码所在的文件名称和行号。
- SSM+Shiro写的一个简单的登录验证
- 使用sqlite3的接口函数完成一个用户登录验证功能模块设计 要封装成独立函数,在独立的main中调用测试;
- 使用idea搭建一个简单的SSM框架:(1)使用idea创建maven项目