搭建DHCP服务器 搭建NFS网络文件共享
2017-08-10 11:41
411 查看
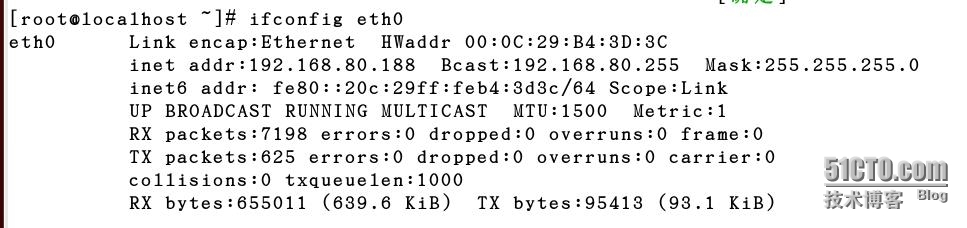
步骤一、为服务器配置静态的IP地址[root@localhost ~]# vim/etc/sysconfig/network-scripts/ifcfg-eth0# Intel Corporation 82545EM Gigabit Ethernet Controller (Copper)DEVICE=eth0BOOTPROTO=staticONBOOT=yesHWADDR=00:0c:29:c3:b1:d9IPADDR=192.168.80.253NETMASK=255.255.255.0步骤二、配置DHCP服务器1、安装软件包[root@localhost ~]# rpm -q dhcppackage dhcp is not installed (dhcp软件包没有安装)进入光盘文件安装dncp[root@localhost ~]# cd /misc/cd/Server/[root@localhost Server]#查找dncp开通的文件[root@localhost Server]# ls dhcp*dhcp-3.0.5-31.el5_8.1.x86_64.rpm dhcpv6-1.0.10-20.el5.x86_64.rpmdhcp-devel-3.0.5-31.el5_8.1.i386.rpm dhcpv6-client-1.0.10-20.el5.x86_64.rpmdhcp-devel-3.0.5-31.el5_8.1.x86_64.rpm安装dhcp软件包[root@localhost Server]# rpm -ivhdhcp-3.0.5-31.el5_8.1.x86_64.rpmwarning: dhcp-3.0.5-31.el5_8.1.x86_64.rpm: Header V3 DSA signature:NOKEY, key ID 37017186Preparing... ########################################### [100%] 1:dhcp ########################################### [100%]2、配置dhcp配置文件让linux客户端获得固定的IP:192.168.80.188,win7客户端自动获取IP地址[root@localhost ~]# vim /etc/dhcpd.conf
[root@localhost ~]# cat /etc/dhcpd.confddns-update-style interim;subnet 192.168.80.0 netmask 255.255.255.0 { optionrouters 192.168.80.253; optionsubnet-mask 255.255.255.0; optiondomain-name "tarena.com"; optiondomain-name-servers 192.168.80.1,202.106.0.20; rangedynamic-bootp 192.168.80.80 192.168.80.100; range dynamic-bootp192.168.80.120 192.168.80.200; default-lease-time21600; max-lease-time43200; host linux { hardwareethernet 00:0C:29:B4:3D:3C; fixed-address 192.168.80.188; } host ns { hardware ethernet 12:34:56:78:AB:CD; fixed-address 207.175.42.254; }}3、启动服务[root@localhost ~]# /etc/init.d/dhcpd configtestSyntax: OK[root@localhost ~]# /etc/init.d/dhcpd statusdhcpd 已停[root@localhost ~]# /etc/init.d/dhcpd start启动 dhcpd: [确定][root@localhost ~]# chkconfig --list dhcpddhcpd 0:关闭 1:关闭 2:关闭 3:关闭 4:关闭 5:关闭 6:关闭[root@localhost ~]# chkconfig dhcpd on[root@localhost ~]# chkconfig --list dhcpddhcpd 0:关闭 1:关闭 2:启用 3:启用4:启用 5:启用 6:关闭4、验证分别登录两台客户机查看ip地址的获取情况Linux获取的IP地址是192.168.80.188.

查看win7客户端

=================================================================================
搭建NFS网络文件共享
实验要求:将/root文件夹共享给192.168.80.188,保留root的身份及完整权限将/usr/src文件夹共享给192.168.80.0/24网段,只有读取权限,不可写入,所有用户均视为nfsnobody对待步骤1、配置NFS配置文件[root@localhost ~]# vim /etc/exports[root@localhost ~]# cat /etc/exports/root 192.168.80.188(rw,no_root_squash)/usr/src 192.168.80.0/24(ro,all_squash)步骤2、开启服务[root@localhost ~]# /etc/init.d/portmap restart停止 portmap: [确定]启动 portmap: [确定][root@localhost ~]# service nfs restart关闭 NFS mountd: [确定]关闭 NFS 守护进程: [确定]关闭 NFS quotas: [确定]关闭 NFS 服务: [确定]启动 NFS 服务: [确定]关掉 NFS 配额: [确定]启动 NFS 守护进程: [确定]启动 NFS mountd: [确定]Stopping RPC idmapd: [确定]正在启动 RPC idmapd: [确定]步骤3、在客户端验证1)查看服务状态[root@localhost ~]# service portmap statusportmap (pid 19000) 正在运行...2)查看nfs共享列表[root@localhost ~]# showmount -e 192.168.80.253Export list for 192.168.80.253:/root 192.168.80.188/usr/src 192.168.80.0/243)挂载NFS共享目录[root@localhost ~]# mkdir /mnt/dir1 /mnt/dir2[root@localhost ~]# ls /mntdir1 dir2 hgfs[root@localhost ~]# mount 192.168.80.253:/root /mnt/dir1[root@localhost ~]# mount 192.168.80.253:/usr/src /mnt/dir24)在客户端写入测试文件[root@localhost dir1]# mkdir dir1[root@localhost dir1]# touch file1[root@localhost dir1]# ls -lh总计 64K-rw------- 1 root root 1015 2013-07-10 anaconda-ks.gdrwxr-xr-x 2 root root 4.0K 2013-07-23 Desktopdrwxr-xr-x 2 root root 4.0K 04-14 20:05 dir1-rw-r--r-- 1 root root 0 04-14 20:05 file1-rw-r--r-- 1 root root 33K 2013-07-10 install.log-rw-r--r-- 1 root root 3.8K 2013-07-10 install.log.syslog
[root@localhost dir2]# mkdir dir2[root@localhost dir2]# touch file2[root@localhost dir2]# ls -lh总计 28Kdrwxr-xr-x 2 root root 4.0K 2009-10-01 debugdrwxr-xr-x 2 root root 4.0K 04-14 20:06 dir2-rw-r--r-- 1 root root 0 04-14 20:06 file2drwxr-xr-x 2 root root 4.0K 2009-10-01 kernels-rw-r--r-- 1 root root 5 04-14 19:02 scim-bridge-0.3.0.lockfile-0@localhost:0.0drwxr-xr-x 7 root root 4.0K 2012-11-01 vmware-tools-distrib
扩展将上面/root共享通过fstab实现开机自动挂载在客户端操作[root@localhost ~]# tail -n 1 /etc/fstab192.168.80.253:/root /mnt/dir1 nfs defaults 0 0[root@localhost ~]# mount -a[root@localhost ~]# df -h | grep nfs192.168.80.253:/root 19G 2.7G 16G 15% /mnt/dir1
将上面/usr/src共享通过autofs实现触发挂载[root@localhost ~]# rm -rf /data/src/[root@localhost ~]# grep nfs /etc/auto.master/data /etc/auto.data[root@localhost ~]# cat /etc/auto.datasrc -fstype=nfs,rw 192.168.80.253:/usr/src(注意前面没有冒号,别的需要加上冒号)[root@localhost ~]# service autofs restart[root@localhost ~]# cd /data/src/
[root@localhost ~]# cat /etc/dhcpd.confddns-update-style interim;subnet 192.168.80.0 netmask 255.255.255.0 { optionrouters 192.168.80.253; optionsubnet-mask 255.255.255.0; optiondomain-name "tarena.com"; optiondomain-name-servers 192.168.80.1,202.106.0.20; rangedynamic-bootp 192.168.80.80 192.168.80.100; range dynamic-bootp192.168.80.120 192.168.80.200; default-lease-time21600; max-lease-time43200; host linux { hardwareethernet 00:0C:29:B4:3D:3C; fixed-address 192.168.80.188; } host ns { hardware ethernet 12:34:56:78:AB:CD; fixed-address 207.175.42.254; }}3、启动服务[root@localhost ~]# /etc/init.d/dhcpd configtestSyntax: OK[root@localhost ~]# /etc/init.d/dhcpd statusdhcpd 已停[root@localhost ~]# /etc/init.d/dhcpd start启动 dhcpd: [确定][root@localhost ~]# chkconfig --list dhcpddhcpd 0:关闭 1:关闭 2:关闭 3:关闭 4:关闭 5:关闭 6:关闭[root@localhost ~]# chkconfig dhcpd on[root@localhost ~]# chkconfig --list dhcpddhcpd 0:关闭 1:关闭 2:启用 3:启用4:启用 5:启用 6:关闭4、验证分别登录两台客户机查看ip地址的获取情况Linux获取的IP地址是192.168.80.188.
查看win7客户端
=================================================================================
搭建NFS网络文件共享
实验要求:将/root文件夹共享给192.168.80.188,保留root的身份及完整权限将/usr/src文件夹共享给192.168.80.0/24网段,只有读取权限,不可写入,所有用户均视为nfsnobody对待步骤1、配置NFS配置文件[root@localhost ~]# vim /etc/exports[root@localhost ~]# cat /etc/exports/root 192.168.80.188(rw,no_root_squash)/usr/src 192.168.80.0/24(ro,all_squash)步骤2、开启服务[root@localhost ~]# /etc/init.d/portmap restart停止 portmap: [确定]启动 portmap: [确定][root@localhost ~]# service nfs restart关闭 NFS mountd: [确定]关闭 NFS 守护进程: [确定]关闭 NFS quotas: [确定]关闭 NFS 服务: [确定]启动 NFS 服务: [确定]关掉 NFS 配额: [确定]启动 NFS 守护进程: [确定]启动 NFS mountd: [确定]Stopping RPC idmapd: [确定]正在启动 RPC idmapd: [确定]步骤3、在客户端验证1)查看服务状态[root@localhost ~]# service portmap statusportmap (pid 19000) 正在运行...2)查看nfs共享列表[root@localhost ~]# showmount -e 192.168.80.253Export list for 192.168.80.253:/root 192.168.80.188/usr/src 192.168.80.0/243)挂载NFS共享目录[root@localhost ~]# mkdir /mnt/dir1 /mnt/dir2[root@localhost ~]# ls /mntdir1 dir2 hgfs[root@localhost ~]# mount 192.168.80.253:/root /mnt/dir1[root@localhost ~]# mount 192.168.80.253:/usr/src /mnt/dir24)在客户端写入测试文件[root@localhost dir1]# mkdir dir1[root@localhost dir1]# touch file1[root@localhost dir1]# ls -lh总计 64K-rw------- 1 root root 1015 2013-07-10 anaconda-ks.gdrwxr-xr-x 2 root root 4.0K 2013-07-23 Desktopdrwxr-xr-x 2 root root 4.0K 04-14 20:05 dir1-rw-r--r-- 1 root root 0 04-14 20:05 file1-rw-r--r-- 1 root root 33K 2013-07-10 install.log-rw-r--r-- 1 root root 3.8K 2013-07-10 install.log.syslog
[root@localhost dir2]# mkdir dir2[root@localhost dir2]# touch file2[root@localhost dir2]# ls -lh总计 28Kdrwxr-xr-x 2 root root 4.0K 2009-10-01 debugdrwxr-xr-x 2 root root 4.0K 04-14 20:06 dir2-rw-r--r-- 1 root root 0 04-14 20:06 file2drwxr-xr-x 2 root root 4.0K 2009-10-01 kernels-rw-r--r-- 1 root root 5 04-14 19:02 scim-bridge-0.3.0.lockfile-0@localhost:0.0drwxr-xr-x 7 root root 4.0K 2012-11-01 vmware-tools-distrib
扩展将上面/root共享通过fstab实现开机自动挂载在客户端操作[root@localhost ~]# tail -n 1 /etc/fstab192.168.80.253:/root /mnt/dir1 nfs defaults 0 0[root@localhost ~]# mount -a[root@localhost ~]# df -h | grep nfs192.168.80.253:/root 19G 2.7G 16G 15% /mnt/dir1
将上面/usr/src共享通过autofs实现触发挂载[root@localhost ~]# rm -rf /data/src/[root@localhost ~]# grep nfs /etc/auto.master/data /etc/auto.data[root@localhost ~]# cat /etc/auto.datasrc -fstype=nfs,rw 192.168.80.253:/usr/src(注意前面没有冒号,别的需要加上冒号)[root@localhost ~]# service autofs restart[root@localhost ~]# cd /data/src/

相关文章推荐
- linux下NFS文件共享服务器搭建
- Ubuntu配置网络文件共享服务器NFS
- 关于在Arm中搭建tftp服务器和搭建nfs网络系统文件服务器的步骤和代码
- RHEL6.4 NFS文件共享服务器搭建
- 搭建服务器之文件共享cifs,nfs,samba
- Ubuntu Kylin 16.04 下搭建nfs网络文件系统服务器
- 搭建NFS网络文件共享
- RHEL6.4 NFS文件共享服务器搭建
- NFS服务器搭建——可用于共享文件或负载均衡文件共享服务器使用
- nfs 网络共享服务器的搭建和配置
- CentOST6.6 搭建NFS网络文件系统服务器
- NFS文件共享服务器的搭建
- NFS(网络文件系统)服务器搭建及挂载
- NFS文件共享服务器的搭建
- 搭建NFS网络文件共享,以及autoFS自…
- Ubuntu 16.04 下搭建nfs网络文件系统服务器
- NFS服务器搭建-共享PC与ARM主板文件
- NFS网络文件共享存储服务器
- NFS文件共享服务器搭建
- 简单搭建nfs文件共享服务器