springboot【11】数据访问之NoSQL数据库redis
2017-08-07 16:23
411 查看
Spring Boot中除了对常用的关系型数据库提供了优秀的自动化支持之外,对于很多NoSQL数据库也提供了自动化配置的支持,包括:Redis, MongoDB, Elasticsearch, Solr和Cassandra。
Redis官网
Redis中文社区
注意:测试前记得开启redis服务器哦!
通过上面这段简单而且只支持String类型的测试案例,演示了如何通过自动配置的
除了String类型,实战中我们还经常会在Redis中存储对象,这时候我们就会想是否可以使用类似
创建要存储的对象实体:User.java
实现对象的序列化接口RedisObjectSerializer.jav
b9bb
a
配置针对User的RedisTemplate实例
完成了配置工作后,编写测试用例实验效果
当然spring-data-redis中提供的数据操作远不止这些,本文仅作为在Spring Boot中使用redis时的配置参考,更多对于redis的操作使用,请参考Spring-data-redis Reference。
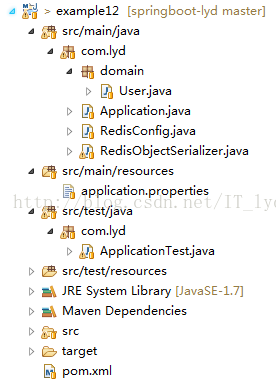
下面是完整项目结构:
一、使用Redis
Redis是一个开源的使用ANSI C语言编写、支持网络、可基于内存亦可持久化的日志型、Key-Value数据库。Redis官网
Redis中文社区
1.引入依赖
Spring Boot提供的数据访问框架Spring Data Redis基于Jedis。可以通过引入spring-boot-starter-redis来配置依赖关系。
<!-- NoSQL数据库之 Redis -->
<dependency>
<groupId>org.springframework.boot</groupId>
<artifactId>spring-boot-starter-redis</artifactId>
</dependency>
2.参数配置
按照惯例在application.properties中加入Redis服务端的相关配置,具体说明如下:
# REDIS (RedisProperties)

# Redis数据库索引(默认为0)
spring.redis.database=0
# Redis服务器地址
spring.redis.host=localhost
# Redis服务器连接端口
spring.redis.port=6379
# Redis服务器连接密码(默认为空)
spring.redis.password=
# 连接池最大连接数(使用负值表示没有限制)
spring.redis.pool.max-active=8
# 连接池最大阻塞等待时间(使用负值表示没有限制)
spring.redis.pool.max-wait=-1
# 连接池中的最大空闲连接
spring.redis.pool.max-idle=8
# 连接池中的最小空闲连接
spring.redis.pool.min-idle=0
# 连接超时时间(毫秒)
spring.redis.timeout=0
说明:其中spring.redis.database的配置通常使用0即可,Redis在配置的时候可以设置数据库数量,默认为16,可以理解为数据库的schema
3.测试访问
编写测试用例访问Redis:package com.lyd;
import org.junit.Assert;
import org.junit.Test;
import org.junit.runner.RunWith;
import org.springframework.beans.factory.annotation.Autowired;
import org.springframework.boot.test.SpringApplicationConfiguration;
import org.springframework.data.redis.core.StringRedisTemplate;
import org.springframework.test.context.junit4.SpringJUnit4ClassRunner;
@RunWith(SpringJUnit4ClassRunner.class)
@SpringApplicationConfiguration(Application.class)
public class ApplicationTest {
@Autowired
private StringRedisTemplate srt;
@Test
public void test() throws Exception {
// 保存字符串
srt.opsForValue().set("a", "1");
Assert.assertEquals("1", srt.opsForValue().get("a"));
}
}注意:测试前记得开启redis服务器哦!
通过上面这段简单而且只支持String类型的测试案例,演示了如何通过自动配置的
StringRedisTemplate对象进行Redis的读写操作。如果有使用过spring-data-redis的开发者一定熟悉
RedisTemplate<K, V>接口,
StringRedisTemplate就相当于
RedisTemplate<String, String>的实现。
除了String类型,实战中我们还经常会在Redis中存储对象,这时候我们就会想是否可以使用类似
RedisTemplate<String, User>来初始化并进行操作。但是Spring Boot并不支持直接使用,需要我们自己实现
RedisSerializer<T>接口来对传入对象进行序列化和反序列化,下面我们通过一个实例来完成对象的读写操作。
创建要存储的对象实体:User.java
package com.lyd.domain;

import java.io.Serializable;

public class User implements Serializable{

/**
*
*/
private static final long serialVersionUID = -4124423467708470558L;

private String username;

private Integer age;

public User(String username, int age) {
this.username = username;
this.age = age;
}

// get/set方法...
}
实现对象的序列化接口RedisObjectSerializer.jav
b9bb
a
package com.lyd;

import org.hamcrest.collection.IsEmptyCollection;
import org.springframework.core.convert.converter.Converter;
import org.springframework.core.serializer.support.DeserializingConverter;
import org.springframework.core.serializer.support.SerializingConverter;
import org.springframework.data.redis.serializer.RedisSerializer;
import org.springframework.data.redis.serializer.SerializationException;

/**
*
* <p>Title: RedisObjectSerializer.java</p>
* <p>Description: 实现对象的序列化接口</p>
* @author lyd
* @date 2017年8月7日
* @version 1.0
* @blog springboot学习http://blog.csdn.net/IT_lyd/article/category/6692929
*/
public class RedisObjectSerializer implements RedisSerializer<Object>{

private Converter<Object, byte[]> serializer = new SerializingConverter();
private Converter<byte[], Object> deserializer = new DeserializingConverter();

static final byte[] EMPTY_ARRAY = new byte[0];

@Override
public Object deserialize(byte[] bytes) throws SerializationException {
if(isEmpty(bytes)){
return null;
}
try {
return deserializer.convert(bytes);
} catch (Exception e) {
throw new SerializationException("Cannot deserialize", e);
}
}

@Override
public byte[] serialize(Object object) throws SerializationException {
if(object == null){
return EMPTY_ARRAY;
}
try {
return serializer.convert(object);
} catch (Exception e) {
return EMPTY_ARRAY;
}
}

private boolean isEmpty(byte[] data){
return (data==null || data.length==0);
}

}
配置针对User的RedisTemplate实例
package com.lyd;

import org.springframework.context.annotation.Bean;
import org.springframework.context.annotation.Configuration;
import org.springframework.data.redis.connection.jedis.JedisConnectionFactory;
import org.springframework.data.redis.core.RedisTemplate;
import org.springframework.data.redis.serializer.StringRedisSerializer;

import com.lyd.domain.User;

/**
*
* <p>Title: RedisConfig.java</p>
* <p>Description: 配置针对User的RedisTemplate实例</p>
* @author lyd
* @date 2017年8月7日
* @version 1.0
* @blog springboot学习http://blog.csdn.net/IT_lyd/article/category/6692929
*/
@Configuration
public class RedisConfig {

@Bean
JedisConnectionFactory jedisConnectionFactory(){
return new JedisConnectionFactory();
}

@Bean
public RedisTemplate<String, User> redisTemplate(JedisConnectionFactory factory){
RedisTemplate<String, User> template = new RedisTemplate<String, User>();
template.setConnectionFactory(jedisConnectionFactory());
template.setKeySerializer(new StringRedisSerializer());
template.setValueSerializer(new RedisObjectSerializer());
return template;
}
}
完成了配置工作后,编写测试用例实验效果
package com.lyd;

import org.springframework.context.annotation.Bean;
import org.springframework.context.annotation.Configuration;
import org.springframework.data.redis.connection.jedis.JedisConnectionFactory;
import org.springframework.data.redis.core.RedisTemplate;
import org.springframework.data.redis.serializer.StringRedisSerializer;

import com.lyd.domain.User;

/**
*
* <p>Title: RedisConfig.java</p>
* <p>Description: 配置针对User的RedisTemplate实例</p>
* @author lyd
* @date 2017年8月7日
* @version 1.0
* @blog springboot学习http://blog.csdn.net/IT_lyd/article/category/6692929
*/
@Configuration
public class RedisConfig {

@Bean
JedisConnectionFactory jedisConnectionFactory(){
return new JedisConnectionFactory();
}

@Bean
public RedisTemplate<String, User> redisTemplate(JedisConnectionFactory factory){
RedisTemplate<String, User> template = new RedisTemplate<String, User>();
template.setConnectionFactory(jedisConnectionFactory());
template.setKeySerializer(new StringRedisSerializer());
template.setValueSerializer(new RedisObjectSerializer());
return template;
}
}
当然spring-data-redis中提供的数据操作远不止这些,本文仅作为在Spring Boot中使用redis时的配置参考,更多对于redis的操作使用,请参考Spring-data-redis Reference。
下面是完整项目结构:

相关文章推荐
- 链接服务器 OLE DB 访问接口 'SQLNCLI10' 返回的数据与列 '[LINK_SCT1].[SCT].[dbo].[v_Employee_Company].empname' 所需的数据长度不匹配。所需的(最大)数据长度为 10,但返回的数据长度为 11。
- 【Effective Java】11、同步访问共享的可变数据
- 第 11 章 使用ORM工具进行数据访问
- SpringBoot的数据访问
- 大数据笔记11:ZooKeeper集群、Java程序访问ZooKeeper
- SpringBoot21-springboot的数据访问-引入Docker
- C++访问Redis的mset 二进制数据接口封装方案
- springboot【9】数据访问之Spring-data-jpa
- 【Redis笔记-11】Redis开启远程访问
- 使用Rest访问Redis中的数据
- 斯坦福iOS7公开课11笔记及演示Demo&访问HTTPS链接下载数据
- springboot【10】数据访问之多数据源配置使用
- 11_传智播客JDBC_用jdbc访问大段文本数据
- 11周2-2项目 - 存储班长信息的学生类,将Stu类的数据成员的访问权限改为private,你的程序是否能完成要求的功能?如果不行,请修改程序。请不要修改给出的代码,只能修改自己写的代码。
- SpringBoot开发详解(十) -- 使用JPA访问数据库下篇及使用Page进行数据分页
- 11、Spring技术栈-整合Redis,通过Redis的Master-Slave实现缓存数据读写分离
- 既然redis是单线程模型,,怎么会出现并发访问操作同一份数据呢?
- 巧用redis位图存储亿级数据与访问
- SpringBoot27-spingboot数据访问-NoSQL(Redis)
- SpringBoot远程访问redis服务器