Spring boot redis的使用(一)
2017-08-02 21:12
447 查看
Spring boot redis的使用
实际的业务中随着业务量的增大,访问量也是慢慢跟着变大,尤其是到达一定的临界点的时候服务器将会不堪其重造成一种假死的状态给用户以“崩溃”感觉,严重的时候甚至可能直接宕机,而我们传统的做法就是:1.应用程序方面采用多节点的负载均衡;2.数据库方面采用主从读写分离、分库、分表等,而现在呢又多了一种方式采用nosql产品来做cache层来分离高并发的压力,也确实起到了很好的效果,市场上已经有很多nosql产品,而本章我们将介绍其中的一种redis。
1. 使用前的准备工作
1.1 下载redis并安装-->网上有很多教程,也很简单,这里就不多介绍了
1.2 引入依赖

1.3 进行基本的参数配置

2. redis的基本使用
2.1 编写redis的基本配置类,代码如下-->详情可看代码中的注释(@EnableCaching表示启动注解):
简要说明:1、使用@EnableCaching启用Cache注解支持;
2、实现CachingConfigurer,然后注入需要的cacheManager和keyGenerator;从spring4开始默认的keyGenerator是SimpleKeyGenerator--》缓存key生产策略;
2.2 开始使用redis:大致分为两种:1.通过注解方式使用@Cacheable;2.通过手动方式使用
2.2.1 通过手动方式使用,具体代码如下图所示:


2.2.2 通过注解方式使用,先来了解下基本的注解以及其作用吧
@CacheEvict
即应用到移除数据的方法上,如删除方法,调用方法时会从缓存中移除相应的数据
@CachePut
应用到写数据的方法上,如新增/修改方法,调用方法时会自动把相应的数据放入缓存:
Tip: Spring Redis默认使用JDK进行序列化和反序列化,因此被缓存对象需要实现java.io.Serializable接口,否则缓存出错。
Tip: 当被缓存对象发生改变时,可以选择更新缓存或者失效缓存,但一般而言,后者优于前者,因为执行速度更快。
Watchout! 在同一个Class内部调用带有缓存注解的方法,缓存并不会生效。
-->在执行完方法后(#result就能拿到返回值了)判断condition,如果返回true,则放入缓存
@Cacheable
应用到读取数据的方法上,即可缓存的方法
4000
,如查找方法:先从缓存中读取,如果没有再调用方法获取数据,然后把数据添加到缓存中:-->@Cacheable根据运行流程,如下@Cacheable将在执行方法之前( #result还拿不到返回值)判断condition,如果返回true,则查缓存
○ value: 缓存名称
○ key: 缓存键,一般包含被缓存对象的主键,支持Spring EL表达式
○ unless: 只有当查询结果不为空时,才放入缓存
@Caching
有时候我们可能组合多个Cache注解使用;比如用户新增成功后,我们要添加id-->user;username--->user;email--->user的缓存;此时就需要@Caching组合多个注解标签了。
如用户新增成功后,添加id-->user;username--->user;email--->user到缓存;
使用的service层的代码如下:
使用的controller层的代码如下:
小提示; 1. 1、首先执行@CacheEvict(如果beforeInvocation=true且condition 通过),如果allEntries=true,则清空所有
2. 2、接着收集@Cacheable(如果condition 通过,且key对应的数据不在缓存),放入cachePutRequests(也就是说如果cachePutRequests为空,则数据在缓存中)
3. 3、如果cachePutRequests为空且没有@CachePut操作,那么将查找@Cacheable的缓存,否则result=缓存数据(也就是说只要当没有cache put请求时才会查找缓存)
4. 4、如果没有找到缓存,那么调用实际的API,把结果放入result
5. 5、如果有@CachePut操作(如果condition 通过),那么放入cachePutRequests
6. 6、执行cachePutRequests,将数据写入缓存(unless为空或者unless解析结果为false);
7. 7、执行@CacheEvict(如果beforeInvocation=false 且 condition 通过),如果allEntries=true,则清空所有
流程中需要注意的就是2/3/4步:
如果有@CachePut操作,即使有@Cacheable也不会从缓存中读取;问题很明显,如果要混合多个注解使用,不能组合使用@CachePut和@Cacheable;官方说应该避免这样使用(解释是如果带条件的注解相互排除的场景);不过个人感觉还是不要考虑这个好,让用户来决定如何使用,否则一会介绍的场景不能满足
提供的SpEL上下文数据
Spring Cache提供了一些供我们使用的SpEL上下文数据,下表直接摘自Spring官方文档:
实际的业务中随着业务量的增大,访问量也是慢慢跟着变大,尤其是到达一定的临界点的时候服务器将会不堪其重造成一种假死的状态给用户以“崩溃”感觉,严重的时候甚至可能直接宕机,而我们传统的做法就是:1.应用程序方面采用多节点的负载均衡;2.数据库方面采用主从读写分离、分库、分表等,而现在呢又多了一种方式采用nosql产品来做cache层来分离高并发的压力,也确实起到了很好的效果,市场上已经有很多nosql产品,而本章我们将介绍其中的一种redis。
1. 使用前的准备工作
1.1 下载redis并安装-->网上有很多教程,也很简单,这里就不多介绍了
1.2 引入依赖
1.3 进行基本的参数配置
2. redis的基本使用
2.1 编写redis的基本配置类,代码如下-->详情可看代码中的注释(@EnableCaching表示启动注解):
简要说明:1、使用@EnableCaching启用Cache注解支持;
2、实现CachingConfigurer,然后注入需要的cacheManager和keyGenerator;从spring4开始默认的keyGenerator是SimpleKeyGenerator--》缓存key生产策略;
package com.zxl.examples.catche;
import com.fasterxml.jackson.annotation.JsonAutoDetect;
import com.fasterxml.jackson.annotation.PropertyAccessor;
import com.fasterxml.jackson.databind.ObjectMapper;
import org.springframework.cache.CacheManager;
import org.springframework.cache.annotation.CachingConfigurerSupport;
import org.springframework.cache.annotation.EnableCaching;
import org.springframework.cache.interceptor.KeyGenerator;
import org.springframework.context.annotation.Bean;
import org.springframework.context.annotation.Configuration;
import org.springframework.data.redis.cache.RedisCacheManager;
import org.springframework.data.redis.connection.RedisConnectionFactory;
import org.springframework.data.redis.core.RedisTemplate;
import org.springframework.data.redis.core.StringRedisTemplate;
import org.springframework.data.redis.serializer.Jackson2JsonRedisSerializer;
import java.lang.reflect.Method;
import java.util.HashMap;
import java.util.Map;
/**
* Created by Administrator on 2017/7/25.
*/
@Configuration
@EnableCaching
public class RedisConfig extends CachingConfigurerSupport {
//缓存key生产策略
@Bean
public KeyGenerator keyGenerator() {
return new KeyGenerator() {
@Override
public Object generate(Object target, Method method, Object... params) {
StringBuilder sb = new StringBuilder();
sb.append(target.getClass().getName());
sb.append(method.getName());
for (Object obj : params) {
sb.append(obj.toString());
}
return sb.toString();
}
};
}
//注册RedisCacheManager:缓存管理器
//
// 为了实现cache注解支持过期时间,提供以下两种方法
// 1.修改CacheManager设置对应缓存名称的过期时间
// 2.扩展CacheManager实现参数化设置过期时间:如@Cacheable(value="userCache#120",key="'user:'+#username",unless = "#result==null")
@SuppressWarnings("rawtypes")
@Bean
public CacheManager cacheManager(RedisTemplate redisTemplate) {
RedisCacheManager rcm = new RedisCacheManager(redisTemplate);
//设置缓存过期时间
//rcm.setDefaultExpiration(60);//秒
//指定缓存名称的过期时间
Map expiresMap=new HashMap();
expiresMap.put("userCache",60L);//单位秒
rcm.setExpires(expiresMap);
return rcm;
}
// @SuppressWarnings("rawtypes")
// @Bean
// public CacheManager cacheManager(RedisTemplate redisTemplate) {
// RedisCacheManager rcm = new RedisCacheManagerExtend(redisTemplate);
// //设置缓存过期时间
// //rcm.setDefaultExpiration(60);//秒
// return rcm;
// }
@Bean
public RedisTemplate redisTemplate(RedisConnectionFactory factory) {
StringRedisTemplate template = new StringRedisTemplate(factory);
Jackson2JsonRedisSerializer jackson2JsonRedisSerializer = new Jackson2JsonRedisSerializer(Object.class);
ObjectMapper om = new ObjectMapper();
om.setVisibility(PropertyAccessor.ALL, JsonAutoDetect.Visibility.ANY);
om.enableDefaultTyping(ObjectMapper.DefaultTyping.NON_FINAL);
jackson2JsonRedisSerializer.setObjectMapper(om);
// 使用String格式序列化缓存键
template.setValueSerializer(jackson2JsonRedisSerializer);
template.afterPropertiesSet();
return template;
}
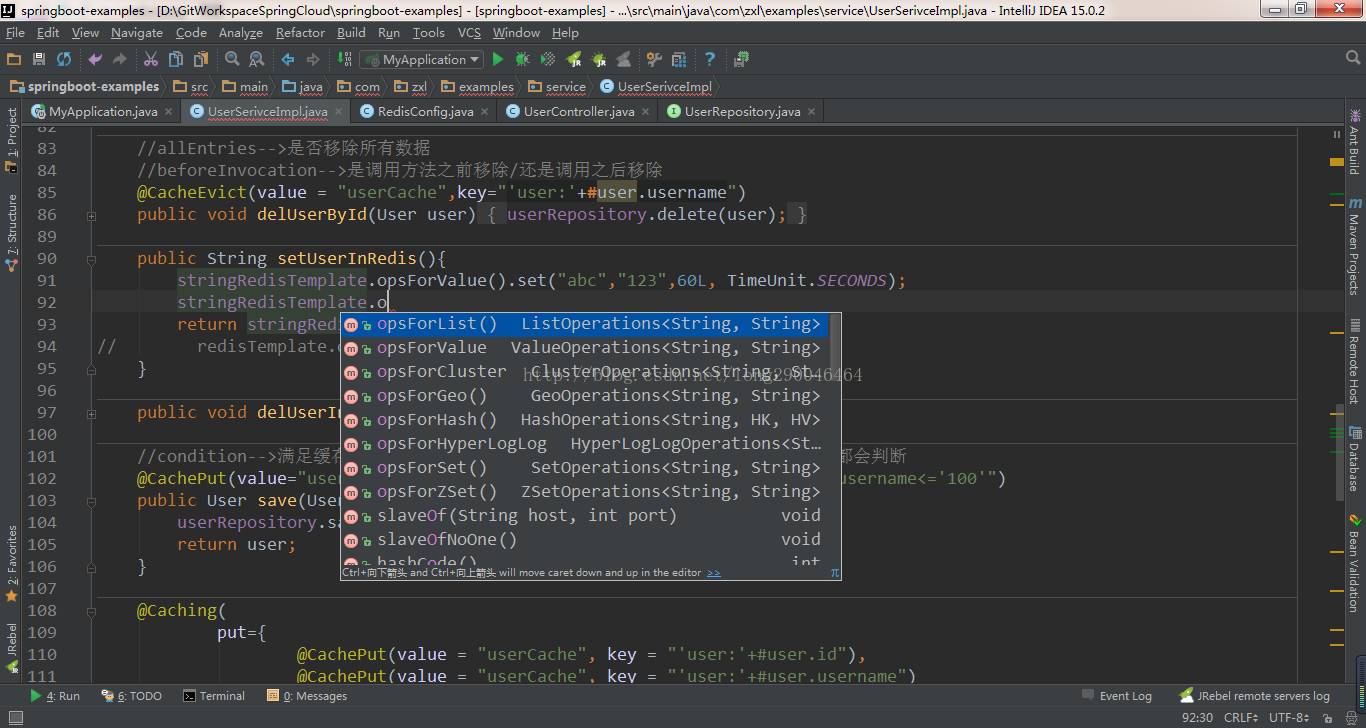
}2.2 开始使用redis:大致分为两种:1.通过注解方式使用@Cacheable;2.通过手动方式使用
2.2.1 通过手动方式使用,具体代码如下图所示:
2.2.2 通过注解方式使用,先来了解下基本的注解以及其作用吧
@CacheEvict
即应用到移除数据的方法上,如删除方法,调用方法时会从缓存中移除相应的数据
@CachePut
应用到写数据的方法上,如新增/修改方法,调用方法时会自动把相应的数据放入缓存:
Tip: Spring Redis默认使用JDK进行序列化和反序列化,因此被缓存对象需要实现java.io.Serializable接口,否则缓存出错。
Tip: 当被缓存对象发生改变时,可以选择更新缓存或者失效缓存,但一般而言,后者优于前者,因为执行速度更快。
Watchout! 在同一个Class内部调用带有缓存注解的方法,缓存并不会生效。
-->在执行完方法后(#result就能拿到返回值了)判断condition,如果返回true,则放入缓存
@Cacheable
应用到读取数据的方法上,即可缓存的方法
4000
,如查找方法:先从缓存中读取,如果没有再调用方法获取数据,然后把数据添加到缓存中:-->@Cacheable根据运行流程,如下@Cacheable将在执行方法之前( #result还拿不到返回值)判断condition,如果返回true,则查缓存
○ value: 缓存名称
○ key: 缓存键,一般包含被缓存对象的主键,支持Spring EL表达式
○ unless: 只有当查询结果不为空时,才放入缓存
@Caching
有时候我们可能组合多个Cache注解使用;比如用户新增成功后,我们要添加id-->user;username--->user;email--->user的缓存;此时就需要@Caching组合多个注解标签了。
如用户新增成功后,添加id-->user;username--->user;email--->user到缓存;
使用的service层的代码如下:
package com.zxl.examples.service;

import com.zxl.examples.catche.customannotation.UserSaveCache;
import com.zxl.examples.entity.User;
import org.springframework.beans.factory.annotation.Autowired;
import org.springframework.cache.annotation.CacheEvict;
import org.springframework.cache.annotation.CachePut;
import org.springframework.cache.annotation.Cacheable;
import org.springframework.cache.annotation.Caching;
import org.springframework.data.redis.core.RedisTemplate;
import org.springframework.data.redis.core.StringRedisTemplate;
import org.springframework.stereotype.Service;
import org.springframework.transaction.annotation.Transactional;

import java.util.ArrayList;
import java.util.List;
import java.util.concurrent.TimeUnit;

/**
* Created by Administrator on 2017/7/24.
*/
@Service("userSerivce")
public class UserSerivceImpl {
@Autowired
UserRepository userRepository;

@Autowired
private StringRedisTemplate stringRedisTemplate;

@Autowired
private RedisTemplate redisTemplate;

//unless-->用于否决缓存更新的,不像condition,该表达只在方法执行之后判断,此时可以拿到返回值result进行判断了
@Cacheable(value="userCache",key="'user:'+#username",unless = "#result==null")
public User getUserByUsername(String username){
User user = null;
List userlist = userRepository.findByUsername(username);
if(userlist!=null && userlist.size()>0){
user = userlist.get(0);
}
return user;
}
//    @Cacheable(value="userCache#120",key="'user:'+#username",unless = "#result==null")
//    public User getUserByUsername(String username){
//        User user = null;
//        List userlist = userRepository.findByUsername(username);
//        if(userlist!=null && userlist.size()>0){
//            user = userlist.get(0);
//        }
//        return user;
//    }

//allEntries-->是否移除所有数据
//beforeInvocation-->是调用方法之前移除/还是调用之后移除
@CacheEvict(value = "userCache",key="'user:'+#user.username")
public void delUserById(User user){
userRepository.delete(user);
}

public String setUserInRedis(){
stringRedisTemplate.opsForValue().set("abc","123",60L, TimeUnit.SECONDS);
return stringRedisTemplate.opsForValue().get("abc");
//        redisTemplate.opsForList();//可直接放入实现序列化的pojo
}

public void delUserInRedis(){
stringRedisTemplate.delete("abc");
}

//condition-->满足缓存条件的数据才会放入缓存,condition在调用方法之前和之后都会判断
@CachePut(value="userCache",key = "#user.username",condition = "#user.username<='100'")
public User save(User user){
userRepository.save(user);
return user;
}

@Caching(
put={
@CachePut(value = "userCache", key = "'user:'+#user.id"),
@CachePut(value = "userCache", key = "'user:'+#user.username")
}
)
public User addUser(User user){
userRepository.save(user);
return user;
}

@UserSaveCache
public User addUser2(User user){
userRepository.save(user);
return user;
}

@Cacheable(value="userCache",key="'user:'+#username",condition = "#root.target.canCache()",unless = "#result==null")
public User getUserByUsername2(String username){
User user = null;
List userlist = userRepository.findByUsername(username);
if(userlist!=null && userlist.size()>0){
user = userlist.get(0);
}
return user;
}

@Cacheable(value="userCache",key="'user:'+#username",condition = "#root.target.notCache()")
public User getUserByUsername3(String username){
User user = null;
List userlist = userRepository.findByUsername(username);
if(userlist!=null && userlist.size()>0){
user = userlist.get(0);
}
return user;
}

public boolean canCache(){
return true;
}

public boolean notCache(){
return false;
}
}
使用的controller层的代码如下:
package com.zxl.examples.controller;

import com.zxl.examples.controller.common.ResultBean;
import com.zxl.examples.controller.common.SuccessBean;
import com.zxl.examples.entity.User;
import com.zxl.examples.service.UserRepository;
import com.zxl.examples.service.UserSerivceImpl;
import org.springframework.beans.factory.annotation.Autowired;
import org.springframework.data.domain.Page;
import org.springframework.data.domain.PageRequest;
import org.springframework.data.domain.Slice;
import org.springframework.data.domain.Sort;
import org.springframework.web.bind.annotation.*;

import java.util.ArrayList;
import java.util.List;

/**
* Created by Administrator on 2017/7/24.
*/
@RestController
public class UserController {

@Autowired
UserRepository userRepository;

@Autowired
UserSerivceImpl userSerivce;

@GetMapping("/users/moreparam18/{username}")
public User getUserByUsername(@PathVariable String username){
//页数从0开始算,比如第一页应传page=0
return  userSerivce.getUserByUsername(username);
}

@DeleteMapping("/users/del/{id}")
public void delUserById12(@PathVariable Long id){
User user = userRepository.findOne(id);
if(user !=null){
userSerivce.delUserById(user);
}
}

@GetMapping("/users/moreparam19")
public String setUserInRedis(){
//页数从0开始算,比如第一页应传page=0
return  userSerivce.setUserInRedis();
}

@GetMapping("/users/moreparam20")
public void delUserInRedis(){
//页数从0开始算,比如第一页应传page=0
userSerivce.delUserInRedis();
}

@PostMapping("/users/moreparam21/{username}")
public User save(@PathVariable String username){
//页数从0开始算,比如第一页应传page=0
User user = new User();
user.setUsername(username);
user.setPassword("123456");
user.setName(username);
userSerivce.save(user);
return user;
}

@PostMapping("/users/moreparam22/{username}")
public User addUser(@PathVariable String username){
//页数从0开始算,比如第一页应传page=0
User user = new User();
user.setUsername(username);
user.setPassword("123456");
user.setName(username);
userSerivce.addUser(user);
return user;
}

@PostMapping("/users/moreparam23/{username}")
public User addUser2(@PathVariable String username){
//页数从0开始算,比如第一页应传page=0
User user = new User();
user.setUsername(username);
user.setPassword("123456");
user.setName(username);
userSerivce.addUser2(user);
return user;
}

@GetMapping("/users/moreparam24/{username}")
public User getUserByUsername2(@PathVariable String username){
//页数从0开始算,比如第一页应传page=0
return  userSerivce.getUserByUsername2(username);
}

@GetMapping("/users/moreparam25/{username}")
public User getUserByUsername3(@PathVariable String username){
//页数从0开始算,比如第一页应传page=0
return  userSerivce.getUserByUsername3(username);
}
}
小提示; 1. 1、首先执行@CacheEvict(如果beforeInvocation=true且condition 通过),如果allEntries=true,则清空所有
2. 2、接着收集@Cacheable(如果condition 通过,且key对应的数据不在缓存),放入cachePutRequests(也就是说如果cachePutRequests为空,则数据在缓存中)
3. 3、如果cachePutRequests为空且没有@CachePut操作,那么将查找@Cacheable的缓存,否则result=缓存数据(也就是说只要当没有cache put请求时才会查找缓存)
4. 4、如果没有找到缓存,那么调用实际的API,把结果放入result
5. 5、如果有@CachePut操作(如果condition 通过),那么放入cachePutRequests
6. 6、执行cachePutRequests,将数据写入缓存(unless为空或者unless解析结果为false);
7. 7、执行@CacheEvict(如果beforeInvocation=false 且 condition 通过),如果allEntries=true,则清空所有
流程中需要注意的就是2/3/4步:
如果有@CachePut操作,即使有@Cacheable也不会从缓存中读取;问题很明显,如果要混合多个注解使用,不能组合使用@CachePut和@Cacheable;官方说应该避免这样使用(解释是如果带条件的注解相互排除的场景);不过个人感觉还是不要考虑这个好,让用户来决定如何使用,否则一会介绍的场景不能满足
提供的SpEL上下文数据
Spring Cache提供了一些供我们使用的SpEL上下文数据,下表直接摘自Spring官方文档:
| 名字 | 位置 | 描述 | 示例 |
| methodName | root对象 | 当前被调用的方法名 | #root.methodName |
| method | root对象 | 当前被调用的方法 | #root.method.name |
| target | root对象 | 当前被调用的目标对象 | #root.target |
| targetClass | root对象 | 当前被调用的目标对象类 | #root.targetClass |
| args | root对象 | 当前被调用的方法的参数列表 | #root.args[0] |
| caches | root对象 | 当前方法调用使用的缓存列表(如@Cacheable(value={"cache1", "cache2"})),则有两个cache | #root.caches[0].name |
| argument name | 执行上下文 | 当前被调用的方法的参数,如findById(Long id),我们可以通过#id拿到参数 | #user.id |
| result | 执行上下文 | 方法执行后的返回值(仅当方法执行之后的判断有效,如‘unless’,'cache evict'的beforeInvocation=false) | #result |

相关文章推荐
- Spring Boot使用redis做数据缓存
- 转载:Spring boot (三):Spring boot中Redis的使用
- 使用Java(Springboot)操作Redis
- Spring Boot教程(二)使用Redis做集中式缓存
- Spring Boot中Redis的使用
- SpringBoot中使用Redis实现缓存
- SpringBoot使用Redis做缓存,@Cacheable、@CachePut、@CacheEvict等注解的使用
- 使用springboot+redis实现session共享
- springboot中使用redis由浅入深解析
- spring boot(三):Spring Boot中Redis的使用
- Spring Boot 系列 | 第五篇:使用Redis
- Redis系列三 - Spring boot如何使用redis做缓存及缓存注解的用法总结
- spring boot使用redis
- Spring boot 使用多个RedisTemplate
- SpringBoot--使用redis做缓存(2)
- Spring Boot系列(三):Spring Boot中Redis的使用
- spring boot2.0使用redis做缓存
- (十九)SpringBoot之使用Spring Session集群-redis
- 使用Java(Springboot)操作Redis
- spring-boot中使用redis