CAS学习记录4--CAS,Spring MVC,Shiro整合
2017-07-25 17:20
405 查看
一、前言
前一节介绍Servlet配置方式,本节介绍比较实用的部分,CAS与Spring MVC,Shiro的整合
二、项目配置
之前已经建好test3的模组,现在就在它上面配
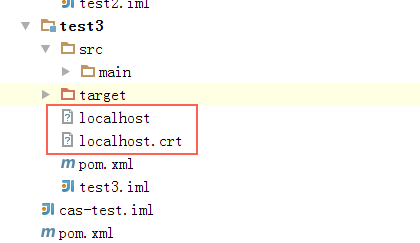
首先是CA证书,将之前生成的证书复制过去
打开pom.xml文件,修改配置如下,比较简单,就不说明了
打开WEB-INF/web.xml修改配置如下,有的文章说Shiro配置要在Spring MVC配置之前,实际上是没有关系的,因为web.xml 的加载顺序是:context-param -> listener -> filter -> servlet
<?xml version="1.0" encoding="UTF-8"?>
<web-app xmlns="http://java.sun.com/xml/ns/javaee"
xmlns:xsi="http://www.w3.org/2001/XMLSchema-instance"
xsi:schemaLocation="http://java.sun.com/xml/ns/javaee http://java.sun.com/xml/ns/javaee/web-app_3_0.xsd" version="3.0" metadata-complete="true">
<display-name>Archetype Created Web Application</display-name>
<!-- Spring配置 -->
<listener>
<listener-class>org.springframework.web.context.ContextLoaderListener</listener-class>
</listener>
<context-param>
<param-name>contextConfigLocation</param-name>
<param-value>
classpath*:applicationContext-web.xml
</param-value>
</context-param>
<!-- Spring MVC配置 -->
<servlet>
<servlet-name>springDispatcherServlet</servlet-name>
<servlet-class>org.springframework.web.servlet.DispatcherServlet</servlet-class>
<!-- 配置Spring mvc下的配置文件的位置和名称 -->
<init-param>
<param-name>contextConfigLocation</param-name>
<param-value>classpath:spring-mvc.xml</param-value>
</init-param>
<load-on-startup>1</load-on-startup>
</servlet>
<servlet-mapping>
<servlet-name>springDispatcherServlet</servlet-name>
<url-pattern>/</url-pattern>
</servlet-mapping>
<!-- 该过滤器用于实现单点登出功能,可选配置。-->
<listener>
<listener-class>org.jasig.cas.client.session.SingleSignOutHttpSessionListener</listener-class>
</listener>
<filter>
<filter-name>singleSignOutFilter</filter-name>
<filter-class>org.springframework.web.filter.DelegatingFilterProxy</filter-class>
</filter>
<filter-mapping>
<filter-name>singleSignOutFilter</filter-name>
<url-pattern>/*</url-pattern>
</filter-mapping>
<!-- shiro配置 -->
<filter>
<filter-name>shiroFilter</filter-name>
<filter-class>org.springframework.web.filter.DelegatingFilterProxy</filter-class>
<init-param>
<param-name>targetFilterLifecycle</param-name>
<param-value>true</param-value>
</init-param>
</filter>
<filter-mapping>
<filter-name>shiroFilter</filter-name>
<url-pattern>/*</url-pattern>
</filter-mapping>
</web-app>
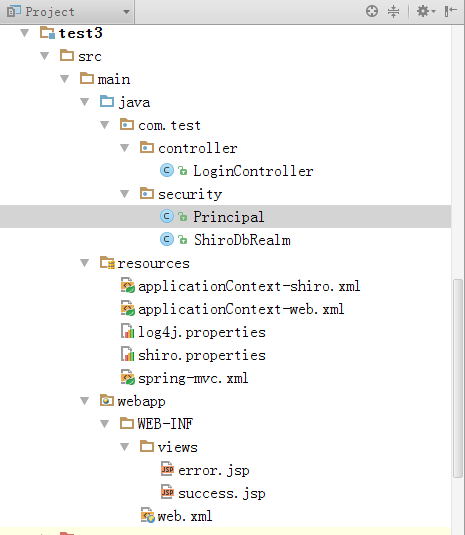
先发个整体项目图
在resources目录下新建spring-mvc.xml
<?xml version="1.0" encoding="UTF-8"?>
<beans xmlns="http://www.springframework.org/schema/beans"
xmlns:xsi="http://www.w3.org/2001/XMLSchema-instance"
xmlns:context="http://www.springframework.org/schema/context"
xmlns:aop="http://www.springframew
c81b
ork.org/schema/aop"
xsi:schemaLocation="http://www.springframework.org/schema/beans http://www.springframework.org/schema/beans/spring-beans.xsd http://www.springframework.org/schema/context http://www.springframework.org/schema/context/spring-context.xsd http://www.springframework.org/schema/aop http://www.springframework.org/schema/aop/spring-aop.xsd">
<!-- 配置自动扫描的包 -->
<context:component-scan base-package="com.test" >
</context:component-scan>
<!-- 配置视图解析器 如何把handler 方法返回值解析为实际的物理视图 -->
<bean id="viewResolver" class="org.springframework.web.servlet.view.InternalResourceViewResolver">
<property name="prefix" value="/WEB-INF/views/"></property>
<property name="suffix" value=".jsp"></property>
</bean>
<!-- 开启aop,对类代理 -->
<aop:config proxy-target-class="true"></aop:config>
<!-- 开启shiro注解支持 -->
<bean class="org.apache.shiro.spring.security.interceptor.AuthorizationAttributeSourceAdvisor">
<property name="securityManager" ref="securityManager" />
</bean>
</beans>在resources目录下新建applicationContext-web.xml
<?xml version="1.0" encoding="UTF-8"?>
<beans xmlns="http://www.springframework.org/schema/beans"
xmlns:xsi="http://www.w3.org/2001/XMLSchema-instance"
xsi:schemaLocation=" http://www.springframework.org/schema/beans http://www.springframework.org/schema/beans/spring-beans.xsd">
<bean id="configProperties" class="org.springframework.beans.factory.config.PropertiesFactoryBean">
<property name="locations">
<list>
<value>classpath:shiro.properties</value>
</list>
</property>
</bean>
<bean id="propertyConfigurer" class="org.springframework.beans.factory.config.PreferencesPlaceholderConfigurer">
<property name="properties" ref="configProperties" />
</bean>
<import resource="applicationContext-shiro.xml"/>
</beans>在resources目录下新建applicationContext-shiro.xml,主要是login和logout两个过滤器
<?xml version="1.0" encoding="UTF-8"?>
<beans xmlns="http://www.springframework.org/schema/beans"
xmlns:xsi="http://www.w3.org/2001/XMLSchema-instance"
xsi:schemaLocation="http://www.springframework.org/schema/beans http://www.springframework.org/schema/beans/spring-beans.xsd">
<bean id="shiroFilter" class="org.apache.shiro.spring.web.ShiroFilterFactoryBean">
<property name="securityManager" ref="securityManager"/>
<!-- 设定角色的登录链接,这里为cas登录页面的链接和可配置回调地址 -->
<property name="loginUrl" value="${shiro.loginUrl}" />
<property name="filters">
<map>
<!-- 添加casFilter到shiroFilter -->
<entry key="casFilter" value-ref="casFilter" />
<entry key="logoutFilter" value-ref="logoutFilter" />
</map>
</property>
<property name="filterChainDefinitions">
<value>
<!-- 接口允许匿名访问 -->
/login = casFilter
/logout = logoutFilter
/** = authc
</value>
</property>
</bean>
<bean id="casFilter" class="org.apache.shiro.cas.CasFilter">
<!--配置验证错误时的失败页面(Ticket 校验不通过时展示的错误页面) -->
<property name="failureUrl" value="${shiro.loginUrl}" />
<property name="successUrl" value="${shiro.successUrl}" />
</bean>
<bean id="logoutFilter" class="org.apache.shiro.web.filter.authc.LogoutFilter">
<property name="redirectUrl" value="${shiro.logoutUrl}" />
</bean>
<!-- 单点登出 -->
<bean name="singleSignOutFilter"
class="org.jasig.cas.client.session.SingleSignOutFilter">
<property name="casServerUrlPrefix" value="${shiro.cas.serverUrlPrefix}"/>
</bean>
<bean id="securityManager" class="org.apache.shiro.web.mgt.DefaultWebSecurityManager">
<property name="realm" ref="shiroDbRealm"/>
<property name="subjectFactory" ref="casSubjectFactory"></property>
</bean>
<bean id="casSubjectFactory" class="org.apache.shiro.cas.CasSubjectFactory"></bean>
<bean id="lifecycleBeanPostProcessor" class="org.apache.shiro.spring.LifecycleBeanPostProcessor"/>
<bean id="shiroDbRealm" class="com.test.security.ShiroDbRealm">
<property name="authorizationCachingEnabled" value="false"/>
<!-- cas服务端地址前缀 -->
<property name="casServerUrlPrefix" value="${shiro.cas.serverUrlPrefix}" />
<!-- 应用服务地址,用来接收cas服务端票据 -->
<property name="casService" value="${shiro.cas.service}" />
</bean>
</beans>在resources目录下新建shiro.properties
#shiro
shiro.loginUrl=https://localhost:9001/cas/login?service=https://localhost:9004/test3/login
shiro.logoutUrl=https://localhost:9001/cas/logout?service=https://localhost:9004/test3/login
shiro.cas.serverUrlPrefix=https://localhost:9001/cas
shiro.cas.service=https://localhost:9004/test3/login
shiro.failureUrl=/error
shiro.successUrl=/success
接下来是几个类建立
在com.test.controller包下新建LoginController.java,不解释
package com.test.controller;
import org.slf4j.Logger;
import org.slf4j.LoggerFactory;
import org.springframework.stereotype.Controller;
import org.springframework.web.bind.annotation.RequestMapping;
@Controller
public class LoginController {
private static final Logger logger = LoggerFactory.getLogger(LoginController.class);
@RequestMapping("/success")
public String success(){
logger.info("登录成功");
return "success";
}
@RequestMapping("/error")
public String error(){
logger.info("登录失败");
return "error";
}
}
在com.test.security包下新建Principal.java,这个用于保存账号登录信息
package com.test.security;
import java.io.Serializable;
public class Principal implements Serializable {
private static final long serialVersionUID = -6577595270150512805L;
private String id;
private String userName;
private String trueName;
private String email;
private boolean superUser;
public Principal(String id, String userName, String trueName, String email) {
this.id = id;
this.userName = userName;
this.trueName = trueName;
this.email = email;
}
public String getId() {
return id;
}
public void setId(String id) {
this.id = id;
}
public String getUserName() {
return userName;
}
public void setUserName(String userName) {
this.userName = userName;
}
public String getTrueName() {
return trueName;
}
public void setTrueName(String trueName) {
this.trueName = trueName;
}
public String getEmail() {
return email;
}
public void setEmail(String email) {
this.email = email;
}
public boolean isSuperUser() {
return superUser;
}
public void setSuperUser(boolean superUser) {
this.superUser = superUser;
}
}
在com.test.security包下新建ShiroDbRealm.java,这个用于自定义登录验证及权限验证
package com.test.security;
import org.apache.shiro.authc.AuthenticationException;
import org.apache.shiro.authc.AuthenticationInfo;
import org.apache.shiro.authc.AuthenticationToken;
import org.apache.shiro.authc.SimpleAuthenticationInfo;
import org.apache.shiro.authz.AuthorizationInfo;
import org.apache.shiro.authz.SimpleAuthorizationInfo;
import org.apache.shiro.cas.CasAuthenticationException;
import org.apache.shiro.cas.CasToken;
import org.apache.shiro.subject.PrincipalCollection;
import org.apache.shiro.subject.SimplePrincipalCollection;
import org.apache.shiro.util.StringUtils;
import org.jasig.cas.client.authentication.AttributePrincipal;
import org.jasig.cas.client.validation.Assertion;
import org.jasig.cas.client.validation.TicketValidationException;
import org.jasig.cas.client.validation.TicketValidator;
import org.slf4j.Logger;
import org.slf4j.LoggerFactory;
import java.util.ArrayList;
import java.util.List;
import java.util.Map;
public class ShiroDbRealm extends org.apache.shiro.cas.CasRealm {
private static Logger log = LoggerFactory.getLogger(ShiroDbRealm.class);
/**
* 设置权限信息
*/
@Override
protected AuthorizationInfo doGetAuthorizationInfo(PrincipalCollection principals) {
Principal principal = (Principal) principals.getPrimaryPrincipal();
if (principal == null) {
return null;
}
SimpleAuthorizationInfo simpleAuthorizationInfo = new SimpleAuthorizationInfo();
// TODO:权限获取
List<String> permissions = new ArrayList();
permissions.add("...");
simpleAuthorizationInfo.addStringPermissions(permissions);
return simpleAuthorizationInfo;
}
/**
* 在原CasRealm方法上做调整
* @param token
* @return
* @throws AuthenticationException
*/
@Override
protected AuthenticationInfo doGetAuthenticationInfo(AuthenticationToken token) throws AuthenticationException {
CasToken casToken = (CasToken)token;
if(token == null) {
return null;
} else {
String ticket = (String)casToken.getCredentials();
if(!StringUtils.hasText(ticket)) {
return null;
} else {
TicketValidator ticketValidator = this.ensureTicketValidator();
try {
Assertion e = ticketValidator.validate(ticket, this.getCasService());
AttributePrincipal casPrincipal = e.getPrincipal();
String userId = casPrincipal.getName();
log.debug("Validate ticket : {} in CAS server : {} to retrieve user : {}", new Object[]{ticket, this.getCasServerUrlPrefix(), userId});
Map attributes = casPrincipal.getAttributes();
casToken.setUserId(userId);
String rememberMeAttributeName = this.getRememberMeAttributeName();
String rememberMeStringValue = (String)attributes.get(rememberMeAttributeName);
boolean isRemembered = rememberMeStringValue != null && Boolean.parseBoolean(rememberMeStringValue);
if(isRemembered) {
casToken.setRememberMe(true);
}
//List principals = CollectionUtils.asList(new Object[]{userId, attributes});
//使用自定义的Principal
Principal principals=new Principal("id", userId, "trueName", "email");
SimplePrincipalCollection principalCollection = new SimplePrincipalCollection(principals, this.getName());
return new SimpleAuthenticationInfo(principalCollection, ticket);
} catch (TicketValidationException var14) {
throw new CasAuthenticationException("Unable to validate ticket [" + ticket + "]", var14);
}
}
}
}
}
还剩两个简单的jsp页面
在WEB-INF/view下新建success.jsp
<%@ page contentType="text/html;charset=UTF-8" language="java" %>
<%@ taglib prefix="shiro" uri="http://shiro.apache.org/tags" %>
<html>
<head>
<title></title>
</head>
<body>
<h1>success</h1>
<shiro:principal property="userName"/>
<a href="https://localhost:9004/test3/logout">单点登出</a>
</body>
</html>在WEB-INF/view下新建error.jsp
<%@ page contentType="text/html;charset=UTF-8" language="java" %>
<html>
<head>
<title></title>
</head>
<body>
<h1>error</h1>
</body>
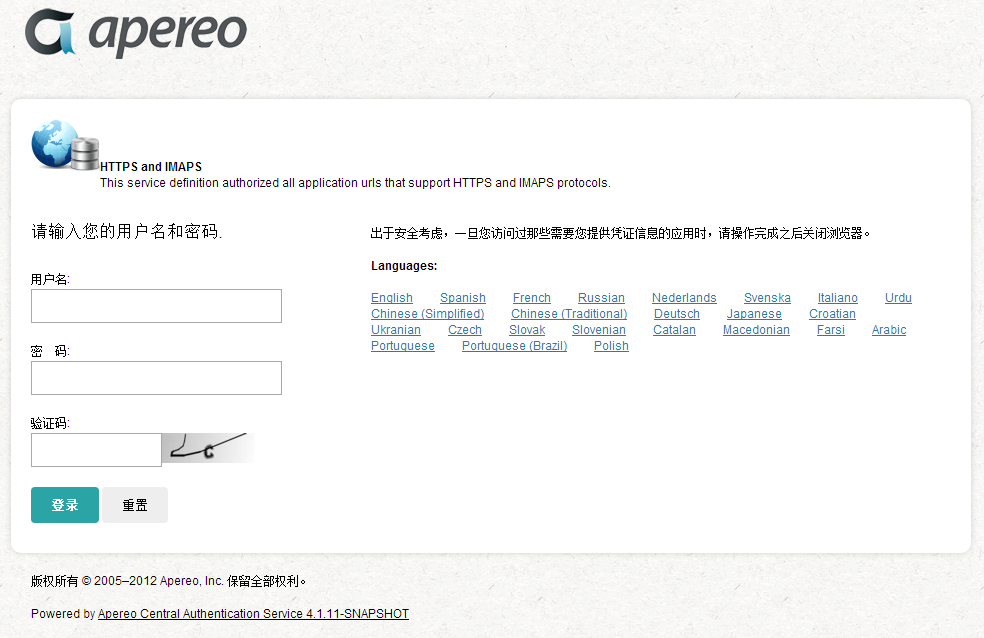
</html>到这边就可以启动Tomcat看效果了,在引用Shiro的CAS相关类的时候会提示过期,因为Shiro把各种协议都整合到一个新包去了
三、小结
整合完成了,不算复杂,CAS Server比较吃内存,可以调大点,CAS Client也可以下载源码来打包
前一节介绍Servlet配置方式,本节介绍比较实用的部分,CAS与Spring MVC,Shiro的整合
二、项目配置
之前已经建好test3的模组,现在就在它上面配
首先是CA证书,将之前生成的证书复制过去
打开pom.xml文件,修改配置如下,比较简单,就不说明了
<project xmlns="http://maven.apache.org/POM/4.0.0" xmlns:xsi="http://www.w3.org/2001/XMLSchema-instance"
xsi:schemaLocation="http://maven.apache.org/POM/4.0.0 http://maven.apache.org/maven-v4_0_0.xsd"> <parent>
<artifactId>cas-test</artifactId>
<groupId>com.company.cas-test</groupId>
<version>1.0-SNAPSHOT</version>
</parent>
<modelVersion>4.0.0</modelVersion>
<artifactId>test3</artifactId>
<packaging>war</packaging>
<name>test3 Maven Webapp</name>
<url>http://maven.apache.org</url>

<properties>
<spring.version>4.3.8.RELEASE</spring.version>
</properties>

<dependencies>
        <!--web -->
        <dependency>
            <groupId>javax.servlet</groupId>
            <artifactId>servlet-api</artifactId>
            <version>3.0-alpha-1</version>
            <scope>provided</scope>
        </dependency>
<dependency>
<groupId>org.slf4j</groupId>
<artifactId>slf4j-log4j12</artifactId>
<version>1.7.2</version>
</dependency>
<!--spring -->
<dependency>
<groupId>org.springframework</groupId>
<artifactId>spring-core</artifactId>
<version>${spring.version}</version>
</dependency>
<dependency>
<groupId>org.springframework</groupId>
<artifactId>spring-webmvc</artifactId>
<version>${spring.version}</version>
</dependency>
<dependency>
<groupId>org.springframework</groupId>
<artifactId>spring-aop</artifactId>
<version>${spring.version}</version>
</dependency>
<dependency>
<groupId>org.springframework</groupId>
<artifactId>spring-orm</artifactId>
<version>${spring.version}</version>
</dependency>
<dependency>
<groupId>org.springframework</groupId>
<artifactId>spring-test</artifactId>
<version>${spring.version}</version>
</dependency>
<dependency>
<groupId>org.springframework</groupId>
<artifactId>spring-context</artifactId>
<version>${spring.version}</version>
</dependency>
<dependency>
<groupId>org.springframework</groupId>
<artifactId>spring-beans</artifactId>
<version>${spring.version}</version>
</dependency>
<dependency>
<groupId>org.springframework</groupId>
<artifactId>spring-tx</artifactId>
<version>${spring.version}</version>
</dependency>
<dependency>
<groupId>org.springframework</groupId>
<artifactId>spring-context-support</artifactId>
<version>${spring.version}</version>
</dependency>

<dependency>
<groupId>org.apache.shiro</groupId>
<artifactId>shiro-core</artifactId>
<version>1.3.2</version>
</dependency>
<dependency>
<groupId>org.apache.shiro</groupId>
<artifactId>shiro-spring</artifactId>
<version>1.3.2</version>
</dependency>
<dependency>
<groupId>org.apache.shiro</groupId>
<artifactId>shiro-cas</artifactId>
<version>1.3.2</version>
</dependency>

<dependency>
<groupId>org.jasig.cas.client</groupId>
<artifactId>cas-client-core</artifactId>
<version>3.4.1</version>
</dependency>
<dependency>
<groupId>junit</groupId>
<artifactId>junit</artifactId>
<version>3.8.1</version>
<scope>test</scope>
</dependency>
</dependencies>
<build>
<finalName>test3</finalName>
<plugins>
<plugin>
<artifactId>maven-compiler-plugin</artifactId>
<version>2.3.2</version>
<configuration>
<source>1.6</source> <!-- 源代码使用的开发版本 -->
<target>1.6</target> <!-- 需要生成的目标class文件的编译版本 -->
<encoding>utf8</encoding>
</configuration>
</plugin>
<plugin>
<!-- 插件在仓库里的group ID -->
<groupId>org.apache.tomcat.maven</groupId>
<!-- 插件在仓库里的artifact ID -->
<artifactId>tomcat7-maven-plugin</artifactId>
<!-- 被使用的插件的版本(或版本范围) -->
<version>2.0</version>
<!-- 作为DOM对象的配置 -->
<configuration>
<port>8004</port>
<path>/test3</path>
<uriEncoding>UTF-8</uriEncoding>
<keystoreFile>${project.basedir}\localhost</keystoreFile>
<keystorePass>123456</keystorePass>
<httpsPort>9004</httpsPort>
</configuration>
</plugin>
</plugins>
</build>
</project>
打开WEB-INF/web.xml修改配置如下,有的文章说Shiro配置要在Spring MVC配置之前,实际上是没有关系的,因为web.xml 的加载顺序是:context-param -> listener -> filter -> servlet
<?xml version="1.0" encoding="UTF-8"?>
<web-app xmlns="http://java.sun.com/xml/ns/javaee"
xmlns:xsi="http://www.w3.org/2001/XMLSchema-instance"
xsi:schemaLocation="http://java.sun.com/xml/ns/javaee http://java.sun.com/xml/ns/javaee/web-app_3_0.xsd" version="3.0" metadata-complete="true">
<display-name>Archetype Created Web Application</display-name>
<!-- Spring配置 -->
<listener>
<listener-class>org.springframework.web.context.ContextLoaderListener</listener-class>
</listener>
<context-param>
<param-name>contextConfigLocation</param-name>
<param-value>
classpath*:applicationContext-web.xml
</param-value>
</context-param>
<!-- Spring MVC配置 -->
<servlet>
<servlet-name>springDispatcherServlet</servlet-name>
<servlet-class>org.springframework.web.servlet.DispatcherServlet</servlet-class>
<!-- 配置Spring mvc下的配置文件的位置和名称 -->
<init-param>
<param-name>contextConfigLocation</param-name>
<param-value>classpath:spring-mvc.xml</param-value>
</init-param>
<load-on-startup>1</load-on-startup>
</servlet>
<servlet-mapping>
<servlet-name>springDispatcherServlet</servlet-name>
<url-pattern>/</url-pattern>
</servlet-mapping>
<!-- 该过滤器用于实现单点登出功能,可选配置。-->
<listener>
<listener-class>org.jasig.cas.client.session.SingleSignOutHttpSessionListener</listener-class>
</listener>
<filter>
<filter-name>singleSignOutFilter</filter-name>
<filter-class>org.springframework.web.filter.DelegatingFilterProxy</filter-class>
</filter>
<filter-mapping>
<filter-name>singleSignOutFilter</filter-name>
<url-pattern>/*</url-pattern>
</filter-mapping>
<!-- shiro配置 -->
<filter>
<filter-name>shiroFilter</filter-name>
<filter-class>org.springframework.web.filter.DelegatingFilterProxy</filter-class>
<init-param>
<param-name>targetFilterLifecycle</param-name>
<param-value>true</param-value>
</init-param>
</filter>
<filter-mapping>
<filter-name>shiroFilter</filter-name>
<url-pattern>/*</url-pattern>
</filter-mapping>
</web-app>
先发个整体项目图
在resources目录下新建spring-mvc.xml
<?xml version="1.0" encoding="UTF-8"?>
<beans xmlns="http://www.springframework.org/schema/beans"
xmlns:xsi="http://www.w3.org/2001/XMLSchema-instance"
xmlns:context="http://www.springframework.org/schema/context"
xmlns:aop="http://www.springframew
c81b
ork.org/schema/aop"
xsi:schemaLocation="http://www.springframework.org/schema/beans http://www.springframework.org/schema/beans/spring-beans.xsd http://www.springframework.org/schema/context http://www.springframework.org/schema/context/spring-context.xsd http://www.springframework.org/schema/aop http://www.springframework.org/schema/aop/spring-aop.xsd">
<!-- 配置自动扫描的包 -->
<context:component-scan base-package="com.test" >
</context:component-scan>
<!-- 配置视图解析器 如何把handler 方法返回值解析为实际的物理视图 -->
<bean id="viewResolver" class="org.springframework.web.servlet.view.InternalResourceViewResolver">
<property name="prefix" value="/WEB-INF/views/"></property>
<property name="suffix" value=".jsp"></property>
</bean>
<!-- 开启aop,对类代理 -->
<aop:config proxy-target-class="true"></aop:config>
<!-- 开启shiro注解支持 -->
<bean class="org.apache.shiro.spring.security.interceptor.AuthorizationAttributeSourceAdvisor">
<property name="securityManager" ref="securityManager" />
</bean>
</beans>在resources目录下新建applicationContext-web.xml
<?xml version="1.0" encoding="UTF-8"?>
<beans xmlns="http://www.springframework.org/schema/beans"
xmlns:xsi="http://www.w3.org/2001/XMLSchema-instance"
xsi:schemaLocation=" http://www.springframework.org/schema/beans http://www.springframework.org/schema/beans/spring-beans.xsd">
<bean id="configProperties" class="org.springframework.beans.factory.config.PropertiesFactoryBean">
<property name="locations">
<list>
<value>classpath:shiro.properties</value>
</list>
</property>
</bean>
<bean id="propertyConfigurer" class="org.springframework.beans.factory.config.PreferencesPlaceholderConfigurer">
<property name="properties" ref="configProperties" />
</bean>
<import resource="applicationContext-shiro.xml"/>
</beans>在resources目录下新建applicationContext-shiro.xml,主要是login和logout两个过滤器
<?xml version="1.0" encoding="UTF-8"?>
<beans xmlns="http://www.springframework.org/schema/beans"
xmlns:xsi="http://www.w3.org/2001/XMLSchema-instance"
xsi:schemaLocation="http://www.springframework.org/schema/beans http://www.springframework.org/schema/beans/spring-beans.xsd">
<bean id="shiroFilter" class="org.apache.shiro.spring.web.ShiroFilterFactoryBean">
<property name="securityManager" ref="securityManager"/>
<!-- 设定角色的登录链接,这里为cas登录页面的链接和可配置回调地址 -->
<property name="loginUrl" value="${shiro.loginUrl}" />
<property name="filters">
<map>
<!-- 添加casFilter到shiroFilter -->
<entry key="casFilter" value-ref="casFilter" />
<entry key="logoutFilter" value-ref="logoutFilter" />
</map>
</property>
<property name="filterChainDefinitions">
<value>
<!-- 接口允许匿名访问 -->
/login = casFilter
/logout = logoutFilter
/** = authc
</value>
</property>
</bean>
<bean id="casFilter" class="org.apache.shiro.cas.CasFilter">
<!--配置验证错误时的失败页面(Ticket 校验不通过时展示的错误页面) -->
<property name="failureUrl" value="${shiro.loginUrl}" />
<property name="successUrl" value="${shiro.successUrl}" />
</bean>
<bean id="logoutFilter" class="org.apache.shiro.web.filter.authc.LogoutFilter">
<property name="redirectUrl" value="${shiro.logoutUrl}" />
</bean>
<!-- 单点登出 -->
<bean name="singleSignOutFilter"
class="org.jasig.cas.client.session.SingleSignOutFilter">
<property name="casServerUrlPrefix" value="${shiro.cas.serverUrlPrefix}"/>
</bean>
<bean id="securityManager" class="org.apache.shiro.web.mgt.DefaultWebSecurityManager">
<property name="realm" ref="shiroDbRealm"/>
<property name="subjectFactory" ref="casSubjectFactory"></property>
</bean>
<bean id="casSubjectFactory" class="org.apache.shiro.cas.CasSubjectFactory"></bean>
<bean id="lifecycleBeanPostProcessor" class="org.apache.shiro.spring.LifecycleBeanPostProcessor"/>
<bean id="shiroDbRealm" class="com.test.security.ShiroDbRealm">
<property name="authorizationCachingEnabled" value="false"/>
<!-- cas服务端地址前缀 -->
<property name="casServerUrlPrefix" value="${shiro.cas.serverUrlPrefix}" />
<!-- 应用服务地址,用来接收cas服务端票据 -->
<property name="casService" value="${shiro.cas.service}" />
</bean>
</beans>在resources目录下新建shiro.properties
#shiro
shiro.loginUrl=https://localhost:9001/cas/login?service=https://localhost:9004/test3/login
shiro.logoutUrl=https://localhost:9001/cas/logout?service=https://localhost:9004/test3/login
shiro.cas.serverUrlPrefix=https://localhost:9001/cas
shiro.cas.service=https://localhost:9004/test3/login
shiro.failureUrl=/error
shiro.successUrl=/success
接下来是几个类建立
在com.test.controller包下新建LoginController.java,不解释
package com.test.controller;
import org.slf4j.Logger;
import org.slf4j.LoggerFactory;
import org.springframework.stereotype.Controller;
import org.springframework.web.bind.annotation.RequestMapping;
@Controller
public class LoginController {
private static final Logger logger = LoggerFactory.getLogger(LoginController.class);
@RequestMapping("/success")
public String success(){
logger.info("登录成功");
return "success";
}
@RequestMapping("/error")
public String error(){
logger.info("登录失败");
return "error";
}
}
在com.test.security包下新建Principal.java,这个用于保存账号登录信息
package com.test.security;
import java.io.Serializable;
public class Principal implements Serializable {
private static final long serialVersionUID = -6577595270150512805L;
private String id;
private String userName;
private String trueName;
private String email;
private boolean superUser;
public Principal(String id, String userName, String trueName, String email) {
this.id = id;
this.userName = userName;
this.trueName = trueName;
this.email = email;
}
public String getId() {
return id;
}
public void setId(String id) {
this.id = id;
}
public String getUserName() {
return userName;
}
public void setUserName(String userName) {
this.userName = userName;
}
public String getTrueName() {
return trueName;
}
public void setTrueName(String trueName) {
this.trueName = trueName;
}
public String getEmail() {
return email;
}
public void setEmail(String email) {
this.email = email;
}
public boolean isSuperUser() {
return superUser;
}
public void setSuperUser(boolean superUser) {
this.superUser = superUser;
}
}
在com.test.security包下新建ShiroDbRealm.java,这个用于自定义登录验证及权限验证
package com.test.security;
import org.apache.shiro.authc.AuthenticationException;
import org.apache.shiro.authc.AuthenticationInfo;
import org.apache.shiro.authc.AuthenticationToken;
import org.apache.shiro.authc.SimpleAuthenticationInfo;
import org.apache.shiro.authz.AuthorizationInfo;
import org.apache.shiro.authz.SimpleAuthorizationInfo;
import org.apache.shiro.cas.CasAuthenticationException;
import org.apache.shiro.cas.CasToken;
import org.apache.shiro.subject.PrincipalCollection;
import org.apache.shiro.subject.SimplePrincipalCollection;
import org.apache.shiro.util.StringUtils;
import org.jasig.cas.client.authentication.AttributePrincipal;
import org.jasig.cas.client.validation.Assertion;
import org.jasig.cas.client.validation.TicketValidationException;
import org.jasig.cas.client.validation.TicketValidator;
import org.slf4j.Logger;
import org.slf4j.LoggerFactory;
import java.util.ArrayList;
import java.util.List;
import java.util.Map;
public class ShiroDbRealm extends org.apache.shiro.cas.CasRealm {
private static Logger log = LoggerFactory.getLogger(ShiroDbRealm.class);
/**
* 设置权限信息
*/
@Override
protected AuthorizationInfo doGetAuthorizationInfo(PrincipalCollection principals) {
Principal principal = (Principal) principals.getPrimaryPrincipal();
if (principal == null) {
return null;
}
SimpleAuthorizationInfo simpleAuthorizationInfo = new SimpleAuthorizationInfo();
// TODO:权限获取
List<String> permissions = new ArrayList();
permissions.add("...");
simpleAuthorizationInfo.addStringPermissions(permissions);
return simpleAuthorizationInfo;
}
/**
* 在原CasRealm方法上做调整
* @param token
* @return
* @throws AuthenticationException
*/
@Override
protected AuthenticationInfo doGetAuthenticationInfo(AuthenticationToken token) throws AuthenticationException {
CasToken casToken = (CasToken)token;
if(token == null) {
return null;
} else {
String ticket = (String)casToken.getCredentials();
if(!StringUtils.hasText(ticket)) {
return null;
} else {
TicketValidator ticketValidator = this.ensureTicketValidator();
try {
Assertion e = ticketValidator.validate(ticket, this.getCasService());
AttributePrincipal casPrincipal = e.getPrincipal();
String userId = casPrincipal.getName();
log.debug("Validate ticket : {} in CAS server : {} to retrieve user : {}", new Object[]{ticket, this.getCasServerUrlPrefix(), userId});
Map attributes = casPrincipal.getAttributes();
casToken.setUserId(userId);
String rememberMeAttributeName = this.getRememberMeAttributeName();
String rememberMeStringValue = (String)attributes.get(rememberMeAttributeName);
boolean isRemembered = rememberMeStringValue != null && Boolean.parseBoolean(rememberMeStringValue);
if(isRemembered) {
casToken.setRememberMe(true);
}
//List principals = CollectionUtils.asList(new Object[]{userId, attributes});
//使用自定义的Principal
Principal principals=new Principal("id", userId, "trueName", "email");
SimplePrincipalCollection principalCollection = new SimplePrincipalCollection(principals, this.getName());
return new SimpleAuthenticationInfo(principalCollection, ticket);
} catch (TicketValidationException var14) {
throw new CasAuthenticationException("Unable to validate ticket [" + ticket + "]", var14);
}
}
}
}
}
还剩两个简单的jsp页面
在WEB-INF/view下新建success.jsp
<%@ page contentType="text/html;charset=UTF-8" language="java" %>
<%@ taglib prefix="shiro" uri="http://shiro.apache.org/tags" %>
<html>
<head>
<title></title>
</head>
<body>
<h1>success</h1>
<shiro:principal property="userName"/>
<a href="https://localhost:9004/test3/logout">单点登出</a>
</body>
</html>在WEB-INF/view下新建error.jsp
<%@ page contentType="text/html;charset=UTF-8" language="java" %>
<html>
<head>
<title></title>
</head>
<body>
<h1>error</h1>
</body>
</html>到这边就可以启动Tomcat看效果了,在引用Shiro的CAS相关类的时候会提示过期,因为Shiro把各种协议都整合到一个新包去了
三、小结
整合完成了,不算复杂,CAS Server比较吃内存,可以调大点,CAS Client也可以下载源码来打包

相关文章推荐
- Shiro学习记录
- 整合之前的一些学习记录4(java开发环境配置相关)
- SpringBoot学习-(十七)SpringBoot整合Shiro
- spring整合shiro框架的实现步骤记录
- Shiro 学习记录 Shiro 入门程序
- Shiro学习--与SpringMVC整合(数据库,Shiro注解和Shiro标签)
- 【Java】SpringMVC整合Shiro记录
- Spring mvc ,spring ,ibatis 学习记录(2)
- Shiro学习--与SpringMVC整合(数据库,Shiro注解和Shiro标签)
- 转-shiro基础学习(四)—shiro与项目整合
- cas与shiro整合笔记
- SpringBoot学习:整合shiro(rememberMe记住我后自动登录session失效解决办法)
- shiro安全框架扩展教程--整合cas框架扩展自定义CasRealm
- SpringBoot+shiro整合学习之登录认证和权限控制
- Shiro学习(6)Realm整合
- Springboot学习笔记之springboot+shiro+cas
- cas sso 整合记录
- shiro学习笔记:整合spring之拦截器链执行流程
- cas4.2.7与shiro进行整合
- shiro基础学习(四)—shiro与项目整合