springmvc 前台向后台传值的两种方式
2017-07-19 20:30
681 查看
一、概述。
在很多企业的开法中常常用到SpringMVC+Spring+Hibernate(mybatis)这样的架构,SpringMVC相当于Struts是页面到Contorller直接的交互的框架也是界面把信息传输到Contorller层的一种架构,通过这个架构可以让我们把页面和Contorller层解耦,使得开发人员的分工更加明确。
二、代码演示。
1、首先配置SpringMVC环境。
1.1导入jar。
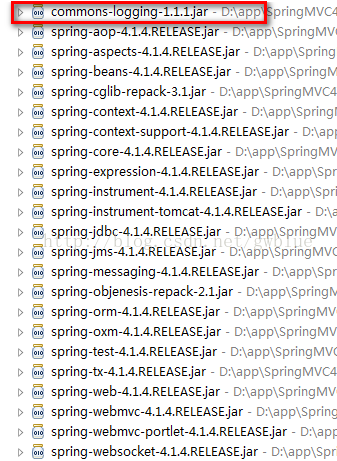
值得注意的是红色标记的commons-logging这个jar包一定得引入进去不然会报错。
1.2、xml配置文件。
web.xml
[html] view
plain copy
<?xml version="1.0" encoding="UTF-8"?>
<web-app xmlns:xsi="http://www.w3.org/2001/XMLSchema-instance" xmlns="http://xmlns.jcp.org/xml/ns/javaee" xsi:schemaLocation="http://xmlns.jcp.org/xml/ns/javaee http://xmlns.jcp.org/xml/ns/javaee/web-app_3_1.xsd" id="WebApp_ID" version="3.1">
<servlet>
<servlet-name>springMVC</servlet-name>
<servlet-class>org.springframework.web.servlet.DispatcherServlet</servlet-class>
<load-on-startup>1</load-on-startup>
</servlet>
<servlet-mapping>
<servlet-name>springMVC</servlet-name>
<url-pattern>*.spring</url-pattern>
</servlet-mapping>
<welcome-file-list>
<welcome-file>index.jsp</welcome-file>
</welcome-file-list>
</web-app>
springMVC-servlet.xml
[html] view
plain copy
<?xml version="1.0" encoding="UTF-8"?>
<beans xmlns="http://www.springframework.org/schema/beans"
xmlns:xsi="http://www.w3.org/2001/XMLSchema-instance" xmlns:p="http://www.springframework.org/schema/p"
xmlns:context="http://www.springframework.org/schema/context"
xsi:schemaLocation="
http://www.springframework.org/schema/beans
http://www.springframework.org/schema/beans/spring-beans-3.0.xsd
http://www.springframework.org/schema/context
http://www.springframework.org/schema/context/spring-context-3.0.xsd">
<context:component-scan base-package="com.gaowei.controller" />
</beans>
2、前台界面代码。
login.jsp
[plain] view
plain copy
<%@ page language="java" contentType="text/html; charset=UTF-8"
pageEncoding="UTF-8"%>
<!DOCTYPE html PUBLIC "-//W3C//DTD HTML 4.01 Transitional//EN" "http://www.w3.org/TR/html4/loose.dtd">
<html>
<head>
<meta http-equiv="Content-Type" content="text/html; charset=UTF-8">
<title>Insert title here</title>
</head>
<body>
<form action="login.spring" method="post">
username:<input type="text" name="username">
<br/>
password:<input type="text" name="password">
<br/>
<input type="submit" value="登录">
</form>
</body>
</html>
No.jsp
[html] view
plain copy
<%@ page language="java" contentType="text/html; charset=UTF-8"
pageEncoding="UTF-8"%>
<!DOCTYPE html PUBLIC "-//W3C//DTD HTML 4.01 Transitional//EN" "http://www.w3.org/TR/html4/loose.dtd">
<html>
<head>
<meta http-equiv="Content-Type" content="text/html; charset=UTF-8">
<title>Insert title here</title>
</head>
<body>
No!
</body>
</html>
Ok.jsp
[html] view
plain copy
<%@ page language="java" contentType="text/html; charset=UTF-8"
pageEncoding="UTF-8"%>
<!DOCTYPE html PUBLIC "-//W3C//DTD HTML 4.01 Transitional//EN" "http://www.w3.org/TR/html4/loose.dtd">
<html>
<head>
<meta http-equiv="Content-Type" content="text/html; charset=UTF-8">
<title>Insert title here</title>
</head>
<body>
OK! welcome:${username}
</body>
</html>
3、Contorller层接收前台的两种方式。
方式一:
利用@RequestParam这个注解
[java] view
plain copy
package com.gaowei.controller;
import org.springframework.stereotype.Controller;
import org.springframework.ui.Model;
import org.springframework.web.bind.annotation.RequestMapping;
import org.springframework.web.bind.annotation.RequestParam;
@Controller
public class Login {
//方式一
@RequestMapping("/login")
public String login(@RequestParam("username") String username,
@RequestParam("password") String password,Model model){
if (username.equals(password))
{
model.addAttribute("username", username);
return "ok.jsp";
} else {
return "no.jsp";
}
}
}
方式二:
[java] view
plain copy
package com.gaowei.controller;
import org.springframework.stereotype.Controller;
import org.springframework.ui.Model;
import org.springframework.web.bind.annotation.RequestMapping;
import org.springframework.web.bind.annotation.RequestParam;
@Controller
public class Login {
@RequestMapping("/login")
public String login(String username,String password,Model model){
if (username.equals(password))
{
model.addAttribute("username", username);
return "ok.jsp";
} else {
return "no.jsp";
}
}
}
4、界面结果。
第一种传值方式:


第二种传值方式:

三、总结。
这里体现出了SpringMVC传值方式的多样性满足了开发人员的不同需求。第一种用来表单的提交。第二种用来界面间相互传值,也为了方便开发人员利用AJAX
转载地址:http://blog.csdn.net/gwblue/article/details/42966017 感谢博主
在很多企业的开法中常常用到SpringMVC+Spring+Hibernate(mybatis)这样的架构,SpringMVC相当于Struts是页面到Contorller直接的交互的框架也是界面把信息传输到Contorller层的一种架构,通过这个架构可以让我们把页面和Contorller层解耦,使得开发人员的分工更加明确。
二、代码演示。
1、首先配置SpringMVC环境。
1.1导入jar。
值得注意的是红色标记的commons-logging这个jar包一定得引入进去不然会报错。
1.2、xml配置文件。
web.xml
[html] view
plain copy
<?xml version="1.0" encoding="UTF-8"?>
<web-app xmlns:xsi="http://www.w3.org/2001/XMLSchema-instance" xmlns="http://xmlns.jcp.org/xml/ns/javaee" xsi:schemaLocation="http://xmlns.jcp.org/xml/ns/javaee http://xmlns.jcp.org/xml/ns/javaee/web-app_3_1.xsd" id="WebApp_ID" version="3.1">
<servlet>
<servlet-name>springMVC</servlet-name>
<servlet-class>org.springframework.web.servlet.DispatcherServlet</servlet-class>
<load-on-startup>1</load-on-startup>
</servlet>
<servlet-mapping>
<servlet-name>springMVC</servlet-name>
<url-pattern>*.spring</url-pattern>
</servlet-mapping>
<welcome-file-list>
<welcome-file>index.jsp</welcome-file>
</welcome-file-list>
</web-app>
springMVC-servlet.xml
[html] view
plain copy
<?xml version="1.0" encoding="UTF-8"?>
<beans xmlns="http://www.springframework.org/schema/beans"
xmlns:xsi="http://www.w3.org/2001/XMLSchema-instance" xmlns:p="http://www.springframework.org/schema/p"
xmlns:context="http://www.springframework.org/schema/context"
xsi:schemaLocation="
http://www.springframework.org/schema/beans
http://www.springframework.org/schema/beans/spring-beans-3.0.xsd
http://www.springframework.org/schema/context
http://www.springframework.org/schema/context/spring-context-3.0.xsd">
<context:component-scan base-package="com.gaowei.controller" />
</beans>
2、前台界面代码。
login.jsp
[plain] view
plain copy
<%@ page language="java" contentType="text/html; charset=UTF-8"
pageEncoding="UTF-8"%>
<!DOCTYPE html PUBLIC "-//W3C//DTD HTML 4.01 Transitional//EN" "http://www.w3.org/TR/html4/loose.dtd">
<html>
<head>
<meta http-equiv="Content-Type" content="text/html; charset=UTF-8">
<title>Insert title here</title>
</head>
<body>
<form action="login.spring" method="post">
username:<input type="text" name="username">
<br/>
password:<input type="text" name="password">
<br/>
<input type="submit" value="登录">
</form>
</body>
</html>
No.jsp
[html] view
plain copy
<%@ page language="java" contentType="text/html; charset=UTF-8"
pageEncoding="UTF-8"%>
<!DOCTYPE html PUBLIC "-//W3C//DTD HTML 4.01 Transitional//EN" "http://www.w3.org/TR/html4/loose.dtd">
<html>
<head>
<meta http-equiv="Content-Type" content="text/html; charset=UTF-8">
<title>Insert title here</title>
</head>
<body>
No!
</body>
</html>
Ok.jsp
[html] view
plain copy
<%@ page language="java" contentType="text/html; charset=UTF-8"
pageEncoding="UTF-8"%>
<!DOCTYPE html PUBLIC "-//W3C//DTD HTML 4.01 Transitional//EN" "http://www.w3.org/TR/html4/loose.dtd">
<html>
<head>
<meta http-equiv="Content-Type" content="text/html; charset=UTF-8">
<title>Insert title here</title>
</head>
<body>
OK! welcome:${username}
</body>
</html>
3、Contorller层接收前台的两种方式。
方式一:
利用@RequestParam这个注解
[java] view
plain copy
package com.gaowei.controller;
import org.springframework.stereotype.Controller;
import org.springframework.ui.Model;
import org.springframework.web.bind.annotation.RequestMapping;
import org.springframework.web.bind.annotation.RequestParam;
@Controller
public class Login {
//方式一
@RequestMapping("/login")
public String login(@RequestParam("username") String username,
@RequestParam("password") String password,Model model){
if (username.equals(password))
{
model.addAttribute("username", username);
return "ok.jsp";
} else {
return "no.jsp";
}
}
}
方式二:
[java] view
plain copy
package com.gaowei.controller;
import org.springframework.stereotype.Controller;
import org.springframework.ui.Model;
import org.springframework.web.bind.annotation.RequestMapping;
import org.springframework.web.bind.annotation.RequestParam;
@Controller
public class Login {
@RequestMapping("/login")
public String login(String username,String password,Model model){
if (username.equals(password))
{
model.addAttribute("username", username);
return "ok.jsp";
} else {
return "no.jsp";
}
}
}
4、界面结果。
第一种传值方式:
第二种传值方式:
三、总结。
这里体现出了SpringMVC传值方式的多样性满足了开发人员的不同需求。第一种用来表单的提交。第二种用来界面间相互传值,也为了方便开发人员利用AJAX
转载地址:http://blog.csdn.net/gwblue/article/details/42966017 感谢博主

相关文章推荐
- 菜鸟学习Spring——SpringMVC注解版前台向后台传值的两种方式
- 菜鸟学习Spring——SpringMVC注解版前台向后台传值的两种方式
- SpringMVC注解版前台向后台传值的两种方式
- 详解SpringMVC注解版前台向后台传值的两种方式
- SpringMVC注解---前台向后台传值的两种方式
- 菜鸟学习Spring——SpringMVC注解版前台向后台传值的两种方式
- 菜鸟学习Spring——SpringMVC注解版前台向后台传值的两种方式
- springmvc前台向后台传值几种方式从简单到复杂
- struts2浏览器前台向服务器后台传值的两种方式。
- springmvc前台给后台传值的几种方式
- springmvc前台给后台传值的几种方式
- springmvc前台向后台传值几种方式总结(从简单到复杂)
- springmvc前台给后台传值的几种方式
- springmvc常用注、上传文件以及后台返回前台数据的两种方式
- springMVC注解前台像后台传值的两种方式
- Struts2中jsp前台传值到action后台的三种方式
- Struts2中jsp前台传值到action后台的三种方式
- .net后台代码调用前台JS的两种方式
- SpringMVC后台获取前台参数的几种方式
- Struts2中jsp前台传值到action后台的三种方式