redis-mac安装与jedis链接测试
2017-07-01 17:50
323 查看
一、安装
redis官网(http://redis.io/download)自行下载安装包解压缩到本地文件夹进入src文件夹,我们可以看到Makefile文件,在Mac终端输入:
sudo make test 测试编译,若无gcc,需要安装gcc yum -y install gcc-c++
重新测试sudo make test 测试编译
sudo make PREFIX=/****/redis install
在/****/redis下建立三个文件夹bin,etc,db
将/****/redis/redis.conf拷贝到etc下
将src目录拷贝到bin下
修改redis.conf,vim redis.conf
#修改为守护模式
daemonize yes
#指定本地数据库路径
dir /****/redis/db
启动服务:./bin/redis-server ./etc/redis.conf
查看进程:ps -ef |grep -i redis
测试1
127.0.0.1:6379> ping
PONG
进入客户端:./bin/redis-cli
测试2
127.0.0.1:6379> set name hjw
OK
127.0.0.1:6379> get name
"hjw"
关闭:shutdown
二、测试
https://redis.io/clients#javahttps://github.com/xetorthio/jedis
建立maven工程:
mvn archetype:generate -DgroupID=com.jedis.learn -DartifactID=JedisLearnMvnPro -DpackageName=jedis.test.v1
添加依赖:
<dependency>
<groupId>redis.clients</groupId>
<artifactId>jedis</artifactId>
<version>2.9.0</version>
<type>jar</type>
<scope>compile</scope>
</dependency>
单例形式
package com.jedis;

import junit.framework.Test;
import junit.framework.TestCase;
import junit.framework.TestSuite;
import redis.clients.jedis.Jedis;

/**
* Unit test for simple App.
*/
//https://github.com/xetorthio/jedis
public class JedisTest{
@org.junit.Test
public void demo(){
Jedis jedis = new Jedis("localhost");
jedis.set("foo", "bar");
String value = jedis.get("foo");
System.out.println(value);
jedis.close();
}
}
启动redis
./bin/redis-server ./etc/redis.conf
$ ps -ef |grep -i redis
501 67215 1 0 6:25下午 ?? 0:00.01 ./bin/redis-server 127.0.0.1:6379
501 67217 64318 0 6:25下午 ttys000 0:00.00 grep -i redis
执行测试程序,成功写入并返回:

./bin/redis-cli
127.0.0.1:6379> get foo
"bar"
连接池形式
@org.junit.Test
public void jedisPool(){
JedisPoolConfig conf = new JedisPoolConfig();
//设置最大链接数
conf.setMaxTotal(20);
//设置最大空闲链接数
conf.setMaxIdle(20);
JedisPool jedisPool = new JedisPool(conf,"localhost",6379);
Jedis jedis = null;
try{
jedis = jedisPool.getResource();
jedis.set("jedispool","test");
String value = jedis.get("jedispool");
System.out.println(value);
}catch (Exception e){
e.printStackTrace();
}finally {
if (jedis != null){
jedis.close();
}
if (jedisPool!=null){
jedisPool.close();
}
}
}
127.0.0.1:6379> get jedispool"test"
127.0.0.1:6379> shutdown
not connected>
Jedis连接Redis操作List、key示例
连接Redis并查看现有key192:redis hjw$ ./bin/redis-server ./etc/redis.conf 192:redis hjw$ ./bin/redis-cli 127.0.0.1:6379> keys * 1) "ky2" 2) "ky1"执行读写操作
package com.jedis;
import redis.clients.jedis.Jedis;
import java.util.Iterator;
import java.util.List;
import java.util.Set;
/**
* Created by hjw on 17/7/3.
*/
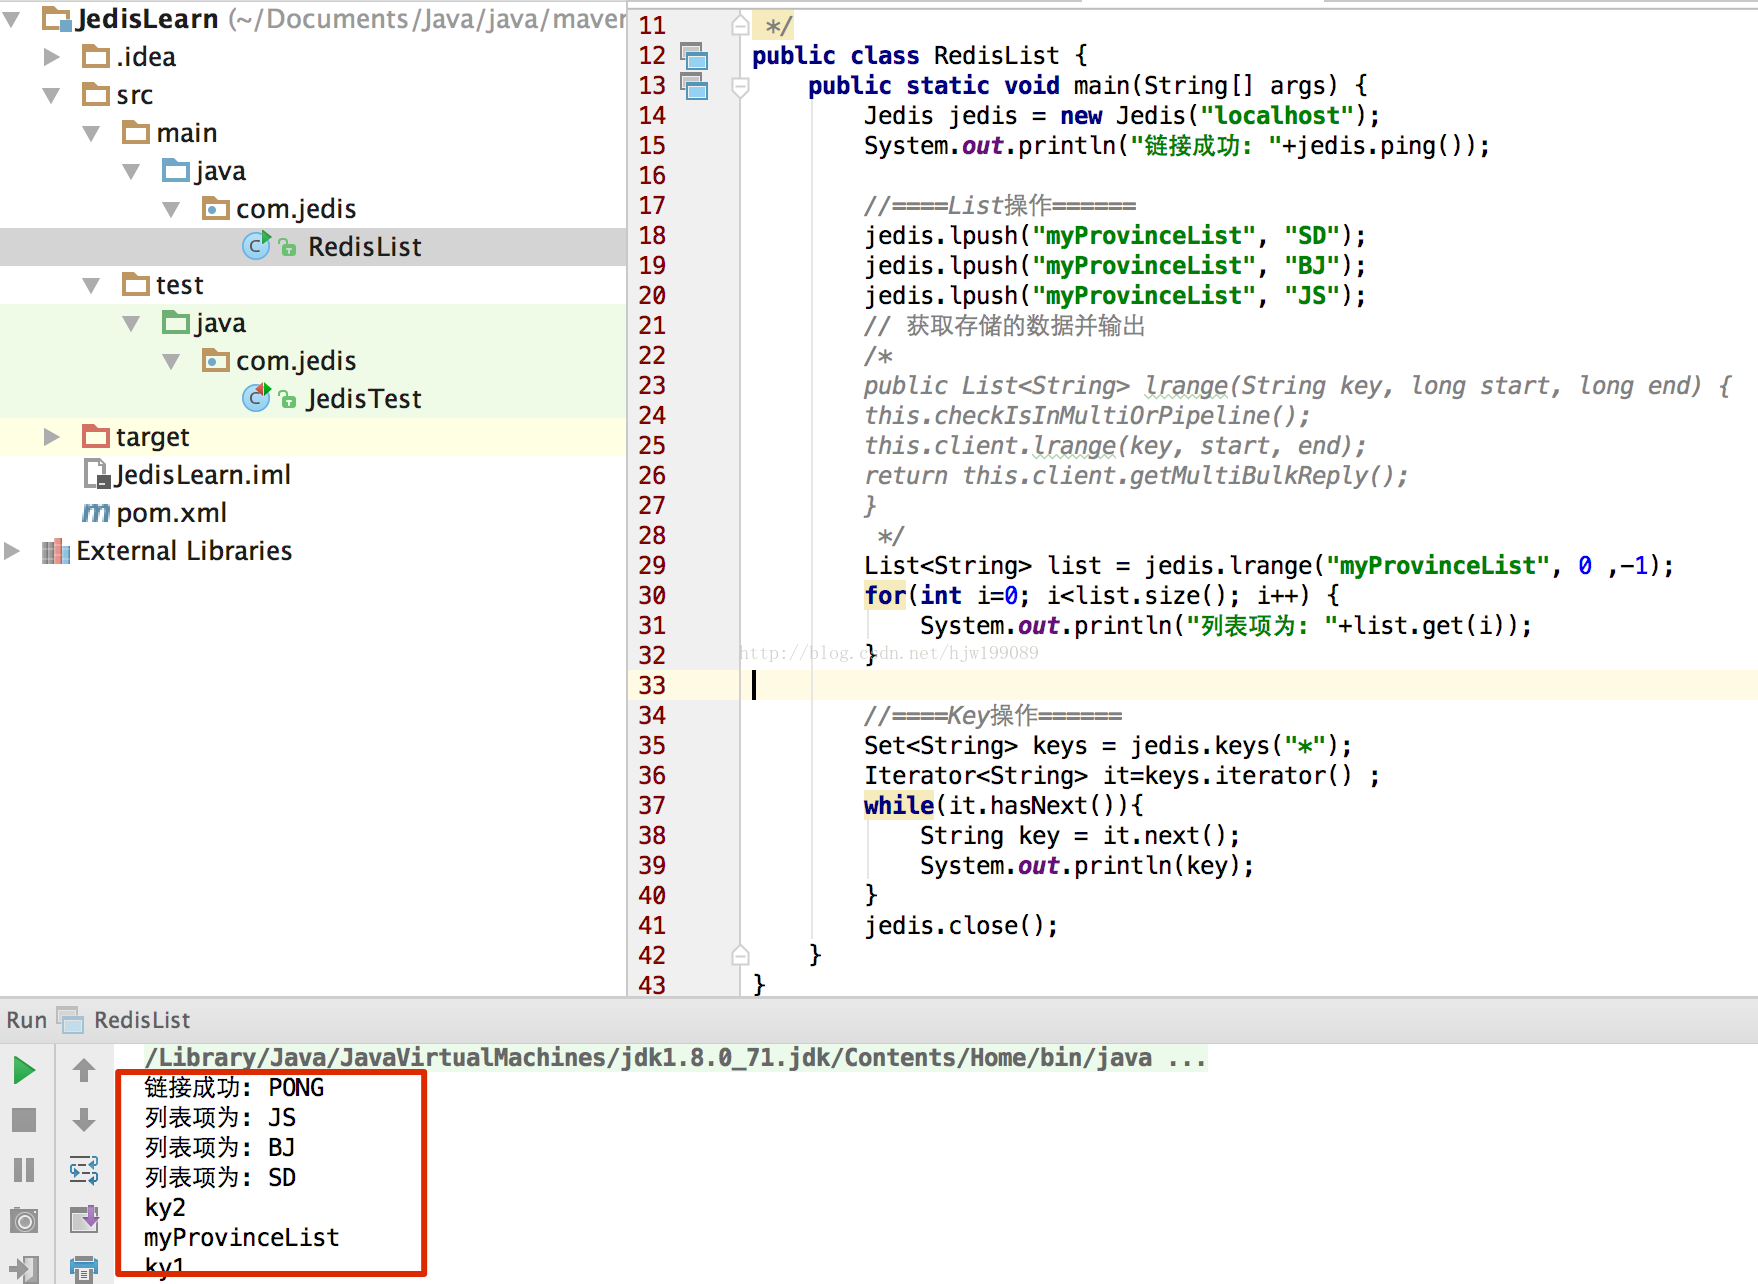
public class RedisList {
public static void main(String[] args) {
Jedis jedis = new Jedis("localhost");
System.out.println("链接成功: "+jedis.ping());
//====List操作======
jedis.lpush("myProvinceList", "SD");
jedis.lpush("myProvinceList", "BJ");
jedis.lpush("myProvinceList", "JS");
// 获取存储的数据并输出
/*
public List<String> lrange(String key, long start, long end) {
this.checkIsInMultiOrPipeline();
this.client.lrange(key, start, end);
return this.client.getMultiBulkReply();
}
*/
List<String> list = jedis.lrange("myProvinceList", 0 ,-1);
for(int i=0; i<list.size(); i++) {
System.out.println("列表项为: "+list.get(i));
}
//====Key操作======
Set<String> keys = jedis.keys("*");
Iterator<String> it=keys.iterator() ;
while(it.hasNext()){
String key = it.next();
System.out.println(key);
}
jedis.close();
}
}
在redis客户端对比结果
127.0.0.1:6379> keys *
1) "ky2"
2) "ky1"
3) "myProvinceList"
127.0.0.1:6379> lrange myProvinceList 0 -1
1) "JS"
2) "BJ"
3) "SD"
备注
若非本地redis注意要先开启6379端口访问权限,开启防火墙vim /etc/sysconfig/iptables 添加 -A INPUT -m state --state NEW -m tcp -p tcp --dport 6379 -j ACCEPT 重启防火墙 service iptables restart

相关文章推荐
- mac上配置redis集群方案--Codis的安装测试小结
- 【redis】mac下 redis安装与测试
- redis安装与jedis测试
- CenterOS7安装Redis,测试 Jedis 连接超时(connect timed out)
- linux 下redis 安装,python 链接测试
- 虚拟机安装MAC系统真机测试,打包发现不了USB链接的IOS设备
- NOSQL系列-Redis精简版安装与Ruby测试
- VMware9虚拟机安装MAC OS X Mountain Lion详细图文教程[亲自测试]
- 实习总结(一)---数据库(mysql)的安装、Myeclipse与数据库的链接测试
- 【Redis学习点滴】Windows下的Redis安装、测试就是这么简单
- MacOSX10.7 安装nodejs npm mongodb redis
- [Redis] 环境的安装与测试
- redis的安装配置使用(二) jedis访问
- redis老版本中的expire问题及新版本的安装测试
- mac 安装redis扩展
- 【Android测试工具】03. ApkTool在Mac上的安装和使用
- Ubuntu12下安装redis(多图版)+ Jedis连接Redis
- redis安装以及主从的简单配置测试
- Redis详细完整教程-windows下的安装、测试(php+redis+mysql)
- Redis详细完整教程-windows下的安装、测试(php+redis+mysql)