Spring Boot整合WebSocket介绍
2017-03-08 00:00
661 查看
WebSocket 简介
WebSocket 是 HTML5 一种新的协议。它实现了浏览器与服务器全双工通信,能更好的节省服务器资源和带宽并达到实时通讯,它建立在 TCP 之上,同 HTTP 一样通过 TCP 来传输数据,但是它和 HTTP 最大不同是:WebSocket 是一种双向通信协议,在建立连接后,WebSocket 服务器和 Browser/Client Agent 都能主动的向对方发送或接收数据,就像 Socket 一样;
WebSocket 需要类似 TCP 的客户端和服务器端通过握手连接,连接成功后才能相互通信。
整合示例
本示例为演示WebSocket的广播式模式,即服务端有消息时,会将消息发送给所有连接了当前endpoint的 Browser/Client Agent1. maven引入依赖包
<properties>
<project.build.sourceEncoding>UTF-8</project.build.sourceEncoding>
<boot.version>1.3.6.RELEASE</boot.version>
</properties>
<dependencies>
<dependency>
<groupId>org.springframework.boot</groupId>
<artifactId>spring-boot-starter-web</artifactId>
<version>${boot.version}</version>
</dependency>
<dependency>
<groupId>org.springframework.boot</groupId>
<artifactId>spring-boot-starter-websocket</artifactId>
<version>${boot.version}</version>
</dependency>
<dependency>
<groupId>org.springframework.boot</groupId>
<artifactId>spring-boot-starter-thymeleaf</artifactId>
<version>${boot.version}</version>
</dependency>
</dependencies>
2. 编写WebSocket的配置类
import org.springframework.context.annotation.Configuration;
import org.springframework.messaging.simp.config.MessageBrokerRegistry;
import org.springframework.web.socket.config.annotation.AbstractWebSocketMessageBrokerConfigurer;
import org.springframework.web.socket.config.annotation.EnableWebSocketMessageBroker;
import org.springframework.web.socket.config.annotation.StompEndpointRegistry;

/**
* @author ZhangPengFei
* @Discription
* @Data 2017-3-7
* @Version 1.0.0
*/
@Configuration
//开启对WebSocket的支持
@EnableWebSocketMessageBroker
public class WebSocketConfig extends AbstractWebSocketMessageBrokerConfigurer{

/**
* 注册一个STOMP协议的节点,并映射到指定的URL
* @param registry
*/
@Override
public void registerStompEndpoints(StompEndpointRegistry registry) {
//注册一个STOMP的endpoint,并指定使用SockJS协议
registry.addEndpoint("/endpointSocket").withSockJS();
}

/**
* 配置消息代理
* @param registry
*/
@Override
public void configureMessageBroker(MessageBrokerRegistry registry) {
//配置一个广播式的消息代理
registry.enableSimpleBroker("/topic");
}
}
3. 浏览器向服务器端发送消息的实体封装类
/**
* @author ZhangPengFei
* @Discription
* @Data 2017-3-7
* @Version 1.0.0
*/
public class SocketMessage {
private String message;

public String getMessage() {
return message;
}

public void setMessage(String message) {
this.message = message;
}
}
4. 服务器向浏览器响应数据的封装实体类
/**
* @author ZhangPengFei
* @Discription
* @Data 2017-3-7
* @Version 1.0.0
*/
public class SocketResponse {
private String responseMessage;

public SocketResponse(String responseMessage) {
this.responseMessage = responseMessage;
}

public String getResponseMessage() {
return responseMessage;
}
}
5. 请求控制器
import com.os.china.entity.SocketMessage;
import com.os.china.entity.SocketResponse;
import org.springframework.messaging.handler.annotation.MessageMapping;
import org.springframework.messaging.handler.annotation.SendTo;
import org.springframework.stereotype.Controller;

import java.text.SimpleDateFormat;
import java.util.Date;

/**
* @author ZhangPengFei
* @Discription
* @Data 2017-3-7
* @Version 1.0.0
*/
@Controller
public class WebSocketController {

private SimpleDateFormat sf = new SimpleDateFormat("yyyy-MM-dd HH:mm:ss");

//当浏览器向服务器端发送STOMP请求时,通过@MessageMapping注解来映射/getServerTime地址
@MessageMapping(value = "/getServerTime")
//当服务端有消息时,会对订阅了@SendTo中的路径的客户端发送消息
@SendTo(value = "/topic/getResponse")
public SocketResponse serverTime(SocketMessage message) throws InterruptedException {
return new SocketResponse(message.getMessage() + sf.format(new Date()));
}
}
6. 配置WebMvc视图映射
import org.springframework.context.annotation.Configuration;
import org.springframework.web.servlet.config.annotation.ViewControllerRegistry;
import org.springframework.web.servlet.config.annotation.WebMvcConfigurerAdapter;

/**
* @author ZhangPengFei
* @Discription
* @Data 2017-3-7
* @Version 1.0.0
*/
@Configuration
public class WebMvcConfig extends WebMvcConfigurerAdapter{
/**
* MVC视图控制器配置
* @param registry
*/
@Override
public void addViewControllers(ViewControllerRegistry registry) {
//添加一个请求映射地址为/index,返回对应视图页面为webSocket
registry.addViewController("/index").setViewName("/webSocket");
}
}
7. 脚本添加,将 stomp.min.js(STOMP协议的客户端脚本),socketjs.min.js(SocketJS的客户端脚本)和 jQuery脚本放在src/main/resources/static下
注:STOMP协议的客户端连接详细介绍,请移步至我的另外一篇文章,WebSocket子协议STOMP详解 https://my.oschina.net/feinik/blog/853875
8. 在项目的src/main/resources/templates下新建webSocket.html页面
<!DOCTYPE html>
<html>
<head>
<meta charset="utf-8"/>
<title>集成WebSocket示例</title>
</head>
<body>
<div>
<button id="connect" onclick="connect();">连接</button>
<button id="disconnect" onclick="disconnect();">断开连接</button>
<button id="serverTimeId" onclick="getServerTime();">获取服务器端时间</button>
<hr/>
<span id="showServerTime"></span>
</div>
<script type="text/javascript" src="sockjs.min.js"></script>
<script type="text/javascript" src="stomp.min.js"></script>
<script type="text/javascript" src="jquery-3.1.1.min.js"></script>
<script src="http://cdn.sockjs.org/sockjs-0.3.min.js"></script>
<script type="text/javascript">
var stompClient = null;
$(function(){
setConnect(false);
});
function setConnect(connected){
$("#connect").attr({disabled:connected});
$("#disconnect").attr({disabled:!connected});
}
function connect() {
var socket = new SockJS('/endpointSocket');
//创建STOMP客户端连接,目标地址为/endpointSocket的STOMP代理
stompClient = Stomp.over(socket);
//打印stomp输出信息
stompClient.debug = function(str) {
console.log(str + "\n");
};
//建立连接
stompClient.connect({},function(frame) {
setConnect(true);
//连接成功后订阅/topic/getResponse目标发送的消息,该地址在Controller中用@SendTo指定
stompClient.subscribe('/topic/getResponse', function(response) {
showResponse(JSON.parse(response.body).responseMessage);
});
});
}

function disconnect() {
if(stompClient != null) {
stompClient.disconnect();
}
setConnect(false);
}
function getServerTime() {
var message = "The server time is : ";
//发送消息到服务端,/getServerTime地址是由Controller中的@MessageMapping指定
stompClient.send("/getServerTime",{},JSON.stringify({'message':message}));
}

function showResponse(message){
var response = $("#showServerTime");
response.html(message);
}

</script>
</body>
</html>
9. 编写SpringBoot的启动类
import org.springframework.boot.Banner;
import org.springframework.boot.SpringApplication;
import org.springframework.boot.autoconfigure.SpringBootApplication;
/**
* @author ZhangPengFei
* @Discription
* @Data 2017-3-7
* @Version 1.0.0
*/
@SpringBootApplication
public class ApplicationTest {
public static void main(String[] args) {
SpringApplication application = new SpringApplication(ApplicationTest.class);
application.setBannerMode(Banner.Mode.OFF);
application.run(args);
}
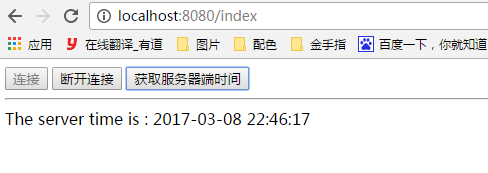
}10. 启动并测试,也可打开多个浏览器窗口连接到WebSocket服务端,在其中一个浏览器窗口中点击获取服务器时间,其他两个也将接收到消息
好了,整合到此完结,具体代码已上传至GitHub https://github.com/AIFEINIK/SpringBoot-Learn/tree/master/spring-boot-websocket

相关文章推荐
- springBoot整合webSocket
- [ Spring Boot ] 整合 Websocket 实现消息推送框架的设计笔记
- springboot整合tomcat自带的websocket实现在线聊天及象棋网页对战功能
- 关于Spring Boot WebSocket整合以及nginx配置详解
- springboot 整合websocket 站内消息 (支持广播式和只给一人发送)单独信息发送 信息群发 统计连接数
- spring-boot与mybatis整合优化介绍
- springboot 学习之路 8 (整合websocket(1))
- springboot整合websocket(1)
- 三分钟构建高性能WebSocket服务 | 超优雅的Springboot整合Netty方案
- SpringBoot整合WebSocket实现实时消息群发功能
- springboot整合websocket实现一对一消息推送和广播消息推送
- SpringBoot整合WebSocket案例
- spring-boot整合websocket
- Spring Boot WebSocket整合及nginx配置
- websocket与Spring整合
- Spring整合Jms学习(三)_MessageConverter介绍
- spring+websocket整合(springMVC+spring+MyBatis即SSM框架和websocket技术的整合)
- struts2中的constant介绍之struts.objectFactory与spring的整合
- Spring整合JMS(三)——MessageConverter介绍