java实现sftp客户端上传文件以及文件夹的功能代码
2017-02-10 14:28
1116 查看
1.依赖的jar文件 jsch-0.1.53.jar
2.登录方式有密码登录,和密匙登录
代码:
主函数:
import java.util.Properties;
import com.cloudpower.util.Login;
import com.util.LoadProperties;
public class Ftp {
public static void main(String[] args) {
Properties properties = LoadProperties.getProperties();
Login.login(properties);
}
}
登陆页面的代码:
package com.cloudpower.util;
import java.io.Console;
import java.util.Properties;
import com.jcraft.jsch.JSch;
import com.jcraft.jsch.Session;
public class Login {
public static void login(Properties properties) {
String ip = properties.getProperty("ip");
String user = properties.getProperty("user");
String pwd = properties.getProperty("pwd");
String port = properties.getProperty("port");
String privateKeyPath = properties.getProperty("privateKeyPath");
String passphrase = properties.getProperty("passphrase");
String sourcePath = properties.getProperty("sourcePath");
String destinationPath = properties.getProperty("destinationPath");
if (ip != null && !ip.equals("") && user != null && !user.equals("")
&& port != null && !port.equals("") && sourcePath != null
&& !sourcePath.equals("") && destinationPath != null
&& !destinationPath.equals("")) {
if (privateKeyPath != null && !privateKeyPath.equals("")) {
sshSftp2(ip, user, Integer.parseInt(port), privateKeyPath,
passphrase, sourcePath, destinationPath);
} else if (pwd != null && !pwd.equals("")) {
sshSftp(ip, user, pwd, Integer.parseInt(port), sourcePath,
destinationPath);
} else {
Console console = System.console();
System.out.print("Enter password:");
char[] readPassword = console.readPassword();
sshSftp(ip, user, new String(readPassword),
Integer.parseInt(port), sourcePath, destinationPath);
}
} else {
System.out.println("请先设置配置文件");
}
}
/**
* 密码方式登录
*
* @param ip
* @param user
* @param psw
* @param port
* @param sPath
* @param dPath
*/
public static void sshSftp(String ip, String user, String psw, int port,
String sPath, String dPath) {
System.out.println("password login");
Session session = null;
JSch jsch = new JSch();
try {
if (port <= 0) {
// 连接服务器,采用默认端口
session = jsch.getSession(user, ip);
} else {
// 采用指定的端口连接服务器
session = jsch.getSession(user, ip, port);
}
// 如果服务器连接不上,则抛出异常
if (session == null) {
throw new Exception("session is null");
}
// 设置登陆主机的密码
session.setPassword(psw);// 设置密码
// 设置第一次登陆的时候提示,可选值:(ask | yes | no)
session.setConfig("StrictHostKeyChecking", "no");
// 设置登陆超时时间
session.connect(300000);
UpLoadFile.upLoadFile(session, sPath, dPath);
} catch (Exception e) {
e.printStackTrace();
}
System.out.println("success");
}
/**
* 密匙方式登录
*
* @param ip
* @param user
* @param port
* @param privateKey
* @param passphrase
* @param sPath
* @param dPath
*/
public static void sshSftp2(String ip, String user, int port,
String privateKey, String passphrase, String sPath, String dPath) {
System.out.println("privateKey login");
Session session = null;
JSch jsch = new JSch();
try {
// 设置密钥和密码
// 支持密钥的方式登陆,只需在jsch.getSession之前设置一下密钥的相关信息就可以了
if (privateKey != null && !"".equals(privateKey)) {
if (passphrase != null && "".equals(passphrase)) {
// 设置带口令的密钥
jsch.addIdentity(privateKey, passphrase);
} else {
// 设置不带口令的密钥
jsch.addIdentity(privateKey);
}
}
if (port <= 0) {
// 连接服务器,采用默认端口
session = jsch.getSession(user, ip);
} else {
// 采用指定的端口连接服务器
session = jsch.getSession(user, ip, port);
}
// 如果服务器连接不上,则抛出异常
if (session == null) {
throw new Exception("session is null");
}
// 设置第一次登陆的时候提示,可选值:(ask | yes | no)
session.setConfig("StrictHostKeyChecking", "no");
// 设置登陆超时时间
session.connect(300000);
UpLoadFile.upLoadFile(session, sPath, dPath);
System.out.println("success");
} catch (Exception e) {
e.printStackTrace();
}
}
}
文件上传的代码:
package com.cloudpower.util;
import java.io.File;
import java.io.FileInputStream;
import java.io.IOException;
import java.io.InputStream;
import java.io.OutputStream;
import java.util.Scanner;
import com.jcraft.jsch.Channel;
import com.jcraft.jsch.ChannelSftp;
import com.jcraft.jsch.Session;
import com.jcraft.jsch.SftpException;
public class UpLoadFile {
public static void upLoadFile(Session session, String sPath, String dPath) {
Channel channel = null;
try {
channel = (Channel) session.openChannel("sftp");
channel.connect(10000000);
ChannelSftp sftp = (ChannelSftp) channel;
try {
sftp.cd(dPath);
Scanner scanner = new Scanner(System.in);
System.out.println(dPath + ":此目录已存在,文件可能会被覆盖!是否继续y/n?");
String next = scanner.next();
if (!next.toLowerCase().equals("y")) {
return;
}
} catch (SftpException e) {
sftp.mkdir(dPath);
sftp.cd(dPath);
}
File file = new File(sPath);
copyFile(sftp, file, sftp.pwd());
} catch (Exception e) {
e.printStackTrace();
} finally {
session.disconnect();
channel.disconnect();
}
}
public static void copyFile(ChannelSftp sftp, File file, String pwd) {
if (file.isDirectory()) {
File[] list = file.listFiles();
try {
try {
String fileName = file.getName();
sftp.cd(pwd);
System.out.println("正在创建目录:" + sftp.pwd() + "/" + fileName);
sftp.mkdir(fileName);
System.out.println("目录创建成功:" + sftp.pwd() + "/" + fileName);
} catch (Exception e) {
// TODO: handle exception
}
pwd = pwd + "/" + file.getName();
try {
sftp.cd(file.getName());
} catch (SftpException e) {
// TODO: handle exception
e.printStackTrace();
}
} catch (Exception e) {
// TODO Auto-generated catch block
e.printStackTrace();
}
for (int i = 0; i < list.length; i++) {
copyFile(sftp, list[i], pwd);
}
} else {
try {
sftp.cd(pwd);
} catch (SftpException e1) {
// TODO Auto-generated catch block
e1.printStackTrace();
}
System.out.println("正在复制文件:" + file.getAbsolutePath());
InputStream instream = null;
OutputStream outstream = null;
try {
outstream = sftp.put(file.getName());
instream = new FileInputStream(file);
byte b[] = new byte[1024];
int n;
try {
while ((n = instream.read(b)) != -1) {
outstream.write(b, 0, n);
}
} catch (IOException e) {
// TODO Auto-generated catch block
e.printStackTrace();
}
} catch (SftpException e) {
// TODO Auto-generated catch block
e.printStackTrace();
} catch (IOException e) {
// TODO Auto-generated catch block
e.printStackTrace();
} finally {
try {
outstream.flush();
outstream.close();
instream.close();
} catch (Exception e2) {
// TODO: handle exception
e2.printStackTrace();
}
}
}
}
}
读取配置文件的代码:
package com.util;
import java.io.File;
import java.io.FileInputStream;
import java.io.IOException;
import java.io.InputStream;
import java.util.Properties;
public class LoadProperties {
public static Properties getProperties() {
File file = new File(Class.class.getClass().getResource("/").getPath()
+ "properties.properties");
InputStream inputStream = null;
try {
inputStream = new FileInputStream(file);
} catch (IOException e) {
// TODO Auto-generated catch block
e.printStackTrace();
}
Properties properties = new Properties();
try {
properties.load(inputStream);
} catch (IOException e) {
// TODO Auto-generated catch block
e.printStackTrace();
}
return properties;
}
}
代码目录结构:
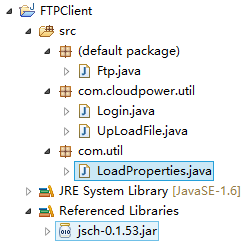
测试运行时配置文件放在项目的bin目录下(打包成可运行jar文件的时候要删除,打包完成后将配置文件和jar包放在同级目录下即可):
properties.properties
ip=
user=
pwd=
port=22
privateKeyPath=
passphrase=
sourcePath=
destinationPath=/home/dbbs/f
打包可运行jar文件:
Export->java->Runnabe JAR file
完成后
在控制台运行java -jar 导出jar包的名字.jar 即可
以上就是本文的全部内容,希望对大家的学习有所帮助,也希望大家多多支持脚本之家。
您可能感兴趣的文章:

相关文章推荐
- java操作hdfs,实现文件上传、下载以及查看当前文件夹下所有文件
- java文件上传下载功能实现代码
- java实现图片或文件的上传功能具体思路及代码
- ftp 实现文件的上传下载以及列出文件列表Java代码
- nodejs ssh2基本功能封装,实现上传、下载文件以及文件夹
- Java 实现上传文件客户端代码(二)
- ftp 实现文件的上传下载以及列出文件列表Java代码(未测试)
- Java中使用fileupload组件实现文件上传功能的实例代码
- 利用Java 代码创建ftp客户端并实现上传下载等功能
- java代码实现文件夹以及下面文件夹和文件的复制
- Java代码使用FTPClient实现ftp文件上传下载和删除的功能
- java代码实现移动文件以及文件夹
- Java实现FTP文件的上传和下载功能的实例代码
- Java与WebUploader相结合实现文件上传功能(实例代码)
- Jquery AjaxUpload实现文件上传功能代码实例教程
- JSch - Java实现的SFTP(文件上传详解篇)
- php利用iframe实现无刷新文件上传功能的代码
- Java实现文件上传功能
- Java代码实现文件上传
- php实现文件上传功能的代码实例