shiro整合spring+springmvc
2016-12-07 15:17
225 查看
1:加入Spring和Shiro的jar包
2:配置Spring和Springmvc
在web.xml中配置spring和springmvc http://download.csdn.net/detail/qq_33913037/9704555 shiro包shiro整合spring+springmvcjar包 http://download.csdn.net/detail/qq_33913037/9704598
<listener>
<listener-class>org.springframework.web.context.ContextLoaderListener</listener-class>
</listener>
<context-param>
<param-name>contextConfigLocation</param-name>
<param-value>classpath:applicationContext.xml</param-value>
</context-param>
<servlet>
<servlet-name>spring</servlet-name>
<servlet-class>org.springframework.web.servlet.DispatcherServlet</servlet-class>
<init-param>
<param-name>contextConfigLocation</param-name>
<param-value>classpath:spring-servlet.xml</param-value>
</init-param>
<load-on-startup>1</load-on-startup>
</servlet>
<servlet-mapping>
<servlet-name>spring</servlet-name>
<url-pattern>/</url-pattern>
</servlet-mapping>
在src目录下建立applicationContext.xml文件和spring-servlet.xml文件
接下来 配置spring-servlet.xml文件
<context:component-scan base-package="com.czmec.shiro"></context:component-scan>
<bean class="org.springframework.web.servlet.view.InternalResourceViewResolver">
<property name="prefix" value="/"></property>
<property name="suffix" value=".jsp"></property>
</bean>
<mvc:annotation-driven></mvc:annotation-driven>
<mvc:default-servlet-handler></mvc:default-servlet-handler>//想必spring-servlet.xml中这些配置大家都知道
整合shiro在web.xml中整合shiro
<!--
1. 配置  Shiro 的 shiroFilter.
2. DelegatingFilterProxy 实际上是 Filter 的一个代理对象. 默认情况下, Spring 会到 IOC 容器中查找和
<filter-name> 对应的 filter bean. 也可以通过 targetBeanName 的初始化参数来配置 filter bean 的 id.
-->
<filter>
<filter-name>shiroFilter</filter-name>
<filter-class>org.springframework.web.filter.DelegatingFilterProxy</filter-class>
<init-param>
<param-name>targetFilterLifecycle</param-name>
<param-value>true</param-value>
</init-param>
</filter>

<filter-mapping>
<filter-name>shiroFilter</filter-name>
<url-pattern>/*</url-pattern>
</filter-mapping>
在applicationContext中配置shiro
可以打开下载的文件找到shiro-root-1.3.2\samples\spring\src\main\webapp\WEB-INF\applicationContext.xml文件
里面有官方的详细讲解配置信息
<!--
1. 配置 SecurityManager!
-->
  <bean id="dataSource" class="org.springframework.jdbc.datasource.DriverManagerDataSource">
        <property name="driverClassName" value="org.hsqldb.jdbcDriver"/>
        <property name="url" value="jdbc:hsqldb:mem:shiro-spring"/>
        <property name="username" value="sa"/>
    </bean>//因为是集成 所以现在不需要配置数据源
<bean id="securityManager" class="org.apache.shiro.web.mgt.DefaultWebSecurityManager">
<property name="cacheManager" ref="cacheManager"/>
<property name="realm" ref="jdbcRealm"></property>
</bean>
<!--
2. 配置 CacheManager.
2.1 需要加入 ehcache 的 jar 包及配置文件.
-->
<bean id="cacheManager" class="org.apache.shiro.cache.ehcache.EhCacheManager">
<!-- Set a net.sf.ehcache.CacheManager instance here if you already have one.  If not, a new one
will be creaed with a default config:
<property name="cacheManager" ref="ehCacheManager"/> -->
<!-- If you don't have a pre-built net.sf.ehcache.CacheManager instance to inject, but you want
a specific Ehcache configuration to be used, specify that here.  If you don't, a default
will be used.: -->
<property name="cacheManagerConfigFile" value="classpath:ehcache.xml"/>//ehcache.xml是hibernate官
网上下载文件中的配置文件,为了大家方便 在上面链接中科院下载
</bean>
<!--
3. 配置 Realm
3.1 直接配置实现了 org.apache.shiro.realm.Realm 接口的 bean
public class ShiroRealm implements Realm{
@Override
public String getName() {
return null;
}

@Override
public boolean supports(AuthenticationToken authenticationToken) {
return false;
}

@Override
public AuthenticationInfo getAuthenticationInfo(AuthenticationToken authenticationToken) throws AuthenticationException {
return null;
}
}
--> <bean id="jdbcRealm" class="com.czmec.shiro.realms.ShiroRealm">//自定义的realm类 需要继承Realm接口 </bean>4. 配置 LifecycleBeanPostProcessor. 可以自定的来调用配置在 Spring IOC 容器中 shiro bean 的生命周期方法. --> <bean id="lifecycleBeanPostProcessor" class="org.apache.shiro.spring.LifecycleBeanPostProcessor"/>
<!-- Enable Shiro Annotations for Spring-configured beans.  Only run after
the lifecycleBeanProcessor has run: -->
<!--启动ioc容器中使用shiro的注解 但必须配置了lifecycleBeanPostProcessor之后才可以使用 -->
<bean class="org.springframework.aop.framework.autoproxy.DefaultAdvisorAutoProxyCreator"
depends-on="lifecycleBeanPostProcessor"/>
<bean class="org.apache.shiro.spring.security.interceptor.AuthorizationAttributeSourceAdvisor">
<property name="securityManager" ref="securityManager"/>
</bean>
<!-- Define the Shiro Filter here (as a FactoryBean) instead of directly in web.xml -
web.xml uses the DelegatingFilterProxy to access this bean.  This allows us
to wire things with more control as well utilize nice Spring things such as
PropertiesPlaceholderConfigurer and abstract beans or anything else we might need: -->
<!--6. 配置 ShiroFilter.
6.1 id 必须和 web.xml 文件中配置的 DelegatingFilterProxy 的 <filter-name> 一致.
若不一致, 则会抛出: NoSuchBeanDefinitionException.
因为 Shiro 会来 IOC 容器中查找和 <filter-name> 名字对应的 filter bean.-->
<bean id="shiroFilter" class="org.apache.shiro.spring.web.ShiroFilterFactoryBean"><property name="securityManager" ref="securityManager"/><property name="loginUrl" value="/login.jsp"/><property name="successUrl" value="/list.jsp"/><property name="unauthorizedUrl" value="/unauthorized.jsp"/><!--配置哪些页面需要受保护.以及访问这些页面需要的权限.1). anon 可以被匿名访问2). authc 必须认证(即登录)后才可能访问的页面.--><property name="filterChainDefinitions"><value>/login.jsp = anon# everything else requires authentication:/** = authc</value></property></bean>
建立如下的几个jsp页面启动tomcat
访问login.jsp
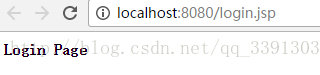 会看到如下结果
当你输入 localhost:8080/list.jsp的时候会自动跳转到login.jsp页面中去 因为login.jsp是(/login.jsp = anon)
是匿名的 而其他的jsp是需要权限的(/** = authc)
好啦 shiro整合spring就大功告成了

相关文章推荐
- 将 Shiro 作为应用的权限基础 五:SpringMVC+Apache Shiro+JPA(hibernate)整合配置
- shiro+springmvc整合demo下载
- Shiro系列之Shiro+Spring MVC整合(Integration)
- java框架整合Springmvc+mybatis+shiro+bootstrap
- spring mvc+Mybatis整合shiro 第一章 整体配置
- SpringMVC+Apache Shiro+JPA(hibernate)案例教学(一)整合配置
- spring mvc+Mybatis整合shiro 第二章Realm
- shiro+springMVC整合文档及Demo
- shiro+redis+springMvc整合配置及说明
- 【Shiro + Spring MVC整合】教程——权限控制
- shiro+redis+springMvc整合配置及说明
- SpringMVC+Apache Shiro+JPA 整合
- Apache Shiro+SpringMVC+Hibernate Search+Hibernate+Bootstrap企业信息管理系统基础框架搭建整合实例代码教程
- SpringMVC+Apache Shiro+JPA(hibernate)案例教学整合配置
- SpringMVC+Apache Shiro+JPA(hibernate)整合配置
- 【Shiro + Spring MVC整合】教程——权限控制
- shiro+redis+springMvc整合配置及说明
- spring mvc+Mybatis整合shiro 第三章 SessionManager
- 【Shiro + Spring MVC整合】教程
- SpringMVC整合Shiro