spring-boot集成activeMQ(一)-使用默认的ActiveMQ
2016-11-27 00:00
791 查看
spring-boot集成ActiveMQ很简单,都不需要安装什么,因为默认使用的就是内存的ActiveMQ,因为是测试配合使用,所以这次就不使用ActiveMQ Server了,一般业务都是使用ActiveMQ Server,下篇在介绍使用ActiveMQ Server
先来说说我的环境吧: jdk版本号是1.8,springboot的版本号是1.4.1先来看看pom文件,引入的依赖
<parent>
<groupId>org.springframework.boot</groupId>
<artifactId>spring-boot-starter-parent</artifactId>
<version>1.4.1.RELEASE</version>
<relativePath/> <!-- lookup parent from repository -->
</parent>

<properties>
<project.build.sourceEncoding>UTF-8</project.build.sourceEncoding>
<project.reporting.outputEncoding>UTF-8</project.reporting.outputEncoding>
<java.version>1.8</java.version>
</properties>

<dependencies>
<dependency>
<groupId>org.springframework.boot</groupId>
<artifactId>spring-boot-starter-web</artifactId>
</dependency>
<dependency>
<groupId>org.springframework.boot</groupId>
<artifactId>spring-boot-starter-test</artifactId>
<scope>test</scope>
</dependency>
<!--引入该jar包,可以使用默认的ActiveMQ-->
<dependency>
<groupId>org.springframework.boot</groupId>
<artifactId>spring-boot-starter-activemq</artifactId>
</dependency>
</dependencies>
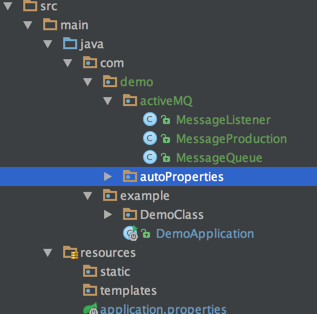
然后是项目结构:
首先,我们分析下,作为队列消息,肯定是需要一个生产者,一个消费者,以及一个仓库(也就是队列,用来存放生产者生产的消息,消费者从这取出消息进行处理)
有思路了,就好做了,首先,我们先构建一个生产者,代码如下/**
* 项目名:SpringBootDemo
* 创建人:贺小五
* 创建时间:16/11/27 下午3:59
* 类名:MessageVo
* 类描述:
* 消息生产者
*/
//注册为一个bean
@Component
//开启定时器
@EnableScheduling
public class MessageProduction {
@Autowired
private JmsMessagingTemplate jmsMessagingTemplate;//使用JmsMessagingTemplate将消息放入队列
@Autowired
private Queue queue;
@Scheduled(fixedDelay = 3000)//每3s执行1次,将消息放入队列内
public void send() {
this.jmsMessagingTemplate.convertAndSend(this.queue, "测试消息队列"+System.currentTimeMillis()/1000);
}
}生产者有了,接下来就是消费者了,消费者代码如下:
/**
* 项目名:SpringBootDemo
* 创建人:贺小五
* 创建时间:16/11/27 下午4:00
* 类名:MessageListener
* 类描述:
*        消息监听者
*/
@Component
public class MessageListener {

/**使用@JmsListener注解来监听指定的某个队列内的消息,是否有新增,有的话则取出队列内消息
*进行处理
**/
@JmsListener(destination="my-message")
public void removeMessage(String msg){
System.out.println("监听接收到的消息是:"+msg);//打印队列内的消息
}

}
消费者,生产已经有了,那下面就看仓库代码吧,代码如下:
/**
* 项目名:SpringBootDemo
* 创建人:贺小五
* 创建时间:16/11/27 下午3:57
* 类名:MessagePush
* 类描述:
*        队列消息发送者
*/
@Component
public class MessageQueue {

//返回一个名为my-message的队列,并且注册为bean
@Bean
public Queue queue(){
return new ActiveMQQueue("my-message");
}

}
三者都有了,下面就是测试看看队列是否生效
执行下面代码的main方法
@SpringBootApplication(scanBasePackages = {"com"})//扫描com包的注解类为bean
public class DemoApplication{

public static void main(String[] args) {
SpringApplication.run(DemoApplication.class, args);
}
打印结果为:

可以看到,生产者每隔3S生产一条消息放入队列内,而消费者也去队列内获取了消息,说明代码是正确的.
以上,均为本人测试而得出的结果,可能会有出入,或者错误,欢迎指正
欢迎转载,请注明出处跟作者,谢谢!

相关文章推荐
- spring-boot集成activeMQ(二)-使用ActiveMQ Server
- springboot集成activemq,超赞!!!
- spring-boot 集成 activemq
- 关于Spring boot 与 redis 的集成,以及Spring中redis的使用
- 使用IDEA在Spring Boot中集成JSP
- spring boot 1.4默认使用 hibernate validator
- Spring Boot 不使用默认的 parent,改用自己的项目的 parent
- Spring Boot 集成 Spring Security 使用自定义的安全数据源
- eclipse 使用maven 集成springboot + retrofit
- ActiveMQ 基于zookeeper的主从(levelDB Master/Slave)搭建以及Spring-boot下使用
- spring boot 、springMVC环境集成百度ueditor富文本编辑器,使用七牛云存储图片
- jersey的简单介绍及与spring-boot的集成使用
- spring-boot集成ActiveMQ
- springboot集成activemq的实例代码
- 86. Spring Boot集成ActiveMQ【从零开始学Spring Boot】
- 使用maven集成docker构建和部署Spring Boot 应用
- spring-boot 集成mybatis配置使用
- spring-boot 集成 activemq
- spring-boot集成mybatis使用Druid监控
- 详解Spring Boot 使用Spring security 集成CAS