代码生成rapid-generator源码分析
2016-10-26 16:09
351 查看
原理
rapid-generator
rapidDemo
假设有mysql数据库和表
修改generatorxml文件发在代码根目录就行生成代码会在classes目录加载配置文件主要是
模板文件
生成代码
rapid生成的代码文件
源码分析
常用类
加载配置文件
获取数据库元数据
构建输出模型和处理输出
总结
一个bug
感谢那位哥们提供了这样的好工具
之前有个项目比较紧急,基本上开发和设计同步进行,所以设计和数据模型基本上每天都会变,每天上班的第一件事就是检查数据模型的变动,内心一万头神兽奔腾,后来忙完想到写个代码生成工具,每天过来自己跑下程序,自行检查,搜索发现这个开源的rapid-generator工具,只要编写模板文件就可以,完全满足需求。看下源码,学习之。
写个freemarker的demo理解下,假如我们要生成这样一个java类:
先抽象成一个demo.ftl模板:
freemarker生成代码:
那位哥们写的代码生成,基本原理也就是这样,一切看起来都是那么美好,也似乎很简单,不过上面的也只是demo,想做好,就要考虑很多细节了。
我是用maven从公司私服下添加的依赖。需要3个jar包:rapid-generator.jar, freemarker.jar和你数据库的驱动包。
先来个demo看这个框架怎么用。
basepackage:输出的包名配置;
outRoot:输出的文件目录。
其他字段一般不用更改。
Ok,完全没问题。
1. 加载generator.xml配置文件;
2. 获取数据库元数据;
3. 构建输出模型和处理输出。
generator包下删除了context类,生成代码不需要context。
1. Generator:代码生成的核心,最终代码生成在这里;
2. GeneratorConstants:常量类,那些参数可以在配置文件在配置,提供了默认值;
3. GeneratorControl:控制生成器的过程中一些动作,有一些参数,如是否容许覆盖,生成目录等;
4. GeneratorFacade:facade模式,入口类;
5. GeneratorProperties:处理配置文件的加载,有参数PropertiesHelper,大多数方法通过委托持有的PropertiesHelper实现。这里我觉得有点设计不好,因为PropertiesHelper有点像工具类,但是又持有真正的Properties,不如Properties持有GeneratorProperties,把PropertiesHelper处理成真正的工具类;
6. DataSourceProvider:主要是通过配置文件获取数据源,支持jndi和常用的链接配置;
7. TableFactory:获取数据库元数据,创建成Table对象;
8. Table、Column等:就是对应数据库的表和列的一些属性;
9. 其他的就是一些工具类;
触发:
这里我改了下,原本propertiesHelper这里会直接实例化下,但是我觉得跟下面的static重复,所以删除了,用static代码块直接加载配置文件数据。
看下
配置文件加载后,后期就可以获取配置参数,如数据库的配置,输出目录,包名等。
以上面的demo为例:
转到TableFactory,真正处理数据库元数据的地方:
OK,到这里我们的数据模型的元数据就有,下面就是构建输出模型和处理输出
构建模型:
现在输出模型有了,接下来就是输出文件了:
把最后创建的语句提出来:
有些代码没贴出来,跟着看就是。OK,生成结束,facade里面还有其他一些方法,还好,看完这个应该再去看应该没什么问题。
这是因为freemarker对user.name的解析有问题,freemarker不是把user.name整体作为一个key,认为user.name的点号存在下一层关系,所以出错。
后来把框架这里的处理代码改了把点号全部替换为下划线,然后模板取user_name就没问题了。作者本人在配置文件全部用下划线,不知道为什么这里不改。
GeneratorFacade.java代码所在:
rapid-generator
rapidDemo
假设有mysql数据库和表
修改generatorxml文件发在代码根目录就行生成代码会在classes目录加载配置文件主要是
模板文件
生成代码
rapid生成的代码文件
源码分析
常用类
加载配置文件
获取数据库元数据
构建输出模型和处理输出
总结
一个bug
感谢那位哥们提供了这样的好工具
之前有个项目比较紧急,基本上开发和设计同步进行,所以设计和数据模型基本上每天都会变,每天上班的第一件事就是检查数据模型的变动,内心一万头神兽奔腾,后来忙完想到写个代码生成工具,每天过来自己跑下程序,自行检查,搜索发现这个开源的rapid-generator工具,只要编写模板文件就可以,完全满足需求。看下源码,学习之。
原理
废话没有,就是利用freemarker来实现的,关于freemarker不多说,记住一点就行:输出 = 模板 + 模型,详细的自己搜索学习。写个freemarker的demo理解下,假如我们要生成这样一个java类:
package com.su.autocode;

/**
* @author:admin
* @version:1.0
* @since:1.0
* @createTime:2016-10-26 09:36:11
*/
pulic class User {
private String username;
private String password;

public User(){}

public User(String username, String password){
this.username = username;
this.password = password;
}

public void setUsername(String username){
this.username = username;
}

public String getUsername(){
return this.username;
}

public void setPassword(String password){
this.password = password;
}

public String getPassword(){
return this.password;
}

}
先抽象成一个demo.ftl模板:
package ${basePackage_dir};

/**
* @author:${author}
* @version:1.0
* @since:1.0
* @createTime:<#if now??>${now?string('yyyy-MM-dd HH:mm:ss')}</#if>
*/
pulic class ${className} {

<#list attrs as attr>
private ${attr.javaType} ${attr.name};
</#list>

public ${className}(){}

<#list attrs as attr>
public void set${attr.name?cap_first}(String ${attr.name}){
this.${attr.name} = ${attr.name};
}

public void get${attr.name?cap_first}(}){
return this.${attr.name};
}
</#list>
}
freemarker生成代码:
public class FreemarkerDemo {

public static void main(String[] args){
Map<String, String> attr1 = new HashMap<String, String>();
attr1.put("javaType", "String");
attr1.put("name", "username");

Map<String, String> attr2 = new HashMap<String, String>();
attr2.put("javaType", "String");
attr2.put("name", "password");

List<Object> attrs = new ArrayList<Object>();
attrs.add(attr1);
attrs.add(attr2);

Map<String,Object> root = new HashMap<String, Object>();
root.put("basePackage_dir", "com.su.autocode");
root.put("author", "admin");
root.put("now", new Date());
root.put("className", "User");
root.put("attrs", attrs);

Configuration cfg = new Configuration();
try {
FileTemplateLoader[] templateLoaders = new FileTemplateLoader[1];
templateLoaders[0] = new FileTemplateLoader(new File("C:\\Users\\chris\\Desktop"));
MultiTemplateLoader multiTemplateLoader = new MultiTemplateLoader(templateLoaders);

cfg.setTemplateLoader(multiTemplateLoader);
Template template = cfg.getTemplate("demo.ftl"); //获取模板
StringWriter out = new StringWriter(); //out可以输出到file
template.process(root, out);

System.out.println(out.toString());
} catch (IOException e) {
e.printStackTrace();
} catch (TemplateException e) {
e.printStackTrace();
}
}
}
那位哥们写的代码生成,基本原理也就是这样,一切看起来都是那么美好,也似乎很简单,不过上面的也只是demo,想做好,就要考虑很多细节了。
rapid-generator
这个代码生成我主要是用来对数据模型生成sqlmap、bean、dao、service,因为用到了公司的组件内容,所以重新编写了模板,不过这个框架也的确做的好,基本上只是编写个代码模板,都不用更改框架代码。我是用maven从公司私服下添加的依赖。需要3个jar包:rapid-generator.jar, freemarker.jar和你数据库的驱动包。
先来个demo看这个框架怎么用。
rapidDemo
假设有mysql数据库和表:
CREATE TABLE `user` (
`id` bigint(20) NOT NULL auto_increment,
`name` varchar(20) default NULL,
PRIMARY KEY  (`id`)
) ENGINE=InnoDB DEFAULT CHARSET=utf8
修改generator.xml(文件发在代码根目录就行,生成代码会在classes目录加载)配置文件,主要是:
数据库配置;basepackage:输出的包名配置;
outRoot:输出的文件目录。
其他字段一般不用更改。
模板文件
假设我们要生成表对应的bean,模板为:<#assign className = table.className>
<#assign classNameLower = className?uncap_first>
package ${basepackage}.bean;
import javax.persistence.Column;
import javax.persistence.Entity;
import javax.persistence.GeneratedValue;
import javax.persistence.GenerationType;
import javax.persistence.Id;
import org.apache.ibatis.type.Alias;
/**
<#if table.remarks?exists && table.remarks != '' && table.remarks != 'null'>
* ${table.remarks}
</#if>
* @author:admin
* @version:1.0
* @since:1.0
* @createTime:<#if now??>${now?string('yyyy-MM-dd HH:mm:ss')}</#if>
*/
@Alias("${classNameLower}")
@Entity(name = "${table.sqlName}")
public class ${className} implements java.io.Serializable{
private static final long serialVersionUID = 1L;
<#list table.columns as column>
<#if column.remarks?exists && column.remarks != '' && column.remarks != 'null'>
/** ${column.remarks} */
</#if>
private ${column.javaType} ${column.columnNameLower};
</#list>
public ${className}(){
}
<#list table.columns as column>
public void set${column.columnName}(${column.javaType} ${column.columnNameLower}) {
this.${column.columnNameLower} = ${column.columnNameLower};
}
<#if column.pk>
@Id
@GeneratedValue(strategy = GenerationType.AUTO)
</#if>
@Column(name = "${column.sqlName}")
public ${column.javaType} get${column.columnName}() {
return this.${column.columnNameLower};
}
</#list>
}生成代码
public class RapidDemo {

public static void main(String[] args) throws Exception {
GeneratorFacade g = new GeneratorFacade();
/** 代码模板文件根目录 */
g.getGenerator().addTemplateRootDir("D:\\workspaces\\NettyRpc-master\\template");
/** 删除代码生成输出目录,配置在generator.xml的outRoot */
g.deleteOutRootDir();
/** 只尝试了下面2中,rapid-framework还支持根据sql,类生成等方式 */
/** 所有表对应代码 */
//        g.generateByAllTable();
/** 指定表对应代码 */
g.generateByTable("user");
}

}
rapid生成的代码文件
package com.su.chris.bean;

import javax.persistence.Column;
import javax.persistence.Entity;
import javax.persistence.GeneratedValue;
import javax.persistence.GenerationType;
import javax.persistence.Id;

import org.apache.ibatis.type.Alias;

/**
* @author:admin
* @version:1.0
* @since:1.0
* @createTime:2016-10-26 11:16:28
*/
@Alias("user")
@Entity(name = "user")
public class User implements java.io.Serializable{

private static final long serialVersionUID = 1L;

private java.lang.Long id;

private java.lang.String name;

public User(){
}

public void setId(java.lang.Long id) {
this.id = id;
}

@Id
@GeneratedValue(strategy = GenerationType.AUTO)
@Column(name = "id")
public java.lang.Long getId() {
return this.id;
}

public void setName(java.lang.String name) {
this.name = name;
}

@Column(name = "name")
public java.lang.String getName() {
return this.name;
}

}
Ok,完全没问题。
源码分析
既然是用freemarker,那么还是之前那就话,输出 = 模板 + 模型。看完这个代码生成的源码,整个流程可以概括为下面几步:1. 加载generator.xml配置文件;
2. 获取数据库元数据;
3. 构建输出模型和处理输出。
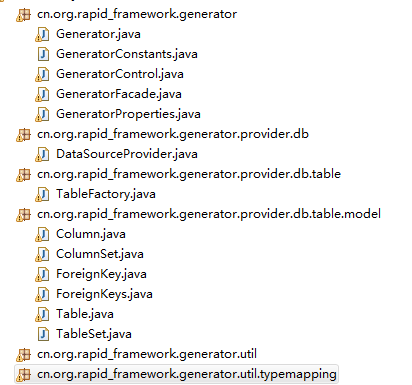
常用类
根据我的实际使用情况,删除了部分源码,保留主流程。generator包下删除了context类,生成代码不需要context。
1. Generator:代码生成的核心,最终代码生成在这里;
2. GeneratorConstants:常量类,那些参数可以在配置文件在配置,提供了默认值;
3. GeneratorControl:控制生成器的过程中一些动作,有一些参数,如是否容许覆盖,生成目录等;
4. GeneratorFacade:facade模式,入口类;
5. GeneratorProperties:处理配置文件的加载,有参数PropertiesHelper,大多数方法通过委托持有的PropertiesHelper实现。这里我觉得有点设计不好,因为PropertiesHelper有点像工具类,但是又持有真正的Properties,不如Properties持有GeneratorProperties,把PropertiesHelper处理成真正的工具类;
6. DataSourceProvider:主要是通过配置文件获取数据源,支持jndi和常用的链接配置;
7. TableFactory:获取数据库元数据,创建成Table对象;
8. Table、Column等:就是对应数据库的表和列的一些属性;
9. 其他的就是一些工具类;
加载配置文件
GeneratorFacade g = new GeneratorFacade();
GeneratorFacade:
private Generator generator = new Generator();
Generator:
private String removeExtensions = GeneratorProperties.getProperty(GENERATOR_REMOVE_EXTENSIONS);
触发:
GeneratorProperties:
/** 配置文件名称,看样子作者是支持2种格式的 */
static final String PROPERTIES_FILE_NAMES[] = new String[]{"generator.properties","generator.xml"};

static PropertiesHelper propertiesHelper;

static {
reload();
}
这里我改了下,原本propertiesHelper这里会直接实例化下,但是我觉得跟下面的static重复,所以删除了,用static代码块直接加载配置文件数据。
public static void reload() {
try {
GLogger.println("Start Load GeneratorPropeties from classpath:"+Arrays.toString(PROPERTIES_FILE_NAMES));
Properties p = new Properties();
/** 这里通过PropertiesHelper加载配置文件 */
String[] loadedFiles = PropertiesHelper.loadAllPropertiesFromClassLoader(p,PROPERTIES_FILE_NAMES);
GLogger.println("GeneratorPropeties Load Success,files:"+Arrays.toString(loadedFiles));

setSepicalProperties(p, loadedFiles);

setProperties(p);
}catch(IOException e) {
throw new RuntimeException("Load "+PROPERTIES_FILE_NAMES+" error",e);
}
}

/** 处理了个特殊目录,搜索代码没看见什么地方用,估计是作者其他框架用吧 */
private static void setSepicalProperties(Properties p, String[] loadedFiles) {
if(loadedFiles != null && loadedFiles.length > 0) {
String basedir = p.getProperty("basedir");
if(basedir != null && basedir.startsWith(".")) {
p.setProperty("basedir", new File(new File(loadedFiles[0]).getParent(),basedir).getAbsolutePath());
}
}
}

/** 这里就加载的配置文件让propertiesHelper来持有 */
public static void setProperties(Properties inputProps) {
propertiesHelper = new PropertiesHelper(inputProps,true);
for(Iterator it = propertiesHelper.entrySet().iterator();it.hasNext();) {
Map.Entry entry = (Map.Entry)it.next();
GLogger.debug("[Property] "+entry.getKey()+"="+entry.getValue());
}
GLogger.println("");
}
看下
PropertiesHelper.loadAllPropertiesFromClassLoader():
public static String[] loadAllPropertiesFromClassLoader(Properties properties,String... resourceNames) throws IOException {
List successLoadProperties = new ArrayList();
for(String resourceName : resourceNames) {
/** 从classes目录获取配置文件路径 */
Enumeration urls = ClassHelper.getDefaultClassLoader().getResources(resourceName);
while (urls.hasMoreElements()) {
URL url = (URL) urls.nextElement();
successLoadProperties.add(url.getFile());
InputStream input = null;
try {
URLConnection con = url.openConnection();
con.setUseCaches(false);
input = con.getInputStream();
/** 这里判断格式,然后加载配置文件 */
if(resourceName.endsWith(".xml")){
properties.loadFromXML(input);
}else {
properties.load(input);
}
}
finally {
if (input != null) {
input.close();
}
}
}
}
return (String[])successLoadProperties.toArray(new String[0]);
}
配置文件加载后,后期就可以获取配置参数,如数据库的配置,输出目录,包名等。
获取数据库元数据
数据库元数据是在真正处理模板前才会获取,不是生成器核心Generator generator = new Generator();实例化的时候就提前处理完。
以上面的demo为例:
/** 指定表对应代码 */
g.generateByTable("user");
GeneratorFacade:
public void generateByTable(String... tableNames) throws Exception {
for(String tableName : tableNames) {
/** 如果有多个表名,循环处理 */
new ProcessUtils().processByTable(tableName,false);
}
}
内部类ProcessUtils处理:
public void processByTable(String tableName,boolean isDelete) throws Exception {
if("*".equals(tableName)) {
if(isDelete)
deleteByAllTable();
else
generateByAllTable();
return;
}
Generator g = getGenerator();
/** 获取数据库表Table元数据 */
Table table = TableFactory.getInstance().getTable(tableName);
try {
/** 根据table信息生成 */
processByTable(g,table,isDelete);
}catch(GeneratorException ge) {
PrintUtils.printExceptionsSumary(ge.getMessage(),getGenerator().getOutRootDir(),ge.getExceptions());
throw ge;
}
}转到TableFactory,真正处理数据库元数据的地方:
/** 单例获取实例化类,注意有的数据库有schema和catalog,有的话需要在配置文件中配置 */
public synchronized static TableFactory getInstance() {
if(instance == null) instance = new TableFactory(GeneratorProperties.getNullIfBlank(GeneratorConstants.JDBC_SCHEMA),GeneratorProperties.getNullIfBlank(GeneratorConstants.JDBC_CATALOG));
return instance;
}

public Table getTable(String tableName) {
return getTable(getSchema(),tableName);
}

private Table getTable(String schema,String tableName) {
return getTable(getCatalog(),schema,tableName);
}

private Table getTable(String catalog,String schema,String tableName) {
Table t = null;
try {
t = _getTable(catalog,schema,tableName);
/** 上面是根据你给的表名获取,获取不到就转换大小写重新获取下 */
if(t == null && !tableName.equals(tableName.toUpperCase())) {
t = _getTable(catalog,schema,tableName.toUpperCase());
}
if(t == null && !tableName.equals(tableName.toLowerCase())) {
t = _getTable(catalog,schema,tableName.toLowerCase());
}
}catch(Exception e) {
throw new RuntimeException(e);
}
if(t == null) {
Connection conn = DataSourceProvider.getConnection();
try {
throw new NotFoundTableException("not found table with give name:"+tableName+ (DatabaseMetaDataUtils.isOracleDataBase(DatabaseMetaDataUtils.getMetaData(conn)) ? " \n databaseStructureInfo:"+DatabaseMetaDataUtils.getDatabaseStructureInfo(DatabaseMetaDataUtils.getMetaData(conn),schema,catalog) : "")+"\n current "+DataSourceProvider.getDataSource()+" current schema:"+getSchema()+" current catalog:"+getCatalog());
}finally {
DBHelper.close(conn);
}
}
return t;
}

/** 真正获取的地方 */
private Table _getTable(String catalog,String schema,String tableName) throws SQLException {
if(tableName== null || tableName.trim().length() == 0)
throw new IllegalArgumentException("tableName must be not empty");
catalog = StringHelper.defaultIfEmpty(catalog, null);
schema = StringHelper.defaultIfEmpty(schema, null);

/** DataSourceProvider获取连接,很简单,也支持jndi方式 */
Connection conn = DataSourceProvider.getConnection();
DatabaseMetaData dbMetaData = conn.getMetaData();
ResultSet rs = dbMetaData.getTables(catalog, schema, tableName, null);
try {
while(rs.next()) {
/** 内部类TableCreateProcessor创建Table,主要是构建table、column结构和获取元数据,跟着看就行 */
Table table = new TableCreateProcessor(conn,getSchema(),getCatalog()).createTable(rs);
return table;
}
}finally {
DBHelper.close(conn,rs);
}
return null;
}
OK,到这里我们的数据模型的元数据就有,下面就是构建输出模型和处理输出
构建输出模型和处理输出
以demo为例,上面代码到了:GeneratorFacade内部类ProcessUtils:
/** 获取数据库表Table元数据 */
Table table = TableFactory.getInstance().getTable(tableName);
try {
/** 根据table信息生成 */
processByTable(g,table,isDelete);
}catch(GeneratorException ge) {
PrintUtils.printExceptionsSumary(ge.getMessage(),getGenerator().getOutRootDir(),ge.getExceptions());
throw ge;
}
public void processByTable(Generator g, Table table,boolean isDelete) throws Exception {
/** 构建输出模型 */
GeneratorModel m = GeneratorModelUtils.newGeneratorModel("table",table);
PrintUtils.printBeginProcess(table.getSqlName()+" => "+table.getClassName(),isDelete);
if(isDelete)
g.deleteBy(m.templateModel,m.filePathModel); //删除
else
g.generateBy(m.templateModel,m.filePathModel); //处理输出
}构建模型:
/** 构建输出模型GeneratorModel,这个类持有2个变量:
*用于存放'模板'可以引用的变量templateModel,
*用于存放'文件路径'可以引用的变量 filePathModel,这个变量主要是路径也可以用freemarker来配置变量
*/
public static GeneratorModel newGeneratorModel(String key,Object valueObject) {
GeneratorModel gm = newDefaultGeneratorModel();
gm.templateModel.put(key, valueObject); //这里讲table加入,挺好的处理,key是不同的入参
gm.filePathModel.putAll(BeanHelper.describe(valueObject));
return gm;
}

public static GeneratorModel newDefaultGeneratorModel() {
Map templateModel = new HashMap();
templateModel.putAll(getShareVars()); //模型加入共享数据

Map filePathModel = new HashMap();
filePathModel.putAll(getShareVars()); //路径加入共享数据
return new GeneratorModel(templateModel,filePathModel);
}

/** 加入一些共享数据 */
public static Map getShareVars() {
Map templateModel = new HashMap();
/** GeneratorProperties增加方法替换所有点号为下划线 */
templateModel.putAll(GeneratorProperties.resolveKeyPlaceholder(System.getProperties())); //系统参数
templateModel.putAll(GeneratorProperties.getProperties()); //配置文件中参数
templateModel.put("env", System.getenv()); //环境变量
templateModel.put("now", new Date());
templateModel.put(GeneratorConstants.DATABASE_TYPE.code, GeneratorProperties.getDatabaseType(GeneratorConstants.DATABASE_TYPE.code));
templateModel.putAll(getToolsMap()); //模板中可以使用的工具类,这个我没试过,freemarker一般的处理个人感觉基本够用,就没管这个
return templateModel;
}
现在输出模型有了,接下来就是输出文件了:
Generator:
/**
* 生成文件
* @param templateModel 生成器模板可以引用的变量
* @param filePathModel 文件路径可以引用的变量
* @throws Exception
*/
public Generator generateBy(Map templateModel,Map filePathModel) throws Exception {
processTemplateRootDirs(templateModel, filePathModel,false);
return this;
}

@SuppressWarnings("unchecked")
private void processTemplateRootDirs(Map templateModel,Map filePathModel,boolean isDelete) throws Exception {
if(StringHelper.isBlank(getOutRootDir())) throw new IllegalStateException("'outRootDir' property must be not empty.");
if(templateRootDirs == null || templateRootDirs.size() == 0) throw new IllegalStateException("'templateRootDirs'  must be not empty");

GLogger.debug("******* Template reference variables *********",templateModel);
GLogger.debug("\n\n******* FilePath reference variables *********",filePathModel);

//生成 路径值,如 pkg=com.company.project 将生成 pkg_dir=com/company/project的值
/** 这里是将所有key,再额外生成一个key_dir的数据,感觉没必要,不如直接配置文件限制一些可以配置路径 */
templateModel.putAll(GeneratorHelper.getDirValuesMap(templateModel));
filePathModel.putAll(GeneratorHelper.getDirValuesMap(filePathModel));

GeneratorException ge = new GeneratorException("generator occer error, Generator BeanInfo:"+BeanHelper.describe(this));
List<File> processedTemplateRootDirs = processTemplateRootDirs(); //模板根路径

for(int i = 0; i < processedTemplateRootDirs.size(); i++) {
File templateRootDir = (File)processedTemplateRootDirs.get(i);
/** 扫描根目录下所有模板文件并处理 */
List<Exception> exceptions = scanTemplatesAndProcess(templateRootDir,processedTemplateRootDirs,templateModel,filePathModel,isDelete);
ge.addAll(exceptions);
}
if(!ge.exceptions.isEmpty()) throw ge;
}

/**
* 用于子类覆盖,预处理模板目录,如执行文件解压动作
* 这里本来还处理了一种场景,就是模板压缩的情况,有个解压的过程,我直接删掉了,太费事,不如简单点,所以我直接返回模板根目录
**/
protected List<File> processTemplateRootDirs() throws Exception {
return templateRootDirs;
}

/**
* 搜索templateRootDir目录下的所有文件并生成东西
* @param templateRootDir 用于搜索的模板目录
* @param templateRootDirs freemarker用于装载模板的目录
*/
private List<Exception> scanTemplatesAndProcess(File templateRootDir,List<File> templateRootDirs,Map templateModel,Map filePathModel,boolean isDelete) throws Exception {
if(templateRootDir == null) throw new IllegalStateException("'templateRootDir' must be not null");
GLogger.println("-------------------load template from templateRootDir = '"+templateRootDir.getAbsolutePath()+"' outRootDir:"+new File(outRootDir).getAbsolutePath());
/** 获取模板根目录下所有模板文件,忽略一些不需要的文件 ,入svn文件等,可配*/
List srcFiles = FileHelper.searchAllNotIgnoreFile(templateRootDir);

List<Exception> exceptions = new ArrayList();
/** 对所有模板文件轮询处理 */
for(int i = 0; i < srcFiles.size(); i++) {
File srcFile = (File)srcFiles.get(i);
try {
if(isDelete){
new TemplateProcessor(templateRootDirs).executeDelete(templateRootDir, templateModel,filePathModel, srcFile); //删除
}else {
long start = System.currentTimeMillis();
new TemplateProcessor(templateRootDirs).executeGenerate(templateRootDir, templateModel,filePathModel, srcFile); //创建
GLogger.perf("genereate by tempate cost time:"+(System.currentTimeMillis() - start)+"ms");
}
}catch(Exception e) {
if (ignoreTemplateGenerateException) {
GLogger.warn("iggnore generate error,template is:" + srcFile+" cause:"+e);
exceptions.add(e);
} else {
throw e;
}
}
}
return exceptions;
}
把最后创建的语句提出来:
Generator:
new TemplateProcessor(templateRootDirs).executeGenerate(templateRootDir, templateModel,filePathModel, srcFile); //创建

Generator内部类TemplateProcessor:
private void executeGenerate(File templateRootDir,Map templateModel, Map filePathModel ,File srcFile) throws SQLException, IOException,TemplateException {
String templateFile = FileHelper.getRelativePath(templateRootDir, srcFile);
/** 配置文件可以配置哪些模板文件需要处理,哪些些不需要,这里是check下 */
if(GeneratorHelper.isIgnoreTemplateProcess(srcFile, templateFile,includes,excludes)) {
return;
}
/** 这里是处理一些二进制文件,直接copy过去 */
if(isCopyBinaryFile && FileHelper.isBinaryFile(srcFile)) {
String outputFilepath = proceeForOutputFilepath(filePathModel, templateFile);
File outputFile = new File(getOutRootDir(),outputFilepath);
GLogger.println("[copy binary file by extention] from:"+srcFile+" => "+outputFile);
FileHelper.parentMkdir(outputFile);
IOHelper.copyAndClose(new FileInputStream(srcFile), new FileOutputStream(outputFile));
return;
}

try {
/** 处理文件路径的变量变成输出路径,假如路径为${basepackage_dir^cap_first}/sit 就需要处理成真正的路径
* 注意路径配置如果?这个符号要转为^
*/
String outputFilepath = proceeForOutputFilepath(filePathModel,templateFile);
/** 就是生成过程中的一些配置 */
initGeneratorControlProperties(srcFile,outputFilepath);
processTemplateForGeneratorControl(templateModel, templateFile); //处理模板,会有freemarker的configuration设置

if(gg.isIgnoreOutput()) {
GLogger.println("[not generate] by gg.isIgnoreOutput()=true on template:"+templateFile);
return;
}

if(StringHelper.isNotBlank(gg.getOutputFile())) {
generateNewFileOrInsertIntoFile(templateFile,gg.getOutputFile(), templateModel); //生成文件
}
}catch(Exception e) {
throw new RuntimeException("generate oucur error,templateFile is:" + templateFile+" => "+ gg.getOutputFile()+" cause:"+e, e);
}
}

/** 生成过程中的一些配置 */
private void initGeneratorControlProperties(File srcFile,String outputFile) throws SQLException {
gg.setSourceFile(srcFile.getAbsolutePath());
gg.setSourceFileName(srcFile.getName());
gg.setSourceDir(srcFile.getParent());
gg.setOutRoot(getOutRootDir());
gg.setOutputEncoding(outputEncoding);
gg.setSourceEncoding(sourceEncoding);
gg.setMergeLocation(GENERATOR_INSERT_LOCATION);
gg.setOutputFile(outputFile);
}

private void processTemplateForGeneratorControl(Map templateModel,String templateFile) throws IOException, TemplateException {
templateModel.put("gg", gg);
Template template = getFreeMarkerTemplate(templateFile); //获取模板,会有freemarker的configuration设置
template.process(templateModel, IOHelper.NULL_WRITER); //这里没搞懂为什么process下
}
有些代码没贴出来,跟着看就是。OK,生成结束,facade里面还有其他一些方法,还好,看完这个应该再去看应该没什么问题。
总结
一个bug
如果你在模板中想获取系统变量的值,会出错。例如,你的javadoc里面,你生成的时候想说明是谁生成的,用系统变量user.name,模板里面你写成author:${user.name},那么就出错。这是因为freemarker对user.name的解析有问题,freemarker不是把user.name整体作为一个key,认为user.name的点号存在下一层关系,所以出错。
后来把框架这里的处理代码改了把点号全部替换为下划线,然后模板取user_name就没问题了。作者本人在配置文件全部用下划线,不知道为什么这里不改。
GeneratorFacade.java代码所在:
public static Map getShareVars() {
Map templateModel = new HashMap();
/** 原代码
templateModel.putAll(System.getProperties());
*/
/** GeneratorProperties增加方法替换所有点号为下划线 */
templateModel.putAll(GeneratorProperties.resolveKeyPlaceholder(System.getProperties()));
templateModel.putAll(GeneratorProperties.getProperties());
templateModel.put("env", System.getenv());
templateModel.put("now", new Date());
templateModel.put(GeneratorConstants.DATABASE_TYPE.code, GeneratorProperties.getDatabaseType(GeneratorConstants.DATABASE_TYPE.code));
templateModel.putAll(getToolsMap());
return templateModel;
}
感谢那位哥们提供了这样的好工具

相关文章推荐
- Maven自定义插件开发(rapid-generator自动生成代码)
- HotSpot模板解释器目标代码生成过程源码分析
- C#分析数据库结构,使用XSL模板自动生成代码 - 清清月儿 .NET万花筒 Asp.net技术 Asp.net教程 Asp.net源码 Asp.net基础 Asp.net控件 Asp.net入门 - CSDNBlog
- HotSpot模板解释器目标代码生成过程源码分析
- sqoop 抽取源码流程分析( 三 ) 代码生成工具分析
- 修改mybatis-generator-1.3.2源码实现自定义代码生成详解
- android使用代码生成LayerDrawable的方法、源码分析和注意事项
- QParserGenerator代码分析一(生成LALR1 DFA)
- IIS6.0日志文件分析代码_1生成访问字段记录到数组中
- IIS6.0日志文件分析代码_2生成访问记录到文本文件
- [导入]C#分析数据库结构,使用XSL模板自动生成代码
- 重构一次后的EasyJWeb Tools辅助代码生成引擎功能及源码
- 基于CodeGenerator的Emit代码生成辅助类源码及演示
- IIS6.0日志文件分析代码_1生成访问字段记录到数组中
- C#分析数据库结构,使用XSL模板自动生成代码(一)
- SRGenerator customtool 源码修改,实现实体类生成
- 生成可执行BPEL代码所需必要信息分析和归纳
- IIS6.0日志文件分析代码_2生成访问记录到文本文件
- C#分析数据库结构,使用XSL模板自动生成代码
- 开放源代码的全文检索引擎Lucene――介绍、系统结构与源码实现分析