ubuntu16下安装Nginx+php+phpMyAdmin全纪录!
2016-09-27 09:57
417 查看
ubuntu16下安装Nginx+php+phpMyAdmin全纪录!
环境:ubuntu 16 LTS,已安装Mysql服务,现在需要安装phpMyadmin进行远程操作。
update-rc.d -f apache2 remove
sudo apt-get remove apache2Ubuntu16.04有Nginx安装包,我们可以安装。sudo apt-get -y install nginx查看nginx服务状态service nginx status
sudo Start nginx afterwards:service nginx start
输入http://localhost),出现页面:

在Ubuntu16.04的默认nginx的文档根目录为/var/www/html
二、安装 PHP 7
可以通过使nginx的PHP工作PHP-FPM(PHP-FPM(FastCGI进程管理器)是为任何规模的网站,尤其是繁忙的网站有用的一些附加功能的替代PHP的FastCGI实现),安装如下:sudo apt-get -y install php7.0-fpm
service php7.0-fpm reload
建立探针文件/var/www/html:sudo gedit /var/www/html/info.php

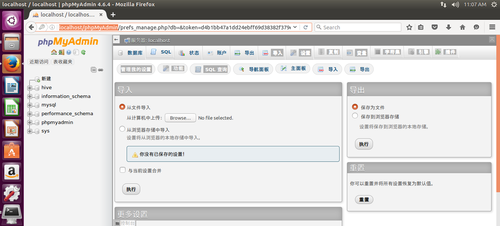
六、安装phpMyAdminsudo mv /home/dyq/Documents/phpMyAdmin-4.6.4-all-languages/ /var/www/html
改名
sudo mv /var/www/html/phpMyAdmin-4.6.4-all-languages/ /var/www/html/phpMyAdmin
修改phpMyAdmin权限为755
sudo chmod 755 /var/www/html/phpMyAdmin
然后可以将phpMyAdmin根目录下的config.sample.inc.php复制一份并改名为config.inc.php,即可作为默认的配置文件。
可以通过配置文件对验证方式进行修改,这里就不多介绍了。需要注意的是,如果使用cookie验证方法,则必须在blowfish_secret后面填上任意字母作为短语密码,如果留空会在登陆后报错。
里面有我做实验用的hive和mysql数据库喔
参考资料:
Ubuntu 16.04 LTS 安装 Nginx/PHP 7/MySQL 5.7 (LEMP):http://www.linuxidc.com/Linux/2016-05/131154.htm
Linux下Nginx、MySQL、PHP5、phpMyAdmin安装与配置 : http://www.pythoner.com/197.html
CentOS 5.6+Nginx 1.0+PHP 5.3.6+MySQL 5.5.11构建LEMP(X64)平台 http://www.linuxidc.com/Linux/2011-07/38107.htmLinux环境下Nginx搭建高性能WEB服务器LEMP http://www.linuxidc.com/Linux/2009-11/22465.htmLAMP架构协同应用的实例——phpMyAdmin http://www.linuxidc.com/Linux/2013-07/87645.htmLAMP应用之phpMyAdmin、Wordpress http://www.linuxidc.com/Linux/2013-04/82757.htmphpMyAdmin老出现登陆超时解决方法 http://www.linuxidc.com/Linux/2012-09/70715.htmUbuntu 安装phpMyAdmin与Adminer http://www.linuxidc.com/Linux/2012-08/69419.htm在LAMP基础上实现SSL功能并安装phpMyAdmin http://www.linuxidc.com/Linux/2012-07/66905.htm
环境:ubuntu 16 LTS,已安装Mysql服务,现在需要安装phpMyadmin进行远程操作。
一、安装 Nginx
在你已经安装了Apache2的话,那么使用这些命令先删除再安装nginx:service apache2 stopupdate-rc.d -f apache2 remove
sudo apt-get remove apache2Ubuntu16.04有Nginx安装包,我们可以安装。sudo apt-get -y install nginx查看nginx服务状态service nginx status
sudo Start nginx afterwards:service nginx start
输入http://localhost),出现页面:
在Ubuntu16.04的默认nginx的文档根目录为/var/www/html
二、安装 PHP 7
可以通过使nginx的PHP工作PHP-FPM(PHP-FPM(FastCGI进程管理器)是为任何规模的网站,尤其是繁忙的网站有用的一些附加功能的替代PHP的FastCGI实现),安装如下:sudo apt-get -y install php7.0-fpm
三、配置 nginx
打开配置文件 /etc/nginx/nginx.conf:sudo gedit /etc/nginx/nginx.conf我只调整keepalive_timeout到一个合理的值:[...] keepalive_timeout 2; [...]虚拟主机服务器{}容器定义。默认的虚拟主机是在文件中定义的/etc/nginx/sites-available/default – 修改它,如下所示:sudo gedit /etc/nginx/sites-available/default
[...]
server {
listen 80 default_server;
listen [::]:80 default_server;

# SSL configuration
#
# listen 443 ssl default_server;
# listen [::]:443 ssl default_server;
#
# Note: You should disable gzip for SSL traffic.
# See: https://bugs.debian.org/773332 #
# Read up on ssl_ciphers to ensure a secure configuration.
# See: https://bugs.debian.org/765782 #
# Self signed certs generated by the ssl-cert package
# Don't use them in a production server!
#
# include snippets/snakeoil.conf;

root /var/www/html;

# Add index.php to the list if you are using PHP
index index.html index.htm index.nginx-debian.html;

server_name _;

location / {
# First attempt to serve request as file, then
# as directory, then fall back to displaying a 404.
try_files $uri $uri/ =404;
}

# pass the PHP scripts to FastCGI server listening on 127.0.0.1:9000
#
location ~ \.php$ {
include snippets/fastcgi-php.conf;

# With php7.0-cgi alone:
# fastcgi_pass 127.0.0.1:9000;
# With php7.0-fpm:
fastcgi_pass unix:/run/php/php7.0-fpm.sock;
}

# deny access to .htaccess files, if Apache's document root
# concurs with nginx's one
#
location ~ /\.ht {
deny all;
}
}
[...]
server_name _; 使这是一个默认捕捉所有虚拟主机,我没有修改根目录 /var/www/html;意味着文档根目录/var/www/html.PHP的重要组成部分位置 ~ \.php$ {} stanza. 取消注释它来启用它。现在保存文件并重新加载nginx:service nginx reload下一步打开 /etc/php/7.0/fpm/php.ini…sudo gedit /etc/php/7.0/fpm/php.ini设置 cgi.fix_pathinfo=0: 这里的内容很多,有搜索功能快一些[...] ; cgi.fix_pathinfo provides *real* PATH_INFO/PATH_TRANSLATED support for CGI. PHP's ; previous behaviour was to set PATH_TRANSLATED to SCRIPT_FILENAME, and to not grok ; what PATH_INFO is. For more information on PATH_INFO, see the cgi specs. Setting ; this to 1 will cause PHP CGI to fix its paths to conform to the spec. A setting ; of zero causes PHP to behave as before. Default is 1. You should fix your scripts ; to use SCRIPT_FILENAME rather than PATH_TRANSLATED. ; http://php.net/cgi.fix-pathinfo cgi.fix_pathinfo=0 [...]重新加载 PHP-FPM:
service php7.0-fpm reload
建立探针文件/var/www/html:sudo gedit /var/www/html/info.php
<?php
phpinfo();
?>
浏览器访问 (e.g. http://localhost/info.php):页面不一样了吧!
四、让 MySQL 获得 PHP 7支持
先搜索一下PHP支持的模块:sudo apt-cache search php7.0使用下面的命令安装:sudo apt-get -y install php7.0-mysql php7.0-curl php7.0-gd php7.0-intl php-pear php-imagick php7.0-imap php7.0-mcrypt php-memcache php7.0-pspell php7.0-recode php7.0-sqlite3 php7.0-tidy php7.0-xmlrpc php7.0-xsl php7.0-mbstring php-gettextAPCu是随PHP7 PHP Opcache模块的扩展,它增加了一些兼容性功能的支持APC缓存(例如WordPress的插件缓存)软件。APCu可以安装如下:sudo apt-get -y install php-apcu重新加载 PHP-FPM:service php7.0-fpm reload刷新 http://localhost/info.php 浏览器看看模块安装情况:五、让 PHP-FPM 使用 TCP 连接
默认情况下PHP-FPM监听 /var/run/php/php7.0-fpm.sock. 另外,也可以使 PHP-FPM 试用 TCP 连接,打开文件 /etc/php/7.0/fpm/pool.d/www.conf…sudo gedit /etc/php/7.0/fpm/pool.d/www.conf修改如下:[...] ;listen = /var/run/php5-fpm.sock listen = 127.0.0.1:9000 [...]这将使PHP-FPM端口9000侦听的IP127.0.0.1(本地主机)。请确保您使用的端口,是不是在你的系统上使用。然后重新加载 PHP-FPM:php7.0-fpm reload接下来通过你的nginx的配置和所有的虚拟主机,并更改fastcgi_pass UNIX行:/var/run/php/php7.0-fpm.sock; tofastcgi_pass127.0.0.1:9000;,如下:sudo gedit /etc/nginx/sites-available/default找到
index,添加
index.php找到
server_name,改为你所希望的域名(准确,正则,glob),当然也可以配置server里的其他属性,如监听端口号
listen等
[...]
location ~ \.php$ {
include snippets/fastcgi-php.conf;

# With php7.0-cgi alone:
#fastcgi_pass 127.0.0.1:9000;
# With php7.0-fpm:
fastcgi_pass unix:/run/php/php7.0-fpm.sock;
}
[...]

删除如下一段的注释(下面为删除后的代码):

location ~ /\.ht {
deny all;
}
最后,重新加载nginx:service nginx restartOK,Nginx的LEMP服务器安装完毕六、安装phpMyAdminsudo mv /home/dyq/Documents/phpMyAdmin-4.6.4-all-languages/ /var/www/html
改名
sudo mv /var/www/html/phpMyAdmin-4.6.4-all-languages/ /var/www/html/phpMyAdmin
修改phpMyAdmin权限为755
sudo chmod 755 /var/www/html/phpMyAdmin
然后可以将phpMyAdmin根目录下的config.sample.inc.php复制一份并改名为config.inc.php,即可作为默认的配置文件。
可以通过配置文件对验证方式进行修改,这里就不多介绍了。需要注意的是,如果使用cookie验证方法,则必须在blowfish_secret后面填上任意字母作为短语密码,如果留空会在登陆后报错。
里面有我做实验用的hive和mysql数据库喔
参考资料:
Ubuntu 16.04 LTS 安装 Nginx/PHP 7/MySQL 5.7 (LEMP):http://www.linuxidc.com/Linux/2016-05/131154.htm
Linux下Nginx、MySQL、PHP5、phpMyAdmin安装与配置 : http://www.pythoner.com/197.html
CentOS 5.6+Nginx 1.0+PHP 5.3.6+MySQL 5.5.11构建LEMP(X64)平台 http://www.linuxidc.com/Linux/2011-07/38107.htmLinux环境下Nginx搭建高性能WEB服务器LEMP http://www.linuxidc.com/Linux/2009-11/22465.htmLAMP架构协同应用的实例——phpMyAdmin http://www.linuxidc.com/Linux/2013-07/87645.htmLAMP应用之phpMyAdmin、Wordpress http://www.linuxidc.com/Linux/2013-04/82757.htmphpMyAdmin老出现登陆超时解决方法 http://www.linuxidc.com/Linux/2012-09/70715.htmUbuntu 安装phpMyAdmin与Adminer http://www.linuxidc.com/Linux/2012-08/69419.htm在LAMP基础上实现SSL功能并安装phpMyAdmin http://www.linuxidc.com/Linux/2012-07/66905.htm

相关文章推荐
- Ubuntu 11.04 安装nginx+php5+mysql 的web服务器
- Ubuntu/Debian上安装Nginx+php环境详细教程
- ubuntu安装nginx+php-fpm+mysql
- ubuntu 12.04 安装 nginx+php+mysql web服务器
- [转] ubuntu 12.04 安装 nginx+php+mysql web服务器
- Ubuntu 11.10 安装nginx+php5+mysql 的web服务器
- Ubuntu 9.04 server安装nginx+php(fastcgi)
- Ubuntu/Debian上安装Nginx+php环境
- Ubuntu 9.04 server安装nginx+php(fastcgi)
- Ubuntu 16 安装php 5.5 的方法
- Debian/Ubuntu里安装Nginx+PHP(spawn-fcgi)+MySQL
- ubuntu 12.04 安装 nginx+php+mysql web服务器
- ubuntu 12.04 安装 nginx+php+mysql web服务器
- ubuntu安装nginx+php-fpm+mysql
- ubuntu 12.04 安装 nginx+php+mysql web服务器
- Ubuntu 9.04 APT-GET 安装nginx+php+mysql
- ubuntu 12.04 安装 nginx+php+mysql web服务器
- Debian/Ubuntu里安装Nginx+PHP(spawn-fcgi)+MySQL
- ubuntu 12.04下的nginx+php安装和配置
- ubuntu 12.04 安装 nginx+php+mysql web服务器