简单介绍一下android studio中网络请求方法的步骤和环境搭建
2016-09-13 09:48
591 查看
程序员常用的几种网络请求方式:
1.httpUrlConnection:
推荐,需要自己封装(在子线程或者线程池)
2.httpclient appache:
不推荐使用
2.2AsyncHttpClient:
框架 不推荐使用
3.volley框架:
推荐
4.okhttp:
推荐,开源框架,没有封装,使用的时候需要自己封装(在子线程或者线程池)
5.retrofit:
对okHttp进行了非常好的封装
先简单介绍一下okhttp(要下载依赖或者Jar包):
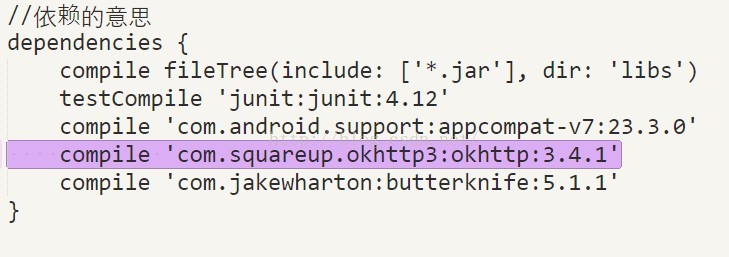
打开github.com(或者谷歌搜索okhttp)下载:
compile 'com.squareup.okhttp3:okhttp:3.4.1'
——>打开app项目build.gradle——>在dependencies添加
以下为OKHttp的实例:
配置Xml文件:
<ImageView
android:id="@+id/iv"
android:layout_centerInParent="true"
android:layout_width="wrap_content"
android:layout_height="wrap_content"
/>
创建CommonUtils工具类
public class CommonUtils {
static Toast toast;
public static void showToast(Context context,String str){
if (toast==null){
//创建toast
toast=Toast.makeText(context,str,Toast.LENGTH_LONG);
}
toast.setText(str);
toast.show();
}
}
配置MainActivity:
public class MainActivity extends AppCompatActivity {
@InjectView(R.id.iv) //使用了Butterknife
ImageView iv;
@Override
protected void onCreate(Bundle savedInstanceState) {
super.onCreate(savedInstanceState);
setContentView(R.layout.activity_main);
ButterKnife.inject(this);
final String imgPath = "图片";
//只有一个核心子线程
ExecutorService executorService = Executors.newSingleThreadExecutor();
executorService.execute(new Runnable() {
@Override
public void run() {
initOkhttpData(imgPath);
}
});
}
private void initOkhttpData(String imgPath) {
//创建okhttpclient对象
OkHttpClient client = new OkHttpClient();
//创建一个请求
Request request = new Request.Builder()
.url(imgPath)
.build();
//给okhttpClient传入一个请求,这个时候得到一个call
Call call = client.newCall(request);
//执行这个call
try {
//得到响应
Response response = call.execute();
int code = response.code();
if (code == 200) {
ResponseBody body = response.body();
byte[] bytes = body.bytes();
final Bitmap bitmap = BitmapFactory.decodeByteArray(bytes, 0, bytes.length);
//UI线程
runOnUiThread(new Runnable() {
@Override
public void run() {
CommonUtils.showToast(getApplicationContext(), "成功");
iv.setImageBitmap(bitmap);
}
});
} else {
runOnUiThread(new Runnable() {
@Override
public void run() {
CommonUtils.showToast(getApplicationContext(), "失败");
}
});
}
} catch (IOException e) {
e.printStackTrace();
}
}
}
配置清单文件(添加网络权限):
<uses-permission android:name="android.permission.INTERNET"></uses-permission>
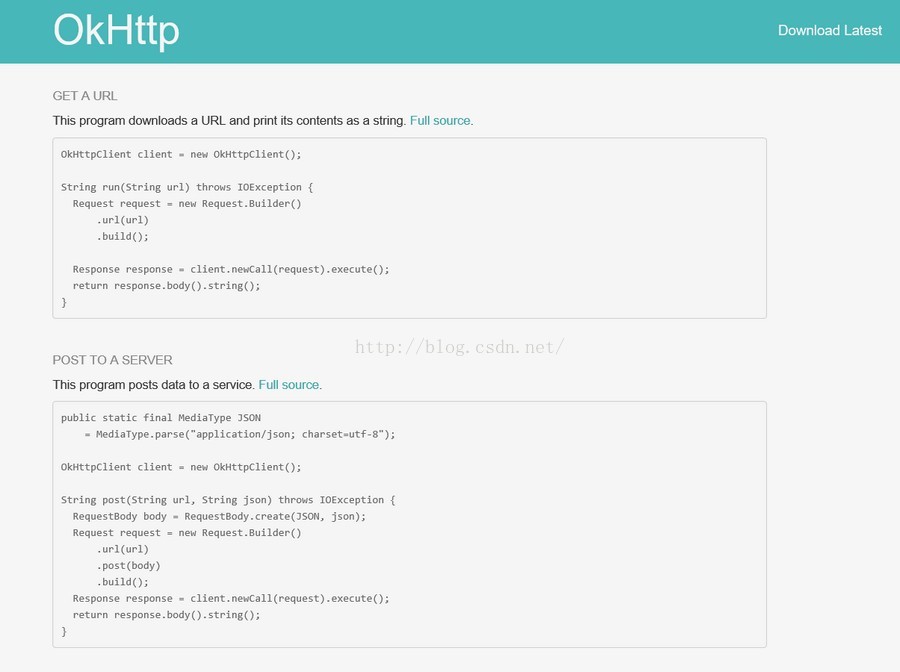
在官网中有Demo:
OKHttp网址: 点击打开链接
1.httpUrlConnection:
推荐,需要自己封装(在子线程或者线程池)
2.httpclient appache:
不推荐使用
2.2AsyncHttpClient:
框架 不推荐使用
3.volley框架:
推荐
4.okhttp:
推荐,开源框架,没有封装,使用的时候需要自己封装(在子线程或者线程池)
5.retrofit:
对okHttp进行了非常好的封装
先简单介绍一下okhttp(要下载依赖或者Jar包):
打开github.com(或者谷歌搜索okhttp)下载:
compile 'com.squareup.okhttp3:okhttp:3.4.1'
——>打开app项目build.gradle——>在dependencies添加
以下为OKHttp的实例:
配置Xml文件:
<ImageView
android:id="@+id/iv"
android:layout_centerInParent="true"
android:layout_width="wrap_content"
android:layout_height="wrap_content"
/>
创建CommonUtils工具类
public class CommonUtils {
static Toast toast;
public static void showToast(Context context,String str){
if (toast==null){
//创建toast
toast=Toast.makeText(context,str,Toast.LENGTH_LONG);
}
toast.setText(str);
toast.show();
}
}
配置MainActivity:
public class MainActivity extends AppCompatActivity {
@InjectView(R.id.iv) //使用了Butterknife
ImageView iv;
@Override
protected void onCreate(Bundle savedInstanceState) {
super.onCreate(savedInstanceState);
setContentView(R.layout.activity_main);
ButterKnife.inject(this);
final String imgPath = "图片";
//只有一个核心子线程
ExecutorService executorService = Executors.newSingleThreadExecutor();
executorService.execute(new Runnable() {
@Override
public void run() {
initOkhttpData(imgPath);
}
});
}
private void initOkhttpData(String imgPath) {
//创建okhttpclient对象
OkHttpClient client = new OkHttpClient();
//创建一个请求
Request request = new Request.Builder()
.url(imgPath)
.build();
//给okhttpClient传入一个请求,这个时候得到一个call
Call call = client.newCall(request);
//执行这个call
try {
//得到响应
Response response = call.execute();
int code = response.code();
if (code == 200) {
ResponseBody body = response.body();
byte[] bytes = body.bytes();
final Bitmap bitmap = BitmapFactory.decodeByteArray(bytes, 0, bytes.length);
//UI线程
runOnUiThread(new Runnable() {
@Override
public void run() {
CommonUtils.showToast(getApplicationContext(), "成功");
iv.setImageBitmap(bitmap);
}
});
} else {
runOnUiThread(new Runnable() {
@Override
public void run() {
CommonUtils.showToast(getApplicationContext(), "失败");
}
});
}
} catch (IOException e) {
e.printStackTrace();
}
}
}
配置清单文件(添加网络权限):
<uses-permission android:name="android.permission.INTERNET"></uses-permission>
在官网中有Demo:
OKHttp网址: 点击打开链接

相关文章推荐
- 下面为大家介绍一下这种快速搭建安卓开发环境的方法:
- iOS开发中大部分App的网络数据交换是基于HTTP协议的。本文将简单介绍在Swift中使用HTTP进行网络请求的几种方法。
- §第一天§简单介绍一下Python的安装与开发环境的搭建
- 图文介绍Android环境搭建详细步骤
- 网络学习(二十六)VMware Workstation 7 设计实验环境步骤介绍
- 一个简单搭建安卓环境的方法
- rh401 - 简单pxe网络引导环境的搭建
- Eclipse rap 富客户端开发总结(1) - rap简单介绍和开发环境搭建
- [环境搭建]-Web Api搭建到IIS服务器后PUT请求返回HTTP Error 405.0 - Method Not Allowed 解决方法
- Android的简单介绍以及搭建运行环境
- 使用WIF实现单点登录Part I——Windows Identity Foundation介绍及环境搭建 -摘自网络
- Android周学习Step By Step(1)--简单介绍环境搭建
- Ubuntu搭建PHP环境并安装Piwik程序、介绍扩展热安装的方法
- IPv6网络环境搭建步骤
- 搭建PHP环境并安装Piwik程序、介绍扩展热安装的方法
- mybatis自带常用操作数据库方法详解以及如何搭建简单的mybatis环境
- [Python]开发环境相关搭建方法介绍
- 图文介绍Android环境搭建详细步骤
- ubuntu下搭建nginx+scala+play 2.0运行环境的方法介绍
- 介绍JSP程序动态网站环境搭建的详细步骤