【转】前端工程筹建NodeJs+gulp+bower
2016-08-03 21:34
543 查看
转自:http://www.myexception.cn/javascript/1781968.html
系统环境变量中:path 增加C:\Program Files\nodejs\ 因为在该目下存在node.exe 和npm.cmd,加入path后可以全局调用该命令。
用户变量中设置:path=C:\Users\Administrator\AppData\Roaming\npm,该目录下node_modules目录用来存放安装的全局的nodejs模块,并在npm目录中生成相应的命令行可执行的文件。而将该路径加入path 是为了全局调用nodejs模块。
npm 是nodejs的程序包管理工具,用于从网上下载程序包并安装还可以管理工程对程序包的依赖,类似于java平台上的maven。程序包是指实现了某些功能,并可以运行于nodejs平台,一般是开源程序,如压缩js代码程序,检查js代码正确性的程序等等,类似于java平台上的jar库文件。
使用npm 管理项目,一般工程目录下会有一个名为package.json 的json格式文件,该文件定义了工程的名称、作者、仓库地址、开发时依赖的模块,该工程的使用版本等等, 如果需要对bootstrap开发,则在package.json所在目录中执行npm install 就可以下载所有的依赖包到当前目录的node_modules中,因此源码中不需要带有依赖包,只需要有一个package.json就搞定了。如下bootstrap中的package.json:(作用类似于pom.xml文件?)
如果是新建的项目需要某个依赖包,命令:npm install --save-dev 程序包名,程序安装在当前目录的node_modules目录中,并依赖添加到 package.json 文件devDependencies属性中。
使用npm config list 可以查看npm 配置信息:如下,
可以使用npm config set <key> <value> 修改默认设置
Bower安装方法:npm install -g bower, -g参数是全局安装,在哪个目录下执行这个命令都行,bower 最终被安装到C:\Users\Administrator\AppData\Roaming\npm\node_modules\(默认情况下), 打开C:\Users\Administrator\AppData\Roaming\npm目录,发现node_modules目录下已经安装了bower,并在npm目录中生成了可执行的命令 bower 和 bower.cmd。
使用bower 可以管理工程中对js类库的依赖,如果程序中依赖jquery ,不需要再到网上下载jquery.min.js了,使用命令 bower install jquery --save,jquery 会动下载到当前目录下的bower_componets目录中了。bower还可以管理js类库之间间依赖,--save参数是指工程对bootstrap的依赖关系写入bower.json。 (使用bower init 可以交互的方式建立bower.json)。bower.json格式:
有了bower.json文件,不需要将bower_componets目录加入版本管理中了。别人使用该项目时,从版本管理系统中检出来,在bower.json 所在目录执行命令 bower install ,那么依赖的javascript类库就自动下载安装到当前目录bower_componets下了。
安装方法: npm install -g gulp

image :图片目录
scripts:脚本目录
styles:css目录
vender :依赖的第三方javscript类库或css样式库,(最好是把第三方的类库放到一个公共的http地址或引用cdn ,而不是将第三方类库存在本地程序中)
vender/css:第三方css样式库
vender/js:第三方javascript类库
views :html模版
index.html:程序入口
安装 angularjs 和 bootstrap
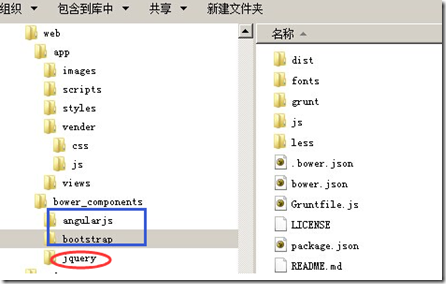
同时目录变为如下:jquery为bootstrap的依赖包
gulp构建前端项目
编写gulpfile.js
npm
nodejs 安装过程中会自动安装npm,nodejs安装程序会在环境变量中添加两个变量:系统环境变量中:path 增加C:\Program Files\nodejs\ 因为在该目下存在node.exe 和npm.cmd,加入path后可以全局调用该命令。
用户变量中设置:path=C:\Users\Administrator\AppData\Roaming\npm,该目录下node_modules目录用来存放安装的全局的nodejs模块,并在npm目录中生成相应的命令行可执行的文件。而将该路径加入path 是为了全局调用nodejs模块。
npm 是nodejs的程序包管理工具,用于从网上下载程序包并安装还可以管理工程对程序包的依赖,类似于java平台上的maven。程序包是指实现了某些功能,并可以运行于nodejs平台,一般是开源程序,如压缩js代码程序,检查js代码正确性的程序等等,类似于java平台上的jar库文件。
使用npm 管理项目,一般工程目录下会有一个名为package.json 的json格式文件,该文件定义了工程的名称、作者、仓库地址、开发时依赖的模块,该工程的使用版本等等, 如果需要对bootstrap开发,则在package.json所在目录中执行npm install 就可以下载所有的依赖包到当前目录的node_modules中,因此源码中不需要带有依赖包,只需要有一个package.json就搞定了。如下bootstrap中的package.json:(作用类似于pom.xml文件?)
{
"name": "bootstrap",//项目名称
"description": "The most popular front-end framework for developing responsive, mobile first projects on the web.",//项目说明
"version": "3.3.0",//项目版本
"keywords": [///关键字,用于别人搜索找到
"css",
"less",
"mobile-first",
"responsive",
"front-end",
"framework",
"web"
],
"homepage": "http://getbootstrap.com",//项目主页地址
"author": "Twitter, Inc.",//作者
"scripts": { //定义脚本,key为脚本名 value为可执行的nodejs命令
"test": "grunt test"
},
"style": "dist/css/bootstrap.css",
"less": "less/bootstrap.less",
"main": "./dist/js/npm",
"repository": {//定义了仓库类型及地址
"type": "git",
"url": "https://github.com/twbs/bootstrap.git"
},
"bugs": {//提交bug地址
"url": "https://github.com/twbs/bootstrap/issues"
},
"license": {//版权声明
"type": "MIT",
"url": "https://github.com/twbs/bootstrap/blob/master/LICENSE"
},
"devDependencies": {//开发依赖哪些nodejs模块
"btoa": "~1.1.2",
"glob": "~4.0.6",
"grunt": "~0.4.5",
"grunt-autoprefixer": "~1.0.1",
"grunt-banner": "~0.2.3",
"grunt-contrib-clean": "~0.6.0",
"grunt-contrib-concat": "~0.5.0",
"grunt-contrib-connect": "~0.8.0",
"grunt-contrib-copy": "~0.7.0",
"grunt-contrib-csslint": "~0.3.1",
"grunt-contrib-cssmin": "~0.10.0",
"grunt-contrib-jade": "~0.13.0",
"grunt-contrib-jshint": "~0.10.0",
"grunt-contrib-less": "~0.12.0",
"grunt-contrib-qunit": "~0.5.2",
"grunt-contrib-uglify": "~0.6.0",
"grunt-contrib-watch": "~0.6.1",
"grunt-csscomb": "~3.0.0",
"grunt-exec": "~0.4.6",
"grunt-html-validation": "~0.1.18",
"grunt-jekyll": "~0.4.2",
"grunt-jscs": "~0.8.1",
"grunt-saucelabs": "~8.3.2",
"grunt-sed": "~0.1.1",
"load-grunt-tasks": "~1.0.0",
"npm-shrinkwrap": "~4.0.0",
"remarkable": "^1.2.2",
"time-grunt": "~1.0.0"
},
"engines": {//nodej引擎版本
"node": "~0.10.1"
}
}
如果是新建的项目需要某个依赖包,命令:npm install --save-dev 程序包名,程序安装在当前目录的node_modules目录中,并依赖添加到 package.json 文件devDependencies属性中。
使用npm config list 可以查看npm 配置信息:如下,
C:\Users\Administrator>npm config list
; cli configs
registry = "https://registry.npmjs.org/" 模块注册地址
user-agent = "npm/1.4.28 node/v0.10.33 win32 x64"

; builtin config undefined
prefix = "C:\\Users\\Administrator\\AppData\\Roaming\\npm" 模块的存放目录

; node bin location = C:\Program Files\nodejs\\node.exe
; cwd = C:\Users\Administrator
; HOME = C:\Users\Administrator
; 'npm config ls -l' to show all defaults.
可以使用npm config set <key> <value> 修改默认设置
bower
Bower是一个适合Web应用的包管理器,它擅长前端的包管理。Bower安装方法:npm install -g bower, -g参数是全局安装,在哪个目录下执行这个命令都行,bower 最终被安装到C:\Users\Administrator\AppData\Roaming\npm\node_modules\(默认情况下), 打开C:\Users\Administrator\AppData\Roaming\npm目录,发现node_modules目录下已经安装了bower,并在npm目录中生成了可执行的命令 bower 和 bower.cmd。
使用bower 可以管理工程中对js类库的依赖,如果程序中依赖jquery ,不需要再到网上下载jquery.min.js了,使用命令 bower install jquery --save,jquery 会动下载到当前目录下的bower_componets目录中了。bower还可以管理js类库之间间依赖,--save参数是指工程对bootstrap的依赖关系写入bower.json。 (使用bower init 可以交互的方式建立bower.json)。bower.json格式:
{
"name": "my-project",//工程名
"version": "1.0.0",//版本号
"main": "path/to/main.css",
"ignore": [
".jshintrc",
"**/*.txt"
],
"dependencies": {//工程依赖的javascript类库
"<name>": "<version>",
"<name>": "<folder>",
"<name>": "<package>"
},
"devDependencies": {//开发环境依赖包
"<test-framework-name>": "<version>"
}
}
有了bower.json文件,不需要将bower_componets目录加入版本管理中了。别人使用该项目时,从版本管理系统中检出来,在bower.json 所在目录执行命令 bower install ,那么依赖的javascript类库就自动下载安装到当前目录bower_componets下了。
gulp
gulp 用于前端项目的构建,如监控程序文件变化,检查js代码正确性,压缩js,源码转换到发布目录,启动web 服务测试等等。安装方法: npm install -g gulp
wrench
nodejs中递归进行文件操作,如下样例:// Recursively create directories, sub-trees and all.
wrench.mkdirSyncRecursive(dir, 0777);
// Recursively delete the entire sub-tree of a directory, then kill the directory
wrench.rmdirSyncRecursive('my_directory_name', failSilently);
// Recursively read directories contents.
wrench.readdirSyncRecursive('my_directory_name');
// Recursively chmod the entire sub-tree of a directory
wrench.chmodSyncRecursive('my_directory_name', 0755);
// Recursively chown the entire sub-tree of a directory
wrench.chownSyncRecursive("directory", uid, gid);
// Deep-copy an existing directory
wrench.copyDirSyncRecursive('directory_to_copy', 'location_where_copy_should_end_up', {
forceDelete: bool, // Whether to overwrite existing directory or not
excludeHiddenUnix: bool, // Whether to copy hidden Unix files or not (preceding .)
preserveFiles: bool, // If we're overwriting something and the file already exists, keep the existing
preserveTimestamps: bool, // Preserve the mtime and atime when copying files
inflateSymlinks: bool, // Whether to follow symlinks or not when copying files
filter: regexpOrFunction, // A filter to match files against; if matches, do nothing (exclude).
whitelist: bool, // if true every file or directory which doesn't match filter will be ignored
include: regexpOrFunction, // An include filter (either a regexp or a function)
exclude: regexpOrFunction // An exclude filter (either a regexp or a function)
});
// Note: If a RegExp is provided then then it will be matched against the filename. If a function is
// provided then the signature should be the following:
// function(filename, dir) { return result; }
// Read lines in from a file until you hit the end
var f = new wrench.LineReader('x.txt');
while(f.hasNextLine()) {
util.puts(f.getNextLine());
}实例说明:
建立工程目录
工程的目录结构可以是任意的,没有固定的结构,自已觉得合理就好了。image :图片目录
scripts:脚本目录
styles:css目录
vender :依赖的第三方javscript类库或css样式库,(最好是把第三方的类库放到一个公共的http地址或引用cdn ,而不是将第三方类库存在本地程序中)
vender/css:第三方css样式库
vender/js:第三方javascript类库
views :html模版
index.html:程序入口
安装依赖库
在工程根目录(我是里是web目录)执行命令:bower init,生成bower.json{
"name": "webtest",
"version": "0.1.0",
"authors": [
"yanlei <java.yanlei@163.com>"
],
"description": "前端测试项目",
"main": "./app/index.html",
"moduleType": [
"globals"
],
"license": "MIT",
"private": true
}安装 angularjs 和 bootstrap
bower install --save angularjs
bower install --save bootstrap
bower.json文件变为如下:
{
"name": "webtest",
"version": "0.1.0",
"authors": [
"yanlei <java.yanlei@163.com>"
],
"description": "前端测试项目",
"main": "./app/index.html",
"moduleType": [
"globals"
],
"license": "MIT",
"private": true,
"dependencies": {
"angularjs": "~1.3.4",
"bootstrap": "~3.3.1"
}
}
同时目录变为如下:jquery为bootstrap的依赖包

gulp构建前端项目
编写gulpfile.js
var gulp = require('gulp');

browserSync = require('browser-sync');

// Start the server
gulp.task('browser-sync', function() {
browserSync({
server: {
baseDir: "./app"
}
});
});

// 将bower的库文件对应到指定位置
gulp.task('refBowerComponents',function() {
gulp.src('./bower_components/angularjs/angular.min.js')
.pipe(gulp.dest('./app/vender/js'));
gulp.src('./bower_components/angularjs/angular.min.js.map')
.pipe(gulp.dest('./app/vender/js'));
gulp.src('./bower_components/bootstrap/dist/js/bootstrap.min.js')
.pipe(gulp.dest('./app/vender/js'));
gulp.src('./bower_components/jquery/dist/jquery.min.js')
.pipe(gulp.dest('./app/vender/js'));
gulp.src('./bower_components/jquery/dist/jquery.min.map')
.pipe(gulp.dest('./app/vender/js'));
//css
gulp.src('./bower_components/bootstrap/dist/css/bootstrap.min.css')
.pipe(gulp.dest('./app/vender/css/'));
});
// Compile SASS & auto-inject into browsers
gulp.task('sass', function () {
return gulp.src('./app/sass/*.scss')
.pipe(sass({includePaths: ['scss']}))
.pipe(gulp.dest('./app/styles/style.css'))
.pipe(browserSync.reload({stream:true}));
});

// Reload all Browsers
gulp.task('bs-reload', function () {
browserSync.reload();
});
var files = [
'./app/*.html',
'./app/images/**/*.*',
'./app/views/**/*.html',
'./app/scripts/**/*.js',
'./app/styles/**/*.css'
];
// Watch scss AND html files, doing different things with each.
gulp.task('default', ['browser-sync'], function () {
gulp.watch("scss/*.scss", ['sass']);
gulp.watch(files, ['bs-reload']);
});

相关文章推荐
- 前端工程筹建NodeJs+gulp+bower
- 前端工程搭建NodeJs+gulp+bower
- nodejs+angularjs+npm+gulp+bower+jade+less构建前端框架
- 前端自动化工程构建node,npm,bower,gulp
- 在Maven+Spring项目中使用Node.js的Gulp进行前端自动化构建
- 在Maven+Spring项目中使用Node.js的Gulp进行前端自动化构建
- 在Maven+Spring项目中使用Node.js的Gulp进行前端自动化构建
- 在Maven+Spring项目中使用Node.js的Gulp进行前端自动化构建
- 前端搭建Nodejs+npm+gulp开发环境
- node和gulp实现前端工程自动化(附:gulp常用插件)
- 前端自动化之路之gulp,node.js
- Node.js前端自动化工具:gulp
- node.js 之express web工程目录结构
- 【Node.js】webstorm+nodejs+JetBrains IDE Support+chrome打造前端开发神器
- windows8.1下nodejs+npm+Bower的使用介绍
- Gulp.js----比Grunt更易用的前端构建工具
- Gulp.js----比Grunt更易用的前端构建工具
- 专访雪球网技术团队:用Node.js做前端的类SOA架构
- 使用 node.js 开发前端打包程序 ---转载
- Windows环境下的NodeJS+NPM+Bower安装配置步骤