nginx使用ssl模块配置支持HTTPS访问 AND 开启gzip
2016-07-16 16:31
1066 查看
默认情况下ssl模块并未被安装,如果要使用该模块则需要在编译nginx时指定–with-http_ssl_module参数.
需求:
做一个网站域名为 www.localhost.cn 要求通过https://www.localhost.cn进行访问.
10.10.100.8 www.localhost.cn
实验步骤:
1.首先确保机器上安装了openssl和openssl-devel
2.创建服务器私钥,命令会让你输入一个口令:
3.创建签名请求的证书(CSR):
4.在加载SSL支持的Nginx并使用上述私钥时除去必须的口令:
5.配置nginx
最后标记证书使用上述私钥和CSR:
6.修改Nginx配置文件,让其包含新标记的证书和私钥:
7.修改Nginx配置文件,让其包含新标记的证书和私钥:
8.启动nginx服务器.
如果出现“[emerg] 10464#0: unknown directive "ssl" in /usr/local/nginx-0.6.32/conf/nginx.conf:74”则说明没有将ssl模块编译进nginx,在configure的时候加上“--with-http_ssl_module”即可
9.测试网站是否能够通过https访问
另外还可以加入如下代码实现80端口重定向到443
过以下配置,可以设置一个虚拟主机同时支持HTTP和HTTPS
.
参考文档:http://dreamfire.blog.51cto.com/418026/1141302/
SSL英文名为Secure Socket Layer,安全套接字层。SSL是一种数字证书,它使用ssl协议在浏览器和web server之间建立一条安全通道,数据信息在client与server之间的安全传输
在这之前,记得nginx编译安装时加参数–with-http_ssl_module,使得nginx支持ssl模块。
一、颁发证书
下面自行颁发不受浏览器信任的证书
cd /usr/local/nginx/conf/key
1、创建服务器私钥,并输入口令
openssl genrsa -des3 -out server.key 1024
2、创建签名请求的csr证书
openssl req -new -key server.key -out server.csr
3、加载ssl支持的Nginx并使用私钥是除去必须的口令
cp server.key server.key.org
openssl rsa -in server.key.org -out server.key
二、配置Nginx
标记证书使用上述私钥和csr
openssl x509 -req -days 365 -in server.csr -signkey server.key -out server.crt
修改nginx配置档,使用ssl
配置完成后启动nginx,https访问
/usr/local/nginx/sbin/nginx -t
/usr/local/nginx/sbin/nginx
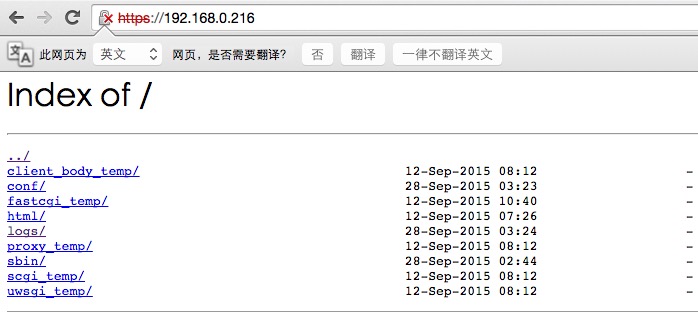
访问https://192.168.0.216
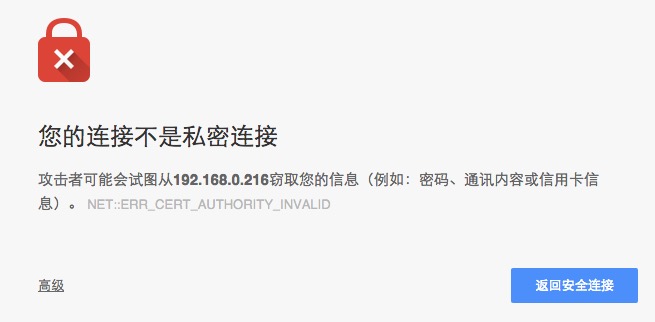
可以看到访问成功,只是ssl证书不是受信的而已
-------------------------------------------------------------------------------------------------------------------------------------------------------------------------------------------------------
2012年8月27日 02:26发表评论阅读评论
文章作者:姜南(Slyar) 文章来源:Slyar Home (www.slyar.com)
转载请注明,谢谢合作。
刚刚给博客加了一个500px相册插件,lightbox引入了很多js文件和css文件,页面一下子看起来非常臃肿,所以还是把Gzip打开了。
环境:Debian 6
1、Vim打开Nginx配置文件
vim /usr/local/nginx/conf/nginx.conf
2、找到如下一段,进行修改
gzip on;
gzip_min_length 1k;
gzip_buffers 4 16k;
#gzip_http_version 1.0;
gzip_comp_level 2;
gzip_types text/plain application/x-javascript text/css application/xml text/javascript application/x-httpd-php image/jpeg image/gif image/png;
gzip_vary off;
gzip_disable "MSIE [1-6]\.";
3、解释一下
第1行:开启Gzip
第2行:不压缩临界值,大于1K的才压缩,一般不用改
第3行:buffer,就是,嗯,算了不解释了,不用改
第4行:用了反向代理的话,末端通信是HTTP/1.0,有需求的应该也不用看我这科普文了;有这句的话注释了就行了,默认是HTTP/1.1
第5行:压缩级别,1-10,数字越大压缩的越好,时间也越长,看心情随便改吧
第6行:进行压缩的文件类型,缺啥补啥就行了,JavaScript有两种写法,最好都写上吧,总有人抱怨js文件没有压缩,其实多写一种格式就行了
第7行:跟Squid等缓存服务有关,on的话会在Header里增加"Vary: Accept-Encoding",我不需要这玩意,自己对照情况看着办吧
第8行:IE6对Gzip不怎么友好,不给它Gzip了
4、:wq保存退出,重新加载Nginx
/usr/local/nginx/sbin/nginx -s reload
5、用curl测试Gzip是否成功开启
curl -I -H "Accept-Encoding: gzip, deflate" "//www.slyar.com/blog/"
HTTP/1.1 200 OK
Server: nginx/1.0.15
Date: Sun, 26 Aug 2012 18:13:09 GMT
Content-Type: text/html; charset=UTF-8
Connection: keep-alive
X-Powered-By: PHP/5.2.17p1
X-Pingback: //www.slyar.com/blog/xmlrpc.php
Content-Encoding: gzip
页面成功压缩
curl -I -H "Accept-Encoding: gzip, deflate" "//www.slyar.com/blog/wp-content/plugins/photonic/include/css/photonic.css"
HTTP/1.1 200 OK
Server: nginx/1.0.15
Date: Sun, 26 Aug 2012 18:21:25 GMT
Content-Type: text/css
Last-Modified: Sun, 26 Aug 2012 15:17:07 GMT
Connection: keep-alive
Expires: Mon, 27 Aug 2012 06:21:25 GMT
Cache-Control: max-age=43200
Content-Encoding: gzip
css文件成功压缩
curl -I -H "Accept-Encoding: gzip, deflate" "//www.slyar.com/blog/wp-includes/js/jquery/jquery.js"
HTTP/1.1 200 OK
Server: nginx/1.0.15
Date: Sun, 26 Aug 2012 18:21:38 GMT
Content-Type: application/x-javascript
Last-Modified: Thu, 12 Jul 2012 17:42:45 GMT
Connection: keep-alive
Expires: Mon, 27 Aug 2012 06:21:38 GMT
Cache-Control: max-age=43200
Content-Encoding: gzip
js文件成功压缩
curl -I -H "Accept-Encoding: gzip, deflate" "//www.slyar.com/blog/wp-content/uploads/2012/08/2012-08-23_203542.png"
HTTP/1.1 200 OK
Server: nginx/1.0.15
Date: Sun, 26 Aug 2012 18:22:45 GMT
Content-Type: image/png
Last-Modified: Thu, 23 Aug 2012 13:50:53 GMT
Connection: keep-alive
Expires: Tue, 25 Sep 2012 18:22:45 GMT
Cache-Control: max-age=2592000
Content-Encoding: gzip
图片成功压缩
curl -I -H "Accept-Encoding: gzip, deflate" "//www.slyar.com/blog/wp-content/plugins/wp-multicollinks/wp-multicollinks.css"
HTTP/1.1 200 OK
Server: nginx/1.0.15
Date: Sun, 26 Aug 2012 18:23:27 GMT
Content-Type: text/css
Content-Length: 180
Last-Modified: Sat, 02 May 2009 08:46:15 GMT
Connection: keep-alive
Expires: Mon, 27 Aug 2012 06:23:27 GMT
Cache-Control: max-age=43200
Accept-Ranges: bytes
最后来个不到1K的文件,由于我的阈值是1K,所以没压缩
需求:
做一个网站域名为 www.localhost.cn 要求通过https://www.localhost.cn进行访问.
10.10.100.8 www.localhost.cn
实验步骤:
1.首先确保机器上安装了openssl和openssl-devel
最后标记证书使用上述私钥和CSR:
参考文档:http://dreamfire.blog.51cto.com/418026/1141302/
SSL英文名为Secure Socket Layer,安全套接字层。SSL是一种数字证书,它使用ssl协议在浏览器和web server之间建立一条安全通道,数据信息在client与server之间的安全传输
在这之前,记得nginx编译安装时加参数–with-http_ssl_module,使得nginx支持ssl模块。
一、颁发证书
下面自行颁发不受浏览器信任的证书
cd /usr/local/nginx/conf/key
1、创建服务器私钥,并输入口令
openssl genrsa -des3 -out server.key 1024
2、创建签名请求的csr证书
openssl req -new -key server.key -out server.csr
3、加载ssl支持的Nginx并使用私钥是除去必须的口令
cp server.key server.key.org
openssl rsa -in server.key.org -out server.key
二、配置Nginx
标记证书使用上述私钥和csr
openssl x509 -req -days 365 -in server.csr -signkey server.key -out server.crt
修改nginx配置档,使用ssl
<code class="hljs applescript has-numbering" style="display: block; padding: 0px; color: inherit; box-sizing: border-box; font-family: "Source Code Pro", monospace;font-size:undefined; white-space: pre; border-radius: 0px; word-wrap: normal; background: transparent;">server {
listen <span class="hljs-number" style="color: rgb(0, 102, 102); box-sizing: border-box;">443</span>;
server_name <span class="hljs-number" style="color: rgb(0, 102, 102); box-sizing: border-box;">192.168</span><span class="hljs-number" style="color: rgb(0, 102, 102); box-sizing: border-box;">.0</span><span class="hljs-number" style="color: rgb(0, 102, 102); box-sizing: border-box;">.216</span>;
autoindex <span class="hljs-function_start" style="box-sizing: border-box;"><span class="hljs-keyword" style="color: rgb(0, 0, 136); box-sizing: border-box;">on</span></span>;
root /usr/<span class="hljs-keyword" style="color: rgb(0, 0, 136); box-sizing: border-box;">local</span>/nginx;
ssl <span class="hljs-function_start" style="box-sizing: border-box;"><span class="hljs-keyword" style="color: rgb(0, 0, 136); box-sizing: border-box;">on</span></span>;
ssl_certificate /usr/<span class="hljs-keyword" style="color: rgb(0, 0, 136); box-sizing: border-box;">local</span>/nginx/conf/key/server.crt;
ssl_certificate_key
/usr/<span class="hljs-keyword" style="color: rgb(0, 0, 136); box-sizing: border-box;">local</span>/nginx/conf/key/server.key;

}</code><ul class="pre-numbering" style="box-sizing: border-box; position: absolute; width: 50px; top: 0px; left: 0px; margin: 0px; padding: 6px 0px 40px; border-right-width: 1px; border-right-style: solid; border-right-color: rgb(221, 221, 221); list-style: none; text-align: right; background-color: rgb(238, 238, 238);"><li style="box-sizing: border-box; padding: 0px 5px;">1</li><li style="box-sizing: border-box; padding: 0px 5px;">2</li><li style="box-sizing: border-box; padding: 0px 5px;">3</li><li style="box-sizing: border-box; padding: 0px 5px;">4</li><li style="box-sizing: border-box; padding: 0px 5px;">5</li><li style="box-sizing: border-box; padding: 0px 5px;">6</li><li style="box-sizing: border-box; padding: 0px 5px;">7</li><li style="box-sizing: border-box; padding: 0px 5px;">8</li><li style="box-sizing: border-box; padding: 0px 5px;">9</li><li style="box-sizing: border-box; padding: 0px 5px;">10</li><li style="box-sizing: border-box; padding: 0px 5px;">11</li></ul>
配置完成后启动nginx,https访问
/usr/local/nginx/sbin/nginx -t
/usr/local/nginx/sbin/nginx
访问https://192.168.0.216
可以看到访问成功,只是ssl证书不是受信的而已
-------------------------------------------------------------------------------------------------------------------------------------------------------------------------------------------------------
Nginx开启Gzip压缩大幅提高页面加载速度及相关测试
2012年8月27日 02:26发表评论阅读评论文章作者:姜南(Slyar) 文章来源:Slyar Home (www.slyar.com)
转载请注明,谢谢合作。
刚刚给博客加了一个500px相册插件,lightbox引入了很多js文件和css文件,页面一下子看起来非常臃肿,所以还是把Gzip打开了。
环境:Debian 6
1、Vim打开Nginx配置文件
vim /usr/local/nginx/conf/nginx.conf
2、找到如下一段,进行修改
gzip on;
gzip_min_length 1k;
gzip_buffers 4 16k;
#gzip_http_version 1.0;
gzip_comp_level 2;
gzip_types text/plain application/x-javascript text/css application/xml text/javascript application/x-httpd-php image/jpeg image/gif image/png;
gzip_vary off;
gzip_disable "MSIE [1-6]\.";
3、解释一下
第1行:开启Gzip
第2行:不压缩临界值,大于1K的才压缩,一般不用改
第3行:buffer,就是,嗯,算了不解释了,不用改
第4行:用了反向代理的话,末端通信是HTTP/1.0,有需求的应该也不用看我这科普文了;有这句的话注释了就行了,默认是HTTP/1.1
第5行:压缩级别,1-10,数字越大压缩的越好,时间也越长,看心情随便改吧
第6行:进行压缩的文件类型,缺啥补啥就行了,JavaScript有两种写法,最好都写上吧,总有人抱怨js文件没有压缩,其实多写一种格式就行了
第7行:跟Squid等缓存服务有关,on的话会在Header里增加"Vary: Accept-Encoding",我不需要这玩意,自己对照情况看着办吧
第8行:IE6对Gzip不怎么友好,不给它Gzip了
4、:wq保存退出,重新加载Nginx
/usr/local/nginx/sbin/nginx -s reload
5、用curl测试Gzip是否成功开启
curl -I -H "Accept-Encoding: gzip, deflate" "//www.slyar.com/blog/"
HTTP/1.1 200 OK
Server: nginx/1.0.15
Date: Sun, 26 Aug 2012 18:13:09 GMT
Content-Type: text/html; charset=UTF-8
Connection: keep-alive
X-Powered-By: PHP/5.2.17p1
X-Pingback: //www.slyar.com/blog/xmlrpc.php
Content-Encoding: gzip
页面成功压缩
curl -I -H "Accept-Encoding: gzip, deflate" "//www.slyar.com/blog/wp-content/plugins/photonic/include/css/photonic.css"
HTTP/1.1 200 OK
Server: nginx/1.0.15
Date: Sun, 26 Aug 2012 18:21:25 GMT
Content-Type: text/css
Last-Modified: Sun, 26 Aug 2012 15:17:07 GMT
Connection: keep-alive
Expires: Mon, 27 Aug 2012 06:21:25 GMT
Cache-Control: max-age=43200
Content-Encoding: gzip
css文件成功压缩
curl -I -H "Accept-Encoding: gzip, deflate" "//www.slyar.com/blog/wp-includes/js/jquery/jquery.js"
HTTP/1.1 200 OK
Server: nginx/1.0.15
Date: Sun, 26 Aug 2012 18:21:38 GMT
Content-Type: application/x-javascript
Last-Modified: Thu, 12 Jul 2012 17:42:45 GMT
Connection: keep-alive
Expires: Mon, 27 Aug 2012 06:21:38 GMT
Cache-Control: max-age=43200
Content-Encoding: gzip
js文件成功压缩
curl -I -H "Accept-Encoding: gzip, deflate" "//www.slyar.com/blog/wp-content/uploads/2012/08/2012-08-23_203542.png"
HTTP/1.1 200 OK
Server: nginx/1.0.15
Date: Sun, 26 Aug 2012 18:22:45 GMT
Content-Type: image/png
Last-Modified: Thu, 23 Aug 2012 13:50:53 GMT
Connection: keep-alive
Expires: Tue, 25 Sep 2012 18:22:45 GMT
Cache-Control: max-age=2592000
Content-Encoding: gzip
图片成功压缩
curl -I -H "Accept-Encoding: gzip, deflate" "//www.slyar.com/blog/wp-content/plugins/wp-multicollinks/wp-multicollinks.css"
HTTP/1.1 200 OK
Server: nginx/1.0.15
Date: Sun, 26 Aug 2012 18:23:27 GMT
Content-Type: text/css
Content-Length: 180
Last-Modified: Sat, 02 May 2009 08:46:15 GMT
Connection: keep-alive
Expires: Mon, 27 Aug 2012 06:23:27 GMT
Cache-Control: max-age=43200
Accept-Ranges: bytes
最后来个不到1K的文件,由于我的阈值是1K,所以没压缩

相关文章推荐
- socket-tcp协议-服务器端
- opencv的一个神经网络例程(转)(转自http://blog.sina.com.cn/s/blog_61e10f020101bv94.html)
- python网络爬虫实例(一):爬取糗事百科
- TCP组包
- opencv的一个神经网络例程(转自http://blog.sina.com.cn/s/blog_61e10f020101bv94.html)
- php $_SERVER['HTTP_USER_AGENT']
- cas 在 反向代理环境中的https 配置
- Android 4.4 Kitkat 使能有线网络 Ethernet
- 微信公众平台消息接口开发之微信浏览器HTTP_USER_AGENT判断
- 计算机网络(13)-----java nio手动实现简单的http服务器
- HTTPS为什么安全 &分析 HTTPS 连接建立全过程
- 网络编程--UDP套接字的使用举例
- 计算机网络(12)-----HTTP协议详解
- 2016年全网营销中太原网络营销师讲【新媒体】思路
- 网络游戏封包基础知识
- Linux2操作篇 -系统日志性能与网络管理
- 网络编程--套接字的简单使用
- HDU 3616 最小割
- 网络编程--实现用户登录验证功能
- 多线程TcpServer