7、CXF与Spring整合,发布WebService服务
2016-07-07 12:23
495 查看
1、需求
将上边cxf入门程序中手动发布服务、手动实现客户端方式改为spring配置方式。
将webservice服务部署在tomcat中.
2、在applicationContext-service.xml配置dao和service
3、在applicationContext-cxf.xml配置发布WebService的配置
通过 cxf和spring整合后采用配置方式发布webservice服务
jaxws.xsd---配置发布soap的服务。
jaxrs.xsd---配置发布为rest方式的服务,即http方式
4、web.xml的配置
加载Spring的配置文件和配置cxf servlet
5、将项目部署到tomcat中,并访问发布的WebService服务
6、客户端的调用
1、利用wsdl2java生成客户端调用代码

2、利用CXF调用
public class ClientTest1 {
public static void main(String[] args) {
// 通过JaxWsProxyFactoryBean实现客户端调用
JaxWsProxyFactoryBean wsProxyFactoryBean = new JaxWsProxyFactoryBean();
// 设置调用的webService的地址
wsProxyFactoryBean
.setAddress("http://localhost:8080/UserCXFSpringService/ws/user?wsdl");
// 设置SEI(接口类型portType)
wsProxyFactoryBean.setServiceClass(IUserServiceSoap.class);
// 创建客户端调用对象(也是portType,与上面的接口是一致的)
IUserServiceSoap port = wsProxyFactoryBean
.create(IUserServiceSoap.class);
// 调用webservice发布的方法
User user = port.findById(1);
System.out.println(user);
}
}
3、原始的调用方法
public class ClientTest2 {
public static void main(String[] args) throws MalformedURLException {
// wsdl地址
URL wsdlDocumentLocation = new URL(
"http://localhost:8080/UserCXFSpringService/ws/user?wsdl");
// 名称空间,serviceName
QName serviceName = new QName("http://user.namager.cn", "IUserService");
// 通过手动指定wsdl地址和服务名称来创建服务视图
Service service = Service.create(wsdlDocumentLocation, serviceName);
// portType的class来创建接口,然后调用服务方法
IUserServiceSoap port = service.getPort(IUserServiceSoap.class);
// 通过服务来调用方法
User user = port.findById(1);
System.out.println(user);
}
}
4、客户端整合Spring的调用方法
1、spring的配置文件
<?xml version="1.0" encoding="UTF-8"?>
<beans xmlns="http://www.springframework.org/schema/beans"
xmlns:xsi="http://www.w3.org/2001/XMLSchema-instance" xmlns:jaxws="http://cxf.apache.org/jaxws"
xmlns:jaxrs="http://cxf.apache.org/jaxrs" xmlns:cxf="http://cxf.apache.org/core"
xsi:schemaLocation="http://www.springframework.org/schema/beans http://www.springframework.org/schema/beans/spring-beans.xsd http://cxf.apache.org/jaxrs http://cxf.apache.org/schemas/jaxrs.xsd http://cxf.apache.org/jaxws http://cxf.apache.org/schemas/jaxws.xsd http://cxf.apache.org/core http://cxf.apache.org/schemas/core.xsd">
<!-- 在这里配置客户端对象,portType对象 下边配置的过程,实现了JaxWsProxyFactoryBean请求服务端代码 -->
<!-- address:调用webservice地址 -->
<!-- serviceClass portType -->
<jaxws:client id="userClient"
address="http://localhost:8080/UserCXFSpringService/ws/user"
serviceClass="cn.namager.user.IUserServiceSoap">
</jaxws:client>
</beans>
2、调用代码
public class ClientTest3 {
public static void main(String[] args) throws MalformedURLException {
// 从spring容器中取porttype对象
ApplicationContext applicationContext = new ClassPathXmlApplicationContext(
"applicationContext-cxfclient.xml");
// bean对象的类型就是xml中定义的serviceClass
IUserServiceSoap port = (IUserServiceSoap) applicationContext
.getBean("userClient");
// 通过面向对象调用
// 调用webservice发布的方法
User user = port.findById(1);
System.out.println(user);
}
}
5、代码下载
CXF与Spring整合的代码下载
将上边cxf入门程序中手动发布服务、手动实现客户端方式改为spring配置方式。
将webservice服务部署在tomcat中.
2、在applicationContext-service.xml配置dao和service
<beans xmlns="http://www.springframework.org/schema/beans"
xmlns:xsi="http://www.w3.org/2001/XMLSchema-instance" xmlns:context="http://www.springframework.org/schema/context"
xmlns:aop="http://www.springframework.org/schema/aop" xmlns:tx="http://www.springframework.org/schema/tx"
xsi:schemaLocation="http://www.springframework.org/schema/beans http://www.springframework.org/schema/beans/spring-beans.xsd http://www.springframework.org/schema/context http://www.springframework.org/schema/context/spring-context.xsd http://www.springframework.org/schema/aop http://www.springframework.org/schema/aop/spring-aop.xsd http://www.springframework.org/schema/tx http://www.springframework.org/schema/tx/spring-tx.xsd">
<!-- 配置UserDaoImpl -->
<bean id="userDaoImpl" class="com.cxfwebservice.daoimpl.UserDaoImpl" />

<!-- 配置portType的实现类 -->
<bean id="userServiceImpl" class="com.cxfwebservice.serviceimpl.UserServiceImpl">
<!-- 注入dao -->
<property name="userDao" ref="userDaoImpl" />
</bean>

</beans>
3、在applicationContext-cxf.xml配置发布WebService的配置
通过 cxf和spring整合后采用配置方式发布webservice服务
jaxws.xsd---配置发布soap的服务。
jaxrs.xsd---配置发布为rest方式的服务,即http方式
<?xml version="1.0" encoding="UTF-8"?>
<beans xmlns="http://www.springframework.org/schema/beans"
xmlns:xsi="http://www.w3.org/2001/XMLSchema-instance" xmlns:jaxws="http://cxf.apache.org/jaxws"
xmlns:jaxrs="http://cxf.apache.org/jaxrs" xmlns:cxf="http://cxf.apache.org/core"
xsi:schemaLocation="http://www.springframework.org/schema/beans http://www.springframework.org/schema/beans/spring-beans.xsd http://cxf.apache.org/jaxrs http://cxf.apache.org/schemas/jaxrs.xsd http://cxf.apache.org/jaxws http://cxf.apache.org/schemas/jaxws.xsd http://cxf.apache.org/core http://cxf.apache.org/schemas/core.xsd">
<!-- 在这里发布服务 这里配置的内容同使用JaxWsServerFactoryBean发布服务 -->
<!-- address:webservice接口访问地址 -->
<!-- serviceClass potyType的类型 -->
<jaxws:server address="/user"
serviceClass="com.cxfwebservice.service.IUserService">
<jaxws:serviceBean>
<!-- bean="userServiceImpl":表示potyType接口的实现类在Spring的bean容器里面的bean的id -->
<ref bean="userServiceImpl" />
</jaxws:serviceBean>
</jaxws:server>

</beans>
4、web.xml的配置
加载Spring的配置文件和配置cxf servlet
<?xml version="1.0" encoding="UTF-8"?>
<web-app version="3.0" xmlns="http://java.sun.com/xml/ns/javaee"
xmlns:xsi="http://www.w3.org/2001/XMLSchema-instance"
xsi:schemaLocation="http://java.sun.com/xml/ns/javaee http://java.sun.com/xml/ns/javaee/web-app_3_0.xsd"> <!-- 加载spring容器 -->
<context-param>
<param-name>contextConfigLocation</param-name>
<!-- 注意这里采用通配符配置方式,实际使用注意配置文件地址的正确性 -->
<param-value>/WEB-INF/classes/applicationContext-*.xml</param-value>
</context-param>
<listener>
<listener-class>org.springframework.web.context.ContextLoaderListener</listener-class>
</listener>

<!-- 配置cxf servlet -->
<servlet>
<servlet-name>CXFServlet</servlet-name>
<servlet-class>org.apache.cxf.transport.servlet.CXFServlet</servlet-class>
<load-on-startup>1</load-on-startup>
</servlet>
<servlet-mapping>
<servlet-name>CXFServlet</servlet-name>
<!-- 请求以/ws/开头的都cxf解析 -->
<url-pattern>/ws/*</url-pattern>
</servlet-mapping>

<display-name></display-name>
<welcome-file-list>
<welcome-file>index.jsp</welcome-file>
</welcome-file-list>
</web-app>
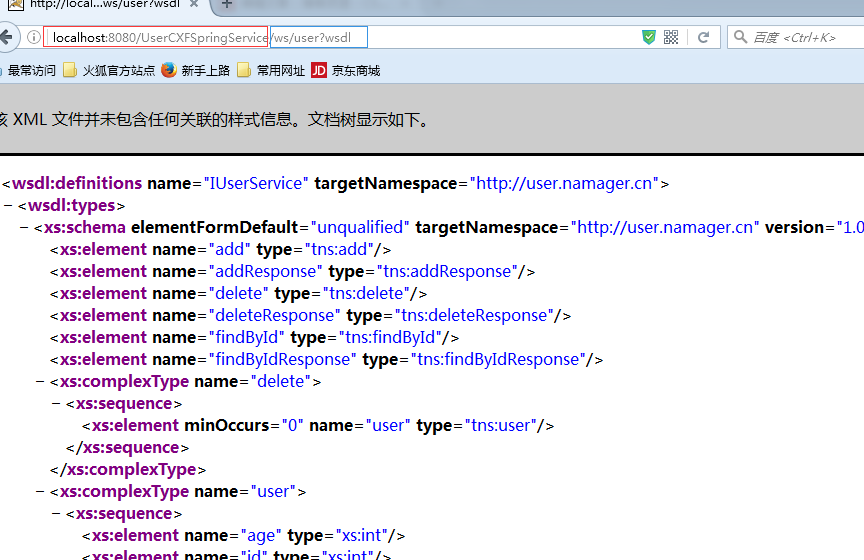
5、将项目部署到tomcat中,并访问发布的WebService服务
6、客户端的调用
1、利用wsdl2java生成客户端调用代码
2、利用CXF调用
public class ClientTest1 {
public static void main(String[] args) {
// 通过JaxWsProxyFactoryBean实现客户端调用
JaxWsProxyFactoryBean wsProxyFactoryBean = new JaxWsProxyFactoryBean();
// 设置调用的webService的地址
wsProxyFactoryBean
.setAddress("http://localhost:8080/UserCXFSpringService/ws/user?wsdl");
// 设置SEI(接口类型portType)
wsProxyFactoryBean.setServiceClass(IUserServiceSoap.class);
// 创建客户端调用对象(也是portType,与上面的接口是一致的)
IUserServiceSoap port = wsProxyFactoryBean
.create(IUserServiceSoap.class);
// 调用webservice发布的方法
User user = port.findById(1);
System.out.println(user);
}
}
3、原始的调用方法
public class ClientTest2 {
public static void main(String[] args) throws MalformedURLException {
// wsdl地址
URL wsdlDocumentLocation = new URL(
"http://localhost:8080/UserCXFSpringService/ws/user?wsdl");
// 名称空间,serviceName
QName serviceName = new QName("http://user.namager.cn", "IUserService");
// 通过手动指定wsdl地址和服务名称来创建服务视图
Service service = Service.create(wsdlDocumentLocation, serviceName);
// portType的class来创建接口,然后调用服务方法
IUserServiceSoap port = service.getPort(IUserServiceSoap.class);
// 通过服务来调用方法
User user = port.findById(1);
System.out.println(user);
}
}
4、客户端整合Spring的调用方法
1、spring的配置文件
<?xml version="1.0" encoding="UTF-8"?>
<beans xmlns="http://www.springframework.org/schema/beans"
xmlns:xsi="http://www.w3.org/2001/XMLSchema-instance" xmlns:jaxws="http://cxf.apache.org/jaxws"
xmlns:jaxrs="http://cxf.apache.org/jaxrs" xmlns:cxf="http://cxf.apache.org/core"
xsi:schemaLocation="http://www.springframework.org/schema/beans http://www.springframework.org/schema/beans/spring-beans.xsd http://cxf.apache.org/jaxrs http://cxf.apache.org/schemas/jaxrs.xsd http://cxf.apache.org/jaxws http://cxf.apache.org/schemas/jaxws.xsd http://cxf.apache.org/core http://cxf.apache.org/schemas/core.xsd">
<!-- 在这里配置客户端对象,portType对象 下边配置的过程,实现了JaxWsProxyFactoryBean请求服务端代码 -->
<!-- address:调用webservice地址 -->
<!-- serviceClass portType -->
<jaxws:client id="userClient"
address="http://localhost:8080/UserCXFSpringService/ws/user"
serviceClass="cn.namager.user.IUserServiceSoap">
</jaxws:client>
</beans>
2、调用代码
public class ClientTest3 {
public static void main(String[] args) throws MalformedURLException {
// 从spring容器中取porttype对象
ApplicationContext applicationContext = new ClassPathXmlApplicationContext(
"applicationContext-cxfclient.xml");
// bean对象的类型就是xml中定义的serviceClass
IUserServiceSoap port = (IUserServiceSoap) applicationContext
.getBean("userClient");
// 通过面向对象调用
// 调用webservice发布的方法
User user = port.findById(1);
System.out.println(user);
}
}
5、代码下载
CXF与Spring整合的代码下载

相关文章推荐
- ASP.NET WebService中使用ASP.NET_SessionId的问题说明
- ASP.NET中基于soaphead的webservice安全机制
- ASP调用WebService转化成JSON数据,附json.min.asp
- js调用webservice构造SOAP进行身份验证
- ajax跨域调用webservice的实现代码
- ASP.NET调用WebService服务的方法详解
- php的webservice的wsdl的XML无法显示问题的解决方法
- PHP调用Webservice实例代码
- 在PHP中利用wsdl创建标准webservice的实现代码
- JQuery调webservice实现邮箱验证(检测是否可用)
- android调用web service(cxf)实例应用详解
- WebService出现"因 URL 意外地以 结束,请求格式无法识别"的解决方法
- 用JavaScript调用WebService的示例
- jQuery 调用WebService 实例讲解
- jQuery调用WebService返回JSON数据及参数设置注意问题
- 同步调用和异步调用WebService
- C#调用WebService实例开发
- 动态webservice调用接口并读取解析返回结果
- WebService 的简单封装接口调用方法
- ASP.NET实现基于Forms认证的WebService应用实例