myeclipse基于JAX-WS开发Webservice
2016-06-03 15:00
567 查看
1、新建工程
新建一个Web Service Project工程File->New->Web Service Project(Optional Maven Support),取名为WebServiceProject.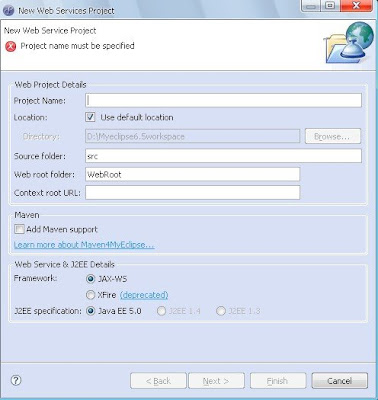
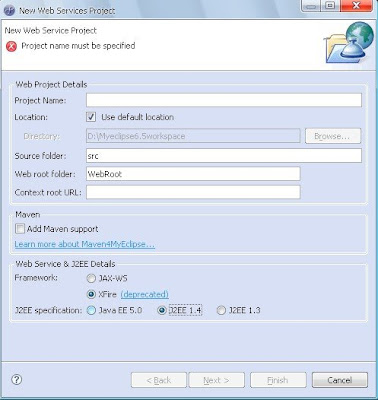
注意:JAX-WS支持只在javaEE5或更高版本的工程中是可行的。如果你需要使用低版本的工程类型(java1.4或者1.3),那么只能使用XFire Web Service代替JAX-WS。
这里我们使用上面的JAX—WS。
2、创建服务类
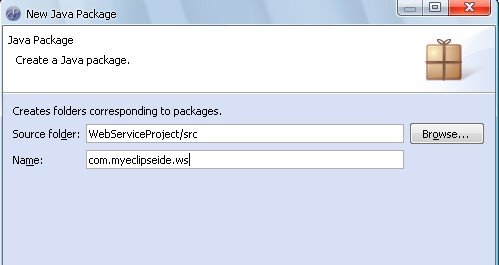
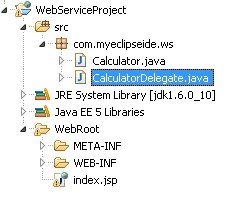
服务类就是一个普通的java类,负责提供我们想要发布的执行方法。这里我们写一个简单的计算器类,实现几个典型的计算器应用方法,如加减乘除。首先,我们先建一个包,WebServiceProject->src->new->package,取名com.myeclipseide.ws。
让后我们在这个包下建一个类,Calculator.java.
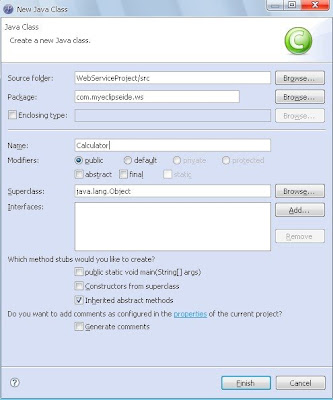
根据上面提到的,这个计算器类实现计算器的加减乘除算法,简单实现:
Java代码
package com.myeclipseide.ws;
public class Calculator {
public int add(int a, int b) {
return (a + b);
}
public int subtract(int a, int b) {
return (a - b);
}
public int multiply(int a, int b) {
return (a * b);
}
public int divide(int a, int b) {
return (a / b);
}
//支持返回自定义类型
public User list(String name){
User u = new User();
u.setName(name);
return u;
}
public List<User> listAll(String name){
List<User> list = new ArrayList<User>();
for(int i=0;i<10;i++){
User u = new User();
u.setName(name);
list.add(u);
}
return list;
}
}
可以看出,这个类中的方法是非常简单的,没有用到特殊的注释还有接口,父类之类的东西。
3、创建一个Web Service
在上面的工具条中点击新建Web Service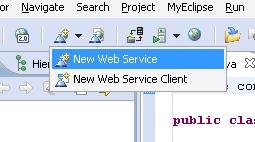
注意:如果没有的话可以File->New->others->Myeclipse->WebService->webService
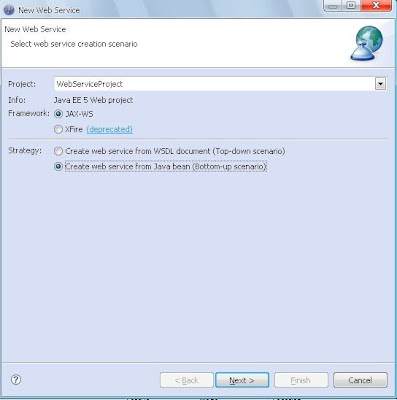
点击之后,出现的屏幕,在Strategy中选择Bottom-up scenario,因为我们已经建立好了Calculator类而且想根据它建立JAX-WS服务。
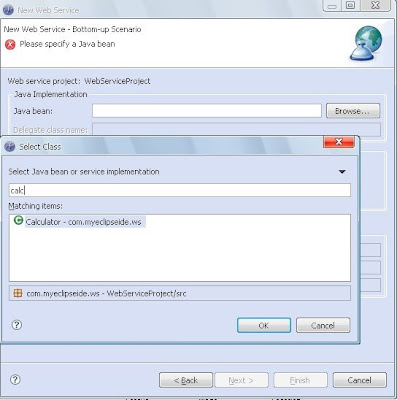
下面是创建的最后一个屏幕,你需要选择提供webService方法的javaBean,在我们这个例子中就是我们已经建立好的Calculator类。
填好之后,Myeclipse会自动帮我们填满其他的项,Select Generate WSDL in project and hit Finish.
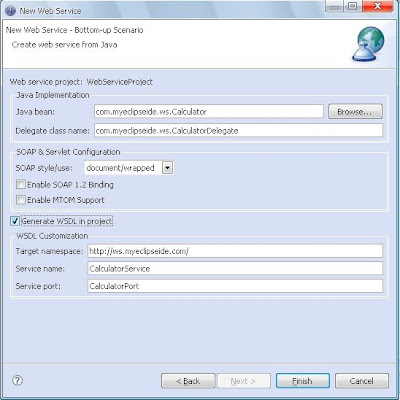
点击完成之后,Myeclipse会自动生成CalculatorDelegate代理类,还有一些必须的JAX-WS描述符,而且会自动在服务器目录下的web.xml中配置WebService的一些mappings,方便将webService部署到服务器中。
到此web service已经建立好了,我们开始部署它然后进行测试。
4、部署和测试webService
这里我们不使用用Myeclipse自带的tomcat服务器,使用自己应经在电脑中部署好的tomcat。 在server面板中右击,选择configure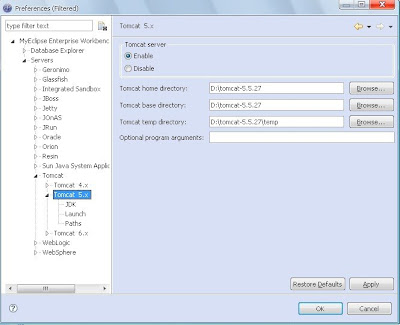
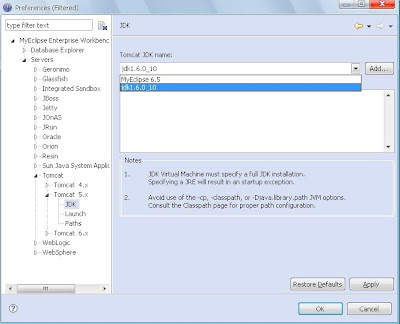
部署自己的tomcat注意选择jdk要跟项目中的相同。
现在要向工程中导入JAX-WS的jar包,在项目名称上右击->properties->Add Library->Myeclipse Libraries->最后面的两个。
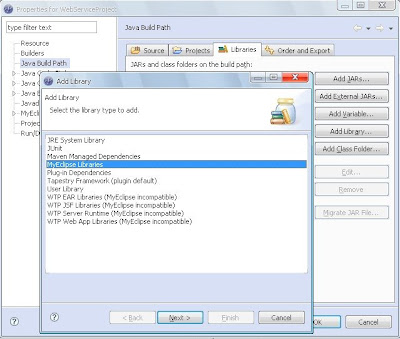

点击完成,导入成功。 注意:Myeclipse自带的tomcat中有自带的这两个jar包,可以不用导入。
在部署好的tomcat服务器上右击选择Add Deployment
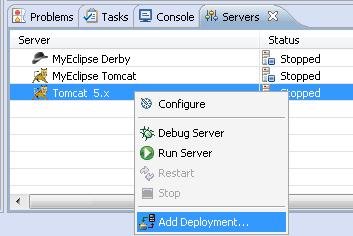
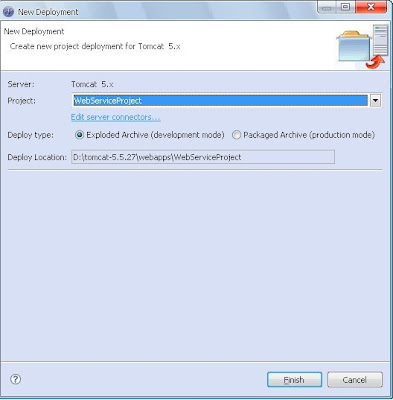
点击完成。 测试
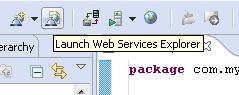
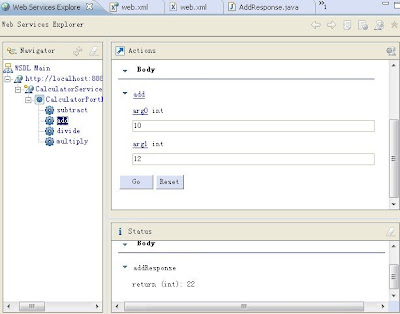
运行tomcat服务器,在工具栏中点击launch WebService Explorer
打开后,点击右上角的WSDL视图,可以看到下面的屏幕
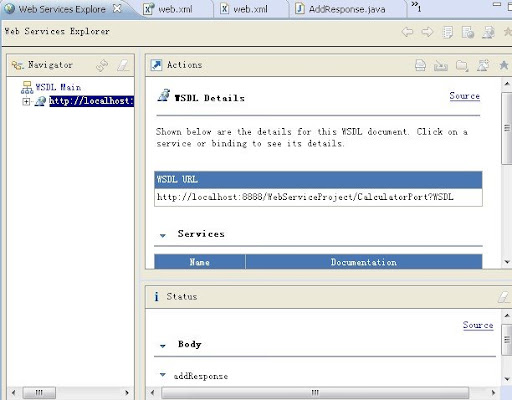
在WSDL URL中填写路径:http://localhost:8888/WebServiceProject/CalculatorPort?WSDL ,解释下路径组成:
http://localhost:8888/是服务器的路径,我的端口号是8888,可以根据自己的更改,一般都是8080。 /WebServiceProject = We know by default the Web Context-root that is used to deploy(部署) web projects matches the name of the projects. (因为我们没有为这个工程自定义我们的Web Context-root,所以他就是这个工程的名字)
/CalculatorPort = As we saw from the last screenshot in Section #5, when our JAX-WS web service was generated, it was bound using a servlet-mapping in the web.xml file to the /CalculatorPort path.
Xml代码
<servlet>
<description>JAX-WS endpoint - CalculatorService</description>
<display-name>CalculatorService</display-name>
<servlet-name>CalculatorService</servlet-name>
<servlet-class>
com.sun.xml.ws.transport.http.servlet.WSServlet
</servlet-class>
<load-on-startup>1</load-on-startup>
</servlet>
<servlet-mapping>
<servlet-name>CalculatorService</servlet-name>
<url-pattern>/CalculatorPort</url-pattern>
</servlet-mapping>
?WSDL = This is a universal query string argument that can be added to the end of any web service which will tell the web service to return it's full WSDL to the caller. In this case, the WSDL is returned to our Web Services Explorer tool which loads it
up, and displays the web services exposed operations to us.
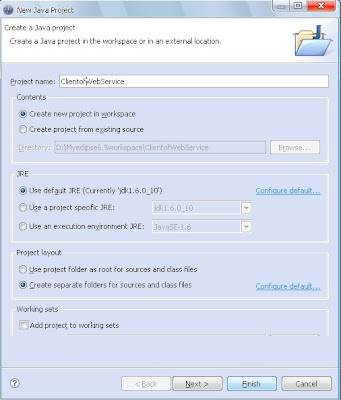
现在我们已经部署好Webservice,而且应经测试过了,那我们新建一个Webservice client,来调用Webservice提供的方法。 新建一个java project,给他取个名字。比如我们叫它ClientofWebService
5、创建Webservice Client
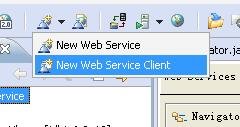
然后按照以下步骤操作:
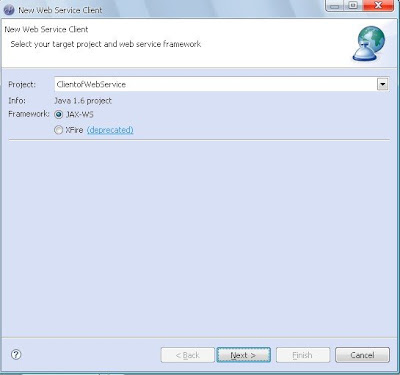
URL and generate the client into the new package com.myeclipseide.ws.client:
http://localhost:8888/WebServiceProject/CalculatorPort?WSDL
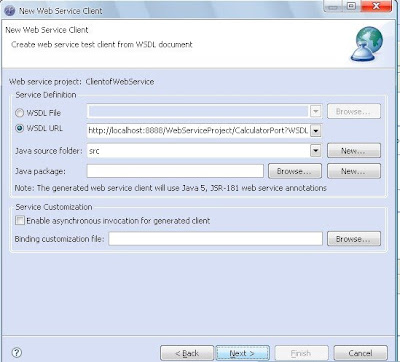
点击Next知道完成。
可以看到在新建的java project ClientofWebService中,src文件夹下产生了许多的文件,根据名称我们大体可以了解其意思,可以打开看一下源代码,其实不难理解。比如add文件,就是Calculator类中add方法的两个参数的get和set方法。其他类似。
我们在文件夹下见一个类test.java写一个main函数测试
Java代码
public static void main(String[] args) {
/* Create the service instance */
CalculatorService service = new CalculatorService();
CalculatorDelegate delegate = service.getCalculatorPort();
/* Using the web service, perform the 4 calculations */
System.out.println("1. 3+7=" + delegate.add(3, 7));
System.out.println("2. 12-2=" + delegate.subtract(12, 2));
System.out.println("3. 9*9=" + delegate.multiply(9, 9));
System.out.println("4. 40/2=" + delegate.divide(40, 2));
User u = delegate.list("dasdsa");
java.util.List<User> list = delegate.listAll("11111111111fdsf");
System.out.println(u.getName());
}
运行得到如下结果:
1. 3+7=10
2. 12-2=10
3. 9*9=81
4. 40/2=20
测试完成。

相关文章推荐
- Java Thread(线程)
- Java的string类为什么是不可变的
- 记录下as编译后 jdk报错
- Eclipse快捷键
- 使用ZooKeeper实现Java跨JVM的分布式锁(优化构思)
- Java提高班 之深究java.lang.Class.getResource(String)与java.lang.ClassLoader.getResource(String)
- Java编程思想第四版第十章学习——内部类(2)
- java 分组 散列排序
- Spring IOC
- spring 声明式事务管理在真实的Service和单元测试时的回滚情况,需要注意的问题,jpa为例子
- java多线程---Executor框架
- java 反射的作用
- 一个简单的Spring MVC配置
- java设计模式—工厂模式三种
- java计算程序运行时间的方法之一
- eclipse代码格式化
- java 反射中的invoke
- Java Web开发——Filter过滤器
- Java Web开发——Servlet监听器
- maven eclipse