Linux Centos 6.5_x86安装Nginx
2016-05-31 09:51
645 查看
一、下载
二、编译安装
三、启动、停止、平滑重启
一、下载
地址:http://nginx.org/en/download.html
或者在linux上使用wget命令下载:
wget http://124.202.164.5/files/40950000082BD3BE/nginx.org/download/nginx-1.8.1.tar.gz
[b]二、编译安装[/b]
Nginx的一些模块需要其他第三方库的支持,比如gzip模块需要zlib库,rewrite模块需要pcre库,ssl需要openssl库等。
上述error说明,没有安装pcre库。
安装zlib、zlib-devel、openssl、openssl-devel、pcrepcre-devel
重新./configure
安装成功!。
按照以上命令,Nginx默认被安装到/usr/local/nginx下。另外您可以通过./configure --help命令查看Nginx可选择编译项目。可参考《Nginx手动编译的编译选项解析》。
[b]三、启动、停止、平滑重启[/b]
[b] a)启动[/b]
Nginx的安装目录是/usr/local/nginx,那么Nginx的启动命令就是:
/usr/local/nginx/sbin/nginx -c /usr/local/nginx/conf/nginx.conf
其中参数“-c”指定了配置文件的路径,如果不加"-c'参数,Nginx会默认加载其安装目录的的conf子目录的nginx.conf文件。在本例中是/usr/local/nginx/conf/nginx.conf。
如果配置文件正确,则显示以下信息:
测试是否启动成功:
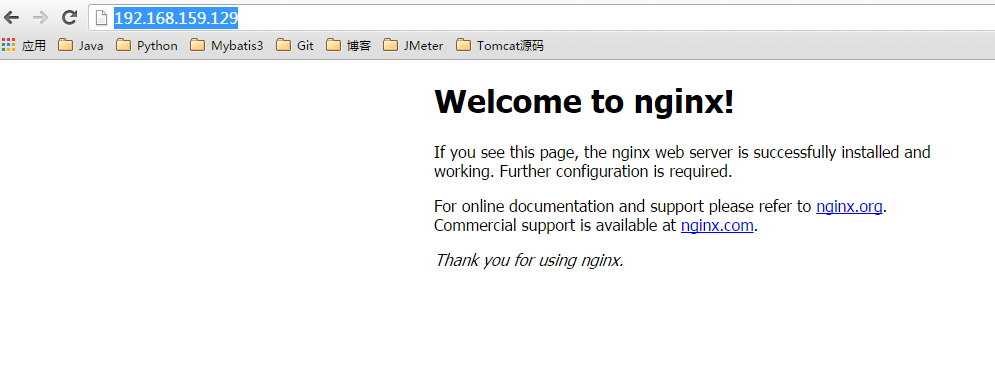
通过浏览器访问:IP地址:Nginx端口号(端口号是在nginx.conf中server模块中配置的),我的是:http://192.168.159.129:80/
b) 停止
Nginx的停止的方法有很多种,一般是通过发送系统信号给Nginx主进程的方式来停止Nginx。
我们通过ps命令查看Nginx的主进程号:
从上边可以看到:其中备注为master process的进程,表示他是主进程,另外8个“worker process”,表示是子进程,其中2439是主进程号。
a)从容停止Nginx
kill - QUIT Nginx主进程号。
或:
kill -QUTI /usr/local/nginx/nginx.pid
b)快速停止Nginx
kill - TERM Nginx主进程号
kill - TERM /usr/local/nginx/nginx.pid
或:
kill - INT Nginx主进程号
kill - INT /usr/local/nginx/nginx.pid
c)强制停止所有nginx进程
kill -9 nginx
c)平滑重启
重启之前要确认配置文件nginx.conf的语法是否正确,否则nginx不会加载新的配置文件。通过以下命令判断neginx配置文件是否正确:
/usr/local/nginx/sbin/nginx -t -c /usr/local/nginx/conf/nginx.conf
控制台出现如下结果说明配置文件正确:
查看nginx主进程号:
重启Nginx:
kill -HUP Nginx主进程号
kill -HUP /usr/local/nginx/nginx.pid
参考文档:
《实战Nginx:取代Apache的高性能Web服务器》
二、编译安装
三、启动、停止、平滑重启
一、下载
地址:http://nginx.org/en/download.html
或者在linux上使用wget命令下载:
wget http://124.202.164.5/files/40950000082BD3BE/nginx.org/download/nginx-1.8.1.tar.gz
[b]二、编译安装[/b]
[root@root3 soft]# tar -zxvf nginx-1.8.0.tar.gz
nginx-1.8.0/
nginx-1.8.0/auto/
nginx-1.8.0/conf/
nginx-1.8.0/contrib/
nginx-1.8.0/src/
nginx-1.8.0/configure
nginx-1.8.0/LICENSE
nginx-1.8.0/README
...
[root@root3 soft]# cd nginx-1.8.0
nginx-1.8.0]# ./configure
checking for OS
+ Linux 2.6.32-431.el6.i686 i686
checking for C compiler ... found
+ using GNU C compiler
...
./configure: error: the HTTP rewrite module requires the PCRE library.
You can either disable the module by using --without-http_rewrite_module
option, or install the PCRE library into the system, or build the PCRE library
statically from the source with nginx by using --with-pcre=<path> option.
Nginx的一些模块需要其他第三方库的支持,比如gzip模块需要zlib库,rewrite模块需要pcre库,ssl需要openssl库等。
上述error说明,没有安装pcre库。
安装zlib、zlib-devel、openssl、openssl-devel、pcrepcre-devel
[root@root3 ~]# yum install zlib zlib-devle openssl openssl-devel pcre pcre-devel
重新./configure
[root@root3 nginx-1.8.0]# ./configure
checking for OS
+ Linux 2.6.32-431.el6.i686 i686
checking for C compiler ... found
+ using GNU C compiler
+ gcc version: 4.4.7 20120313 (Red Hat 4.4.7-16) (GCC)
...
Configuration summary
+ using system PCRE library
+ OpenSSL library is not used
+ md5: using system crypto library
+ sha1: using system crypto library
+ using system zlib library

nginx path prefix: "/usr/local/nginx"
nginx binary file: "/usr/local/nginx/sbin/nginx"
nginx configuration prefix: "/usr/local/nginx/conf"
nginx configuration file: "/usr/local/nginx/conf/nginx.conf"
nginx pid file: "/usr/local/nginx/logs/nginx.pid"
nginx error log file: "/usr/local/nginx/logs/error.log"
nginx http access log file: "/usr/local/nginx/logs/access.log"
nginx http client request body temporary files: "client_body_temp"
nginx http proxy temporary files: "proxy_temp"
nginx http fastcgi temporary files: "fastcgi_temp"
nginx http uwsgi temporary files: "uwsgi_temp"
nginx http scgi temporary files: "scgi_temp"
[root@root3 nginx-1.8.0]# make
[root@root3 nginx-1.8.0]# make install
安装成功!。
按照以上命令,Nginx默认被安装到/usr/local/nginx下。另外您可以通过./configure --help命令查看Nginx可选择编译项目。可参考《Nginx手动编译的编译选项解析》。
[b]三、启动、停止、平滑重启[/b]
[b] a)启动[/b]
Nginx的安装目录是/usr/local/nginx,那么Nginx的启动命令就是:
/usr/local/nginx/sbin/nginx -c /usr/local/nginx/conf/nginx.conf
其中参数“-c”指定了配置文件的路径,如果不加"-c'参数,Nginx会默认加载其安装目录的的conf子目录的nginx.conf文件。在本例中是/usr/local/nginx/conf/nginx.conf。
如果配置文件正确,则显示以下信息:
nginx: the configuration file /usr/local/nginx/conf/nginx.conf syntax is ok
nginx: configuration file /usr/local/nginx/conf/nginx.conf test is successful
测试是否启动成功:
[root@mch conf]# ps -ef|grep nginx
root      2896     1  0 10:56 ?        00:00:00 nginx: master process /usr/local/nginx/sbin/nginx -c /usr/local/nginx/conf/nginx.conf
oracle    2897  2896  0 10:56 ?        00:00:00 nginx: worker process
oracle    2898  2896  0 10:56 ?        00:00:00 nginx: worker process
oracle    2899  2896  0 10:56 ?        00:00:00 nginx: worker process
oracle    2900  2896  0 10:56 ?        00:00:00 nginx: worker process
oracle    2901  2896  0 10:56 ?        00:00:00 nginx: worker process
oracle    2902  2896  0 10:56 ?        00:00:00 nginx: worker process
oracle    2903  2896  0 10:56 ?        00:00:00 nginx: worker process
oracle    2904  2896  0 10:56 ?        00:00:00 nginx: worker process
root      3033  2876  0 11:17 pts/0    00:00:00 grep nginx
通过浏览器访问:IP地址:Nginx端口号(端口号是在nginx.conf中server模块中配置的),我的是:http://192.168.159.129:80/
b) 停止
Nginx的停止的方法有很多种,一般是通过发送系统信号给Nginx主进程的方式来停止Nginx。
我们通过ps命令查看Nginx的主进程号:
[root@mch ~]# ps -ef | grep nginx
root      2439     1  0 10:49 ?        00:00:00 nginx: master process /usr/local/nginx/sbin/nginx -c /usr/local/nginx/conf/nginx.conf
oracle    2440  2439  2 10:49 ?        00:00:00 nginx: worker process
oracle    2441  2439  2 10:49 ?        00:00:00 nginx: worker process
oracle    2442  2439  2 10:49 ?        00:00:00 nginx: worker process
oracle    2443  2439  2 10:49 ?        00:00:00 nginx: worker process
oracle    2444  2439  2 10:49 ?        00:00:00 nginx: worker process
oracle    2445  2439  2 10:49 ?        00:00:00 nginx: worker process
oracle    2446  2439  2 10:49 ?        00:00:00 nginx: worker process
oracle    2447  2439  2 10:49 ?        00:00:00 nginx: worker process
root      2449  2407  0 10:49 pts/0    00:00:00 grep nginx
从上边可以看到:其中备注为master process的进程,表示他是主进程,另外8个“worker process”,表示是子进程,其中2439是主进程号。
a)从容停止Nginx
kill - QUIT Nginx主进程号。
或:
kill -QUTI /usr/local/nginx/nginx.pid
b)快速停止Nginx
kill - TERM Nginx主进程号
kill - TERM /usr/local/nginx/nginx.pid
或:
kill - INT Nginx主进程号
kill - INT /usr/local/nginx/nginx.pid
c)强制停止所有nginx进程
kill -9 nginx
c)平滑重启
重启之前要确认配置文件nginx.conf的语法是否正确,否则nginx不会加载新的配置文件。通过以下命令判断neginx配置文件是否正确:
/usr/local/nginx/sbin/nginx -t -c /usr/local/nginx/conf/nginx.conf
控制台出现如下结果说明配置文件正确:
     nginx: the configuration file /usr/local/nginx/conf/nginx.conf syntax is ok
     nginx: configuration file /usr/local/nginx/conf/nginx.conf test is successful
查看nginx主进程号:
[root@mch /]# ps -ef|grep nginx
root      2896     1  0 Oct13 ?        00:00:00 nginx: master process /usr/local/nginx/sbin/nginx -c /usr/local/nginx/conf/nginx.conf
oracle    9954  2896  3 15:46 ?        00:00:00 nginx: worker process
oracle    9955  2896  3 15:46 ?        00:00:00 nginx: worker process
oracle    9956  2896  2 15:46 ?        00:00:00 nginx: worker process
oracle    9957  2896  2 15:46 ?        00:00:00 nginx: worker process
oracle    9958  2896  3 15:46 ?        00:00:00 nginx: worker process
oracle    9959  2896  3 15:46 ?        00:00:00 nginx: worker process
oracle    9960  2896  3 15:46 ?        00:00:00 nginx: worker process
oracle    9961  2896  3 15:46 ?        00:00:00 nginx: worker process
root      9975  7915  0 15:46 pts/0    00:00:00 grep nginx
重启Nginx:
kill -HUP Nginx主进程号
kill -HUP /usr/local/nginx/nginx.pid
参考文档:
《实战Nginx:取代Apache的高性能Web服务器》

相关文章推荐
- 服务器监控之zabbix监控Nginx篇
- nginx禁止指定user_agent
- nginx的一些安全配置笔记
- Nginx开启Gzip压缩大幅提高页面加载速度
- Nginx安装部署
- nginx cpu过高或过低--状态简单分析与监控
- nginx lua 模块开发
- 入门第二篇继续 关于nginx upstream的几种配置方式
- angular路由移除#号(跟nginx)
- 浅谈一个网页打开的全过程(涉及DNS、CDN、Nginx负载均衡等)
- Nginx-请求处理与响应
- linux+nginx+apache+mysql+php配置
- nginx服务器安装及配置文件详解
- ElKstack-解决nginx日志url链接包含中文logstash报错问题
- nginx配置文件的说明
- nginx访问控制
- nginx配置防盗链
- 初识nginx
- nginx配置静态文件过期时间
- Nginx配置 批量二级域名映射到二级目录