基于HTML5上使用iScroll实现下拉刷新,上拉加载更多
2016-05-21 10:52
846 查看
前言
前一段有个手机端的项目需要用到下拉刷新和上拉加载更多的效果,脑海里第一反映就是微博那种效果,刚开始的理解有些偏差,以为下拉也是追加数据,上拉也是追加数据,后请教同事后发现其实下拉只是刷新最新数据而已,上拉是追加数据。
使用技巧
1、引用iScroll.js, 在初始化时添加两个事件监听:touchMove、DOMContentLoaded。
2、实现iScroll插件的onScrollEnd事件, 也就是在这个事件里调用你自己的ajax方法实现数据的刷新和追加。
3、上拉加载更多请求后台时就相当于分页请求数据,这时候需要在ajax请求时发送pageIndex参数,而初始化加载时需要从后台返回一个pageCount以便前台判断。
4、最关键的就是实现下拉刷新方法(pullDownAction)和上拉加载更多(pullUpAction)方法。
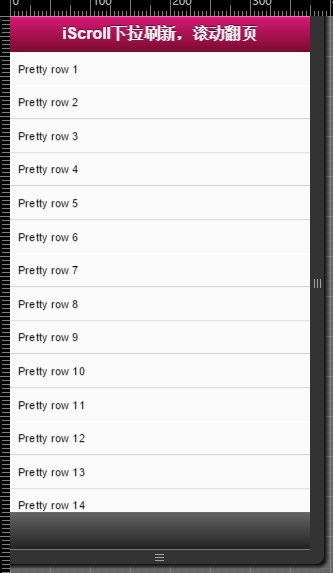
运行效果图
实现方法
var  myScroll,
pullDownEl, pullDownOffset,
pullUpEl, pullUpOffset,
generatedCount = 0;
/**
* 下拉刷新 (自定义实现此方法)
* myScroll.refresh(); 数据加载完成后,调用界面更新方法
*/
function pullDownAction () {
setTimeout(function () {
var el, li, i;
el = document.getElementById('thelist');
for (i=0; i<3; i++) {
li = document.createElement('li');
li.innerText = 'Generated row ' + (++generatedCount);
el.insertBefore(li, el.childNodes[0]);
}
myScroll.refresh(); //数据加载完成后,调用界面更新方法
}, 1000);
}
/**
* 滚动翻页 (自定义实现此方法)
* myScroll.refresh(); // 数据加载完成后,调用界面更新方法
*/
function pullUpAction () {
setTimeout(function () { // <-- Simulate network congestion, remove setTimeout from production!
var el, li, i;
el = document.getElementById('thelist');
for (i=0; i<3; i++) {
li = document.createElement('li');
li.innerText = 'Generated row ' + (++generatedCount);
el.appendChild(li, el.childNodes[0]);
}
myScroll.refresh(); //数据加载完成后,调用界面更新方法
}, 1000);
}
/**
* 初始化iScroll控件
*/
function loaded() {
pullDownEl = document.getElementById('pullDown');
pullDownOffset = pullDownEl.offsetHeight;
pullUpEl = document.getElementById('pullUp');
pullUpOffset = pullUpEl.offsetHeight;
myScroll = new iScroll('wrapper', {
scrollbarClass: 'myScrollbar',
useTransition: false,
topOffset: pullDownOffset,
onRefresh: function () {
if (pullDownEl.className.match('loading')) {
pullDownEl.className = '';
pullDownEl.querySelector('.pullDownLabel').innerHTML = '下拉刷新...';
} else if (pullUpEl.className.match('loading')) {
pullUpEl.className = '';
pullUpEl.querySelector('.pullUpLabel').innerHTML = '上拉加载更多...';
}
},
onScrollMove: function () {
if (this.y > 5 && !pullDownEl.className.match('flip')) {
pullDownEl.className = 'flip';
pullDownEl.querySelector('.pullDownLabel').innerHTML = '松手开始更新...';
this.minScrollY = 0;
} else if (this.y < 5 && pullDownEl.className.match('flip')) {
pullDownEl.className = '';
pullDownEl.querySelector('.pullDownLabel').innerHTML = '下拉刷新...';
this.minScrollY = -pullDownOffset;
} else if (this.y < (this.maxScrollY - 5) && !pullUpEl.className.match('flip')) {
pullUpEl.className = 'flip';
pullUpEl.querySelector('.pullUpLabel').innerHTML = '松手开始更新...';
this.maxScrollY = this.maxScrollY;
} else if (this.y > (this.maxScrollY + 5) && pullUpEl.className.match('flip')) {
pullUpEl.className = '';
pullUpEl.querySelector('.pullUpLabel').innerHTML = '上拉加载更多...';
this.maxScrollY = pullUpOffset;
}
},
onScrollEnd: function () {
if (pullDownEl.className.match('flip')) {
pullDownEl.className = 'loading';
pullDownEl.querySelector('.pullDownLabel').innerHTML = '加载中...';
pullDownAction(); // ajax call
} else if (pullUpEl.className.match('flip')) {
pullUpEl.className = 'loading';
pullUpEl.querySelector('.pullUpLabel').innerHTML = '加载中...';
pullUpAction(); // ajax call
}
}
});
setTimeout(function () { document.getElementById('wrapper').style.left = '0'; }, 800);
}
//初始化绑定iScroll控件
document.addEventListener('touchmove', function (e) { e.preventDefault(); }, false);
document.addEventListener('DOMContentLoaded', loaded, false);
总结
主要还是要对iScroll做一些初始化的操作,针对不同的动作显示不同的提示信息,然后针对下拉和上拉事件写相应刷新和加载更多的处理方法即可。
您可能感兴趣的文章:

相关文章推荐
- jQuery iScroll.js 移动端滚动条美化插件第1/5页
- iscroll碰到Select无法选择下拉刷新的解决办法
- iScroll中事件点击触发两次解决方案
- jqmobi(Appframework)和iscroll4兼容的问题解决
- web移动端滑动
- 移动设备web开发插件iScroll的使用详解
- iScroll使用总结
- 关于在jquery中使用iscorll实现上拉下拉加载刷新的方法
- iScroll 下拉刷新
- iscroll 部分android手机(如三星的)不能点击兼容问题
- IScroll5中文API整理,用法与参考
- AlloyPhoto 图像处理,兼容手机端、allouimage.js
- web app开发利器 - iscroll4 解决方案
- iScroll 捕捉元素 源码
- iScroll下拉刷新 源码
- 使用iScroll时候HTML结构该怎么设计?
- iScroll适应IE8+,FIREFOX,CHROME
- 关于 IScroll5 和IScroll4 的一些用法
- 关于iscroll5 click事件触发两次
- iscroll插件的一些用法