FreeMarker整合Spring 3
2016-05-19 14:21
357 查看
转自:http://www.cnblogs.com/hoojo/archive/2011/04/19/2020551.html
开发环境:
System:Windows
WebBrowser:IE6+、Firefox3+
JavaEE Server:tomcat5.0.2.8、tomcat6
IDE:eclipse、MyEclipse 8
开发依赖库:
JavaEE5、Spring 3.0.0.M4、FreeMarker 2.3.16
Email:hoojo_@126.com
Blog:http://blog.csdn.net/IBM_hoojo
http://hoojo.cnblogs.com/
1、 新建WebProject,工程名称是SpringFreemarker;然后手动添加jar包,需要的jar包如下:
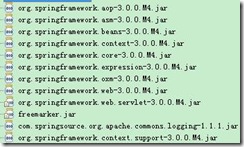
SpringFramework jar包下载地址:
http://ebr.springsource.com/repository/app/library/version/detail?name=org.springframework.spring&version=3.0.5.RELEASE
FreeMarker library下载地址:
http://ebr.springsource.com/repository/app/bundle/version/detail?name=com.springsource.freemarker&version=2.3.15
当然你也可以去官方下载
2、 在web.xml中添加如下配置:
上面分别是添加Spring的监听器、以及配置Spring的配置文件、还有SpringMVC的控制器;
3、 在WEB-INF中添加文件dispatcher.xml,和web.xml中的对应。内容如下:
开发环境:
System:Windows
WebBrowser:IE6+、Firefox3+
JavaEE Server:tomcat5.0.2.8、tomcat6
IDE:eclipse、MyEclipse 8
开发依赖库:
JavaEE5、Spring 3.0.0.M4、FreeMarker 2.3.16
Email:hoojo_@126.com
Blog:http://blog.csdn.net/IBM_hoojo
http://hoojo.cnblogs.com/
1、 新建WebProject,工程名称是SpringFreemarker;然后手动添加jar包,需要的jar包如下:
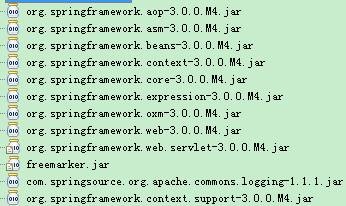
SpringFramework jar包下载地址:
http://ebr.springsource.com/repository/app/library/version/detail?name=org.springframework.spring&version=3.0.5.RELEASE
FreeMarker library下载地址:
http://ebr.springsource.com/repository/app/bundle/version/detail?name=com.springsource.freemarker&version=2.3.15
当然你也可以去官方下载
2、 在web.xml中添加如下配置:
<!-- 加载Spring容器配置 -->
<listener>
<listener-class>org.springframework.web.context.ContextLoaderListener</listener-class>
</listener>
<!-- 设置Spring容器加载配置文件路径 -->
<context-param>
<param-name>contextConfigLocation</param-name>
<param-value>classpath*:applicationContext-*.xml</param-value>
</context-param>
<servlet>
<servlet-name>dispatcher</servlet-name>
<servlet-class>org.springframework.web.servlet.DispatcherServlet</servlet-class>
<init-param>
<param-name>contextConfigLocation</param-name>
<param-value>/WEB-INF/dispatcher.xml</param-value>
</init-param>
<load-on-startup>1</load-on-startup>
</servlet>
<servlet-mapping>
<servlet-name>dispatcher</servlet-name>
<url-pattern>*.do</url-pattern>
</servlet-mapping>
上面分别是添加Spring的监听器、以及配置Spring的配置文件、还有SpringMVC的控制器;
3、 在WEB-INF中添加文件dispatcher.xml,和web.xml中的对应。内容如下:
<?xml version="1.0" encoding="UTF-8"?>
<beans xmlns="http://www.springframework.org/schema/beans"
xmlns:mvc="http://www.springframework.org/schema/mvc" xmlns:context="http://www.springframework.org/schema/context"
xmlns:util="http://www.springframework.org/schema/util" xmlns:xsi="http://www.w3.org/2001/XMLSchema-instance"
xsi:schemaLocation="http://www.springframework.org/schema/beans >
http://www.springframework.org/schema/beans/spring-beans-3.0.xsd[/code]http://www.springframework.org/schema/mvc[/code]http://www.springframework.org/schema/mvc/spring-mvc-3.0.xsd[/code]http://www.springframework.org/schema/contexthttp://www.springframework.org/schema/context/spring-context-3.0.xsd[/code]http://www.springframework.org/schema/util[/code]http://www.springframework.org/schema/util/spring-util-3.0.xsd"[/code]<context:component-scan base-package="com.hoo" /><!-- annotation的方法映射适配器<bean id="handlerAdapter" class="org.springframework.web.servlet.mvc.annotation.AnnotationMethodHandlerAdapter"/>--><!-- annotation默认的方法映射适配器 --><bean id="handlerMapping" class="org.springframework.web.servlet.mvc.annotation.DefaultAnnotationHandlerMapping"/><bean class="org.springframework.web.servlet.view.InternalResourceViewResolver"><property name="viewClass" value="org.springframework.web.servlet.view.JstlView"/></bean></beans>
上面是SpringMVC的基本配置
4、 在src中添加applicationContext-beans.xml,内容如下:<?xml version="1.0" encoding="UTF-8"?><beans xmlns="http://www.springframework.org/schema/beans"xmlns:xsi="http://www.w3.org/2001/XMLSchema-instance"xmlns:aop="http://www.springframework.org/schema/aop"xmlns:tx="http://www.springframework.org/schema/tx"xmlns:util="http://www.springframework.org/schema/util"xmlns:context="http://www.springframework.org/schema/context"xsi:schemaLocation="http://www.springframework.org/schema/beans >http://www.springframework.org/schema/beans/spring-beans-3.0.xsd[/code]http://www.springframework.org/schema/aophttp://www.springframework.org/schema/aop/spring-aop-3.0.xsd[/code]http://www.springframework.org/schema/txhttp://www.springframework.org/schema/tx/spring-tx-3.0.xsd[/code]http://www.springframework.org/schema/utilhttp://www.springframework.org/schema/util/spring-util-3.0.xsd[/code]http://www.springframework.org/schema/contexthttp://www.springframework.org/schema/context/spring-context-3.0.xsd"[/code]</beans>
里面可以添加一些bean的配置
5、 在src目录添加freemarker.properties配置文件,这个文件是freemarker一些常用的转换,内容如下:tag_syntax=auto_detecttemplate_update_delay=2default_encoding=UTF-8output_encoding=UTF-8locale=zh_CNdate_format=yyyy-MM-ddtime_format=HH:mm:ssdatetime_format=yyyy-MM-dd HH:mm:ss
6、 在dispatcher.xml中添加freemarker的配置,配置如下:<!-- 设置freeMarker的配置文件路径 --><bean id="freemarkerConfiguration" class="org.springframework.beans.factory.config.PropertiesFactoryBean"><property name="location" value="classpath:freemarker.properties"/></bean><!-- 配置freeMarker的模板路径 --><bean id="freemarkerConfig" class="org.springframework.web.servlet.view.freemarker.FreeMarkerConfigurer"><!--property name="freemarkerSettings" ref="freemarkerConfiguration"/--><property name="templateLoaderPath"><value>/WEB-INF/ftl/</value></property><property name="freemarkerVariables"><map><entry key="xml_escape" value-ref="fmXmlEscape" /></map></property></bean><bean id="fmXmlEscape" class="freemarker.template.utility.XmlEscape"/><!-- 配置freeMarker视图解析器 --><bean id="viewResolver" class="org.springframework.web.servlet.view.freemarker.FreeMarkerViewResolver"><property name="viewClass" value="org.springframework.web.servlet.view.freemarker.FreeMarkerView"/><property name="viewNames" value="*.ftl"/><property name="contentType" value="text/html; charset=utf-8"/><property name="cache" value="true" /><property name="prefix" value="" /><property name="suffix" value="" /><property name="order" value="2"/></bean>
上面最关键的就是freeMarker的视图解析器viewResolver的配置,viewClass是使用哪个视图解析器,这里是类路径;其他的和jsp的视图解析器都很类似。
7、 下面在WEB-INF中添加2个ftl模板,在WEB-INF添加ftl,然后添加hello.ftl/hi.ftl,内容分别是:
hello.ftl<html><body><h1>say hello ${name}</h1><br/>${(1 == 1)?string("yes", "no")}</body></html>
hi.ftl<html><body><h1>say hello ${name}</h1><br/>${(1 != 1)?string("yes", "no")}</body></html>
8、 添加Controller控制器,代码如下:package com.hoo.controller;import org.springframework.stereotype.Controller;import org.springframework.ui.ModelMap;import org.springframework.web.bind.annotation.RequestMapping;/*** <b>function:</b> FreeMarker示例控制器* @author hoojo* @createDate 2011-3-3 下午04:50:10* @file HelloWorldController.java* @package com.hoo.controller* @project SpringFreemarker* @version 1.0*/@Controller@RequestMapping("/freeMarker")public class HelloWorldController {@RequestMapping("/hello")public String sayHello(ModelMap map) {System.out.println("say Hello ……");map.addAttribute("name", " World!");return "/hello.ftl";}@RequestMapping("/hi")public String sayHi(ModelMap map) {System.out.println("say hi ……");map.put("name", "jojo");return "/hi.ftl";}@RequestMapping("/jsp")public String jspRequest(ModelMap map) {System.out.println("jspRequest ……");map.put("name", "jsp");return "/temp.jsp";}}
9、 添加index.jsp的测试链接或temp.jsp的内容:
index.jsp<body><a href="freeMarker/hello.do">say hello</a><br/><a href="freeMarker/hi.do">say hi</a><br/><a href="freeMarker/jsp.do">jspRequest</a></body>
temp.jsp<body><h3>${name }</h3></body>
如果运行无错误,并输出正确的结果就整合成功!~.~

相关文章推荐
- 一个jar包里的网站
- 一个jar包里的网站之文件上传
- 一个jar包里的网站之返回对媒体类型
- Spring和ThreadLocal
- Spring Boot 开发微服务
- Spring整合Quartz(JobDetailBean方式)
- Spring整合Quartz(JobDetailBean方式)
- 模拟Spring的简单实现
- Spring整合WebSocket应用示例(上)
- spring+html5实现安全传输随机数字密码键盘
- Spring中属性注入详解
- springmvc 发送ajax出现中文乱码的解决方法汇总
- SpringMVC框架下JQuery传递并解析Json格式的数据是如何实现的
- struts2 spring整合fieldError问题
- freemarker 数字格式化深入理解
- spring的jdbctemplate的crud的基类dao
- 读取spring配置文件的方法(spring读取资源文件)
- Spring Bean基本管理实例详解
- java实现简单美女拼图游戏