Centos 7 Oracle 12C 超详细安装
2016-05-05 16:10
441 查看
| [1] | 先决环境Install Desktop Environment, refer to here. |
| [2] | Install required packages. |
| [root@dlp ~]# yum -y install binutils compat-libcap1 gcc gcc-c++ glibc glibc.i686 glibc-devel glibc.i686 ksh libaio libaio.i686 libaio-devel libaio-devel.i686 libgcc libgcc.i686 libstdc++ libstdc++l7.i686 libstdc++-devel libstdc++-devel.i686 compat-libstdc++-33 compat-libstdc++-33.i686 libXi libXi.i686 libXtst libXtst.i686 make sysstat |
| [3] | Edit Kernel parameters. |
| [root@dlp ~]# MEMTOTAL=$(free -b | sed -n '2p' | awk '{print $2}') [root@dlp ~]# SHMMAX=$(expr $MEMTOTAL / 2) [root@dlp ~]# SHMMNI=4096 [root@dlp ~]# PAGESIZE=$(getconf PAGE_SIZE) [root@dlp ~]# cat >> /etc/sysctl.conf << EOF fs.aio-max-nr = 1048576 fs.file-max = 6815744 kernel.shmmax = $SHMMAX kernel.shmall = `expr \( $SHMMAX / $PAGESIZE \) \* \( $SHMMNI / 16 \)` kernel.shmmni = $SHMMNI kernel.sem = 250 32000 100 128 net.ipv4.ip_local_port_range = 9000 65500 net.core.rmem_default = 262144 net.core.rmem_max = 4194304 net.core.wmem_default = 262144 net.core.wmem_max = 1048576 EOF [root@dlp ~]# sysctl -p fs.aio-max-nr = 1048576 fs.file-max = 6815744 kernel.shmmax = 6274715648 kernel.shmall = 392169728 kernel.shmmni = 4096 kernel.sem = 250 32000 100 128 net.ipv4.ip_local_port_range = 9000 65500 net.core.rmem_default = 262144 net.core.rmem_max = 4194304 net.core.wmem_default = 262144 net.core.wmem_max = 1048576 |
| [4] | Create user and groups for Oracle Database service. |
| [root@dlp ~]# i=54321; for group in oinstall dba backupdba oper dgdba kmdba; do groupadd -g $i $group; i=`expr $i + 1` done [root@dlp ~]# useradd -u 1200 -g oinstall -G dba,oper,backupdba,dgdba,kmdba -d /home/oracle oracle [root@dlp ~]# passwd oracle Changing password for user oracle. New password: Retype new password: passwd: all authentication tokens updated successfully. [root@dlp ~]# mkdir -p /u01/app/oracle [root@dlp ~]# chown -R oracle:oinstall /u01/app [root@dlp ~]# chmod -R 775 /u01 [root@dlp ~]# vi /etc/pam.d/login # near line 14: add session required pam_selinux.so open session required pam_namespace.so session required pam_limits.so session optional pam_keyinit.so force revoke session include system-auth -session optional pam_ck_connector.so [root@dlp ~]# vi /etc/security/limits.conf # add to the end oracle soft nproc 2047 oracle hard nproc 16384 oracle soft nofile 1024 oracle hard nofile 65536 oracle soft stack 10240 oracle hard stack 32768 |
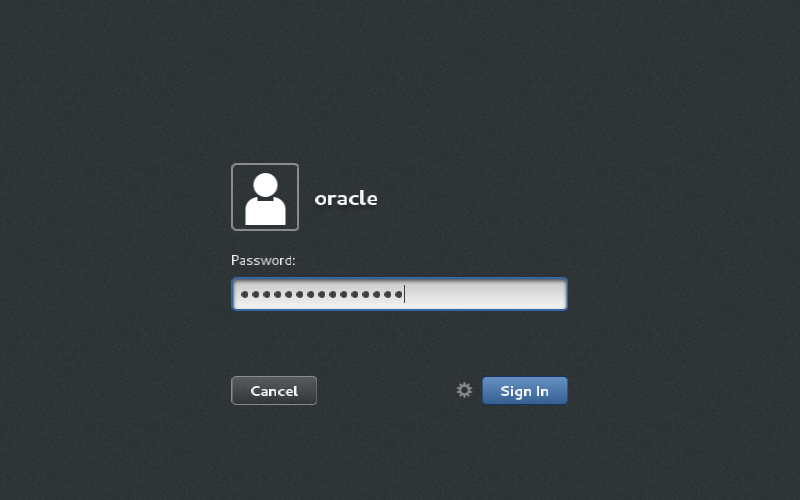
| [5] | 图形化安装Oracle 12C Login with the user "oracle" and set environment variables. |
oracle
Password:
[oracle@dlp ~]$
vi ~/.bash_profile
# add to the end
umask 022
export ORACLE_BASE=/u01/app/oracle
# create a temporary directory for installation
[oracle@dlp ~]$
mkdir tmp
| [1] | Login and work with oracle admin user which you create in pre-requirements settings. |
 |
| [2] | Download Oracle Databse 12c for Linux and upload on your server. ⇒ http://www.oracle.com/technology/software/products/database/index.html |
| [3] | After uploading Oracle files, move to a tmp directory and run an Installer like follows. |
| [oracle@dlp ~]$ cd tmp [oracle@dlp tmp]$ unzip linuxamd64_12102_database_1of2.zip [oracle@dlp tmp]$ unzip linuxamd64_12102_database_2of2.zip [oracle@dlp tmp]$ ./database/runInstaller |
| [4] | Oracle Installer starts like follows. First, Set your email address and password for receiving some infomation from Oracle like security issues and so on. |
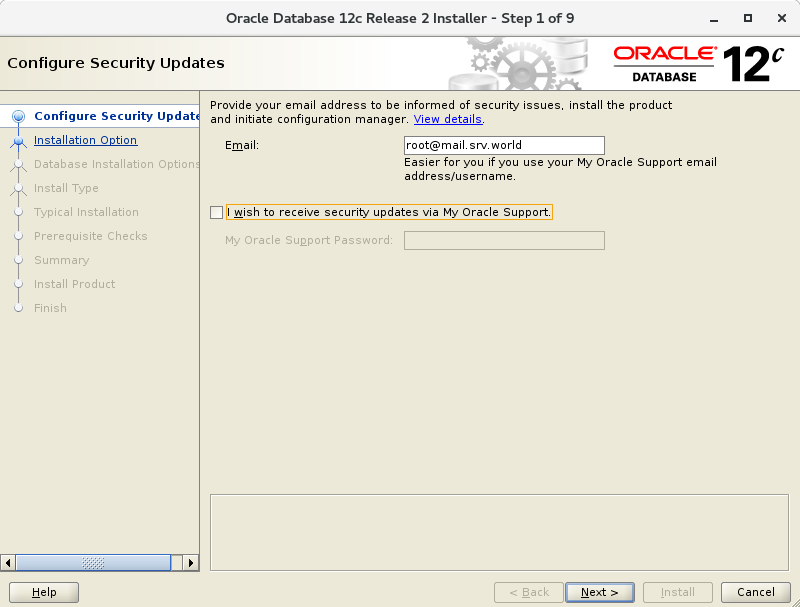 |
| [5] | On this example, Select "Install database software only". |
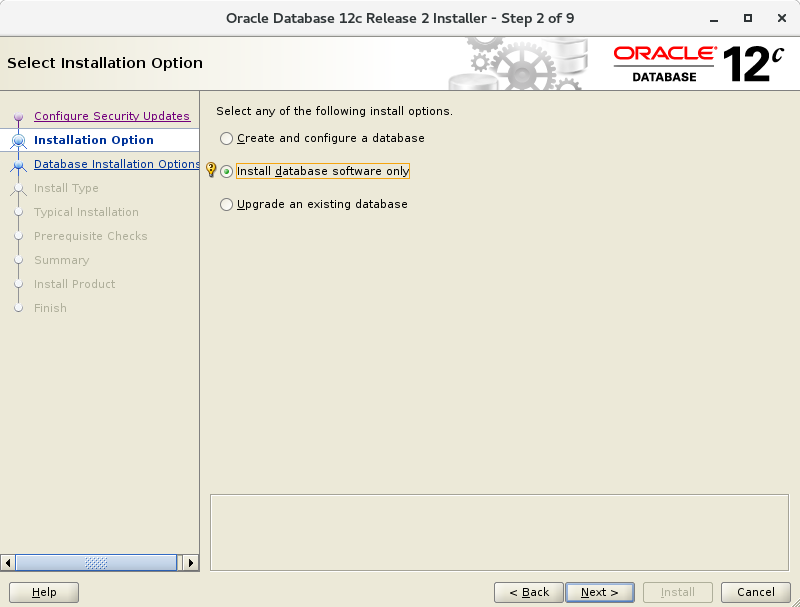 |
| [6] | On this example, Select "Single Instance Database ***". |
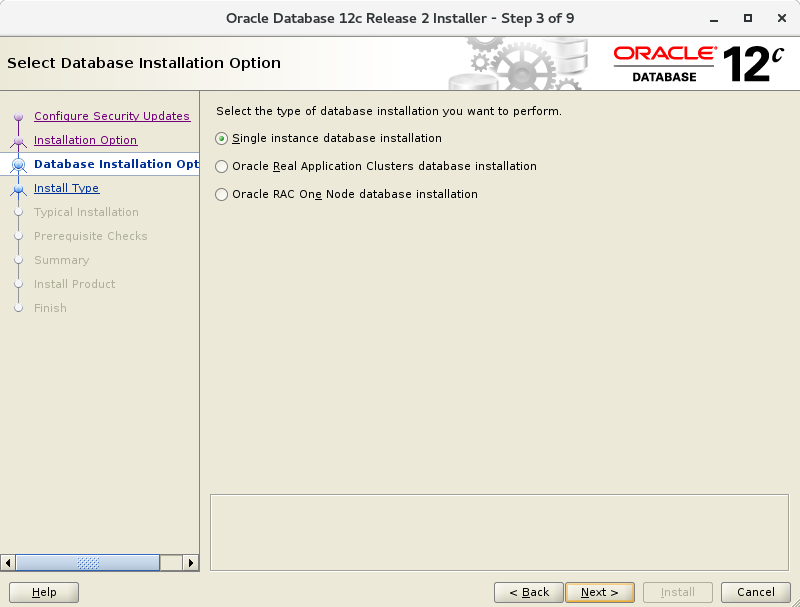 |
| [7] | Select your language. |
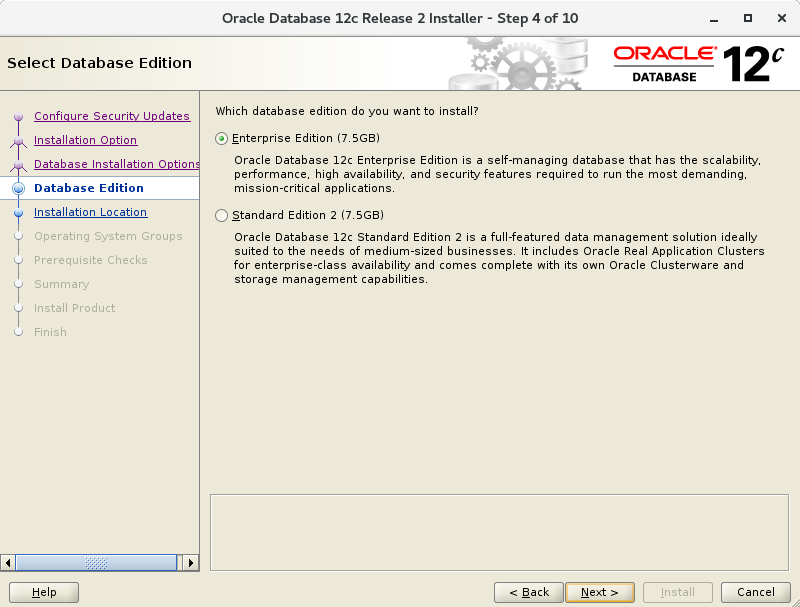 |
| [8] | Select which edition you install. |
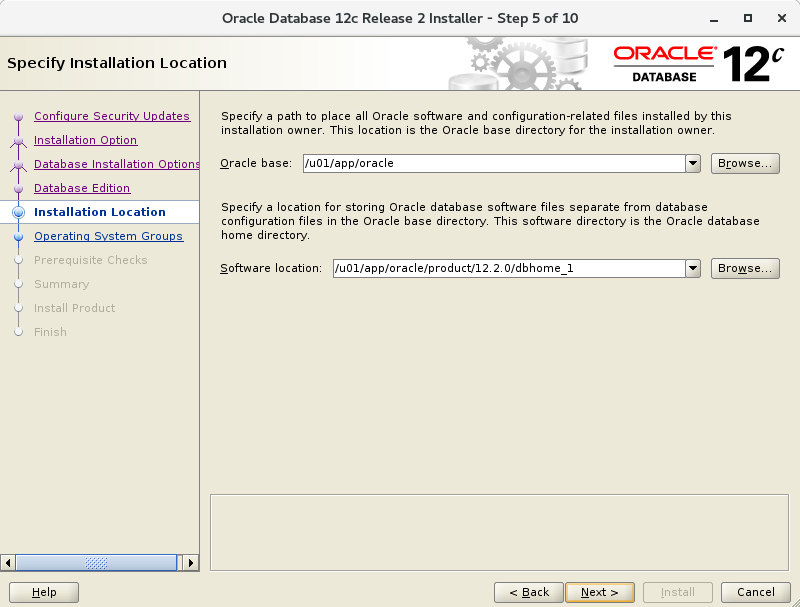 |
| [9] | Specify the base directory and files for Oracle. On this example, keep default and proceed to next. |
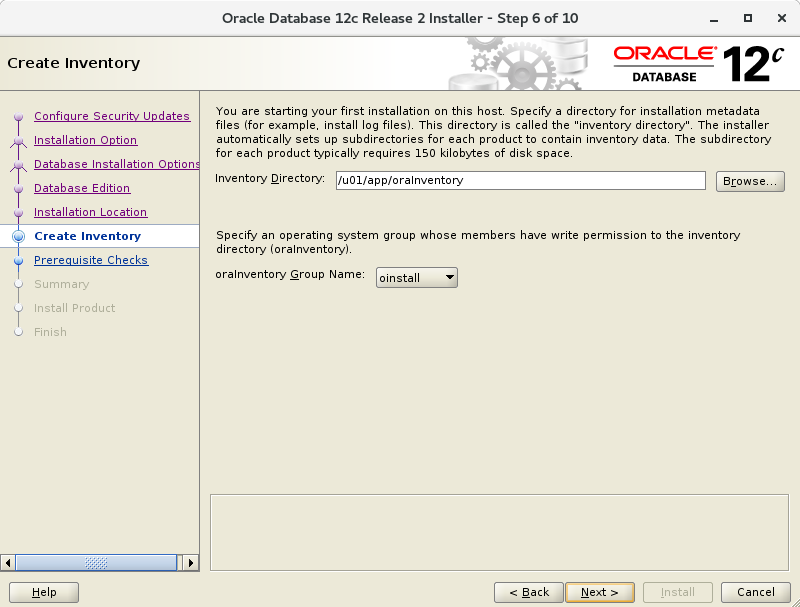 |
| [10] | Specify the installed directory. On this example, keep default and proceed to next. |
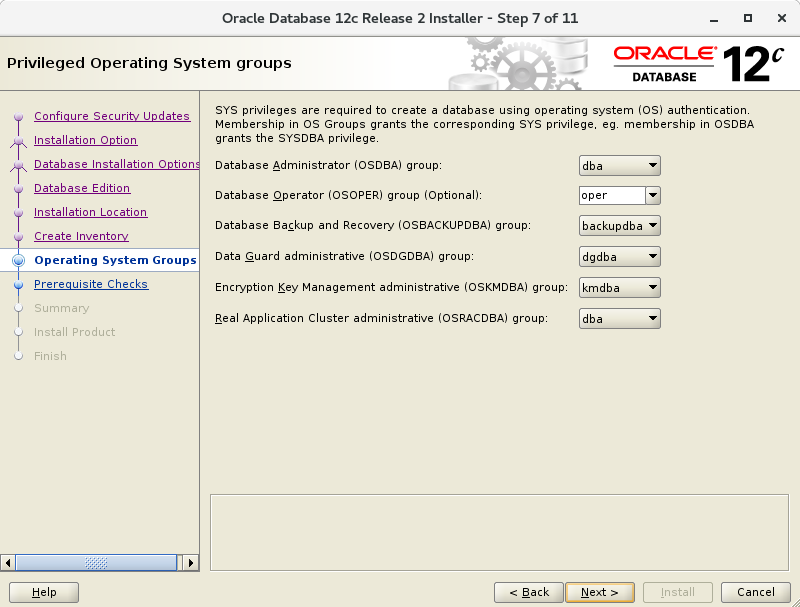 |
| [11] | Specify the priviledged group. On this example, keep default and proceed to next. |
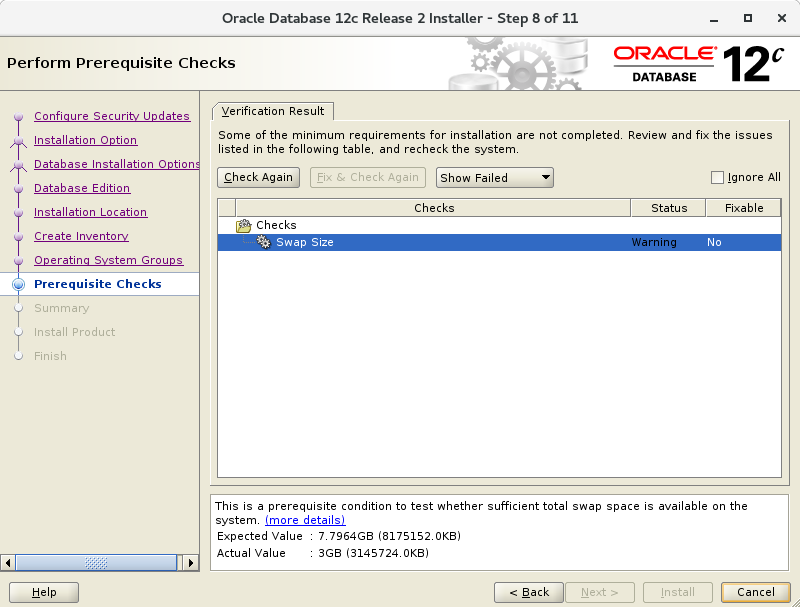 |
| [12] | Pre-requirements are checked. If some settings are not configured for recomendations, notification is displayed like follows.Confirm them again. |
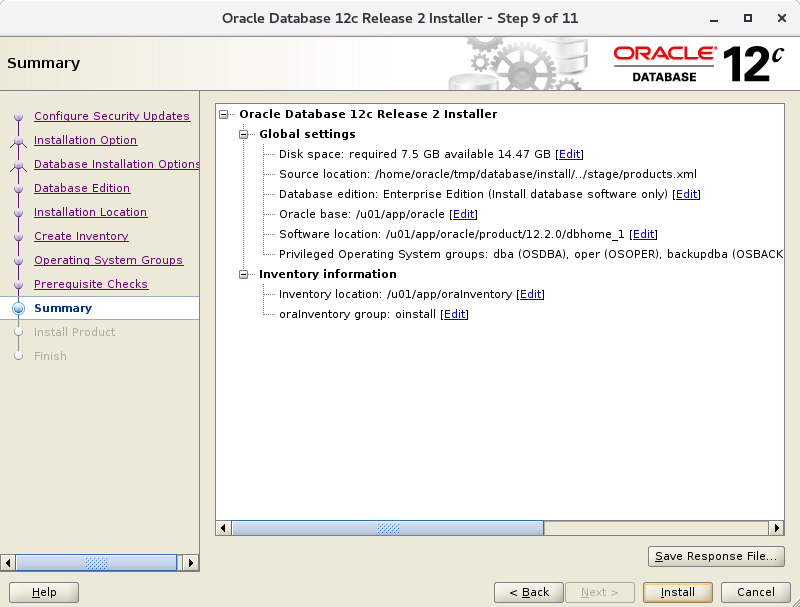 |
| [13] | The summary is shown for configuration. Click "Install" if it's OK all. |
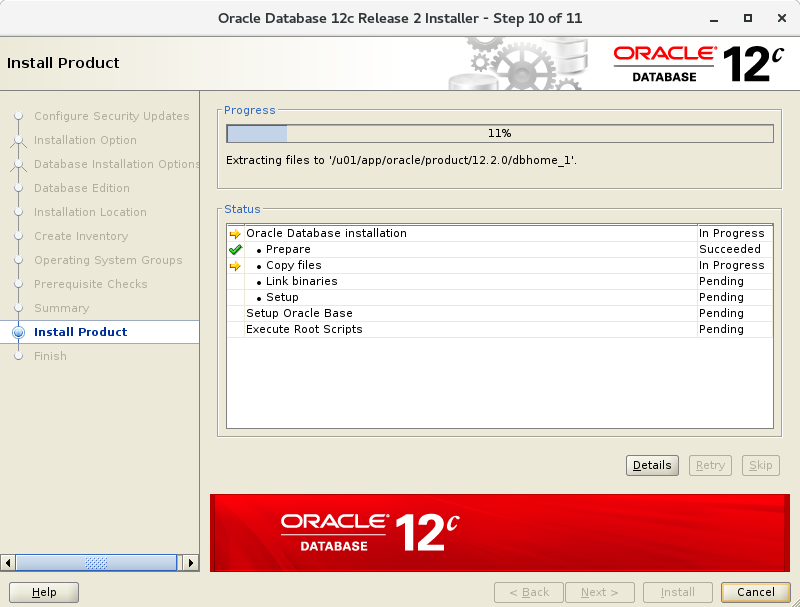 |
| [14] | Installation starts. |
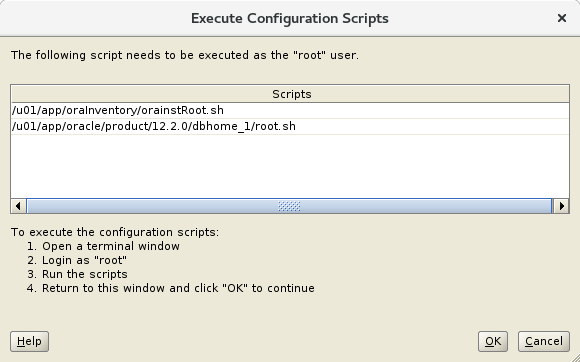 |
| [15] | Following screen is shown, then open a terminal and execute follwong commands with the root user. |
 |
| [root@dlp ~]# /u01/app/oraInventory/orainstRoot.sh Changing permissions of /u01/app/oraInventory. Adding read,write permissions for group. Removing read,write,execute permissions for world. Changing groupname of /u01/app/oraInventory to oinstall. The execution of the script is complete. [root@dlp ~]# [root@dlp ~]# /u01/app/oracle/product/12.1.0/dbhome_1/root.sh Performing root user operation. The following environment variables are set as: ORACLE_OWNER= oracle ORACLE_HOME= /u01/app/oracle/product/12.1.0/dbhome_1 Enter the full pathname of the local bin directory: [/usr/local/bin]: # Enter Copying dbhome to /usr/local/bin ... Copying oraenv to /usr/local/bin ... Copying coraenv to /usr/local/bin ... Creating /etc/oratab file... Entries will be added to the /etc/oratab file as needed by Database Configuration Assistant when a database is created Finished running generic part of root script. Now product-specific root actions will be performed. |
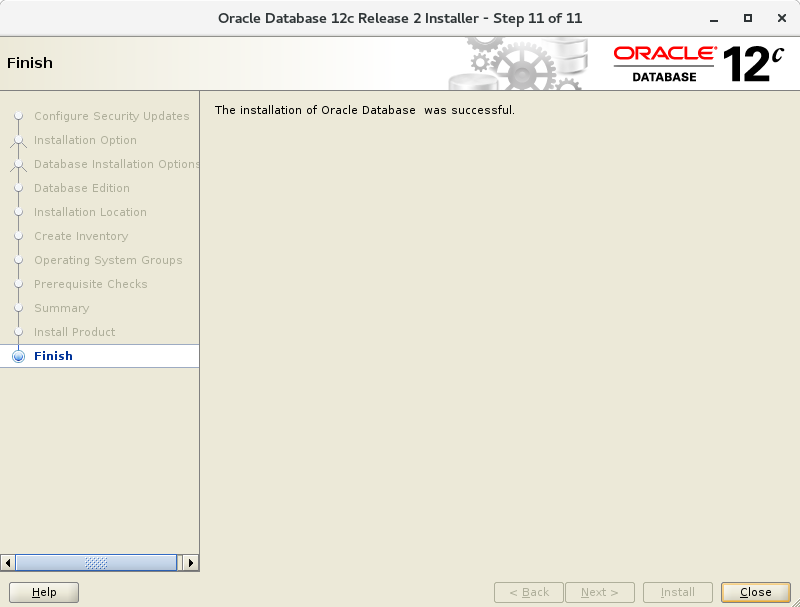
| [16] | Installation completed. Click "Close" button. |
 |
| [17] | Set Environment variables for Oracle user. |
vi ~/.bash_profile
# add to the end
export ORACLE_HOME=/u01/app/oracle/product/12.1.0/dbhome_1
export PATH=$PATH:$ORACLE_HOME/bin
[oracle@dlp ~]$
source ~/.bash_profile
[oracle@dlp ~]$
rm -rf tmp
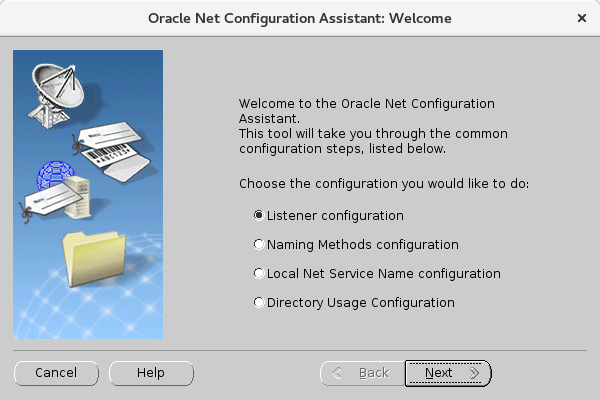
| 创建监听Create Oracle Net Listener that is the network service on Oracle. | |
| [1] | Login with the oracle admin user and input a command "netca" like follows. |
| [oracle@dlp ~]$ netca |
| [2] | Check a box "Listener Configuration" and go next. |
 |
| [3] | Go next. |
 |
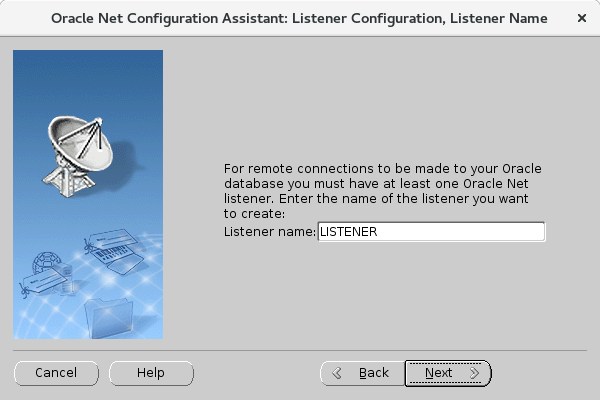
| [4] | Set Listner's name. Input any one you like. |
 |
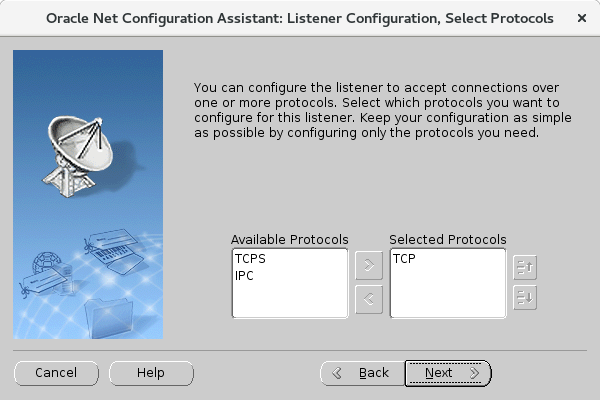
| [5] | This example goes next with keeping default "TCP". |
 |
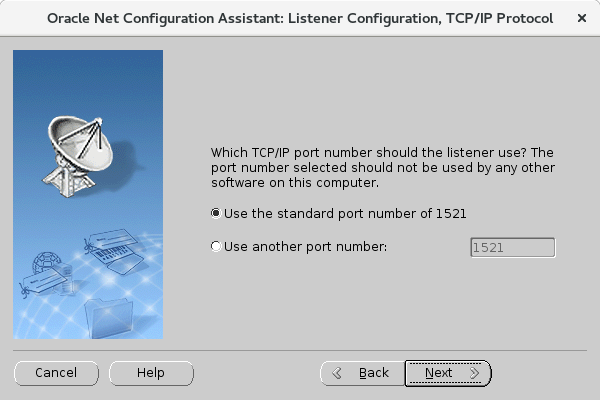
| [6] | Set a port. This example goes next with keeping default. |
 |
| [7] | If you'd like to create more Listeners, Answer "Yes". This example selects "No". |
 |
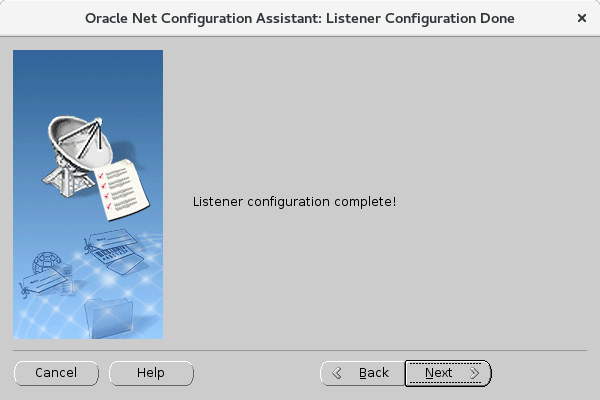
| [8] | Configuration completed. |
 |
| [9] | After creating Listener, tnslsnr listens on the port you configured like follows. |
ss -napt
State      Recv-Q Send-Q          Local Address:Port       Peer Address:Port
LISTEN     0      128                         *:22                    *:*
LISTEN     0      128                 127.0.0.1:631                   *:*
LISTEN     0      100                 127.0.0.1:25                    *:*
ESTAB      0      52                  10.0.0.30:22             10.0.0.5:50113
LISTEN     0      128                        :::1521                 :::*      users:(("tnslsnr",3988,9))
LISTEN     0      128                        :::22                   :::*
LISTEN     0      128                       ::1:631                  :::*
LISTEN     0      100                       ::1:25                   :::*
[oracle@dlp ~]$
tnsping localhost
TNS Ping Utility for Linux: Version 12.1.0.2.0 - Production on 04-JUL-2015 01:03:07

Copyright (c) 1997, 2014, Oracle.  All rights reserved.

Used parameter files:

Used HOSTNAME adapter to resolve the alias
Attempting to contact (DESCRIPTION=(CONNECT_DATA=(SERVICE_NAME=))(ADDRESS=(PROTOCOL=TCP)(HOST=127.0.0.1)
(PORT=1521)))
OK (0 msec)
| 创建数据库 Create a Database. | |
| [1] | Login with the oracle admin user and input a command "dbca" like follows. |
| [oracle@dlp ~]$ dbc |
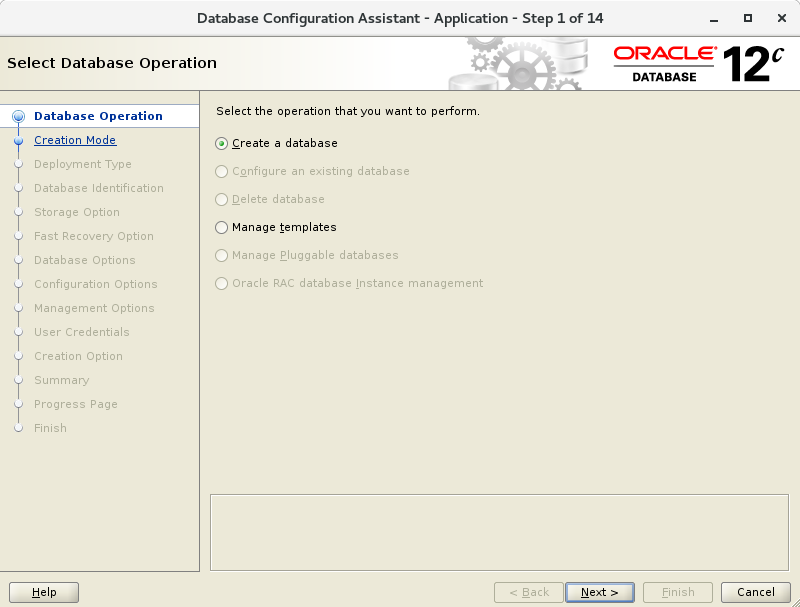
| [2] | Select "Create Database" and go next. |
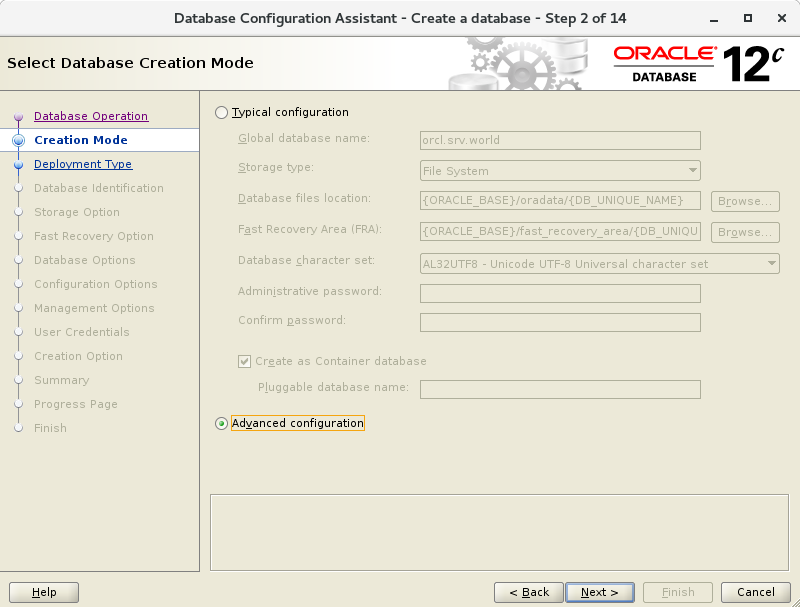 |
| [3] | On this example, select "Advanced Mode" and go next. |
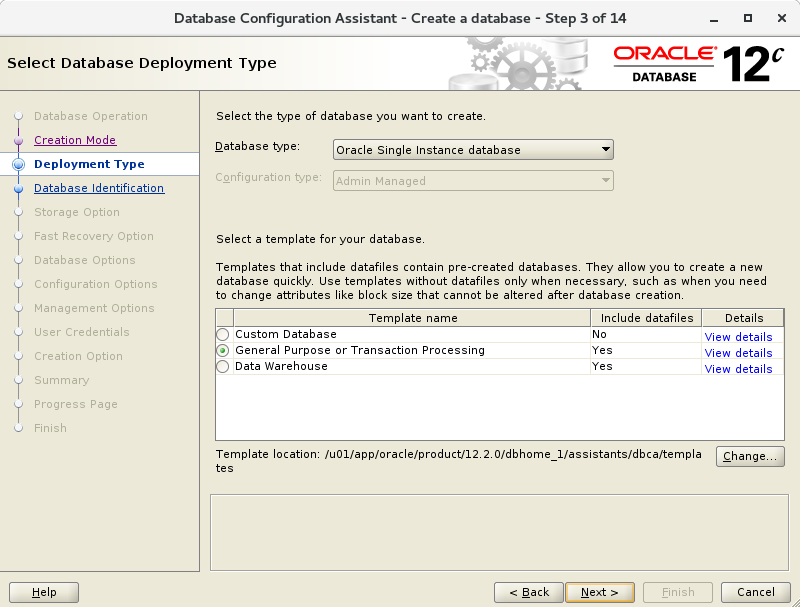 |
| [4] | This example selects "General Purpose ***" and go next. |
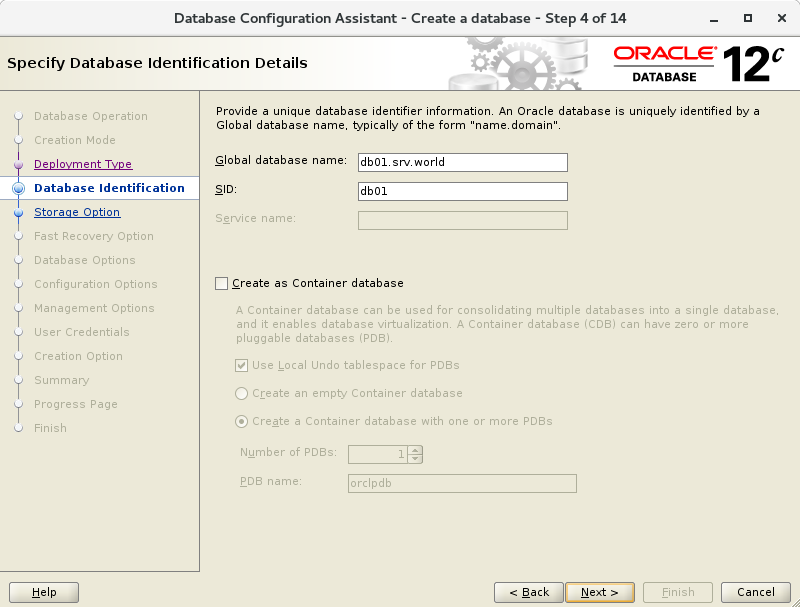 |
| [5] | Set Grobal Database name and SID like follows. Input any one you like. |
 |
| [6] | This example goes next with keeping default. |
 |
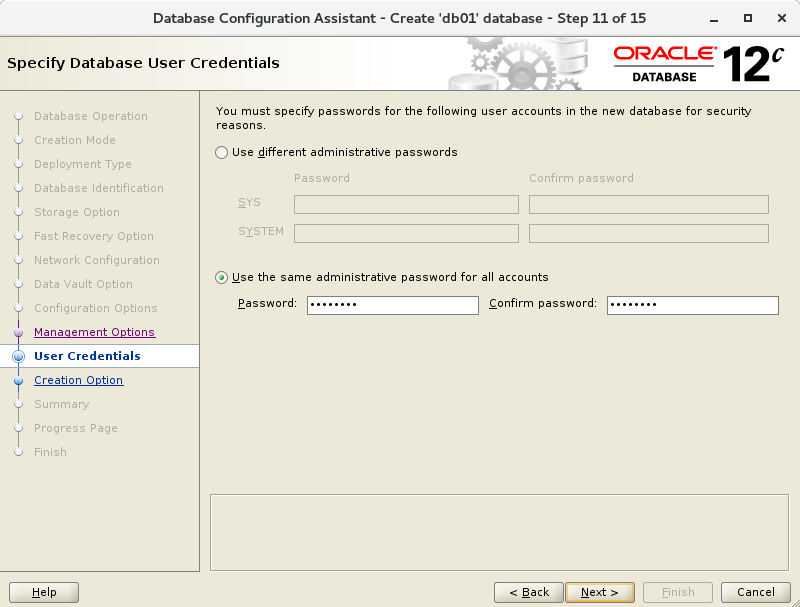
| [7] | Set passwords. Please set a password for a user for security. |
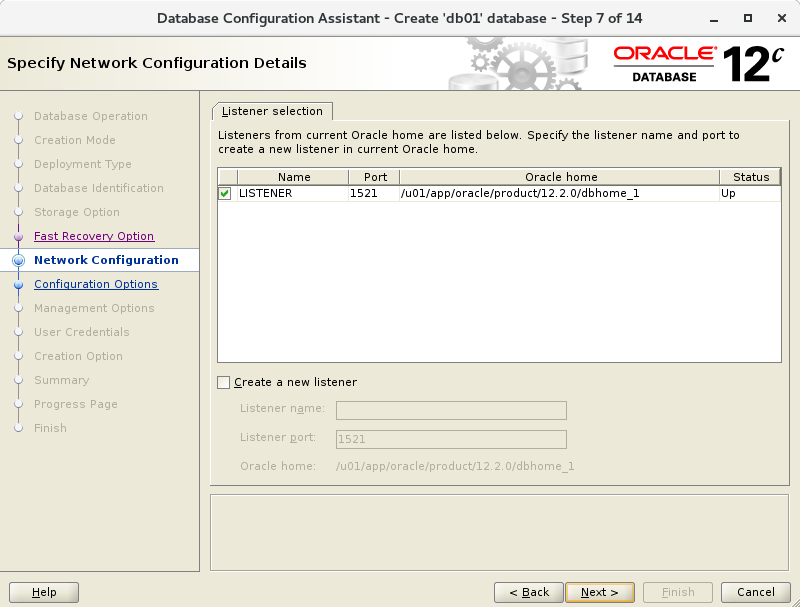 |
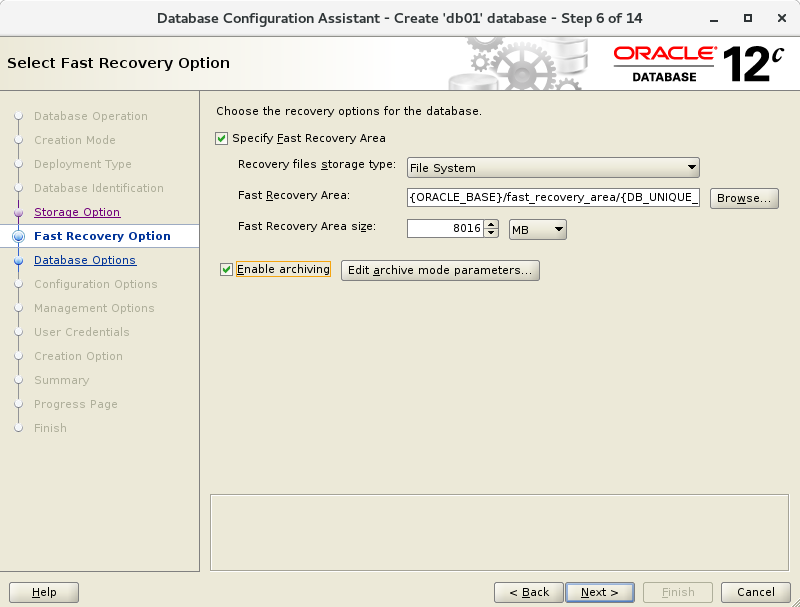
| [8] | Configure Listener. On this example, keep default and go next. |
 |
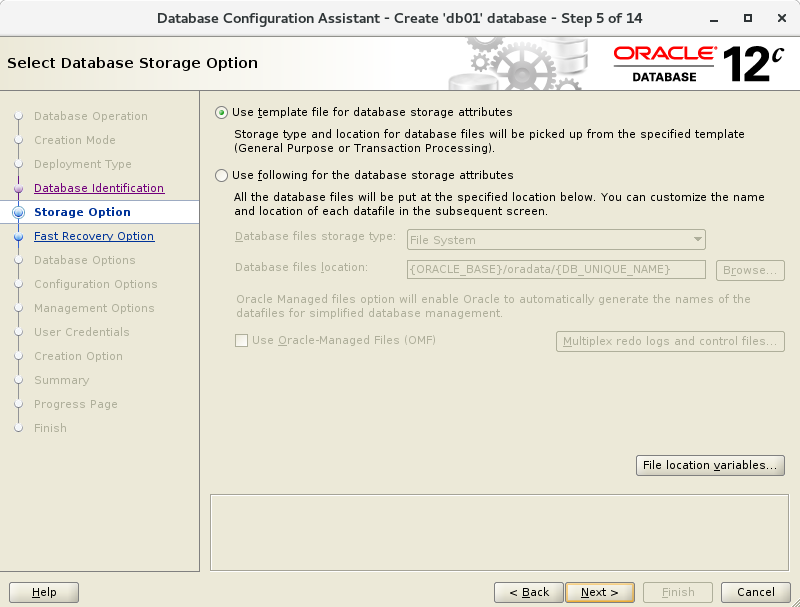
| [9] | Configure Storage settings. On this example, keep default and go next. |
 |
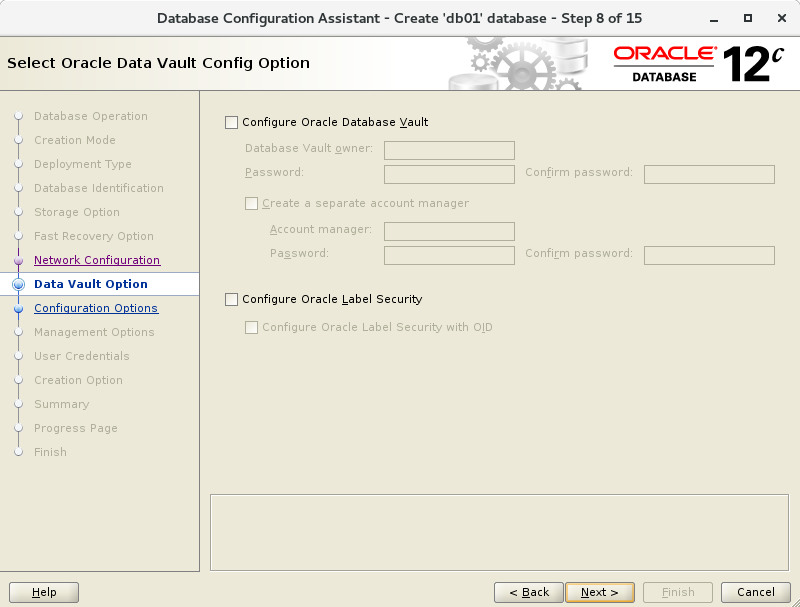
| [10] | Configure sample schema and scripts. If you'd like to add them, Set them. |
 |
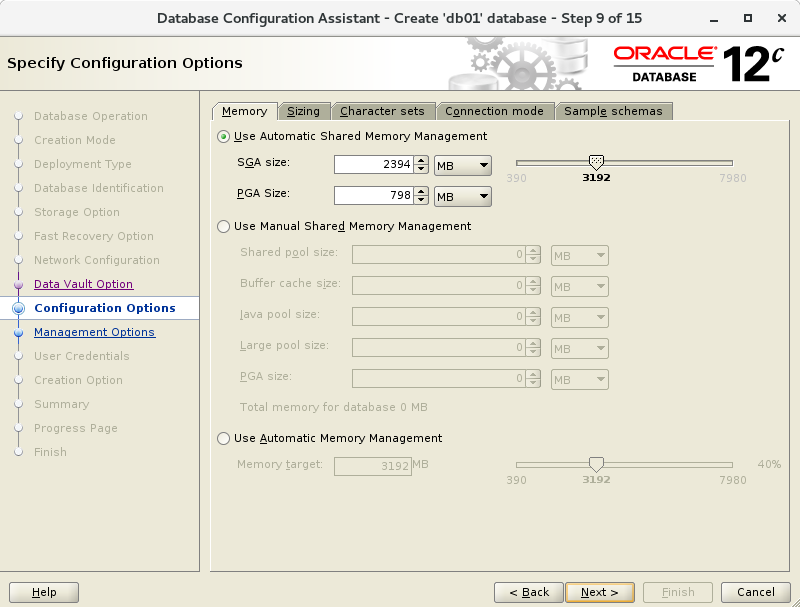
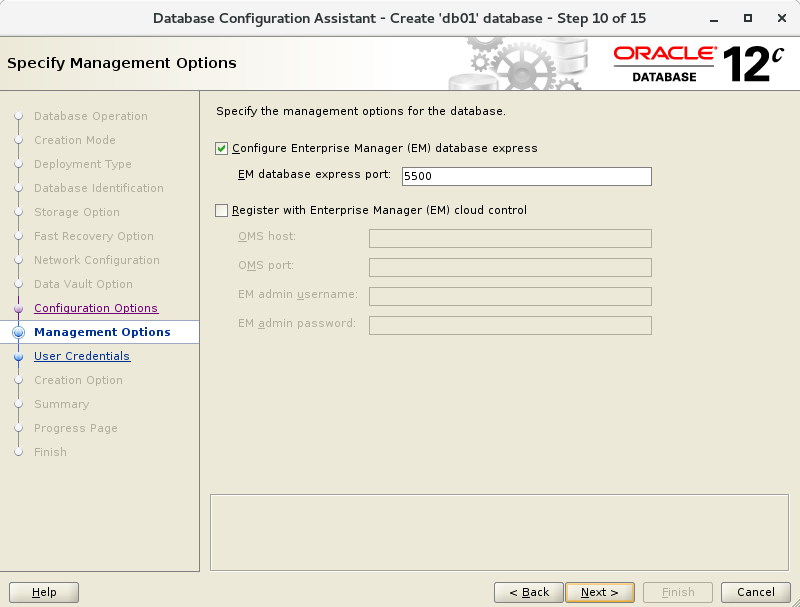
| [11] | Configure memory settings. After setting, go to next tab. |
 |
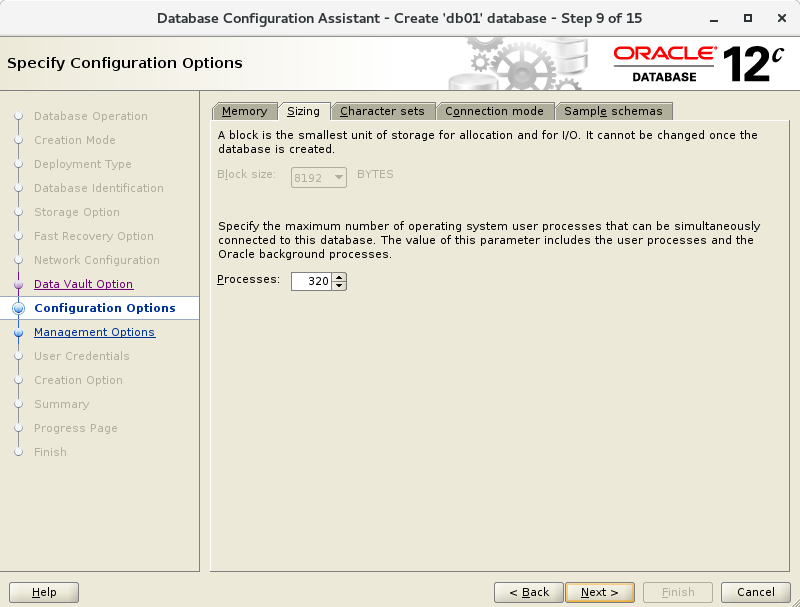
| [12] | Specify max processes. |
 |
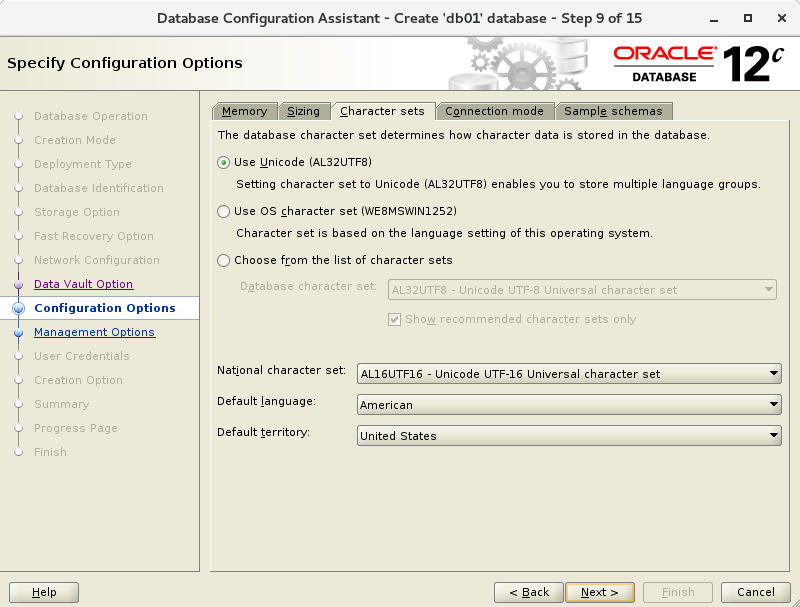
| [13] | Set Character setting. |
 |
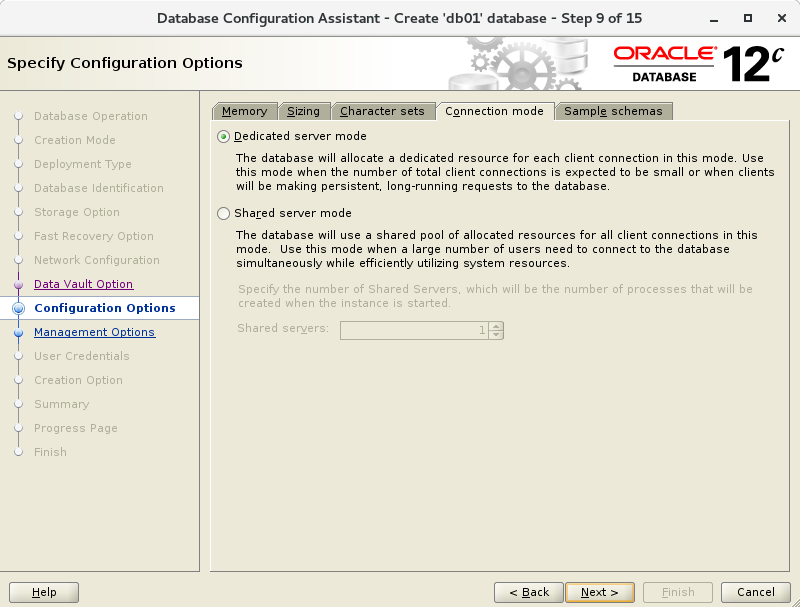
| [14] | Select a connection mode. If your server does not have many clients, Select Dedicated server mode. If your server has many clients, Select Shared server mode. |
 |
| [15] | Go next. |
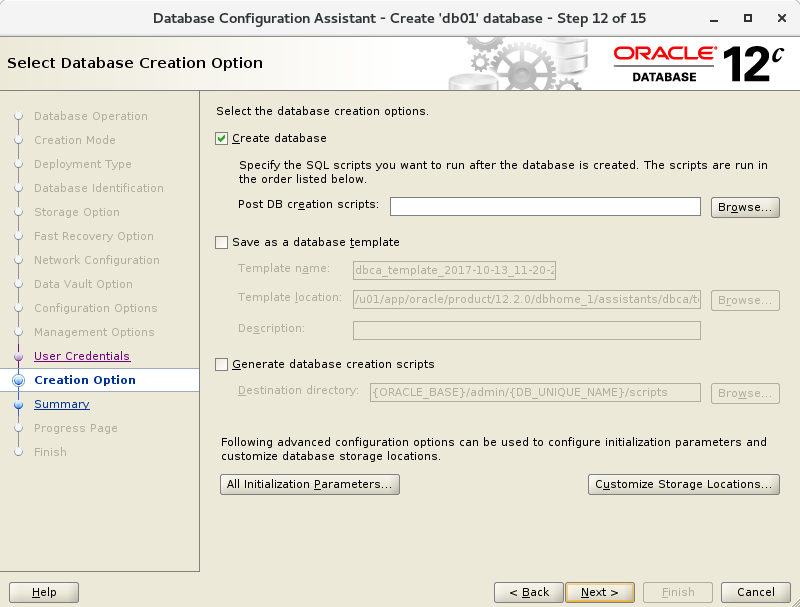 |
| [16] | Configuration completed. Click "Finish" button to finish. |
 |
| [17] | Database creation starts. |
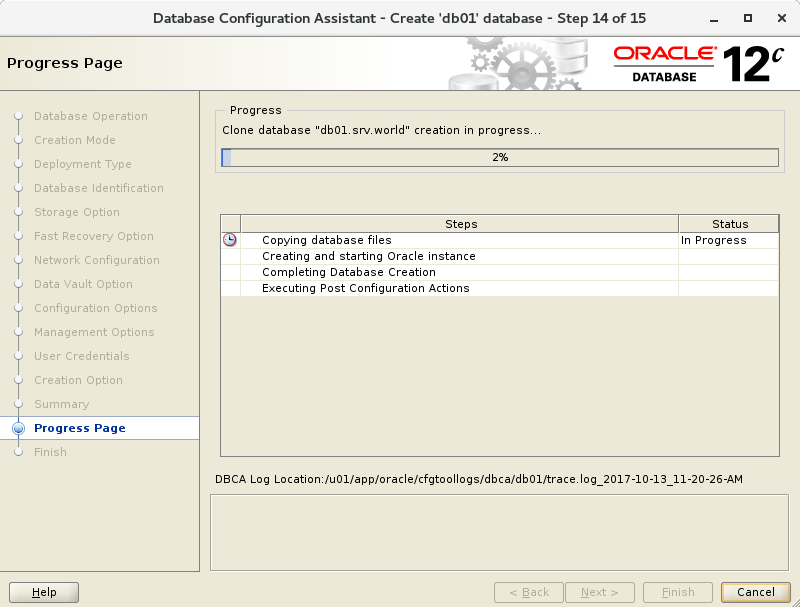 |
| [18] | After completing to create a database, Click "Close" to finish. |
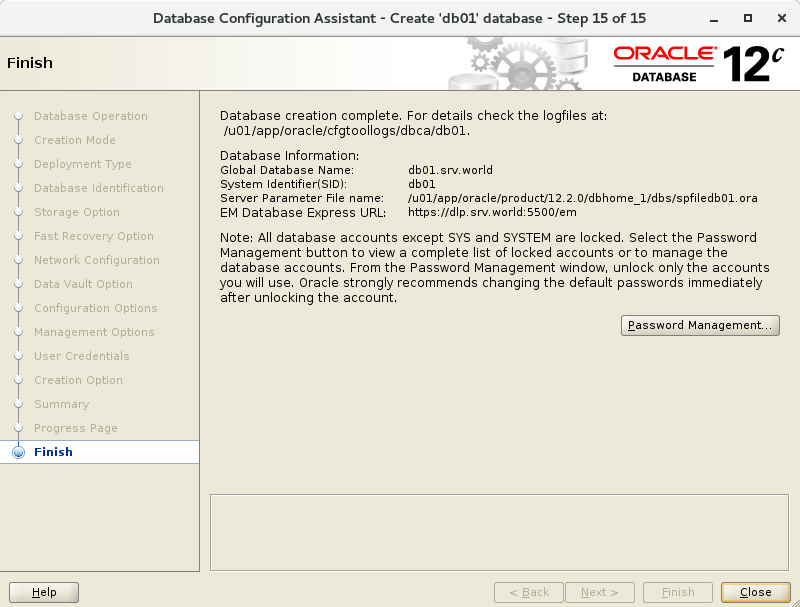 |
| [19] | Add Database SID to the environment variables. |
vi /etc/oratab
# change like follows
dlp:/u01/app/oracle/product/12.1.0/dbhome_1:
Y
[oracle@dlp ~]$
vi ~/.bash_profile
# add to the end
export ORACLE_SID=dlp
| To access to the Enterprise Manager, it's possible to manage Database on Web GUI. | |
| [1] | After creating database, database service is running and it's possible to access to Enterprise Manager, too. Access to the URL which was displayed when database creation finished, then Login form is shown and it's possible to login with a database user. |
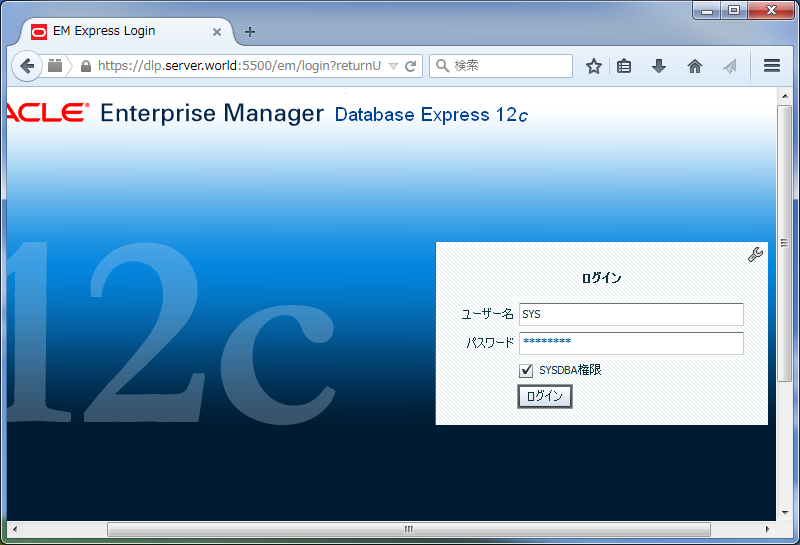 |
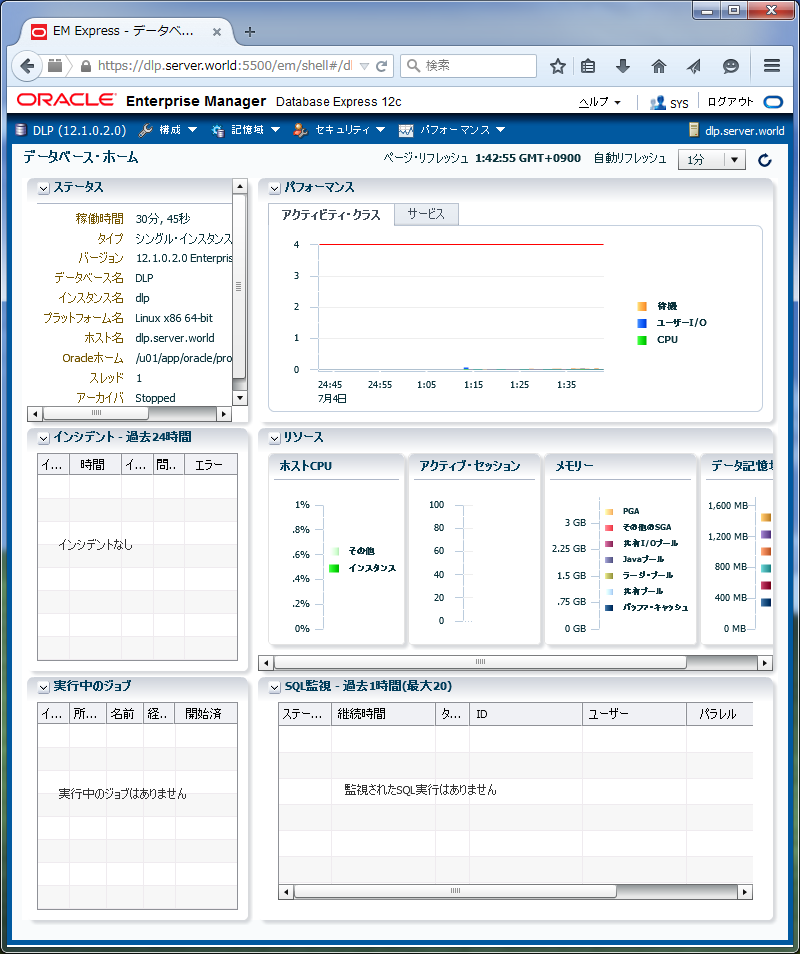
| [2] | Just logined. It's possible to manage Database on here. |
| Create Systemd file for Oracle Database services. | |
| [1] | Login as root user and create Systemd files. |
| [root@dlp ~]# vi /etc/sysconfig/dlp.oracledb # create new : define environment variables ORACLE_BASE=/u01/app/oracle ORACLE_HOME=/u01/app/oracle/product/12.1.0/dbhome_1 ORACLE_SID=dlp # configure listener service [root@dlp ~]# vi /usr/lib/systemd/system/dlp@lsnrctl.service # this is an example, modify for free [Unit] Description=oracle net listener After=network.target [Service] Type=forking EnvironmentFile=/etc/sysconfig/dlp.oracledb ExecStart=/u01/app/oracle/product/12.1.0/dbhome_1/bin/lsnrctl start ExecStop=/u01/app/oracle/product/12.1.0/dbhome_1/bin/lsnrctl stop User=oracle [Install] WantedBy=multi-user.target # configure database service [root@dlp ~]# vi /usr/lib/systemd/system/dlp@oracledb.service # this is an example, modify for free [Unit] Description=oracle net listener After=network.target lsnrctl.service [Service] Type=forking EnvironmentFile=/etc/sysconfig/dlp.oracledb ExecStart=/u01/app/oracle/product/12.1.0/dbhome_1/bin/dbstart /u01/app/oracle/product/12.1.0/dbhome_1 ExecStop=/u01/app/oracle/product/12.1.0/dbhome_1/bin/dbshut /u01/app/oracle/product/12.1.0/dbhome_1 User=oracle [Install] WantedBy=multi-user.target [root@dlp ~]# systemctl daemon-reload [root@dlp ~]# systemctl enable dlp@lsnrctl dlp@oracledb |

相关文章推荐
- oracle查询语句大全
- spark读取oracle的
- oracle case when 用法
- oracle 常用知识点
- PL/SQL语句块基本语法(ORACLE存储过程,函数,包,游标)
- oracle中的rank() over,dense_rank(),row_number()的区别
- Oracle逐行提交、批量提交及极限提速方法
- Oracle数据库和SQLServer数据库中创建DB-Link语法
- oracle 响应时间分析(二)
- oracle rownum原理和使用
- Oracle 11g笔记——归档
- VirtualBox 5.0.20发布下载!
- oracle 响应时间分析 (一)
- Oracle数据库名字不能超过8位,但实例名可以超过8位
- CentOS下oracle11gR2静默安装
- 在Linux下卸载Oracle 11g
- oracle写一本日历
- oracle 数据按月份分类,并求其中某项值的总和
- ORACLE、MYSQL的JDBC配置
- weblogic.jdbc.wrapper.Blob_oracle_sql_BLOB cannot be cast to oracle.sql.BLOB 不改程序解决方法