Nginx+Tomcat实现动静分离
2016-04-27 00:00
549 查看
一、什么是动静分离
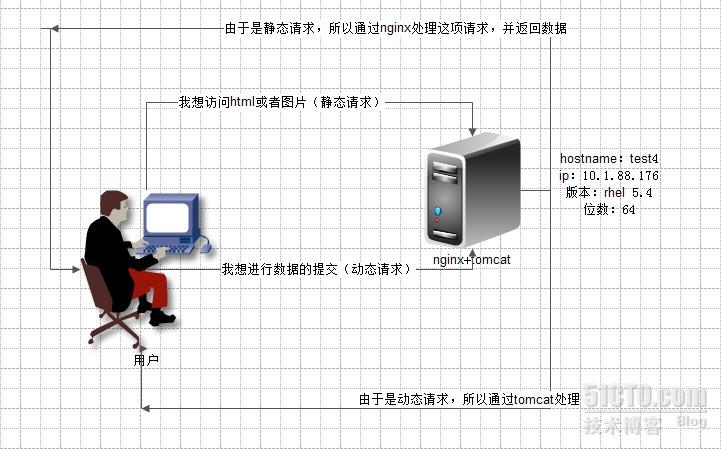
本文的动静分离主要是通过nginx+tomcat来实现,其中nginx处理图片、html等静态的文件,tomcat处理jsp、do等动态文件。
二、结构图

三、安装
1、安装、配置nginx
下载nginx与pcre(如果需要使用正则,需要安装pcre)
wget http://blog.s135.com/soft/linux/nginx_php/nginx/nginx-0.8.46.tar.gz
wget http://blog.s135.com/soft/linux/nginx_php/pcre/pcre-8.10.tar.gz 安装pcre
安装nginx
nginx.conf配置
2、安装、配置tomcat
先安装jdk
在/etc/profile里设置环境变量
然后在source /etc/profile使这个改变生效
安装tomcat
启动tomcat
之后打开http://localhost:8080就能看到tomcat的默认界面了
下面我们来修改tomcat的首页
我在$tomcat/webapps/下建了个html目录作为我网站的默认目录,在html中有一个index.html文件,该文件要作为我网站的默认主页。
首先,修改$tomcat/conf/server.xml文件。
在server.xml文件中,有一段如下:
在<host></host>标签之间添加上:
path是说明虚拟目录的名字,如果你要只输入ip地址就显示主页,则该键值留为空;
docBase是虚拟目录的路径,它默认的是$tomcat/webapps/ROOT目录,现在我在webapps目录下建了一个html目录,让该目录作为我的默认目录。
debug和reloadable一般都分别设置成0和true。
然后,修改$tomcat/conf/web.xml文件。
在web.xml文件中,有一段如下:
在<welcome-file-list>与<welcome-file>index.html</welcome-file>之间添加上:
修改完成之后,重启tomcat即可看到index.html里的内容
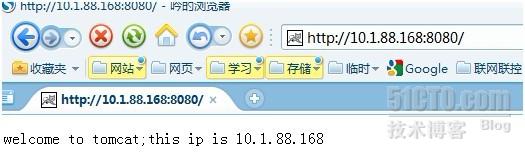
tomcat服务器的ip为10.1.88.168
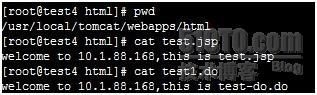
在test4建立test.jsp、test1.do文本,内容如下

tomcat的首页内容

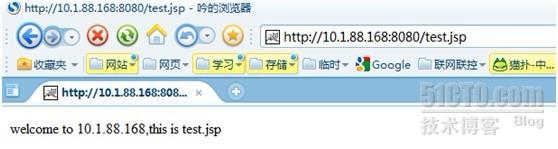
test.jsp内容
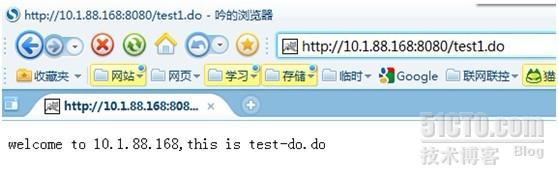
test1.do内容
nginx的首页内容

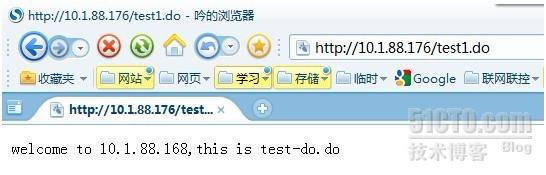
在nginx里查看动态请求
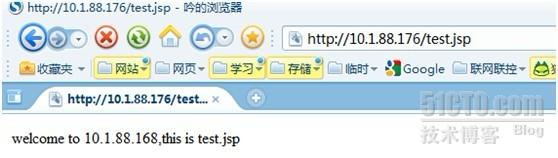
nginx处理test1.do

本文的动静分离主要是通过nginx+tomcat来实现,其中nginx处理图片、html等静态的文件,tomcat处理jsp、do等动态文件。
二、结构图
三、安装
1、安装、配置nginx
下载nginx与pcre(如果需要使用正则,需要安装pcre)
wget http://blog.s135.com/soft/linux/nginx_php/nginx/nginx-0.8.46.tar.gz
wget http://blog.s135.com/soft/linux/nginx_php/pcre/pcre-8.10.tar.gz 安装pcre
tar zxvf pcre-8.10.tar.gz cd pcre-8.10/ ./configure make make install cd ..
安装nginx
tar zxvf nginx-0.8.46.tar.gz cd nginx-0.8.46/ ./configure --user=www --group=www --prefix=/usr/local/nginx --with-http_stub_status_module --with-http_ssl_module make make install
nginx.conf配置
user www www; worker_processes 8; error_log /usr/local/nginx/logs/nginx_error.log crit; pid /usr/local/nginx/nginx.pid; worker_rlimit_nofile 65535; events { use epoll; worker_connections 65535; } http { include mime.types; default_type application/octet-stream; #charset gb2312; server_names_hash_bucket_size 128; client_header_buffer_size 32k; large_client_header_buffers 4 32k; client_max_body_size 8m; sendfile on; tcp_nopush on; keepalive_timeout 60; tcp_nodelay on; fastcgi_connect_timeout 300; fastcgi_send_timeout 300; fastcgi_read_timeout 300; fastcgi_buffer_size 64k; fastcgi_buffers 4 64k; fastcgi_busy_buffers_size 128k; fastcgi_temp_file_write_size 128k; gzip on; gzip_min_length 1k; gzip_buffers 4 16k; gzip_http_version 1.0; gzip_comp_level 2; gzip_types text/plain application/x-javascript text/css application/xml; gzip_vary on; #limit_zone crawler $binary_remote_addr 10m; server { listen 80; server_name test1.dl.com; ####test1.dl.com的ip为10.1.88.176 index index.html index.htm index.php; root /usr/local/nginx/html; #limit_conn crawler 20; location ~ .*\.(php|php5)?$ { #fastcgi_pass unix:/tmp/php-cgi.sock; fastcgi_pass 127.0.0.1:9000; fastcgi_index index.php; include fastcgi.conf; } location ~ .*\.(gif|jpg|jpeg|png|bmp|swf)$ ###所以的静态文件人gif、jpg等都在本地打开,存放的目录为/usr/local/nginx/html,保存时间为30天 { root /usr/local/nginx/html; expires 30d; } location ~ (\.jsp)|(\.do)$ ###所以jsp、do的动态请求都交给后面的tomcat处理 { proxy_pass http://10.1.88.168:8080; proxy_redirect off; proxy_set_header HOST $host; proxy_set_header X-Real-IP $remote_addr; proxy_set_header X-Forwarded-For $proxy_add_x_forwarded_for; client_max_body_size 10m; client_body_buffer_size 128k; proxy_connect_timeout 90; proxy_send_timeout 90; proxy_read_timeout 90; proxy_buffer_size 4k; proxy_buffers 4 32k; proxy_busy_buffers_size 64k; proxy_temp_file_write_size 64k; } location ~ .*\.(js|css)?$ { expires 1h; } log_format access '$remote_addr - $remote_user [$time_local] "$request" ' '$status $body_bytes_sent "$http_referer" ' '"$http_user_agent" $http_x_forwarded_for'; access_log /usr/local/nginx/logs/access.log access; } server { listen 80; server_name status.test1.dl.com; location / { stub_status on; access_log off; } } }2、安装、配置tomcat
先安装jdk
wget http://download.oracle.com/otn-pub/java/jdk/7u3-b04/jdk-7u3-linux-x64.rpm chmod 755 jdk-7u3-linux-x64.rpm rpm -ivh jdk-7u3-linux-x64.rpm
在/etc/profile里设置环境变量
JAVA_HOME=/usr/java/jdk1.7.0 CLASSPATH=$JAVA_HOME/lib:$JAVA_HOME/jre/lib PATH=$PATH:$JAVA_HOME/bin:$JAVA_HOME/jre/bin export PATH CLASSPATH JAVA_HOME
然后在source /etc/profile使这个改变生效
安装tomcat
wget http://mirror.bjtu.edu.cn/apache/tomcat/tomcat-7/v7.0.25/bin/apache-tomcat-7.0.25.tar.gz tar zxvf apache-tomcat-7.0.25.tar.gz cp -R apache-tomcat-7.0.25 /usr/local/tomcat
启动tomcat
/usr/local/tomcat/bin/startup.sh
之后打开http://localhost:8080就能看到tomcat的默认界面了
下面我们来修改tomcat的首页
我在$tomcat/webapps/下建了个html目录作为我网站的默认目录,在html中有一个index.html文件,该文件要作为我网站的默认主页。
首先,修改$tomcat/conf/server.xml文件。
在server.xml文件中,有一段如下:
…… <engine name="Catalina" defaultHost="localhost"> <host name="localhost" appBase="webapps" unpackWARs="true" autoDeploy="true" xmlValidation="false" xmlNamespaceAware="false"> …… <host> </engine> ……
在<host></host>标签之间添加上:
<Context path="" docBase="html" debug="0" reloadable="true" />
path是说明虚拟目录的名字,如果你要只输入ip地址就显示主页,则该键值留为空;
docBase是虚拟目录的路径,它默认的是$tomcat/webapps/ROOT目录,现在我在webapps目录下建了一个html目录,让该目录作为我的默认目录。
debug和reloadable一般都分别设置成0和true。
然后,修改$tomcat/conf/web.xml文件。
在web.xml文件中,有一段如下:
<welcome-file-list> <welcome-file>index.html</welcome-file> <welcome-file>index.htm</welcome-file> <welcome-file>index.jsp</welcome-file> </welcome-file-list>
在<welcome-file-list>与<welcome-file>index.html</welcome-file>之间添加上:
<welcome-file>html</welcome-file>
修改完成之后,重启tomcat即可看到index.html里的内容
tomcat服务器的ip为10.1.88.168
在test4建立test.jsp、test1.do文本,内容如下
tomcat的首页内容
test.jsp内容

test1.do内容

nginx的首页内容

在nginx里查看动态请求

nginx处理test1.do

相关文章推荐
- nginx整合tomcat
- Jetty和Tomcat的选择:按场景而定
- Ubuntu Tomcat自动启动+内存溢出
- 更改myeclipse工具的内存和tomcat的内存
- MyEclipse和tomcat结合编写jsp对于中文乱码的解决方法
- 利用ant将Web项目部署至远程Tomcat
- linux 启动 终止 tomcat,查看进程
- 使用tomcatPlugin配合JRebel解决maven项目依赖war的打包和热部署的问题
- 在windows中通过jconsole监视远程linux服务器中JVM的运行状态(比如:监视Tomcat的各项运行指标)
- Java设计模式(七) COR(责任链)模式及Tomcat引申
- eclipse maven tomcat7 热部署
- [web service]axis2+eclipse+tomcat开发web service
- tomcat 启动not found for the web module
- Tomcat源码分析--启动过程
- 监控zabbix使用jmx监控tomcat
- 监控zabbix使用jmx监控tomcat
- Windows下Nginx+Tomcat整合的安装与配置
- ubuntu下 apache2和tomcat6 的整合
- Tomcat中的Session小结
- [工作点滴]tomcat 启动不成功