IOS原声二维码条形码扫描实现
2016-04-17 21:28
609 查看
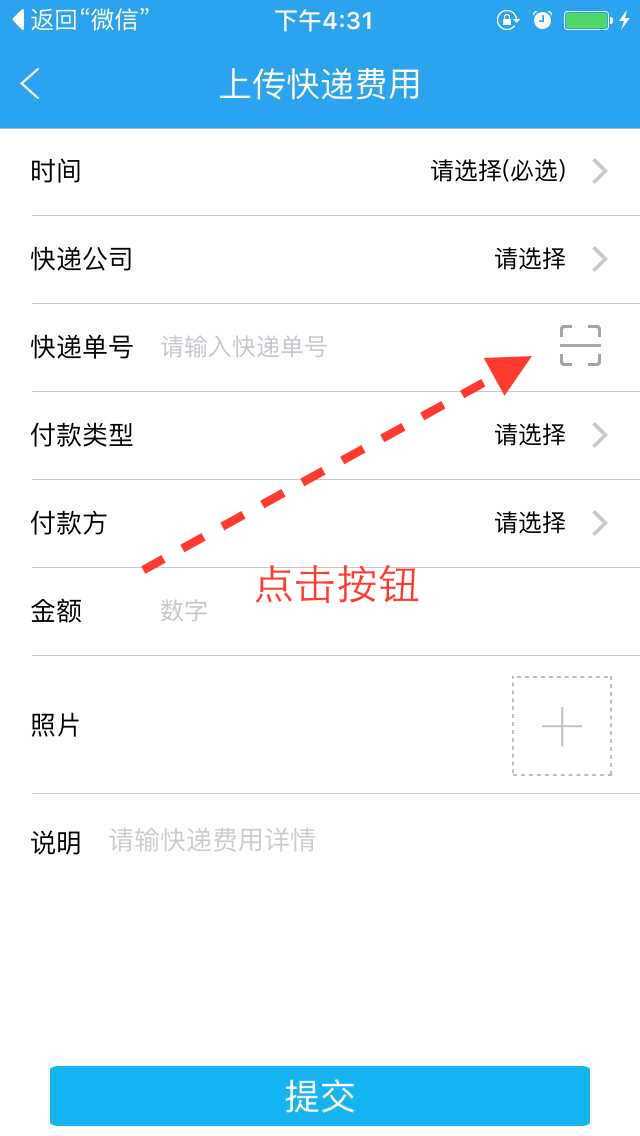
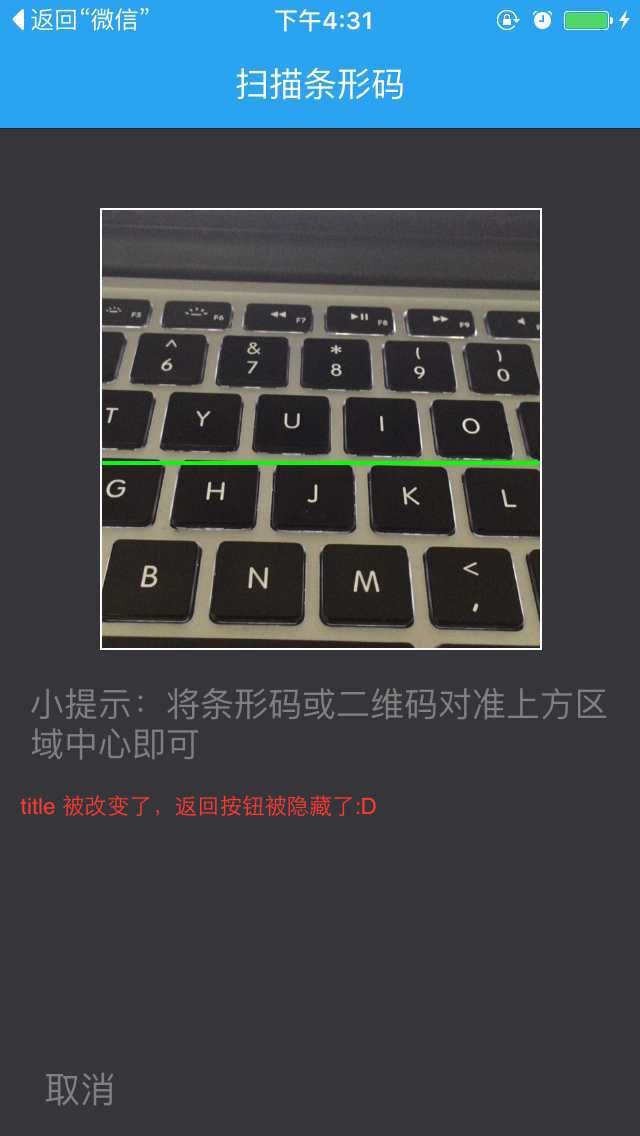
本文讲述如何用系统自带的东东实现二维码扫描的功能:点击当前页面的某个按钮,创建扫描VIEW。细心的小伙伴可以发现 title被改变了,返回按钮被隐藏了。这个代码自己写就行了,与本文关系不大。。。绿色的线会上下跑,不要担心:D
实现效果如下:
1.在工程中添加框架AVFoundation.framework
2.声明代理:AVCaptureMetadataOutputObjectsDelegate 。 define 几个东东用来画框、画线:
3.声明以下属性:
4.在某个方法中(我是点击扫描按钮)创建扫描界面,开始扫描:
5.实现定时器、还有基准线的滚动方法
6.扫描成功后,想干嘛干嘛,就在这个代理方法里面实现就行了
7.如果用户不想扫描了,点击取消按钮:
实现效果如下:
1.在工程中添加框架AVFoundation.framework
2.声明代理:AVCaptureMetadataOutputObjectsDelegate 。 define 几个东东用来画框、画线:
#define SCANVIEW_EdgeTop 40.0
#define SCANVIEW_EdgeLeft 50.0
#define TINTCOLOR_ALPHA 0.2 //浅色透明度
#define DARKCOLOR_ALPHA 0.5 //深色透明度
#define VIEW_WIDTH [UIScreen mainScreen].bounds.size.width
#define VIEW_HEIGHT [UIScreen mainScreen].bounds.size.height
3.声明以下属性:
AVCaptureSession * session;//输入输出的中间桥梁
UIView *AVCapView;//此 view 用来放置扫描框、取消按钮、说明 label
UIView *_QrCodeline;//上下移动绿色的线条
NSTimer *_timer;
4.在某个方法中(我是点击扫描按钮)创建扫描界面,开始扫描:
//创建一个 view 来放置扫描区域、说明 label、取消按钮
UIView *tempView = [[UIView alloc]initWithFrame:CGRectMake(0, 0, 320, [UIScreen mainScreen].bounds.size.height )];
AVCapView = tempView;
AVCapView.backgroundColor = [UIColor colorWithRed:54.f/255 green:53.f/255 blue:58.f/255 alpha:1];

UIButton *cancelBtn = [[UIButton alloc]initWithFrame:CGRectMake(15, [UIScreen mainScreen].bounds.size.height - 100, 50, 25)];
UILabel *label = [[UILabel alloc]initWithFrame:CGRectMake(15, 268, 290, 60)];
label.numberOfLines = 0;
label.text = @"小提示:将条形码或二维码对准上方区域中心即可";
label.textColor = [UIColor grayColor];
[cancelBtn setTitle:@"取消" forState: UIControlStateNormal];
[cancelBtn setTitleColor:[UIColor grayColor] forState:UIControlStateNormal];
[cancelBtn addTarget:self action:@selector(touchAVCancelBtn) forControlEvents:UIControlEventTouchUpInside];
[AVCapView addSubview:label];
[AVCapView addSubview:cancelBtn];
[self.view addSubview:AVCapView];

//画上边框
UIView *topView = [[UIView alloc] initWithFrame:CGRectMake(SCANVIEW_EdgeLeft, SCANVIEW_EdgeTop, VIEW_WIDTH- 2 * SCANVIEW_EdgeLeft, 1)];
topView.backgroundColor = [UIColor whiteColor];
[AVCapView addSubview:topView];

//画左边框
UIView *leftView = [[UIView alloc] initWithFrame:CGRectMake(SCANVIEW_EdgeLeft, SCANVIEW_EdgeTop , 1,VIEW_WIDTH - 2 * SCANVIEW_EdgeLeft )];
leftView.backgroundColor = [UIColor whiteColor];
[AVCapView addSubview:leftView];

//画右边框
UIView *rightView = [[UIView alloc] initWithFrame:CGRectMake(SCANVIEW_EdgeLeft + VIEW_WIDTH- 2 * SCANVIEW_EdgeLeft, SCANVIEW_EdgeTop , 1,VIEW_WIDTH - 2 * SCANVIEW_EdgeLeft + 1)];
rightView.backgroundColor = [UIColor whiteColor];
[AVCapView addSubview:rightView];

//画下边框
UIView *downView = [[UIView alloc] initWithFrame:CGRectMake(SCANVIEW_EdgeLeft, SCANVIEW_EdgeTop + VIEW_WIDTH- 2 * SCANVIEW_EdgeLeft,VIEW_WIDTH - 2 * SCANVIEW_EdgeLeft ,1 )];
downView.backgroundColor = [UIColor whiteColor];
[AVCapView addSubview:downView];

//画中间的基准线
_QrCodeline = [[UIView alloc] initWithFrame:CGRectMake(SCANVIEW_EdgeLeft + 1, SCANVIEW_EdgeTop, VIEW_WIDTH- 2 * SCANVIEW_EdgeLeft - 1, 2)];
_QrCodeline.backgroundColor = [UIColor greenColor];
[AVCapView addSubview:_QrCodeline];

// 先让基准线运动一次,避免定时器的时差
[UIView animateWithDuration:1.2 animations:^{

_QrCodeline.frame = CGRectMake(SCANVIEW_EdgeLeft + 1, VIEW_WIDTH - 2 * SCANVIEW_EdgeLeft + SCANVIEW_EdgeTop , VIEW_WIDTH - 2 * SCANVIEW_EdgeLeft - 1, 2);

}];

[self performSelector:@selector(createTimer) withObject:nil afterDelay:0.4];

AVCaptureDevice * device = [AVCaptureDevice defaultDeviceWithMediaType:AVMediaTypeVideo];
//创建输入流
AVCaptureDeviceInput * input = [AVCaptureDeviceInput deviceInputWithDevice:device error:nil];
//创建输出流
AVCaptureMetadataOutput * output = [[AVCaptureMetadataOutput alloc]init];
//设置代理 在主线程里刷新
[output setMetadataObjectsDelegate:self queue:dispatch_get_main_queue()];

//初始化链接对象
session = [[AVCaptureSession alloc]init];
//高质量采集率
[session setSessionPreset:AVCaptureSessionPresetHigh];

[session addInput:input];
[session addOutput:output];
//设置扫码支持的编码格式(如下设置条形码和二维码兼容)
output.metadataObjectTypes=@[AVMetadataObjectTypeQRCode,AVMetadataObjectTypeEAN13Code, AVMetadataObjectTypeEAN8Code, AVMetadataObjectTypeCode128Code];

AVCaptureVideoPreviewLayer * layer = [AVCaptureVideoPreviewLayer layerWithSession:session];
layer.videoGravity=AVLayerVideoGravityResizeAspectFill;
layer.frame = CGRectMake(SCANVIEW_EdgeLeft, SCANVIEW_EdgeTop, VIEW_WIDTH- 2 * SCANVIEW_EdgeLeft, 220);
[AVCapView.layer insertSublayer:layer atIndex:0];
//开始捕获
[session startRunning];
5.实现定时器、还有基准线的滚动方法
- (void)createTimer
{
_timer=[NSTimer scheduledTimerWithTimeInterval:1.1 target:self selector:@selector(moveUpAndDownLine) userInfo:nil repeats:YES];
}

- (void)stopTimer
{
if ([_timer isValid] == YES) {
[_timer invalidate];
_timer = nil;
}

}

// 滚来滚去 :D :D :D
- (void)moveUpAndDownLine
{
CGFloat YY = _QrCodeline.frame.origin.y;

if (YY != VIEW_WIDTH - 2 * SCANVIEW_EdgeLeft + SCANVIEW_EdgeTop ) {
[UIView animateWithDuration:1.2 animations:^{
_QrCodeline.frame = CGRectMake(SCANVIEW_EdgeLeft + 1, VIEW_WIDTH - 2 * SCANVIEW_EdgeLeft + SCANVIEW_EdgeTop , VIEW_WIDTH - 2 * SCANVIEW_EdgeLeft - 1,2);
}];
}else {
[UIView animateWithDuration:1.2 animations:^{
_QrCodeline.frame = CGRectMake(SCANVIEW_EdgeLeft + 1, SCANVIEW_EdgeTop, VIEW_WIDTH - 2 * SCANVIEW_EdgeLeft - 1,2);
}];

}
}
6.扫描成功后,想干嘛干嘛,就在这个代理方法里面实现就行了
-(void)captureOutput:(AVCaptureOutput *)captureOutput didOutputMetadataObjects:(NSArray *)metadataObjects fromConnection:(AVCaptureConnection *)connection{
if (metadataObjects.count>0) {
//[session stopRunning];
AVMetadataMachineReadableCodeObject * metadataObject = [metadataObjects objectAtIndex : 0 ];
//输出扫描字符串
NSLog(@"%@",metadataObject.stringValue);
[session stopRunning];
[self stopTimer];
[AVCapView removeFromSuperview];
.....
}
}
7.如果用户不想扫描了,点击取消按钮:
- (void)touchAVCancelBtn{
[session stopRunning];//摄像也要停止
[self stopTimer];//定时器要停止
[AVCapView removeFromSuperview];//刚刚创建的 view 要移除

...
}

相关文章推荐
- IOS原声二维码条形码扫描实现
- iOS 获取手机的型号,系统版本,软件名称,软件版本
- IOS开发之代理的设计小技巧
- 谈谈iOS Animation
- iOS--AFN实现原理
- IOS 把格式化的JSON字符串转换成字典
- iOS工程如何支持64-bit
- iOS开发常用术语————API,SDK,IDE和Xcode概念和关系
- 关于ios播放音频的简单实现
- iOS改变View的Frame
- iOS9如何隐藏各种bar
- iOS-CocoaPods的安装和使用
- ios运行程序崩溃调试
- Mac环境配置 - iOS开发人员 -待续
- 关于ios中的setNeedsDisplay和setNeedsLayout
- iOS应用内支付(IAP)详解
- ios RunTime运用
- iOS开发--Mac下服务器搭建
- ios Category和Extension
- 解决iOS手势冲突问题